Looks great, Paul. Nice subtle weathering as already pointed out.
Anthony, great buy! I really love those coupons that allows already discounted products to be further discounted. Buy of the month!
Hosted by Richard S.
20 Bucks for the win
Posted: Monday, August 03, 2015 - 01:42 PM UTC
PRH001
New Mexico, United States
Joined: June 16, 2014
KitMaker: 681 posts
Armorama: 603 posts
Joined: June 16, 2014
KitMaker: 681 posts
Armorama: 603 posts
Posted: Monday, August 03, 2015 - 05:55 PM UTC
Thanks! I tried to scale the weathering back to something appropriate for 1/48. The camera and lighting washed out some of the tonal variations, but my goal was short service life and hot dusty summer.
easyco69
Ontario, Canada
Joined: November 03, 2012
KitMaker: 2,275 posts
Armorama: 2,233 posts
Joined: November 03, 2012
KitMaker: 2,275 posts
Armorama: 2,233 posts
Posted: Monday, August 03, 2015 - 08:50 PM UTC
when I do crappy old kits , i doll them up with tons of spares parts.
AnalogKid
Texas, United States
Joined: December 20, 2014
KitMaker: 46 posts
Armorama: 42 posts
Joined: December 20, 2014
KitMaker: 46 posts
Armorama: 42 posts
Posted: Tuesday, August 04, 2015 - 06:08 AM UTC
Howdy, everyone...here with an update on my Dragon Panzer III K.
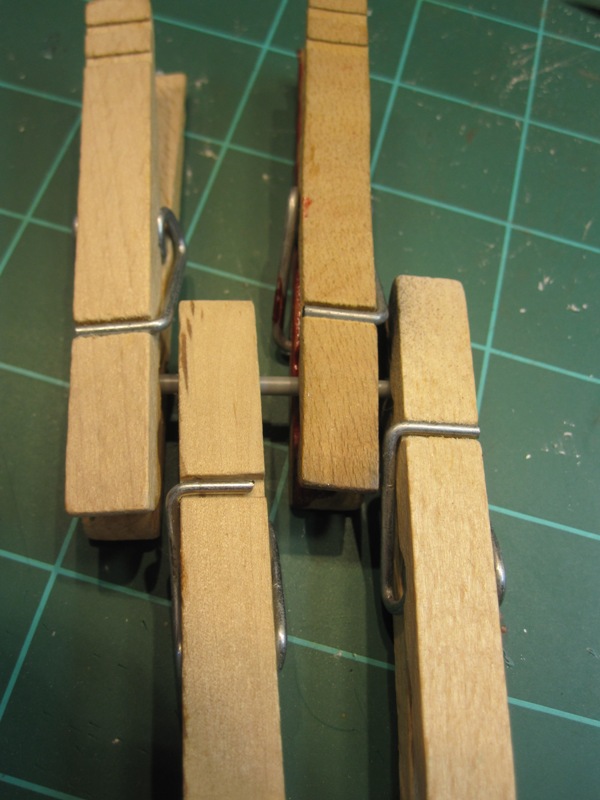
This is the first kit barrel I've done in a while. I let it dry/cure in the clothes pins overnight and tackled the sanding the next day. It came out OK but there is some slight warp-age that was inherent in the styrene.
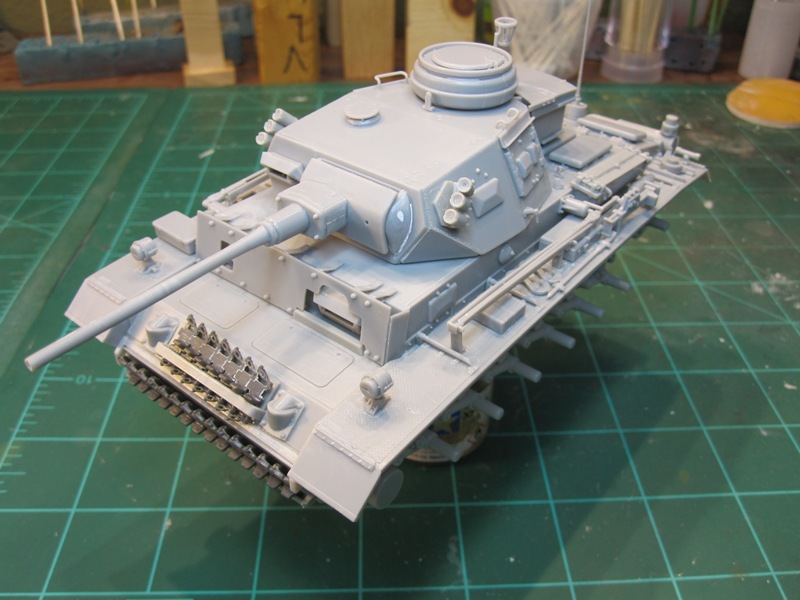
Here is the kit mostly put together, minus the wheels and track. A noticeable goof-up with the side antenna mount not on straight but I'm going to let it ride as is.
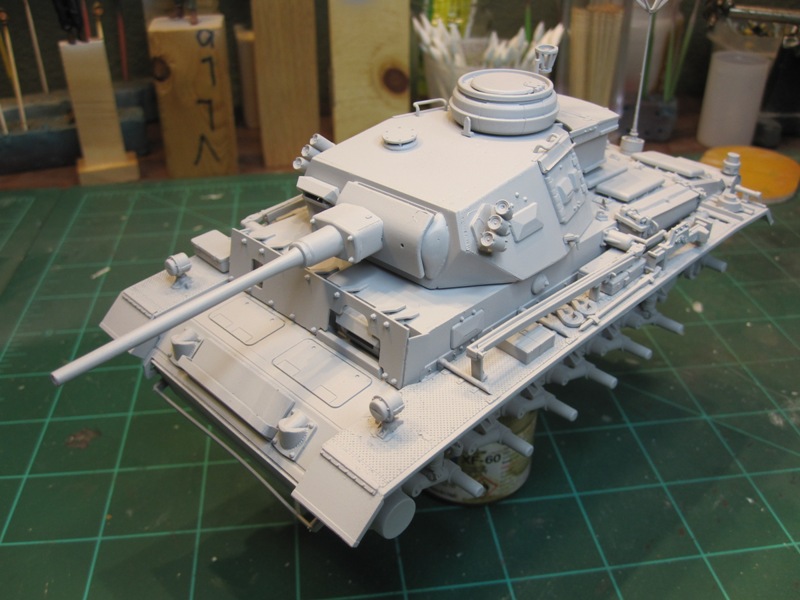
The primer coat is on. I like using Tamiya Surface Primer in the bottle and thinned with Tamiya lacquer thinner. For the first time I used my new Iwata RG-3 spray gun. The primer coat came out near perfect...no flaws at all.
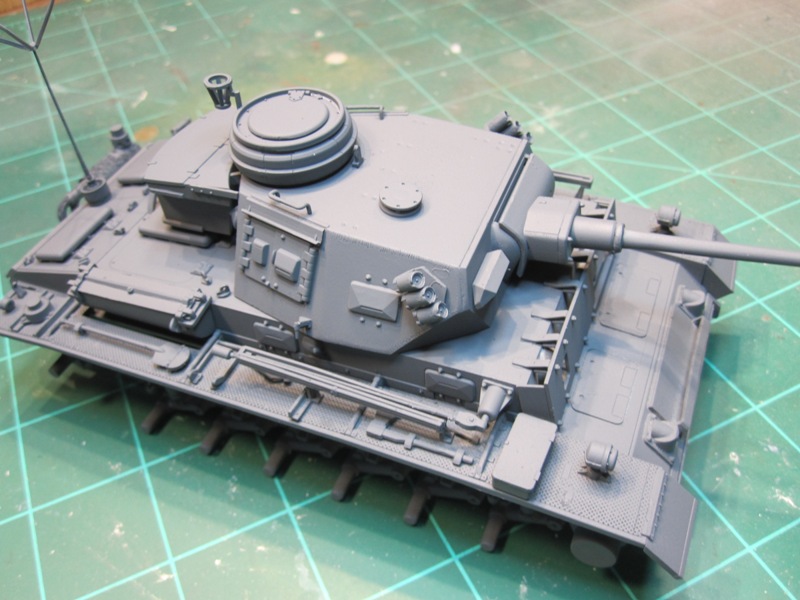
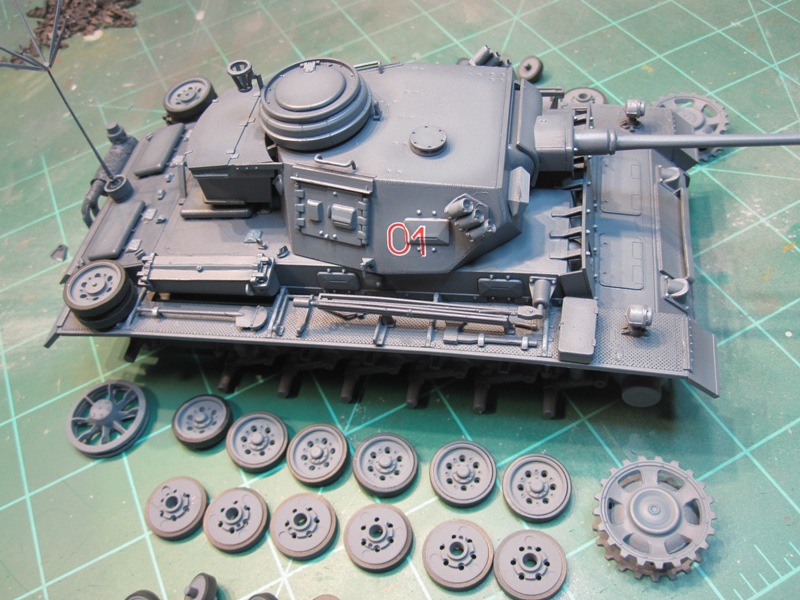
The base coat of German Gray. This is a heavily modified Tamiya XF-63 again sprayed through my new Iwata RG-3...fantastic spray gun. I also did some modulation but unfortunately the pics didn't pick up on it very well.
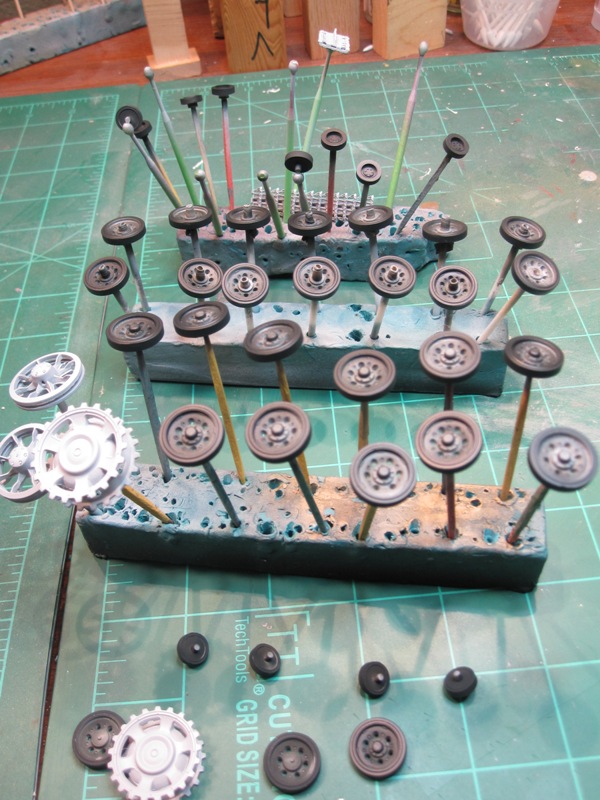
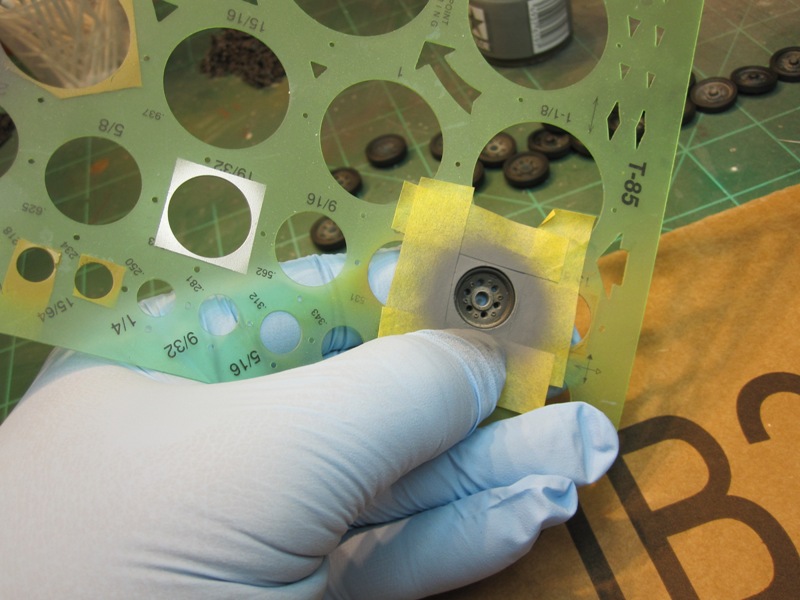
Now to tackle painting the wheels. First primed with Tamiya Surface Primer then some Tamiya NATO Black (XF-69) on the tires and then with the circle template I sprayed the wheels.
Decals are on as well as a blue filter from Sin Industries. Wheels are done as well. Now on to the tracks...piece by piece.
-Len
PRH001
New Mexico, United States
Joined: June 16, 2014
KitMaker: 681 posts
Armorama: 603 posts
Joined: June 16, 2014
KitMaker: 681 posts
Armorama: 603 posts
Posted: Tuesday, August 04, 2015 - 06:39 AM UTC
Looking really nice. Can't wait to see the finished product.
Posted: Tuesday, August 04, 2015 - 03:43 PM UTC
Looking good, Ken.
Looking forward to see more.
Posted: Saturday, August 22, 2015 - 01:21 PM UTC
AnalogKid
Texas, United States
Joined: December 20, 2014
KitMaker: 46 posts
Armorama: 42 posts
Joined: December 20, 2014
KitMaker: 46 posts
Armorama: 42 posts
Posted: Saturday, August 22, 2015 - 03:30 PM UTC
Interesting build, Jesper, and great job so far. I am enjoying everyone's builds as well...fantastic work all around.
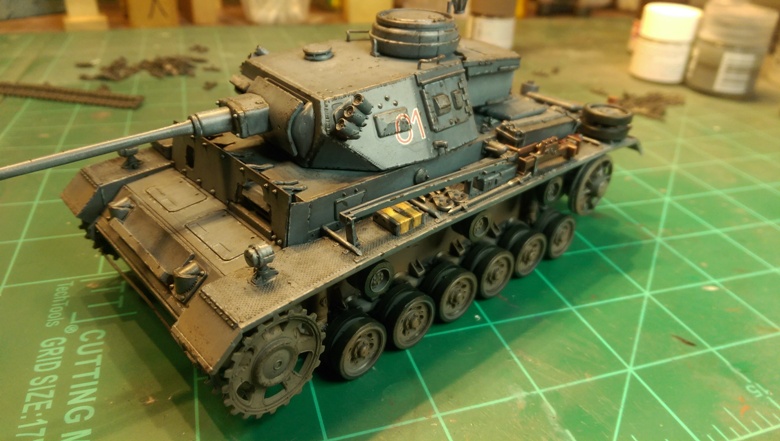
Since my last post on my Panzer III K I have mainly focused on weathering. This has included: a white oil dot filter to simulate paint fading, a black oil pin wash, acrylic paint chipping, steel and rust pigments, enamel rust wash, and enamel rust/grime streaking. Next and final step will be the tracks. I am shooting for next weekend to finish "for the win".
-Len
joepanzer
North Carolina, United States
Joined: January 21, 2004
KitMaker: 803 posts
Armorama: 740 posts
Joined: January 21, 2004
KitMaker: 803 posts
Armorama: 740 posts
Posted: Saturday, August 22, 2015 - 04:41 PM UTC
That's a brilliant idea to use an artist circle template for a mask on the road wheels. I've got a bunch of those laying around I'll have to try it!
Posted: Saturday, August 22, 2015 - 11:56 PM UTC
I need a quick build so I'm going to join with Italeri's Willys Jeep. Cost me £9.99.
And to do something completely different I'm going to use markings for a Canadian MP Jeep from the Korean War using Bison Decals Korean War Commonwealth units sheet. I think it cost me around £6 and comes with markings for the Jeep, Centurions, Churchills, Bren carrier and a NZ Dingo. Working out the cost for each vehicle comes to around 85p. So well within budget.
Posted: Sunday, August 23, 2015 - 12:31 PM UTC
Thanks for the comment, Len. Really nice weathering on the Pz. III. The extra effort is really paying of.
Looking forward to see more.
AnalogKid
Texas, United States
Joined: December 20, 2014
KitMaker: 46 posts
Armorama: 42 posts
Joined: December 20, 2014
KitMaker: 46 posts
Armorama: 42 posts
Posted: Sunday, August 23, 2015 - 09:42 PM UTC
Thanks for the kind words, Jesper.
Joe, I can't take credit for "inventing" the circle-template method of painting wheels but forgot where/when I first saw it. Like many techniques in this hobby there are many that are passed around and around. I'm glad you got to see it and now maybe will pass it on to someone else in the future. I have found it works for most wheels but for the Panther and Hetzer (38t) wheels I had to do by hand or buy aftermarket masks. I am practicing making my own masks using a small blade mounted in a drafting compass...but need much more practice to make it work flawlessly in order to make near-flawless wheels (especially those with rubber outer rims/wheels).
-Len
Szmann
Netherlands Antilles
Joined: September 02, 2014
KitMaker: 1,977 posts
Armorama: 305 posts
Joined: September 02, 2014
KitMaker: 1,977 posts
Armorama: 305 posts
Posted: Sunday, August 23, 2015 - 10:04 PM UTC
Looks good, Jesper, after your initial struggle with fitting issues. Waiting for final steps.
Gabriel.
Gabriel.
Posted: Monday, August 24, 2015 - 11:57 AM UTC
Thanks for the comment, Gabriel. More to follow over the weekend.
Posted: Wednesday, August 26, 2015 - 09:32 PM UTC
Posted: Friday, August 28, 2015 - 07:46 PM UTC
Szmann
Netherlands Antilles
Joined: September 02, 2014
KitMaker: 1,977 posts
Armorama: 305 posts
Joined: September 02, 2014
KitMaker: 1,977 posts
Armorama: 305 posts
Posted: Saturday, August 29, 2015 - 03:15 AM UTC
@ Jesper: congrats for finishing the campaign. Your model is interesting, to say the least. See you on future group builds.
Gabriel.
Gabriel.
Posted: Saturday, August 29, 2015 - 03:29 AM UTC
That is one mean looking tank Jesper!
I'll have to go back through the previous pages to follow your build. I'm guessing it's a Warhammer kit?
Posted: Saturday, August 29, 2015 - 12:28 PM UTC
Thanks for the comments, guys. Much appreciated.
The kit is a resin kit from a messed up kickstarter campaign. So I think very few will ever be made. A lot of sanding and filling was needed. The end result is ok especially since I ended up with getting a lot of stuff for a low price.
Stephen, you are right that I will use it for wh40k although slightly smaller than a standard tank.
TankManNick
California, United States
Joined: February 01, 2010
KitMaker: 551 posts
Armorama: 543 posts
Joined: February 01, 2010
KitMaker: 551 posts
Armorama: 543 posts
Posted: Tuesday, September 01, 2015 - 11:58 AM UTC
Got some paint on this baby. Just about ready for 'weathering', which in this case is going to be mainly dust, dust and more dust!
Comments:
This is one good looking piece of armor!
'Photofilm' was provided for the vision blocks in the turret. Basically just flat clear film that you were supposed to cut to fit. Couldn't make it work for Ended up just using gloss black in the 'holes'. Not great but then it's not too visible either.
There are some delicate rear-view mirrors which I will put on LAST! Otherwise I will be sure to break them off. Usually I try to use wire to replace the rods, but these are not just straight rods so I was foiled! I already broke the gun lock on the rear and lost it. Not sure what to do about that yet!
Question. Anyone have anything good for mirrors? I've used foil which is better than silver paint, but not totally convincing.
I left off most of the tools for painting separately and then found out that most were painted same color as the body. DOH!
Wasn't happy with the coverage or color of the airbrushed Tamiya acrylic, so repainted by brush in Humbrol enamael. Sounds weird but I end up doing that quite often. It's warm in these parts so the Tamiya dries really flat and makes a great surface for relaxing brush painting! Anyone else do that? Also I use a magnifying lamp for brushing, so it's a lot easier for me to see what I'm doing. Airbrushing is out in the garage due to noisy compressor and paint spray.
TankManNick
California, United States
Joined: February 01, 2010
KitMaker: 551 posts
Armorama: 543 posts
Joined: February 01, 2010
KitMaker: 551 posts
Armorama: 543 posts
Posted: Saturday, September 05, 2015 - 07:30 AM UTC
First stage dust up - heavy vertical streaks.
TankManNick
California, United States
Joined: February 01, 2010
KitMaker: 551 posts
Armorama: 543 posts
Joined: February 01, 2010
KitMaker: 551 posts
Armorama: 543 posts
Posted: Saturday, September 05, 2015 - 10:38 AM UTC
Second step - acrylic wash:
Posted: Saturday, September 05, 2015 - 11:28 AM UTC
Nice weathering, Nick. It definitely gets that dusty Middle East feel.
Looking forward to see more
ant88
Rhode Island, United States
Joined: January 27, 2005
KitMaker: 225 posts
Armorama: 176 posts
Joined: January 27, 2005
KitMaker: 225 posts
Armorama: 176 posts
Posted: Sunday, September 06, 2015 - 07:04 PM UTC
Hey all! Well heres my entry. Just a few little odds and ends to wrap up but its basically done.
Its the Academy M1A1 kit that I got for just under $20 with coupon at Hobby Lobby!!
AnalogKid
Texas, United States
Joined: December 20, 2014
KitMaker: 46 posts
Armorama: 42 posts
Joined: December 20, 2014
KitMaker: 46 posts
Armorama: 42 posts
Posted: Monday, September 07, 2015 - 01:41 AM UTC
Greeting fellow $20 warriors,
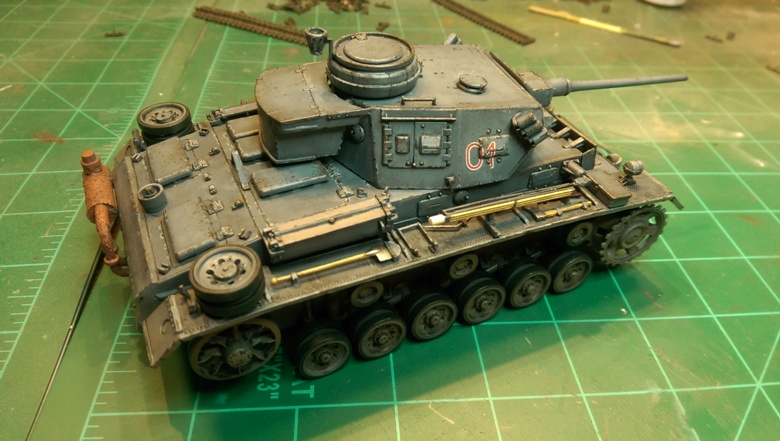
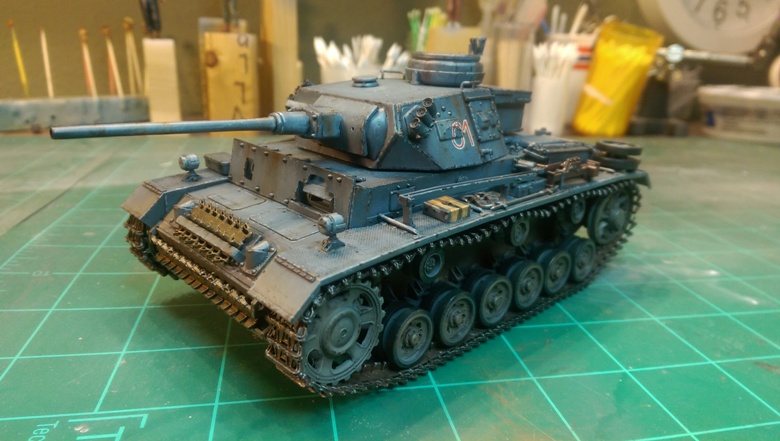
Here with my final update and shot of my completed Panzer III K that I bought for the price of $20 with no after-market added at all.
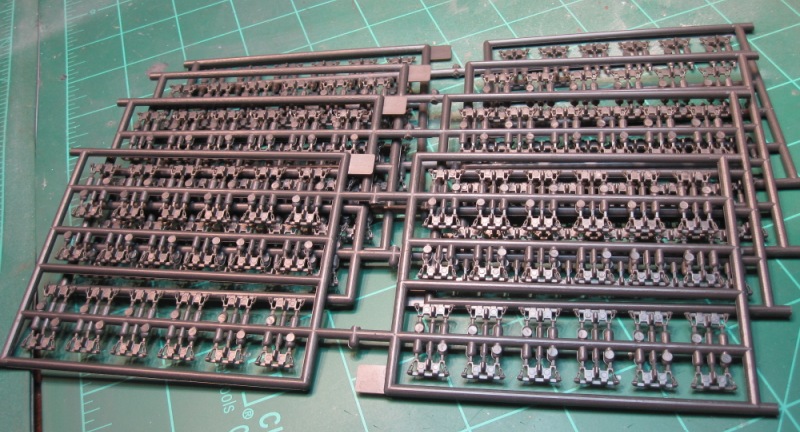
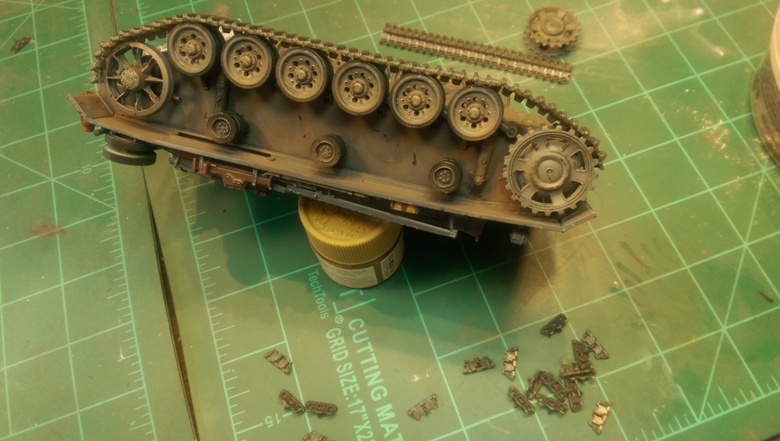
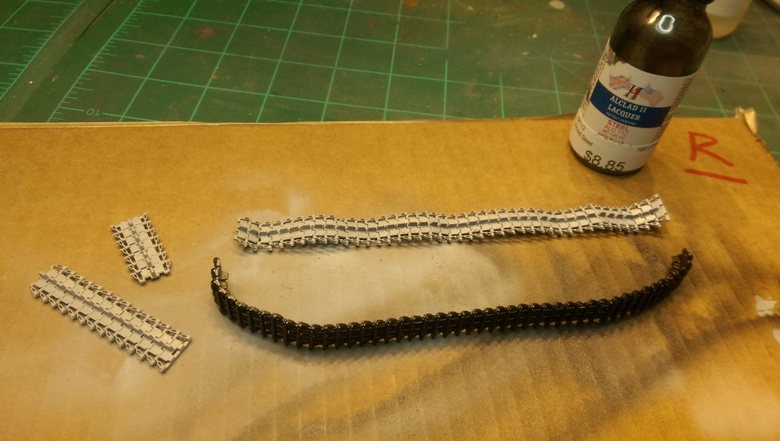
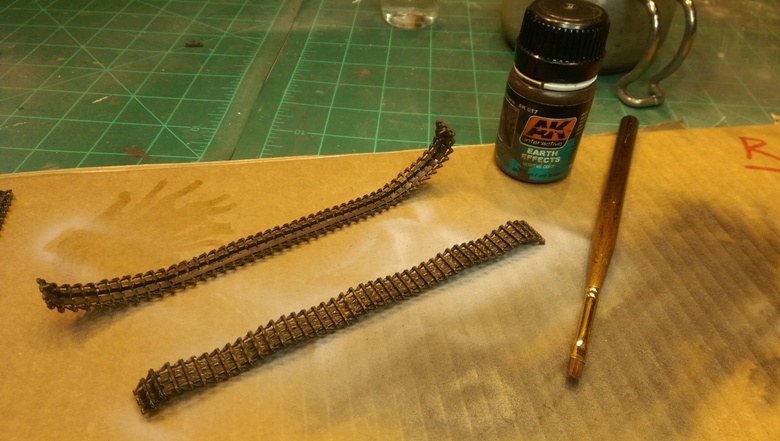
This last couple of weeks was spent working on the tracks. Luckily they are of the individual link variety. While more tedious I like these better than vinyl or rubber band tracks as I like the ability to pose the track especially on these older panzers where track sag was often seen.
I assembled them with Testors liquid cement at this gives me enough time after application to form the tread around the various wheels of the tank.
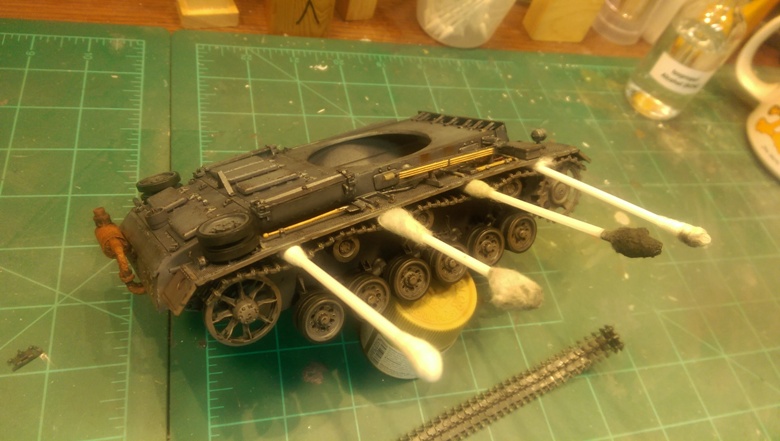
After a day's drying/curing of the cement off they come and a first coat of Tamiya surface primer goes on followed by Alcad II steel. Then a coat of Vallejo satin varnish before the AK enamel Earth Effects wash to give the track the dirty look. Vallejo varnish again and then some dry brushing with Testors Chrome Silver enamel.
The tracks go back on, are glued in-place and we have a completed Dragon Panzer III K for the win! Yay!
This was a fun campaign but I am eager to get back into something a little more detailed as I enjoy kits that are more challenging than the last one completed...and this means more and more aftermarket resin and brass.
-Len