Hi Guys! I'm still in with my Adler Kfz.13 Armored Car. To get it officially entered, here's my timestamp image.
Tuesday, March 10, 2015, 12:46 a.m.
Looking forward to a fun campaign!
—mike
Hosted by Richard S.
20 Bucks for the win
justsendit
Colorado, United States
Joined: February 24, 2014
KitMaker: 3,033 posts
Armorama: 2,492 posts
Joined: February 24, 2014
KitMaker: 3,033 posts
Armorama: 2,492 posts
Posted: Monday, March 09, 2015 - 01:12 PM UTC
Yeti01012001
England - North West, United Kingdom
Joined: July 28, 2005
KitMaker: 360 posts
Armorama: 334 posts
Joined: July 28, 2005
KitMaker: 360 posts
Armorama: 334 posts
Posted: Thursday, March 12, 2015 - 04:24 PM UTC
just a quick update so on my progreesion
The ground work was air drying clay and then Tamiya sand grain paint. Then I used woodland scenics green scatter and some small twigs all glue with wood PVA. Once dried the foliage is made from cheap aquarium plants from the £1 shop and glued on to wire and painted as well as other plastic decorative leaves and dried flowers.
I still have a bit to go yet on painting, the sandbags at the gun emplacement and finish the foliage on the ground near the bunker
I still need to added some debris in the and around the tracks and add some stowage and some sort of figures
comments welcomed
jasperck
Massachusetts, United States
Joined: December 14, 2010
KitMaker: 79 posts
Armorama: 79 posts
Joined: December 14, 2010
KitMaker: 79 posts
Armorama: 79 posts
Posted: Thursday, March 12, 2015 - 09:03 PM UTC
Your model and base look great!
I always use at least one of the colors I used on the vehicle for foliage, groundwork, etc. to give the camo its proper effect; this tip was published in FineScale Modeler a while ago. Using the various shades of green you used for the camo on your vehicle to paint (or just mist) some of your plants would produce a superb effect in my opinion.
justsendit
Colorado, United States
Joined: February 24, 2014
KitMaker: 3,033 posts
Armorama: 2,492 posts
Joined: February 24, 2014
KitMaker: 3,033 posts
Armorama: 2,492 posts
Posted: Friday, March 13, 2015 - 04:03 AM UTC
Gary, Great looking LVT and dio base. I love the bunker element and the foliage already looks awesome!
—mike
—mike
jasperck
Massachusetts, United States
Joined: December 14, 2010
KitMaker: 79 posts
Armorama: 79 posts
Joined: December 14, 2010
KitMaker: 79 posts
Armorama: 79 posts
Posted: Friday, March 13, 2015 - 04:14 AM UTC
Alright, I'm calling this one finished. Since my last update I painted details (guns, tracks, etc.) and glosscoated the model, applied decals using Micro Set and Micro Sol, gave the tank a black oil wash, lightly drybrushed with lighted Vallejo Russian uniform green, gave the model a flat/dust coat using Micro Flat with a few drops of Model Air white and yellow brown mixed in, and applied mud in two layers. The first was a mixture of tile grout, wood glue, water, and pigments, while the second was earth, burnt umber pigment, wood glue, and water. I finished off with another coat of Micro Flat.
All comments are welcome.
Posted: Friday, March 13, 2015 - 06:17 AM UTC
Howdy Y'all
@Jasper-Good Job! The KV-1 came out great, I watched your progress because I want to do one someday. Have the kit, no time.
@Gary-Wow, awesome! I always wanted to try the aquarium plant method. Now I've seen it work out great.
Take care,
Don "Lakota"
@Jasper-Good Job! The KV-1 came out great, I watched your progress because I want to do one someday. Have the kit, no time.
@Gary-Wow, awesome! I always wanted to try the aquarium plant method. Now I've seen it work out great.
Take care,
Don "Lakota"
jasperck
Massachusetts, United States
Joined: December 14, 2010
KitMaker: 79 posts
Armorama: 79 posts
Joined: December 14, 2010
KitMaker: 79 posts
Armorama: 79 posts
Posted: Friday, March 13, 2015 - 06:50 AM UTC
Thanks! It's completely possible to have the kit built and painted in a weekend. Construction takes no time at all and if you use simple weathering techniques, the finish should be simple enough. This was a wonderfully relaxing build that I did to de-tox most of the way through my huge Afghan diorama with 2 vehicles, 8 figures, and a fully furnished house!
MikeyBugs95
New York, United States
Joined: May 27, 2013
KitMaker: 2,210 posts
Armorama: 1,712 posts
Joined: May 27, 2013
KitMaker: 2,210 posts
Armorama: 1,712 posts
Posted: Friday, March 13, 2015 - 09:39 AM UTC
Quoted Text
...
Michael – I think I'll need to build a light tank after this heavy and the T-90! Tiny little tracked vehicles look so cool....
I do like these small vehicles. They fit on the shelf well. If you manage to find some of these, try to not pick the Tom Modellbau or RPM kits. They are the same molds and aren't that great. I forgot to give it a wash before I painted it and I'm regretting it. There were these dry aqua blue spots all over the blue parts. Now they've shown through the PRIMER (|:() AND the base. Luckily it isn't everywhere and I think I've scraped off most of them. Many parts are seriously oversized, as I've stated before and the kit gun is scrap. Mirage makes (or made, I'm not too sure) some kits of the TK series that are more accurate. How accurate? I don't know. I'm not a rivet counter and I've never had one. If you get the Tom TKS 20mm kit, make sure to get an AM 20mm barrel. I'm not sure of anyone makes a FK-A barrel but a Flak barrel does the trick and looks the part. Although, not exactly.
nng-nng
Bayern, Germany
Joined: October 22, 2013
KitMaker: 380 posts
Armorama: 376 posts
Joined: October 22, 2013
KitMaker: 380 posts
Armorama: 376 posts
Posted: Friday, March 13, 2015 - 04:22 PM UTC
Nice work chaps,
@Gary: Nicely done, weathering to the spot. Even the tracks look better than I thought they ever could.
@Jasper: Same goes to you, Trumpys KVs are quite nice to build if you´ve done the roadweels
@Gary: Nicely done, weathering to the spot. Even the tracks look better than I thought they ever could.
@Jasper: Same goes to you, Trumpys KVs are quite nice to build if you´ve done the roadweels
Posted: Sunday, March 15, 2015 - 02:27 AM UTC
Howdy Y'all
This is the kit I hope to build. I bought it at the LHS for $15 from an estate they had on consignment. I picked up the barrel for about $5.00 more online. I'll take it on my next business trip and start cutting plastic.
Take care,
Don "Lakota"
This is the kit I hope to build. I bought it at the LHS for $15 from an estate they had on consignment. I picked up the barrel for about $5.00 more online. I'll take it on my next business trip and start cutting plastic.
Take care,
Don "Lakota"
gcdavidson
Ontario, Canada
Joined: August 05, 2003
KitMaker: 1,698 posts
Armorama: 1,563 posts
Joined: August 05, 2003
KitMaker: 1,698 posts
Armorama: 1,563 posts
Posted: Wednesday, March 18, 2015 - 07:31 AM UTC
I think I have enough left overs from AVGP's and M-113 kits I can probably build a new vehicle for $0.
scaleyback
Louth, Ireland
Joined: March 06, 2013
KitMaker: 29 posts
Armorama: 25 posts
Joined: March 06, 2013
KitMaker: 29 posts
Armorama: 25 posts
Posted: Thursday, March 19, 2015 - 05:17 PM UTC
Some great work already guys! I'm hoping to start cutting plastic if I have a quiet spell at work this evening. I'm building this Merkava III by Revell which cost me €11 from a Dublin toy store. I've built a few Revell 1/72 kits and they have been pretty good so far. This will be my first time working with link and length tracks which I'm looking forward to. The 'rubber bands' I'm familiar with can be frustrating. Paint is not ordered yet but I'm planning on using Life Color Israeli Sand Gray.
nng-nng
Bayern, Germany
Joined: October 22, 2013
KitMaker: 380 posts
Armorama: 376 posts
Joined: October 22, 2013
KitMaker: 380 posts
Armorama: 376 posts
Posted: Thursday, March 19, 2015 - 06:02 PM UTC
Sorry Kevin,
but you can´t enter with a 1:72 kit. I´ve excluded anything smaller than 1:48 from this campaign as it´s not hard at all to find such a kit below the 20 bucks limit. If you leave Dragon kits aside I´d rather consider spending more than 20 quid on a 1:72 kit would be the appropriate callenge
But as I banned you, I have to ban my build aswell. I could neither find the right antenna base in my spare nor could I pass the aftermarket barrels. I´ve started a builldlog (here ) and will join with another kit.
scaleyback
Louth, Ireland
Joined: March 06, 2013
KitMaker: 29 posts
Armorama: 25 posts
Joined: March 06, 2013
KitMaker: 29 posts
Armorama: 25 posts
Posted: Thursday, March 19, 2015 - 06:10 PM UTC
I didn't notice the minimum scale when I signed up and I don't build anything bigger than 1/72 yet. Oh well, I'll still build my Merkava anyway as I'm psyched up for it.
Szmann
Netherlands Antilles
Joined: September 02, 2014
KitMaker: 1,977 posts
Armorama: 305 posts
Joined: September 02, 2014
KitMaker: 1,977 posts
Armorama: 305 posts
Posted: Monday, March 23, 2015 - 01:44 AM UTC
Hi, guys!
I've got the marching order quite late, but I'm here...
I started on 20th with the artillery tractor from RPM, 1/35 scale, as initially announced.
I've got the marching order quite late, but I'm here...
I started on 20th with the artillery tractor from RPM, 1/35 scale, as initially announced.
Szmann
Netherlands Antilles
Joined: September 02, 2014
KitMaker: 1,977 posts
Armorama: 305 posts
Joined: September 02, 2014
KitMaker: 1,977 posts
Armorama: 305 posts
Posted: Monday, March 23, 2015 - 01:53 AM UTC
I know the requirements are three photos: one with the kit before construction, one during assembly and one finishing / painting. In my case it is going to be a little mix-up, because the little bugger has interior and I have to paint as I go - which is my favorite style, anyhow.
In the first posting I have mentioned that I intended to do some field improvisation and so I will: I'm going to depict a cannibalistic re-build tractor, with some mismatching items, perhaps a fueling cart and / or an artillery piece. The price will remain lower than USD 25.00, grace to starting price, a little under USD 8.00. Any advice welcome.
Warm regards.
Szmann
Netherlands Antilles
Joined: September 02, 2014
KitMaker: 1,977 posts
Armorama: 305 posts
Joined: September 02, 2014
KitMaker: 1,977 posts
Armorama: 305 posts
Posted: Thursday, March 26, 2015 - 03:06 AM UTC
Good day, fellas
Time for another update. The little tractor is virtually finished - just a few touches and weathering.
I started on its trailer - a horse drawn artillery caisson converted to maintenance mobile unit.
And I couldn't hold myself on having a peak at the should be finished assembly...
Time for another update. The little tractor is virtually finished - just a few touches and weathering.
I started on its trailer - a horse drawn artillery caisson converted to maintenance mobile unit.
And I couldn't hold myself on having a peak at the should be finished assembly...
Szmann
Netherlands Antilles
Joined: September 02, 2014
KitMaker: 1,977 posts
Armorama: 305 posts
Joined: September 02, 2014
KitMaker: 1,977 posts
Armorama: 305 posts
Posted: Thursday, April 02, 2015 - 01:51 AM UTC
It looks I'm the only one remaining alive on the battlefield...
The little tractor is almost (as always!) finished:
The trailer it is done:
The completed assembly:
Perhaps I will upload a couple more pictures after the tractor receives its last touch-ups and I should say thank you guys for comments - for me this build was fun: I dare to say that I ground my teeth only once, maybe twice
panzerbob01
Louisiana, United States
Joined: March 06, 2010
KitMaker: 3,128 posts
Armorama: 2,959 posts
Joined: March 06, 2010
KitMaker: 3,128 posts
Armorama: 2,959 posts
Posted: Thursday, April 02, 2015 - 06:34 AM UTC
Nice Job ! On this itty bitty "tank"!
Overall, I really like the whole thing, and you managed to get something pretty nice-looking frm a tny bear I a kit! Bravo and congrats!
I do confess to uncertainty about that rather colorful insignia up front: Did they really do that? It does look cool, accurate or not!
Bob
Overall, I really like the whole thing, and you managed to get something pretty nice-looking frm a tny bear I a kit! Bravo and congrats!
I do confess to uncertainty about that rather colorful insignia up front: Did they really do that? It does look cool, accurate or not!
Bob
justsendit
Colorado, United States
Joined: February 24, 2014
KitMaker: 3,033 posts
Armorama: 2,492 posts
Joined: February 24, 2014
KitMaker: 3,033 posts
Armorama: 2,492 posts
Posted: Thursday, April 02, 2015 - 06:54 AM UTC
Quoted Text
... I've got the marching order quite late, but I'm here...
Gabriel, You really marched right through this campaign! Nice job to you and the other speed demons as well!
—mike
Szmann
Netherlands Antilles
Joined: September 02, 2014
KitMaker: 1,977 posts
Armorama: 305 posts
Joined: September 02, 2014
KitMaker: 1,977 posts
Armorama: 305 posts
Posted: Thursday, April 09, 2015 - 06:50 AM UTC
@Bob
You are all to kind, sir. Well, I have no photographic evidence of such a color scheme. I not even think as being probable but for sure is possible in 1939 in Poland if we accept a rather twisted scenario...
I just felt like putting a punch into less than impressive model (no big expectations, given the price). Thank you again for the appreciative comment.
Szmann
Netherlands Antilles
Joined: September 02, 2014
KitMaker: 1,977 posts
Armorama: 305 posts
Joined: September 02, 2014
KitMaker: 1,977 posts
Armorama: 305 posts
Posted: Thursday, April 09, 2015 - 06:57 AM UTC
@Mike
Well, it was not like building a pyramid... only 62 parts in the layout and I haven't used them all... Then, the color scheme is monochrome... Honestly, I spent more time fixing alignment problems and cutting masks for markings. I'm glad though I could get a decent looking model with perhaps less than 10 dollars (shipping excluded).
Thank you for follow up.
Gabriel
Bluestab
South Carolina, United States
Joined: December 03, 2009
KitMaker: 2,160 posts
Armorama: 1,906 posts
Joined: December 03, 2009
KitMaker: 2,160 posts
Armorama: 1,906 posts
Posted: Saturday, April 11, 2015 - 04:29 AM UTC
Nice builds guys.
Update. I'm trying to get all of my progress pictures caught up. As a reminder, this is the CyberHobby SA-9 Gaskin.
I started with the wheels...the hubs to be exact. The kit comes with vinyl tires. The good news is that they slip over the rims so they can be added later, after the rims are painted. And straight out of the chute, there's a need for a good deal of clean-up on parts.
Missile pods. The kit includes parts for six. Four go in the launcher and two can be stored on the vehicle's sides. Two of these can be modeled with the ends open, as if ready to be fired.
Rims and missile pods assembled. I decided to model two as if they are ready to be fired. As mentioned above, I'm leaving the vinyl tires off the rims until after paint.
Assembly on the upper hull. The instructions are not good. You'll need to open up several holes to mount various bits. These don't show up well on the instructions. Any you miss you'll catch as you go.
Here is a spool...I assume for communication phone lines. And you have the extra missile storage racks. I assume these can also be folded down to be used as platforms for the crews.
I got ahead of myself here, so I don't have a lot of assembly pictures. So you have two angles of the upper hull assembly.
Rear plate and the two axle assemblies. Pretty straightforward. The rear plate has a recessed molded prop for amphibious use. It's covered with a positionable triangular cover. It also has a shovel but I left that off until after paint.
The front axle allows for the wheels to be steerable.
Axles and suspension added. The Gaskin did not have the retractable sets of trenching wheels so there really isn't much going on down there.
I went ahead and shot a coat of paint on the underside. I'm still debating on a color scheme but I figured that even a Middle Eastern based vehicle wold have a base green coat underneath. I went ahead and sprayed the inside of the rims, trim vane, and one of the missile pods. If I go sand scheme, I'll probably leave one pod overall green just to be different. Maybe it's a stored missile that wasn't painted for the desert yet.
While that dries, I moved on to the launcher. It's a pretty simple build. The turret mount is simple...though it really needs some cleanup.
Launcher assembled. The square on the sprue is a bezel for the turret's windscreen. I left it off until after paint.
Assembled and ready for paint.
And that's where this build has been for the past few weeks. I'm basically stuck on choosing a paint scheme.
Update. I'm trying to get all of my progress pictures caught up. As a reminder, this is the CyberHobby SA-9 Gaskin.
I started with the wheels...the hubs to be exact. The kit comes with vinyl tires. The good news is that they slip over the rims so they can be added later, after the rims are painted. And straight out of the chute, there's a need for a good deal of clean-up on parts.
Missile pods. The kit includes parts for six. Four go in the launcher and two can be stored on the vehicle's sides. Two of these can be modeled with the ends open, as if ready to be fired.
Rims and missile pods assembled. I decided to model two as if they are ready to be fired. As mentioned above, I'm leaving the vinyl tires off the rims until after paint.
Assembly on the upper hull. The instructions are not good. You'll need to open up several holes to mount various bits. These don't show up well on the instructions. Any you miss you'll catch as you go.
Here is a spool...I assume for communication phone lines. And you have the extra missile storage racks. I assume these can also be folded down to be used as platforms for the crews.
I got ahead of myself here, so I don't have a lot of assembly pictures. So you have two angles of the upper hull assembly.
Rear plate and the two axle assemblies. Pretty straightforward. The rear plate has a recessed molded prop for amphibious use. It's covered with a positionable triangular cover. It also has a shovel but I left that off until after paint.
The front axle allows for the wheels to be steerable.
Axles and suspension added. The Gaskin did not have the retractable sets of trenching wheels so there really isn't much going on down there.
I went ahead and shot a coat of paint on the underside. I'm still debating on a color scheme but I figured that even a Middle Eastern based vehicle wold have a base green coat underneath. I went ahead and sprayed the inside of the rims, trim vane, and one of the missile pods. If I go sand scheme, I'll probably leave one pod overall green just to be different. Maybe it's a stored missile that wasn't painted for the desert yet.
While that dries, I moved on to the launcher. It's a pretty simple build. The turret mount is simple...though it really needs some cleanup.
Launcher assembled. The square on the sprue is a bezel for the turret's windscreen. I left it off until after paint.
Assembled and ready for paint.
And that's where this build has been for the past few weeks. I'm basically stuck on choosing a paint scheme.
Szmann
Netherlands Antilles
Joined: September 02, 2014
KitMaker: 1,977 posts
Armorama: 305 posts
Joined: September 02, 2014
KitMaker: 1,977 posts
Armorama: 305 posts
Posted: Saturday, April 18, 2015 - 04:57 AM UTC
You're going nice there with the Gaskin. Regarding the colour scheme, hard to tell... I would pick a desert olive... just saying.
nng-nng
Bayern, Germany
Joined: October 22, 2013
KitMaker: 380 posts
Armorama: 376 posts
Joined: October 22, 2013
KitMaker: 380 posts
Armorama: 376 posts
Posted: Saturday, April 18, 2015 - 06:38 PM UTC
Alex, if you´re interrested, i´ve got some shots of the BMP from Bovington. If I recall correctly it´s in the same state as it was when beeing captured in Irak. Green with heavily chipped sand ontop.
As I needed to go for something less fancy this time (;)) I´ve choosen Revells Calliope, which was once one of Italeris Sherman line. Neiter superior detail nor nice casting structure. I ignored the fist issue and improved the later one, so I was rewarded with a simple and quick construction. Probably as good as it gets for 10 quid.
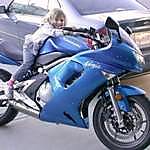
I´ve sprayed it with the Ak modulation set, looks quite convincing to me...
Sorry for rushing through the costruction progress, but there isn´t much to show. It feels like you´re almost done after 20 Parts, the rest seem to be boogies, tools and hatches.
I´ll robably finish it as A PTO vehicle, but will just add some wooden planks on the sides. The launcher tubes will be issued to the spares, i might use it to make a M4 Calliope... one day... probably.