Official: Flak You Two: The Flak is Back!
Nova Scotia, Canada
Joined: July 26, 2012
KitMaker: 454 posts
Armorama: 281 posts
Posted: Saturday, October 17, 2015 - 03:51 AM UTC
So far so good on the Panzer 1.
Cheers,
Tom


Nova Scotia, Canada
Joined: September 13, 2005
KitMaker: 96 posts
Armorama: 96 posts
Posted: Saturday, October 17, 2015 - 07:10 PM UTC
Hi Folks,
Here is what my contribution to this build will be.

Regards,
Namabiiru
 Associate Editor
#399
Rhode Island, United States
Joined: March 05, 2014
KitMaker: 2,888 posts
Armorama: 1,920 posts
Posted: Sunday, October 18, 2015 - 06:35 PM UTC
Eric,
That's generally a pretty nice kit; I built one a few years ago. In case you aren't already aware, a heads-up the kit missiles are too long and skinny for some reason, not to mention missing anything in the way of decals. There is an AM set of replacement missiles I wish I had known about when I built mine. Not only do they get the dimensions right, but they include a decent set of decals. I have also seen a tutorial online (forget where) on modifying the kit missiles to fix the dimensions if you are so inclined.

Nova Scotia, Canada
Joined: September 13, 2005
KitMaker: 96 posts
Armorama: 96 posts
Posted: Sunday, October 18, 2015 - 07:16 PM UTC
Hi Mark,
Yes I read about the missile diameter issues and actually started the rebuild last night using 3/8" styrene tube using the article by Andy Claesens on Military Modelling as a guide.
http://www.militarymodelling.com/forums/postings.asp?th=32946I will have to check out a source for the decals.
Thanks,
Eric
Namabiiru
Associate Editor #399
Rhode Island, United States
Joined: March 05, 2014
KitMaker: 2,888 posts
Armorama: 1,920 posts
Posted: Monday, October 19, 2015 - 04:40 PM UTC
Yep, that's the post I was thinking of. I also recommend using solder for the missile umbilicals--the vinyl tube provided in the kit is just too unwieldy--but you've probably already figured that out for yourself.
Ontario, Canada
Joined: February 04, 2009
KitMaker: 743 posts
Armorama: 549 posts
Posted: Monday, October 19, 2015 - 04:54 PM UTC
Hi All,
I updated my build long with some pics of the sd.kfz 7/1 frame build up.
Check it out here:
https://archive.kitmaker.net/forums/239828#2022885http://ghmicro.wix.com/twis-first-cut
England - South East, United Kingdom
Joined: March 01, 2010
KitMaker: 7,078 posts
Armorama: 248 posts
Posted: Thursday, October 22, 2015 - 10:29 PM UTC
The bridge windows reglazed with Krystal klear. (Well I hope it will go clear.

Radars and aerials on the bridge roof.

And the Merlin Helicopter ready for decals.

More soon.
Si
Nova Scotia, Canada
Joined: September 13, 2005
KitMaker: 96 posts
Armorama: 96 posts
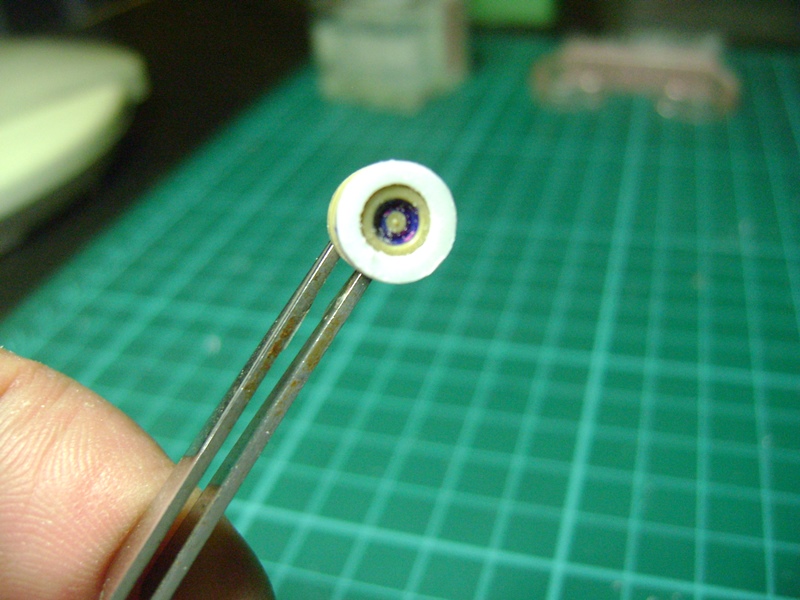
Posted: Saturday, October 24, 2015 - 04:12 AM UTC
Hi Folks,
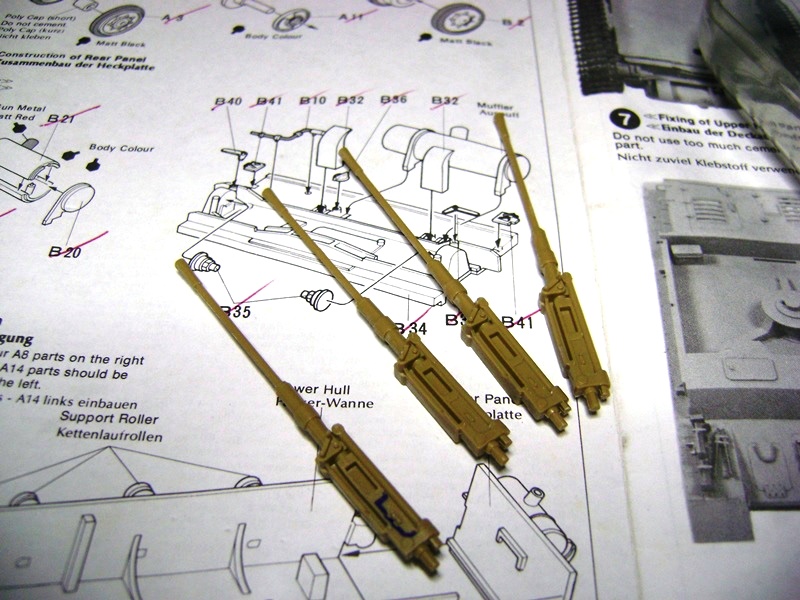
Well I have started the corrections to the SA-6 undersized missiles. A bit time consuming but not very difficult. The missile at the bottom of the photo is one of the ones that came with the kit.
The one at the top is ready for the fins and booster rockets and the one in the middle is nearly to that stage.

Eric
#041
Kobenhavn, Denmark
Joined: July 20, 2006
KitMaker: 10,069 posts
Armorama: 4,677 posts
Posted: Saturday, October 24, 2015 - 12:07 PM UTC
Nice progress, Si. The Dragon is really coming together well.
Eric, looking good. How are you making the changes? Plastic tubing for new body and using the old missile cone?
Campaign'oholic - 252+ campaigns completed
England - South East, United Kingdom
Joined: March 01, 2010
KitMaker: 7,078 posts
Armorama: 248 posts
Posted: Sunday, October 25, 2015 - 02:05 AM UTC
Thanks Jesper,
Getting there, the blood, sweat & bad language have been worth it.
Cage ladders for the funnel, one folded and on strait off the fret.

Fitted in place, along with the funnel deck railings.

The railings fitted to the missile silo, and showing the reglazed bridge windows dry.

.
Down to the final details now.
cheers.
Si.
Nova Scotia, Canada
Joined: September 13, 2005
KitMaker: 96 posts
Armorama: 96 posts
Posted: Sunday, October 25, 2015 - 07:12 AM UTC
Hi Jesper,
Yup styrene tubing for the body then styrene strips over the original cone to build up and reshape.

Eric
tatbaqui
News Writer #040
Metro Manila, Philippines
Joined: May 06, 2007
KitMaker: 2,713 posts
Armorama: 2,451 posts
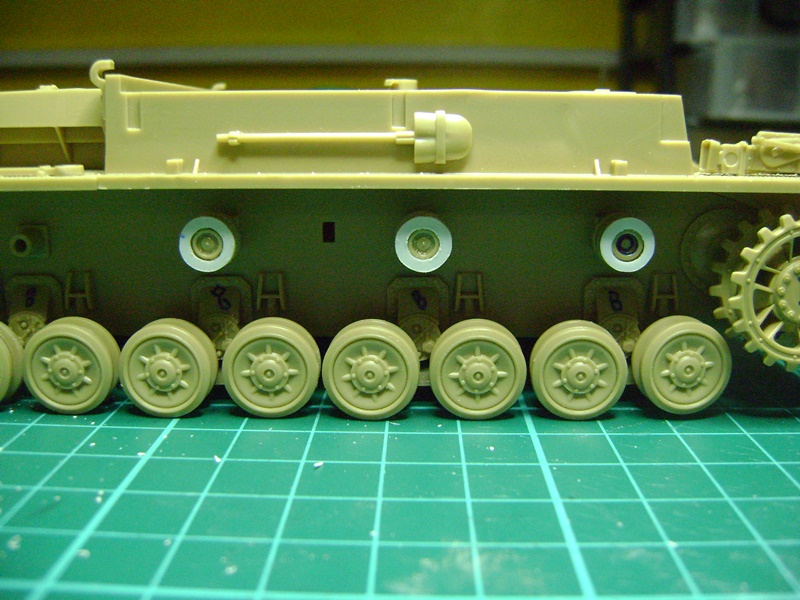
Posted: Monday, October 26, 2015 - 07:02 PM UTC
Hello,
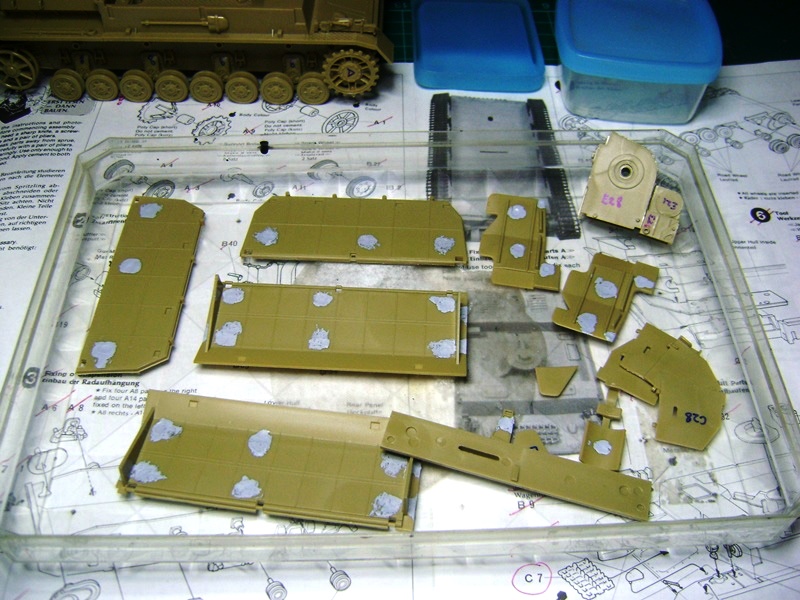
Progress pics on my Tamiya Flakpanzer build:

It builds quick, the fit is quite ok. There's flash that needs to be cleaned up, and yes areas to that need filling!
Cheers,
Tat
Nova Scotia, Canada
Joined: September 13, 2005
KitMaker: 96 posts
Armorama: 96 posts
Posted: Monday, October 26, 2015 - 07:36 PM UTC
Hi Jesper,
Yup styrene tubing for the body then styrene strips over the original cone to build up and reshape.


Eric
(sorry about the re post but I moved my photos without thinking)
tatbaqui
News Writer #040
Metro Manila, Philippines
Joined: May 06, 2007
KitMaker: 2,713 posts
Armorama: 2,451 posts
Posted: Wednesday, October 28, 2015 - 07:43 PM UTC
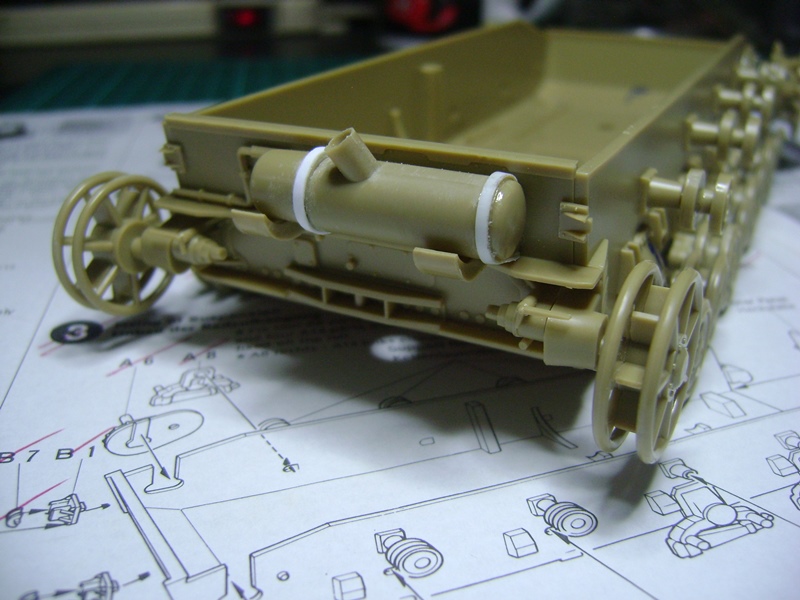
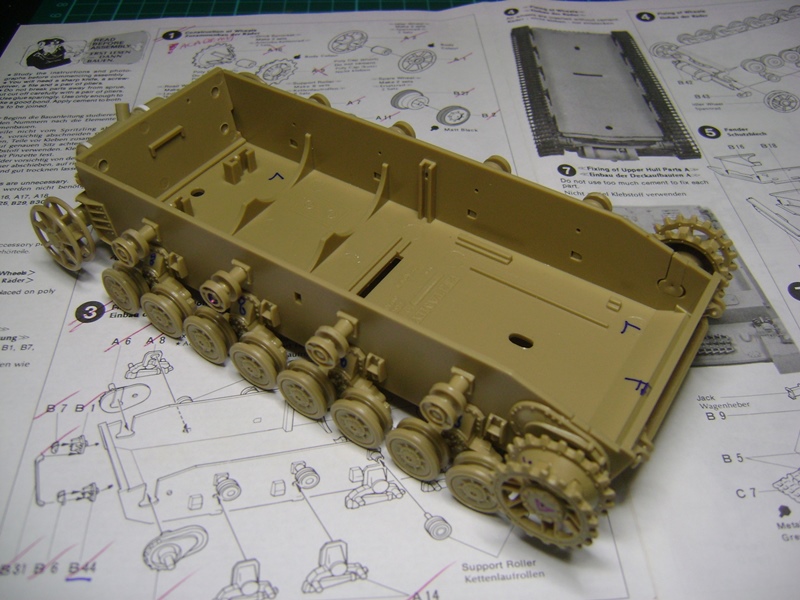
Hello,
Update for today:
The Tamiya kit has steel return rollers, but the reference pics I've seen of the Flakpanzer prototype had rubber return rollers. Initially tried to fill with putty, but was too messy for me. Along came an idea of putting over a thin sheet and sanding it to shape:
I think it looks the part. Still need to get it consistent though.
Here's the barrel. It's the closest I can drill without damaging the muzzle.

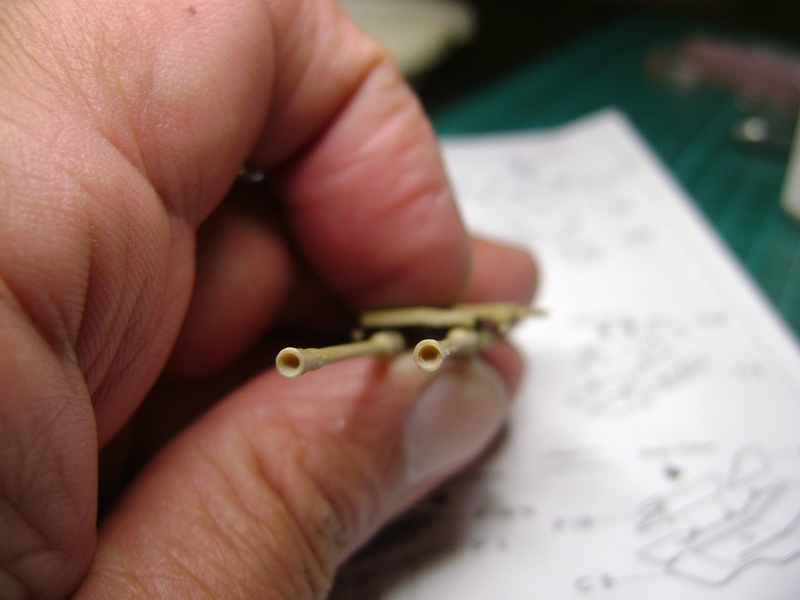
Cheers,
Tat
Gauteng, South Africa
Joined: July 03, 2015
KitMaker: 280 posts
Armorama: 135 posts
Posted: Wednesday, October 28, 2015 - 07:54 PM UTC
Nice work on the barrels Tat!
Louisiana, United States
Joined: March 06, 2010
KitMaker: 3,128 posts
Armorama: 2,959 posts
Posted: Thursday, October 29, 2015 - 01:24 AM UTC
Looking GOOD, Tat!
Yeah, it does look like that prototype had the rubber return-rollers. And if a guy doesn't have some lying around in a parts-box, I guess your solution is a pretty good way to go! I would suggest that you wear and round-off the sharp-appearing shoulders (edges) of your "rubber" a bit - they look a bit like they are metal even though you want rubber tires there!
I see and go along with the do-over on the exhaust can straps - the molded-on stuff doesn't look very sharp... But maybe you could go back and thin those bands down some - I don't know what you made them from, but they look to be like a scale 1 or more inches thick!
Cheers!
Bob

tatbaqui
News Writer #040
Metro Manila, Philippines
Joined: May 06, 2007
KitMaker: 2,713 posts
Armorama: 2,451 posts
Posted: Thursday, October 29, 2015 - 04:02 AM UTC
Thanks for your comments Kobus, Bob!
I have the Tamiya Pz IVD in the stash -- it has the rubber return rollers, but thought against it as I plan to build the kit as well. Will continue to improve on those "rubber" rollers, also on the exhaust bands.
I believe the tracks should have hollow guide horns as well. But I guess the only way to have it is to get AM tracks which will of course be additional $$$. Hmmmm...
Cheers,
Tat
#041
Kobenhavn, Denmark
Joined: July 20, 2006
KitMaker: 10,069 posts
Armorama: 4,677 posts
Posted: Thursday, October 29, 2015 - 03:42 PM UTC
Eric, very nice job on the missiles. They look very menacing!
Tat, good improvements on the return rollers and the barrels.
Looking forward to see more.
Campaign'oholic - 252+ campaigns completed
England - South East, United Kingdom
Joined: March 01, 2010
KitMaker: 7,078 posts
Armorama: 248 posts
Posted: Thursday, October 29, 2015 - 11:31 PM UTC
Small update on HMS Dragon.
The Merlin Helicopter decaled and fitted to the flight deck.

Anchors and jackstaff on at the other end.

More Soon.
Si
tatbaqui
News Writer #040
Metro Manila, Philippines
Joined: May 06, 2007
KitMaker: 2,713 posts
Armorama: 2,451 posts
Posted: Friday, October 30, 2015 - 09:56 AM UTC
Quoted Text
Eric, very nice job on the missiles. They look very menacing!
Tat, good improvements on the return rollers and the barrels.
Looking forward to see more.
Thanks Jesper!
#041
Kobenhavn, Denmark
Joined: July 20, 2006
KitMaker: 10,069 posts
Armorama: 4,677 posts
Posted: Friday, October 30, 2015 - 01:24 PM UTC
Looking great, Si! Close to the finish line of your great project. The result will be awesome!
Campaign'oholic - 252+ campaigns completed
Nova Scotia, Canada
Joined: September 13, 2005
KitMaker: 96 posts
Armorama: 96 posts
Posted: Monday, November 02, 2015 - 07:33 AM UTC
Well the missiles have been modified and primed. So now work on the erector/launcher is underway.


Eric
England - South East, United Kingdom
Joined: March 01, 2010
KitMaker: 7,078 posts
Armorama: 248 posts
Posted: Monday, November 02, 2015 - 01:41 PM UTC
Thanks Jesper,
A bit closer to the finishing line.
A few more details added around the bridge and foremast. The white bit at thee top of the picture is a scratchbuilt replacement for one of the sensors / aerials that was eaten by the floor monster.

The big pole aerial on top of the hanger and the safety netting on the flight deck.

Just a few minor details to go and she will be done.
Cheers
Si
England - South East, United Kingdom
Joined: March 01, 2010
KitMaker: 7,078 posts
Armorama: 248 posts
Posted: Monday, November 02, 2015 - 10:38 PM UTC
The gangway finished off with some scrap left over railing.

Whip aerials in place around the midships area.

Jack and ensign on, and job done.


Will put some pics in the gallery of both builds.
Cheers.
Si
#123
New Mexico, United States
Joined: November 17, 2008
KitMaker: 1,202 posts
Armorama: 635 posts
Posted: Monday, November 02, 2015 - 11:05 PM UTC
Howdy Y'all

@Tat-you're a brave man. Great work!
@Si-once again, you've given us a superb model. I always enjoy watching your builds.
Take care,
Don "Lakota"
Working on Campaigns:
1/72 Hasegawa Ki-84 Frank
1/144 Dragon Armor


 .
.


