Campaigns: Active Campaigns
Campaigns that are either in planning or underway should be grouped here.
Campaigns that are either in planning or underway should be grouped here.
Hosted by Richard S.
Campaign 500+

Ranger74

Joined: April 04, 2002
KitMaker: 1,290 posts
Armorama: 658 posts

Posted: Friday, July 15, 2016 - 09:53 PM UTC
Small correction on the kit parts for the T28 kit. The four runs of track are made of Dragon "vinyl", so just eight parts. There are, however separate center guides for each track block that add up the parts count!

ColinEdm


Joined: October 15, 2013
KitMaker: 1,355 posts
Armorama: 1,229 posts

Posted: Saturday, July 16, 2016 - 09:37 AM UTC
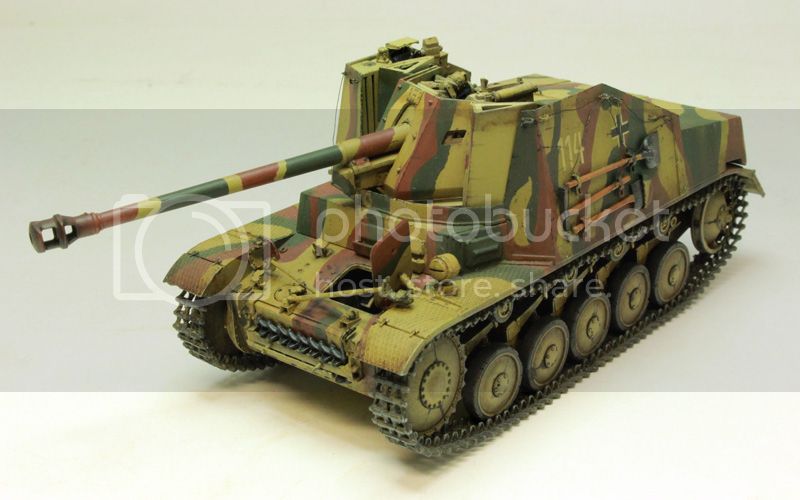
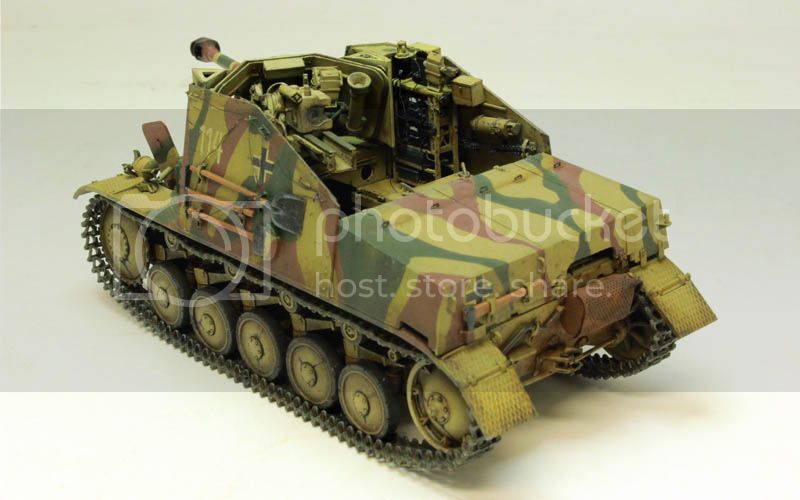
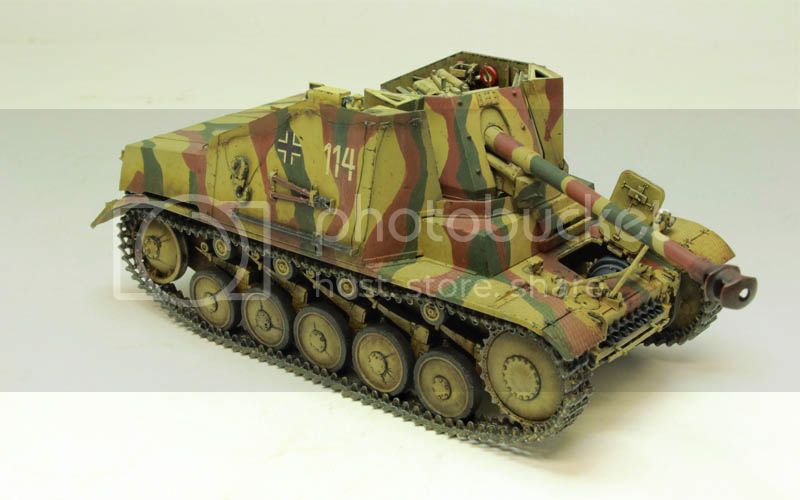
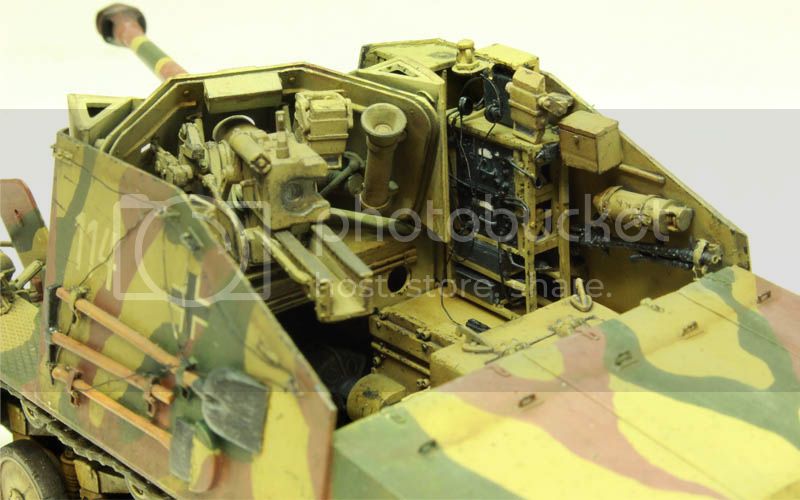
Calling this one done for this campaign, gotta move on to some other stuff! Just have to add an arial and some stowage.



PRH001

Joined: June 16, 2014
KitMaker: 681 posts
Armorama: 603 posts

Posted: Saturday, July 16, 2016 - 09:47 AM UTC
Colin,
The Marder looks very good!
PH
The Marder looks very good!
PH
Armored76

Joined: September 30, 2013
KitMaker: 1,615 posts
Armorama: 1,500 posts

Posted: Saturday, July 16, 2016 - 11:44 AM UTC
@Dustin: You did a great job! All-yellow, desert colors are not easy to weather but I think this one looks good.
@Colin: That Marder looks indeed great! The dry-brushing on the tools are probably my favorite detail.
@Colin: That Marder looks indeed great! The dry-brushing on the tools are probably my favorite detail.
Thirian24

Joined: September 30, 2015
KitMaker: 2,493 posts
Armorama: 2,344 posts

Posted: Saturday, July 16, 2016 - 05:34 PM UTC
Cristian - thank you for the kind words. I was nervous about weathering this. It's my first desert vehicle.
Colin - Beautiful job sir.
Colin - Beautiful job sir.
Armorsmith

Joined: April 09, 2015
KitMaker: 1,063 posts
Armorama: 1,000 posts

Posted: Saturday, July 16, 2016 - 05:37 PM UTC
Your Bradley turned out very nicely.
Killer cammo on the Marder.
Killer cammo on the Marder.
Thirian24

Joined: September 30, 2015
KitMaker: 2,493 posts
Armorama: 2,344 posts

Posted: Saturday, July 16, 2016 - 05:51 PM UTC
Thank you very much Armorsmith!

ColinEdm


Joined: October 15, 2013
KitMaker: 1,355 posts
Armorama: 1,229 posts

Posted: Saturday, July 16, 2016 - 06:47 PM UTC
Thanks everyone! Dustin, very good job on the Bradley, just needs some dust and it looks like it came straight from Iraq.
ltb073

Joined: March 08, 2010
KitMaker: 3,662 posts
Armorama: 3,078 posts

Posted: Saturday, July 16, 2016 - 06:47 PM UTC
Thirian24

Joined: September 30, 2015
KitMaker: 2,493 posts
Armorama: 2,344 posts

Posted: Saturday, July 16, 2016 - 08:10 PM UTC
Colin - Thank you sir. I need to buy the proper pigments for this theater of operation.
Sal - Nice looking Elefant.
Sal - Nice looking Elefant.
Thirian24

Joined: September 30, 2015
KitMaker: 2,493 posts
Armorama: 2,344 posts

Posted: Sunday, July 17, 2016 - 07:05 AM UTC

Ranger74

Joined: April 04, 2002
KitMaker: 1,290 posts
Armorama: 658 posts

Posted: Sunday, July 17, 2016 - 10:50 PM UTC
Paul - thanks for the kind words...it was a truly enjoyable build
Dave - you have met the challenge of such a large kit...great progress
Colin - really like your work on the Marder..traversing the gun gives it life
Dustin - Really nice build and weathering on your Bradley. Some pastel dust or other pigments accumulated in corners, around protrusions, etc., will confirm the vehicle is hte the field and not a motor pool. Below are a couple photos I took of M2A3 Brads on Fort Bliss, TX in 2013. They are not carrying the reactive armor but give some idea of realistic stowage, pericope colors and other details. They are carrying MILES gear to include the yellow "kill" lights.


Armorsmith

Joined: April 09, 2015
KitMaker: 1,063 posts
Armorama: 1,000 posts

Posted: Monday, July 18, 2016 - 12:07 AM UTC
Really like the weathering on the Bradley. You have learned well grasshopper. Continue on this path and you will one day be called Master.
Thirian24

Joined: September 30, 2015
KitMaker: 2,493 posts
Armorama: 2,344 posts

Posted: Monday, July 18, 2016 - 01:31 AM UTC
Quoted Text
Really like the weathering on the Bradley. You have learned well grasshopper. Continue on this path and you will one day be called Master.
Wow! Thank you so much Armorsmith for the kind words! Might just give me a big head.. Hahah
Thirian24

Joined: September 30, 2015
KitMaker: 2,493 posts
Armorama: 2,344 posts

Posted: Monday, July 18, 2016 - 02:28 AM UTC
Jeff - Thanks for the kind words and pictures. They'll be helpful for sure.
Armorsmith

Joined: April 09, 2015
KitMaker: 1,063 posts
Armorama: 1,000 posts

Posted: Monday, July 18, 2016 - 07:20 AM UTC
Quoted Text
Quoted TextReally like the weathering on the Bradley. You have learned well grasshopper. Continue on this path and you will one day be called Master.
Wow! Thank you so much Armorsmith for the kind words! Might just give me a big head.. Hahah
Of your work so far I think this is your best effort to date. The weathering elements are particularly well done. A monotone scheme is difficult to make look interesting but you have done a splendid job. All you need now is a bit of stowage in the bin.

Thirian24

Joined: September 30, 2015
KitMaker: 2,493 posts
Armorama: 2,344 posts

Posted: Monday, July 18, 2016 - 07:44 AM UTC
Thank you very much Armorsmith. That means a lot coming from you! Funny you say that, because I'm happiest with this also. When I get back in town from work, I plan to make my own tarp roll and add some stowage. I have a modern stowage set from Tamiya.
Posted: Tuesday, July 19, 2016 - 04:14 AM UTC
Sal - I think that zimm did come out nicely. I have a tool that is made to rake a paste to recreate it but it really looked like too much work to bother with. Is the PE easy to apply?
Dustin - I'm impressed with the weather streaks on the sides. Your Bradley looks like a well maintained vehicle that lives outdoors. Well done!
Dustin - I'm impressed with the weather streaks on the sides. Your Bradley looks like a well maintained vehicle that lives outdoors. Well done!
Thirian24

Joined: September 30, 2015
KitMaker: 2,493 posts
Armorama: 2,344 posts

Posted: Tuesday, July 19, 2016 - 06:56 AM UTC
Paul - Thank you very much, sir. Means a lot coming from such great modelers.
Posted: Saturday, July 23, 2016 - 08:50 AM UTC
Hello,
I'd echo what the others have said of your build Dustin, surely one nice desert finish!
Been slow with my DML Pz IV A. Some update pics:
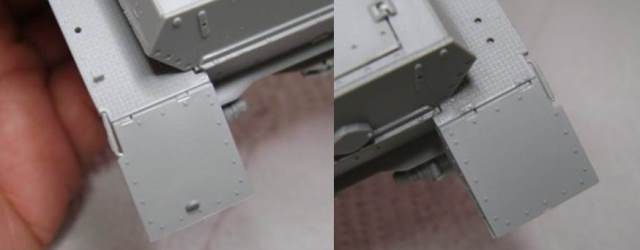
The instructions call for putting on the rear fenders early on. Obviously it's better to wait till you get to marry the lower and middle hulls.

There's a bit of gap as well.

Anyways the above two are no deal-breakers and have since been corrected.
I've moved on to the on-board tools. The builder has two options -- either build using PE clamps or use the ones with the molded ones. Bending those ultra small bits is not for me so I settled for the latter:


I thought I've successfully avoided the bending bit till I came upon the jack. By itself the jack is a 6-part assembly, then add another 4 for the PE. Well, this is the best that my hands and eyes can do so I'm letting it stand. Definitely not contest material!

Since I've been seriously documenting this build, might as well call out the others that I've come across.
There are four mounting holes that I can't figure out. Have checked the instructions if there was anything I missed or misplaced, but apparently none. Anyways these will be plugged as I finish this.

The other one is the antenna. Again the builder has the option of having it deployed or stowed. As I chose the latter I found out that you can't simply just stick it the mounting hole and stow it as the alignment is off. The mounting hole is that black bit on the side. So off with the mounting stub and let glue do its work.

I haven't put on the spare tracks as there are bits of PE mountings as well. The spare tracks are to be drawn from the main track supply so I am deferring that till I complete the tracks and see what's left for spares.
Lastly, I have observed that the rear fender area where one puts the springs are not of the same length. Was this the how it was really designed?
So far my count is 401 parts used, 2 lost.
Next up would be the turret and its internals.
Cheers,
Tat
I'd echo what the others have said of your build Dustin, surely one nice desert finish!
Been slow with my DML Pz IV A. Some update pics:
The instructions call for putting on the rear fenders early on. Obviously it's better to wait till you get to marry the lower and middle hulls.
There's a bit of gap as well.
Anyways the above two are no deal-breakers and have since been corrected.
I've moved on to the on-board tools. The builder has two options -- either build using PE clamps or use the ones with the molded ones. Bending those ultra small bits is not for me so I settled for the latter:
I thought I've successfully avoided the bending bit till I came upon the jack. By itself the jack is a 6-part assembly, then add another 4 for the PE. Well, this is the best that my hands and eyes can do so I'm letting it stand. Definitely not contest material!

Since I've been seriously documenting this build, might as well call out the others that I've come across.
There are four mounting holes that I can't figure out. Have checked the instructions if there was anything I missed or misplaced, but apparently none. Anyways these will be plugged as I finish this.
The other one is the antenna. Again the builder has the option of having it deployed or stowed. As I chose the latter I found out that you can't simply just stick it the mounting hole and stow it as the alignment is off. The mounting hole is that black bit on the side. So off with the mounting stub and let glue do its work.
I haven't put on the spare tracks as there are bits of PE mountings as well. The spare tracks are to be drawn from the main track supply so I am deferring that till I complete the tracks and see what's left for spares.
Lastly, I have observed that the rear fender area where one puts the springs are not of the same length. Was this the how it was really designed?


So far my count is 401 parts used, 2 lost.
Next up would be the turret and its internals.
Cheers,
Tat
Thirian24

Joined: September 30, 2015
KitMaker: 2,493 posts
Armorama: 2,344 posts

Posted: Saturday, July 23, 2016 - 08:58 AM UTC
Tat, thank you for the kind words sir.
Your Pz IV is coming along nicely.
Your Pz IV is coming along nicely.

bison126

Joined: June 10, 2004
KitMaker: 5,329 posts
Armorama: 5,204 posts

Posted: Saturday, July 23, 2016 - 01:08 PM UTC
There are some nice builds there. My Bradley still is stuck because of my recent move. I hope strting the weathering late August after some holidays to regain inspiration 

ltb073

Joined: March 08, 2010
KitMaker: 3,662 posts
Armorama: 3,078 posts

Posted: Saturday, July 23, 2016 - 04:58 PM UTC
Quoted Text
Sal - I think that zimm did come out nicely. I have a tool that is made to rake a paste to recreate it but it really looked like too much work to bother with. Is the PE easy to apply?
The Zimm PE was just as easy as any outer PE hardly any trimming needed. Only problem was 2 of the whole on the rear top were off. So I trimmed off the bolt heads and reapplied them

I have the zimm wheel as well it was a lot of work to do


ColinEdm


Joined: October 15, 2013
KitMaker: 1,355 posts
Armorama: 1,229 posts

Posted: Saturday, July 23, 2016 - 06:08 PM UTC
Sal, that PE zimm is looking good on your Elefant, I am interested to see how it will look once painted.
Dustin, keep going with that Bradley, weathering is going great!
Tat, good progress on a challenging DML kit, I have their Tauchpanzer IV in the stash so I am getting a good idea of what it will be like to build.
Dustin, keep going with that Bradley, weathering is going great!
Tat, good progress on a challenging DML kit, I have their Tauchpanzer IV in the stash so I am getting a good idea of what it will be like to build.
Thirian24

Joined: September 30, 2015
KitMaker: 2,493 posts
Armorama: 2,344 posts

Posted: Sunday, July 24, 2016 - 07:37 AM UTC
Thank you Colin!
I broke out the Bradley tonight... Even though my wife moved my modeling table.. So now I have no other place to model except the kitchen table. Searching for things is a pain when trying to accomplish something. It's for a greater good.. So I must not complain. Haha
Anyways, I did some pigments on the turret and upper hull area and on the running gear and tracks. I also used Alclad II Armored Glass tint for the glass around the commanders cupola. I do still need to paint the "hold down" area on those. I also did the periscopes, which I'm completely unhappy with. I'll be doing something different there next time.


 |


