

Aah! I understand what you're saying!
Thanks for that!
Hosted by Darren Baker
Panzer IV Ausf.J Sd.Kfz.161/2

Thirian24

Joined: September 30, 2015
KitMaker: 2,493 posts
Armorama: 2,344 posts
Posted: Thursday, October 29, 2015 - 07:41 AM UTC
brekinapez
Joined: July 26, 2013
KitMaker: 2,272 posts
Armorama: 1,860 posts
Posted: Thursday, October 29, 2015 - 09:29 AM UTC
Quoted Text
...I am also of the mind that during WWII especially the latter stages German tanks in particular had a very short life and hence were not around long enough to get all chipped up as a vehicle in extended service might get. As I said I am not a big fan but it does seem to be popular.
I tend to lean your direction. I concentrate on showing wear on highly trafficked areas of the vehicle rather than plaster it everywhere, like the vehicle experienced as gravel storm. Think about all the stuff that flies up off the highway and smacks the front of your car every day; all the little bits of gravel, metal, and glass trash blasting in at 55mph+ and bouncing off. How does the front of your car look? I think I would create small-arms fire chips all over a tank in an urban diorama to reflect the increased density of fire confined within city streets (say, Berlin), but they wouldn't be rusty.
My tendency is to concentrate more on environmental factors to weather a vehicle, like mud and dust. Like you say, some of these vehicles got their wicks lit by a Russian tank destroyer before their first transmission change so no time to rust. There is an M47 Patton sitting in front of a VFW hall near me that has been sitting there at least nine years (most likely much more) and really doesn't have that much rust on it, although the paint has dulled and paled heavily from the intense Georgia summer sun.
Thirian24
Joined: September 30, 2015
KitMaker: 2,493 posts
Armorama: 2,344 posts
Posted: Thursday, October 29, 2015 - 09:46 AM UTC
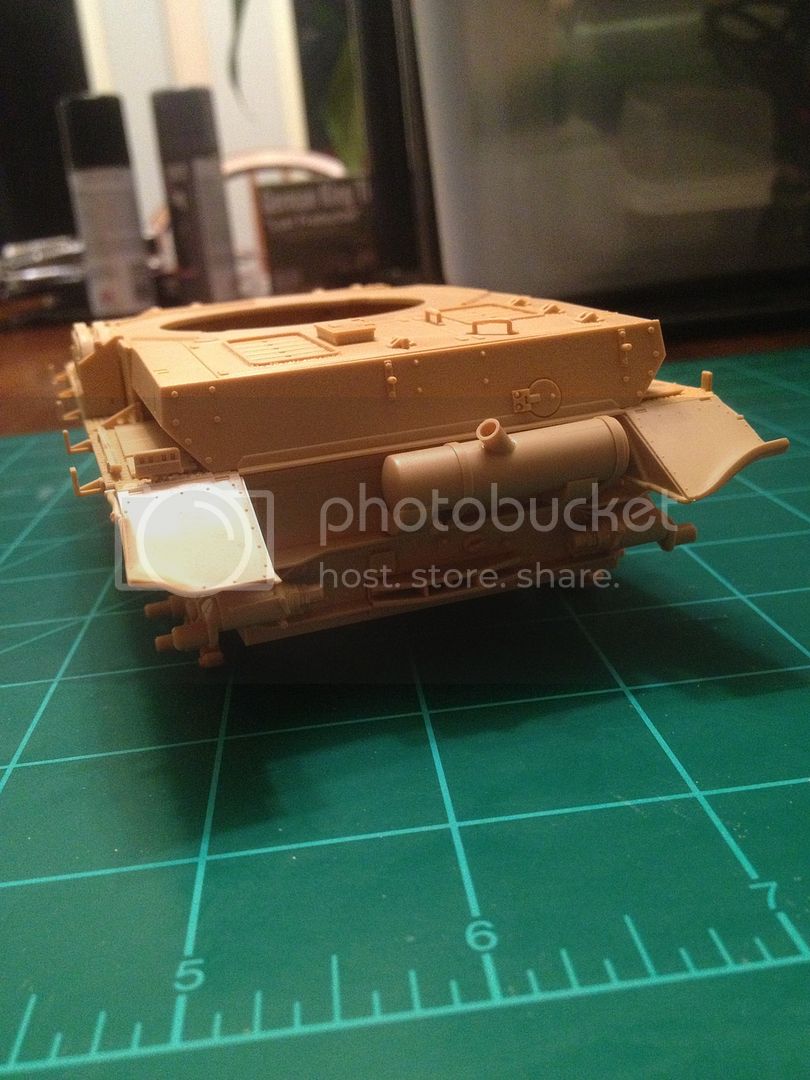
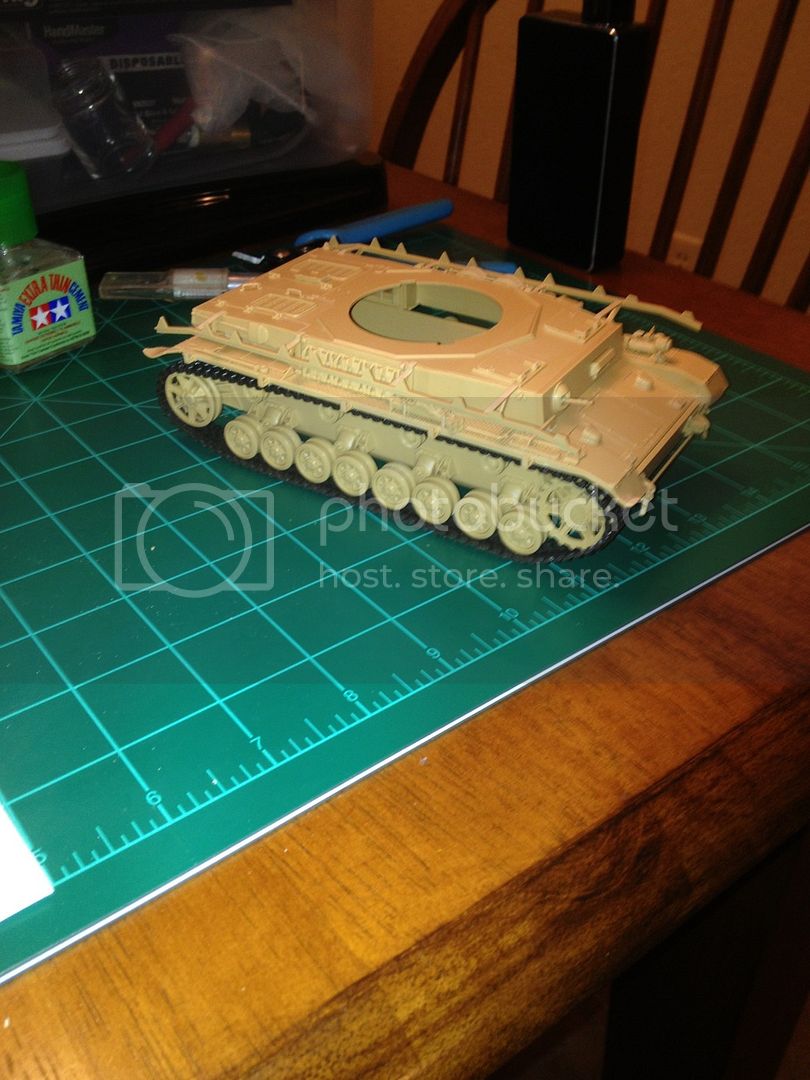
A bit of progress on fender damage. This kit is going together easily which I appreciate.
So, a few more bits and I'll be able to try out my new Iwata Neo, which I'm very excited about.


Cheers,
Dustin
So, a few more bits and I'll be able to try out my new Iwata Neo, which I'm very excited about.


Cheers,
Dustin

Armorsmith
Joined: April 09, 2015
KitMaker: 1,063 posts
Armorama: 1,000 posts
Posted: Thursday, October 29, 2015 - 03:34 PM UTC
Quoted Text
A bit of progress on fender damage. This kit is going together easily which I appreciate.
So, a few more bits and I'll be able to try out my new Iwata Neo, which I'm very excited about.
Cheers,
Dustin
Looks like you opted to heat them. Congratulations on not melting them completely. You might have noticed that the plastic along the "melted" edges is somewhat thicker and rounded. Hard for me to tell from the pics. Anyway, if that is the case you might want to scrape them with a sharp blade to help restore them to a more angular/flat surfaced look and to thin them out to a more scale like thickness. Coming along very nicely so far.

varanusk


Joined: July 04, 2013
KitMaker: 1,288 posts
Armorama: 942 posts
Posted: Thursday, October 29, 2015 - 03:50 PM UTC
Hi,
As said above it would look much better if you use a file to thin it down *a lot*, as thin as if it was PE.Then you can damage it with flat nose pliers.
I avoid using heat because of the soft bents it makes... not very realistic
As said above it would look much better if you use a file to thin it down *a lot*, as thin as if it was PE.Then you can damage it with flat nose pliers.
I avoid using heat because of the soft bents it makes... not very realistic

retiredyank
Joined: June 29, 2009
KitMaker: 11,610 posts
Armorama: 7,843 posts
Posted: Thursday, October 29, 2015 - 05:33 PM UTC
As an alternative to sanding the fenders, you can replace them with metal foil. Just be careful to shave the hinges off, so you don't have to replace them.

Thirian24
Joined: September 30, 2015
KitMaker: 2,493 posts
Armorama: 2,344 posts
Posted: Thursday, October 29, 2015 - 05:52 PM UTC
When I first applied light heat the edges did round some. So I did file them and use a hobby knife to scrape the edges to bring them back into "shape" it's kind of hard to tell from the pictures though. Perhaps it could use some more working.
Modelrob
Joined: October 20, 2015
KitMaker: 304 posts
Armorama: 293 posts
Posted: Thursday, October 29, 2015 - 06:01 PM UTC
The damage is coming along nicely.
Thirian24
Joined: September 30, 2015
KitMaker: 2,493 posts
Armorama: 2,344 posts
Posted: Thursday, October 29, 2015 - 09:40 PM UTC
Thanks fellas!
Armorsmith
Joined: April 09, 2015
KitMaker: 1,063 posts
Armorama: 1,000 posts
Posted: Friday, October 30, 2015 - 01:40 AM UTC
Quoted Text
Thanks fellas!
I agree the fenders do need to be thinned more. Another good looking build.
Thirian24
Joined: September 30, 2015
KitMaker: 2,493 posts
Armorama: 2,344 posts
Posted: Friday, October 30, 2015 - 02:02 AM UTC
Ok, I'll thin them more this evening while finishing the build, at least I hope to have it finished tonight.
Thanks for the mind words sir!
Cheers,
Dustin
Thanks for the mind words sir!
Cheers,
Dustin

TheGreatPumpkin
Vendor
Joined: April 20, 2009
KitMaker: 690 posts
Armorama: 672 posts
Posted: Friday, October 30, 2015 - 02:16 AM UTC
Hi All,
This is in reference to the use of primer as a base coat on German armor in the late war period. It seems that in late October, early November 1944 orders were cut for the tank plants to use the red oxide primer as the base coat, to which well thinned patches of dark yellow and olive green were to be applied to the vehicles. Tom Jentz's book on the King Tiger has the exact quote from the orders, but to paraphrase, the factories took over cammo painting sometime in September, 1994 and continued to do so until the end of the war.
Regards,
Georg

Thirian24
Joined: September 30, 2015
KitMaker: 2,493 posts
Armorama: 2,344 posts
Posted: Friday, October 30, 2015 - 09:10 AM UTC
Thank you for that info sir.
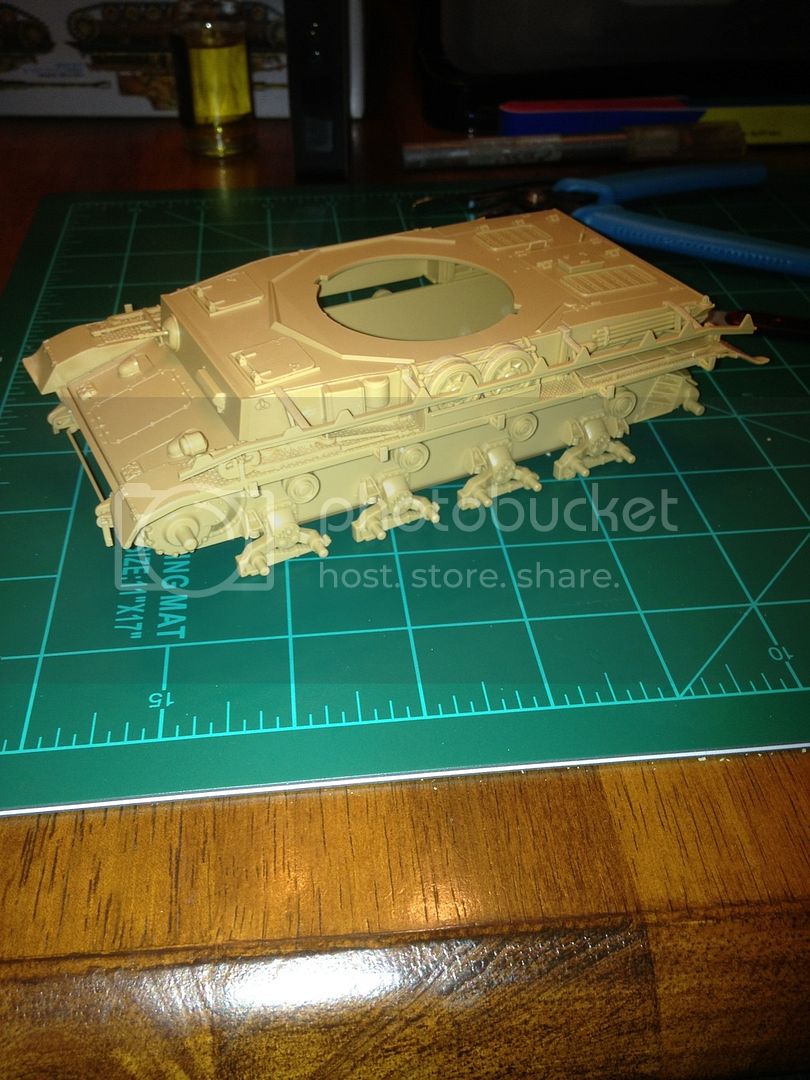
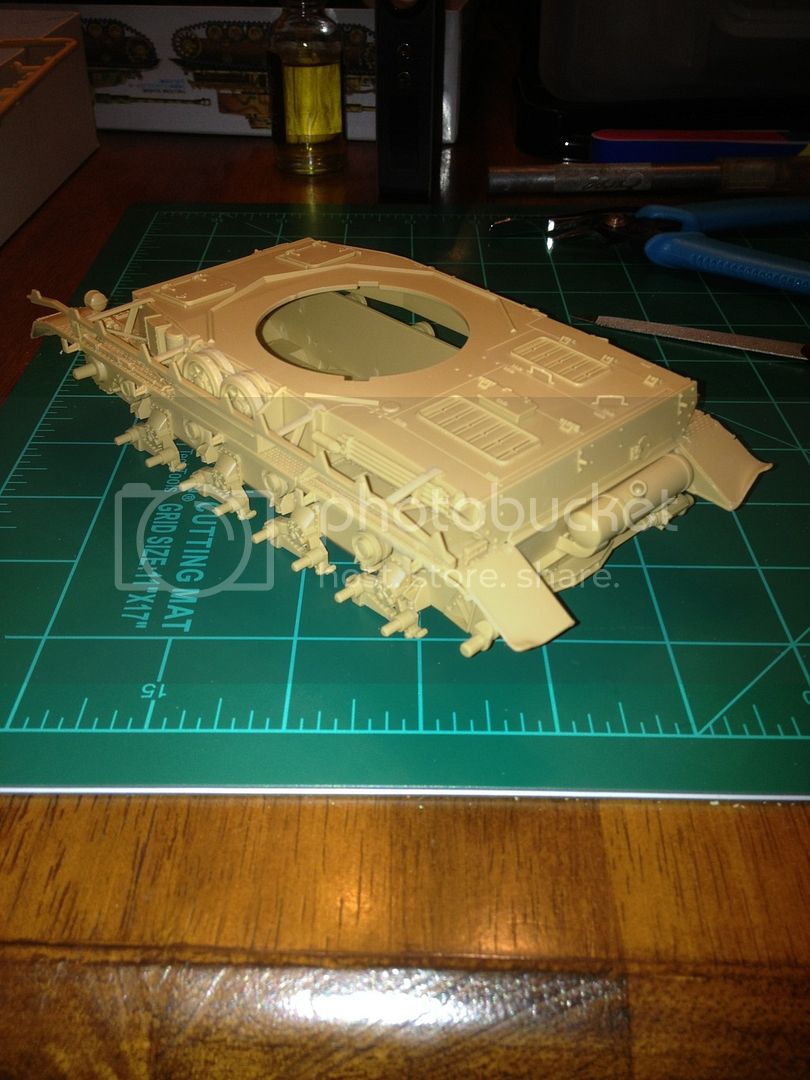
A bit of progress. I didn't get as far as I wanted, but it's a few steps closer.
I did thin the fenders a lot more. I'm not sure if you can see from the pictures, but they do look way better. Thanks for that advice.
Cheers,
Dustin
A bit of progress. I didn't get as far as I wanted, but it's a few steps closer.
I did thin the fenders a lot more. I'm not sure if you can see from the pictures, but they do look way better. Thanks for that advice.


Cheers,
Dustin
Armorsmith
Joined: April 09, 2015
KitMaker: 1,063 posts
Armorama: 1,000 posts
Posted: Saturday, October 31, 2015 - 04:03 AM UTC
Quoted Text
Thank you for that info sir.
A bit of progress. I didn't get as far as I wanted, but it's a few steps closer.
I did thin the fenders a lot more. I'm not sure if you can see from the pictures, but they do look way better. Thanks for that advice.
Cheers,
Dustin
In the first pic you can tell that the left rear fender is much thinner. If the others are the same then you're good. Coming along nicely.
Thirian24
Joined: September 30, 2015
KitMaker: 2,493 posts
Armorama: 2,344 posts
Posted: Saturday, October 31, 2015 - 04:13 AM UTC
Thank you sir!

TRM5150
Joined: January 03, 2010
KitMaker: 2,159 posts
Armorama: 707 posts

Posted: Saturday, October 31, 2015 - 07:50 AM UTC
Making some decent progress there Dustin!! Looking good! 
Thirian24
Joined: September 30, 2015
KitMaker: 2,493 posts
Armorama: 2,344 posts
Posted: Saturday, October 31, 2015 - 09:47 AM UTC
Thank you sir!
Thirian24
Joined: September 30, 2015
KitMaker: 2,493 posts
Armorama: 2,344 posts
Posted: Wednesday, November 04, 2015 - 11:29 AM UTC
Bit of an update. This is my first time fitting tracks, it went very well!
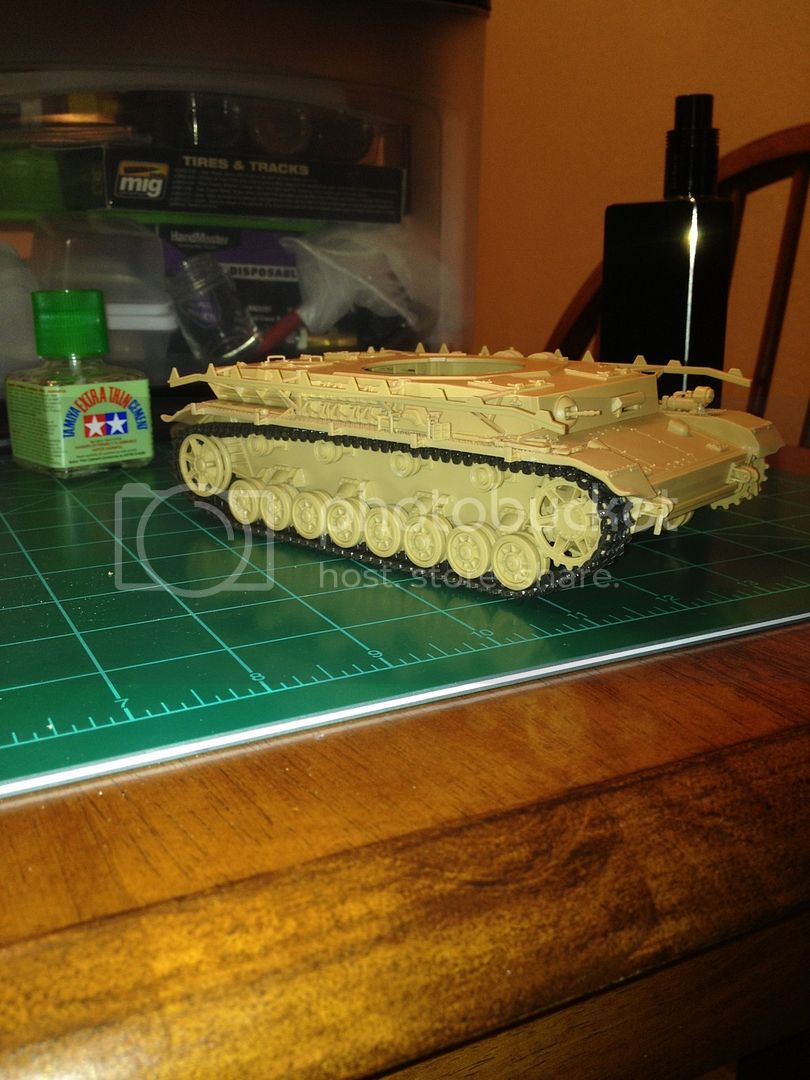
Just test fitting them. Should be finished up with the build tomorrow.
Cheers,
Dustin


Just test fitting them. Should be finished up with the build tomorrow.
Cheers,
Dustin
Modelrob
Joined: October 20, 2015
KitMaker: 304 posts
Armorama: 293 posts
Posted: Wednesday, November 04, 2015 - 03:55 PM UTC
Its coming along nicely.
TRM5150
Joined: January 03, 2010
KitMaker: 2,159 posts
Armorama: 707 posts
Posted: Wednesday, November 04, 2015 - 04:17 PM UTC
And just like that, she's got some sneakers on!  Getting close to slinging some paint soon! Looking good!
Getting close to slinging some paint soon! Looking good! Thirian24
Joined: September 30, 2015
KitMaker: 2,493 posts
Armorama: 2,344 posts
Posted: Wednesday, November 04, 2015 - 07:12 PM UTC
Robert, Todd,
Thanks for the kind words fellas. I'm ready to try some new stuff on this little Panzer. So far the few new things I've tried, seemed to turn out well.
Cheers,
Dustin
Thanks for the kind words fellas. I'm ready to try some new stuff on this little Panzer. So far the few new things I've tried, seemed to turn out well.
Cheers,
Dustin
Thirian24
Joined: September 30, 2015
KitMaker: 2,493 posts
Armorama: 2,344 posts
Posted: Wednesday, November 04, 2015 - 10:51 PM UTC
Nearly there.
Did these Panzerz have track sag? What's the best way to apply it on this kit, because there is much to glue the top to, to hold it down to give the sagged appreance.

Cheers,
Dustin
Did these Panzerz have track sag? What's the best way to apply it on this kit, because there is much to glue the top to, to hold it down to give the sagged appreance.

Cheers,
Dustin
Armorsmith
Joined: April 09, 2015
KitMaker: 1,063 posts
Armorama: 1,000 posts
Posted: Wednesday, November 04, 2015 - 11:20 PM UTC
Quoted Text
Nearly there.
Did these Panzerz have track sag? What's the best way to apply it on this kit, because there is much to glue the top to, to hold it down to give the sagged appreance.
Cheers,
Dustin
Virtually all German armored vehicles had some degree of track sag. German armored vehicle tracks had to be manually adjusted to maintain the proper tension. The degree of sag would depend on how recently the crew had preformed this maintenance. Achieving sag with rubber band tracks is a bit tricky but can be done although not without some work. One method is to use pins inserted from the inside of the hull. The pins are placed where the track would sag to hold the track down. This requires some measuring or a good Mk1 eyeball to ensure proper placement. It's also important to make sure the pin protrudes far enough to the outside edge of the track to hold it down but not too far so that it is easily seen. The pin also has to be sufficient thin that it does not stand too high above the track to be visible as well. This procedure is best done before the hull is sealed. An alternative would be replacement individual link metal or plastic tracks. This will run you anywhere from about $25-45 depending on the brand and type. Perhaps others have a better/more efficient way of dealing with the sag or rubber band tracks.
I'm not sure at this point that I would be too concerned with the sag. You can always get indy tracks to improve the look later.
Thirian24
Joined: September 30, 2015
KitMaker: 2,493 posts
Armorama: 2,344 posts
Posted: Wednesday, November 04, 2015 - 11:47 PM UTC
Thank you for that info sir. I believe you're correct, that its probably not very important to worry about the sag, a you said that I can always upgrade later.

M4A1Sherman
Joined: May 02, 2013
KitMaker: 4,403 posts
Armorama: 4,078 posts
Posted: Thursday, November 05, 2015 - 12:29 AM UTC
[quote]I recently looked over all the available AM schurzen for the Panzer IV online and I found that, based on the photos on the net, that Aber, Voyager and Eduard all have some degree of inaccuracy in the configuration of their schurzen, especially the Thoma (wire mesh) schurzen. For my money, I would go with Griffon models which seems to make a very accurate representation of both the solid (early J) and Thoma (late) schurzen. And I am not in any way employed by or connected with Griffon! I'm a little bit surprised that Tamiya wouldn't include at least the solid plate schurzen in this kit, given their reputation for accuracy and completeness.[/quot
Don't forget that this kit has been around since the mid-90's. TAMIYA probably looked over some WWII photos and saw how many Pz.IVs' Schurzen had fallen off, so they probably figured that they could save some money by not molding them...
As far as "Track-sag" goes, YES, most German tracked vehicles DO show Track-sag, as:
a.German Tracks were adjusted manually by their crews, and
b.German Tracks were NOT "Live" Tracks, like US tracked vehicles were, and still are on most of our vehicles, today.
"Live" Tracks aid Engine, Driveline, Suspension Components, and Sprocket, Idler and Road-wheel life, because they are designed to roll up on themselves. A perfect example is comparing the average M4-Series Sherman Tank's track-life of 2500 miles to the average Panzer's (that includes Pz.IIIs, Pz.IVs, Panthers, Tiger Is and Tiger IIs) track-life of 500 miles!!! The US M4-series was a much more mechanically dependable vehicle than ANY WWII German AFV, bar none!
 |

WEB HOSTING BY


Copyright ©2021 Armorama and Kitmaker Network, a subsidiary of Silver Star Enterprises
All Rights Reserved. Please read our Conditions of Use and Privacy Policy.
All Rights Reserved. Please read our Conditions of Use and Privacy Policy.