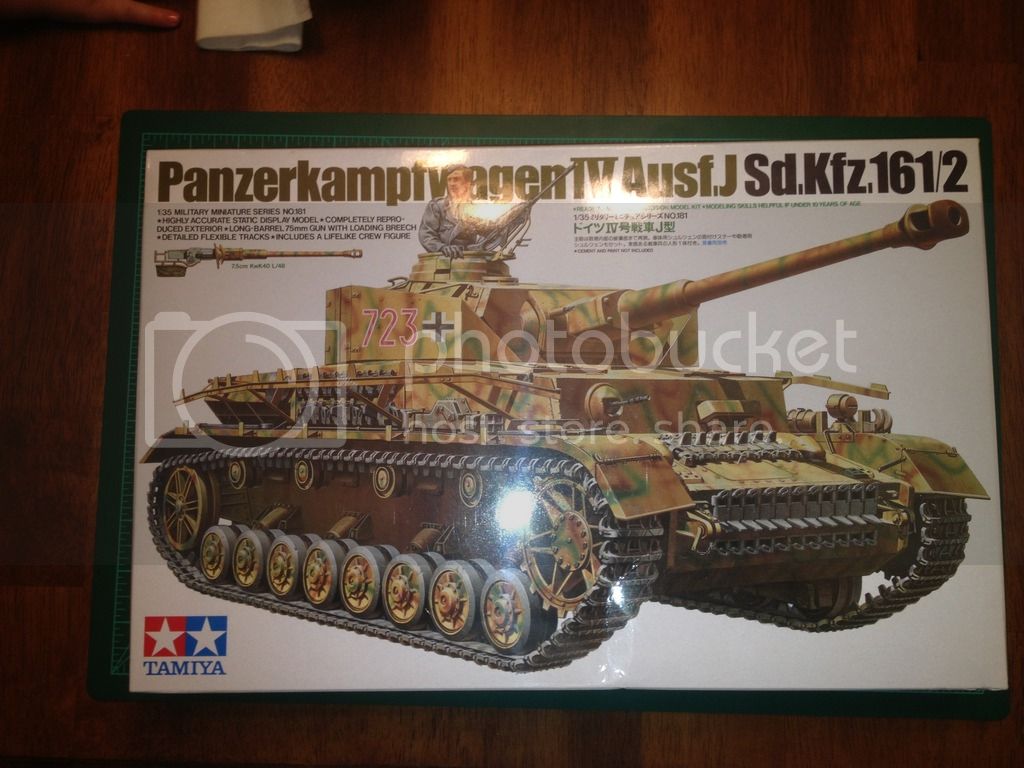
Panzer IV Ausf.J Sd.Kfz.161/2
Oklahoma, United States
Joined: September 30, 2015
KitMaker: 2,493 posts
Armorama: 2,344 posts
Posted: Monday, October 26, 2015 - 08:17 AM UTC
Hey fellas,
I decided to put this kit together while I sort out the Tiger 1 I was building. I hate having idle time.
This kit is Tamiya 35181.
Question, where can I buy Schürzen and some other PE at?
Cheers,
Dustin
"Only the dead have seen the end of war." - Plato
United States
Joined: June 04, 2014
KitMaker: 137 posts
Armorama: 128 posts
Posted: Monday, October 26, 2015 - 08:53 AM UTC
I recently looked over all the available AM schurzen for the Panzer IV online and I found that, based on the photos on the net, that Aber, Voyager and Eduard all have some degree of inaccuracy in the configuration of their schurzen, especially the Thoma (wire mesh) schurzen. For my money, I would go with Griffon models which seems to make a very accurate representation of both the solid (early J) and Thoma (late) schurzen. And I am not in any way employed by or connected with Griffon! I'm a little bit surprised that Tamiya wouldn't include at least the solid plate schurzen in this kit, given their reputation for accuracy and completeness.
Oklahoma, United States
Joined: September 30, 2015
KitMaker: 2,493 posts
Armorama: 2,344 posts
Posted: Monday, October 26, 2015 - 09:44 AM UTC
Thanks or the reply sir!
I looked at their website, wow they have nice products. I'll be looking into their stuff for sure.
Cheers,
Dustin
"Only the dead have seen the end of war." - Plato
Massachusetts, United States
Joined: January 03, 2010
KitMaker: 2,159 posts
Armorama: 707 posts
Posted: Monday, October 26, 2015 - 04:25 PM UTC
Looking forward to seeing Your J come out of the box soon Dustin! Kev was pretty much spot on with the Griffon sets. You certainly could make the others work if you wanted, but you would probably be happier with the Griffon versions. I have two set from them right now...the Basic and Royal versions. Both cover a wide range of items for upgrading whether you choose to use all the parts or not.
Check out the Griffon site...if you have not yet -
http://www.griffonmodel.com/Product.asp There are several sets that cover the H/J and just J variants and in different configuration. Just scroll through the listings and look each one over and find the one that best suites you and you project!!

Best of luck!
Pennsylvania, United States
Joined: April 09, 2015
KitMaker: 1,063 posts
Armorama: 1,000 posts
Posted: Monday, October 26, 2015 - 05:09 PM UTC
Quoted Text
Hey fellas,
I decided to put this kit together while I sort out the Tiger 1 I was building. I hate having idle time.
This kit is Tamiya 35181.
Question, where can I buy Schürzen and some other PE at?
Cheers,
Dustin
Good choice, nice kit, fairly easy build. Going to dive into PE are we? Good luck.
"No plan survives contact with the enemy." Helmuth von Moltke the Elder
Oklahoma, United States
Joined: September 30, 2015
KitMaker: 2,493 posts
Armorama: 2,344 posts
Posted: Monday, October 26, 2015 - 06:13 PM UTC
Quoted Text
Looking forward to seeing Your J come out of the box soon Dustin! Kev was pretty much spot on with the Griffon sets. You certainly could make the others work if you wanted, but you would probably be happier with the Griffon versions. I have two set from them right now...the Basic and Royal versions. Both cover a wide range of items for upgrading whether you choose to use all the parts or not.
Check out the Griffon site...if you have not yet - http://www.griffonmodel.com/Product.asp There are several sets that cover the H/J and just J variants and in different configuration. Just scroll through the listings and look each one over and find the one that best suites you and you project!!
Best of luck!
Thank you sir. I did check our teir site and they have amazing looking products.
Thanks for the words of encouragement.
Cheers
Dustin
"Only the dead have seen the end of war." - Plato
Oklahoma, United States
Joined: September 30, 2015
KitMaker: 2,493 posts
Armorama: 2,344 posts
Posted: Monday, October 26, 2015 - 06:14 PM UTC
Quoted Text
Quoted Text
Hey fellas,
I decided to put this kit together while I sort out the Tiger 1 I was building. I hate having idle time.
This kit is Tamiya 35181.
Question, where can I buy Schürzen and some other PE at?
Cheers,
Dustin
Good choice, nice kit, fairly easy build. Going to dive into PE are we? Good luck.
Thank you sir!
Yes, it seems very straight forward.
I decided to try some PE this time. With the last build I feel like I did a good job of building, painting and weathering. Just the clear coats messed up on me. So I want to take my progression of learning a step further with a bit of PE.
Cheers,
Dustin
"Only the dead have seen the end of war." - Plato
Pennsylvania, United States
Joined: April 09, 2015
KitMaker: 1,063 posts
Armorama: 1,000 posts
Posted: Tuesday, October 27, 2015 - 02:10 AM UTC
[quote]
Quoted Text
I decided to try some PE this time. With the last build I feel like I did a good job of building, painting and weathering. Just the clear coats messed up on me. So I want to take my progression of learning a step further with a bit of PE.
Cheers,
Dustin
Something to help take this build a step further, adding texture to the "rusty" exhaust. This is fairly simple to do and can be used to enhance cast texture as well. There are two methods, the first is the older way and the second is the newer. For the older method you will need some liquid cement(I prefer Testors liquid for this). Paint the muffler with the liquid cement and allow it to soften the plastic. This might take more than 1 application. Once the plastic is soft, use a stiff bristle brush and stipple the surface. This will "roughen" it up and give it a grainy look. If it looks too rough you can soften it by repainting it with the liquid cement. You can practice on some scrap plastic or on the bottom inside of the hull which no one will see once the kit is complete. The second way is to use Gunze Mr. Surfacer. This comes in several different grades and is lacquer based so it dries very quickly. Simply paint it on and allow it to dry. It is basically a textured paint. Use either an old disposable brush or clean your brush in lacquer thinner. Either way is pretty easy and will add another dimension of realism to your model. Good luck.
"No plan survives contact with the enemy." Helmuth von Moltke the Elder
Oklahoma, United States
Joined: September 30, 2015
KitMaker: 2,493 posts
Armorama: 2,344 posts
Posted: Tuesday, October 27, 2015 - 03:04 AM UTC
Armorsmith,
Thanks for that great tip! I'll order some Mr. Surfacer
"Only the dead have seen the end of war." - Plato
Pennsylvania, United States
Joined: April 09, 2015
KitMaker: 1,063 posts
Armorama: 1,000 posts
Posted: Tuesday, October 27, 2015 - 03:07 AM UTC
Quoted Text
Armorsmith,
Thanks for that great tip! I'll order some Mr. Surfacer
Forgot to mention I use the Mr. Surfacer 500.
"No plan survives contact with the enemy." Helmuth von Moltke the Elder
Oklahoma, United States
Joined: September 30, 2015
KitMaker: 2,493 posts
Armorama: 2,344 posts
Posted: Tuesday, October 27, 2015 - 04:01 AM UTC
I was going to ask, but I just went ahead and bought 500 and 1000. I also bought an Iwata airbrush. So maybe my camo will turn out better? Lol!
"Only the dead have seen the end of war." - Plato
Pennsylvania, United States
Joined: April 09, 2015
KitMaker: 1,063 posts
Armorama: 1,000 posts
Posted: Tuesday, October 27, 2015 - 04:11 AM UTC
Quoted Text
I was going to ask, but I just went ahead and bought 500 and 1000. I also bought an Iwata airbrush. So maybe my camo will turn out better? Lol!
Which Iwata, Eclipse? I know lots of folks use/swear by the Iwata so you have made a very solid choice. I tend to be lazy and don't like the hassle of cleaning/disassembly of an airbrush. Believe it or not I have been using a Testors Aztec for over 20 years. Not the greatest but so easy to clean and maintain. I just unscrew the tip, put it in a bottle of Windex, shake, remove, and let dry. To be honest though I have been seriously considering buying an Iwata but due to my very limited budget it's a choice between buying kits to build or buying a new AB and having very few or no kits to build for a while. Kind of a catch 22 for me.
"No plan survives contact with the enemy." Helmuth von Moltke the Elder
Oklahoma, United States
Joined: September 30, 2015
KitMaker: 2,493 posts
Armorama: 2,344 posts
Posted: Tuesday, October 27, 2015 - 04:15 AM UTC
I bought the Neo.
It was only $50. So it seemed like a better step up for a beginner. What kind of new kits would you be looking at getting?
"Only the dead have seen the end of war." - Plato
Pennsylvania, United States
Joined: April 09, 2015
KitMaker: 1,063 posts
Armorama: 1,000 posts
Posted: Tuesday, October 27, 2015 - 05:07 AM UTC
Quoted Text
I bought the Neo.
It was only $50. So it seemed like a better step up for a beginner. What kind of new kits would you be looking at getting?
A good choice. I am sure there are others who can help you if you have any specific technical questions about its care and use. Like any tool it's important to keep it clean and in good condition.
Since I was a teenager I have been building WWII armor, mostly German. About a year ago I realized that I have built every major variant of tanks, halftracks, and self propelled guns countless times and, decided that I was tired of them and started to build cold war/modern Soviet(T 62, T-64, T-72) and US(M60, Stryker, M1, Bradley).I am also now interested in Israeli armor although I have not yet built any of those kits. It has been a refreshing change for me although my knowledge of the armor of that period is severely lacking, whereas I am pretty knowledgeable(although no expert) on WWII German stuff. Slowly learning though.
"No plan survives contact with the enemy." Helmuth von Moltke the Elder
Oklahoma, United States
Joined: September 30, 2015
KitMaker: 2,493 posts
Armorama: 2,344 posts
Posted: Tuesday, October 27, 2015 - 06:30 PM UTC
"Only the dead have seen the end of war." - Plato
Oklahoma, United States
Joined: September 30, 2015
KitMaker: 2,493 posts
Armorama: 2,344 posts
Posted: Wednesday, October 28, 2015 - 08:25 AM UTC
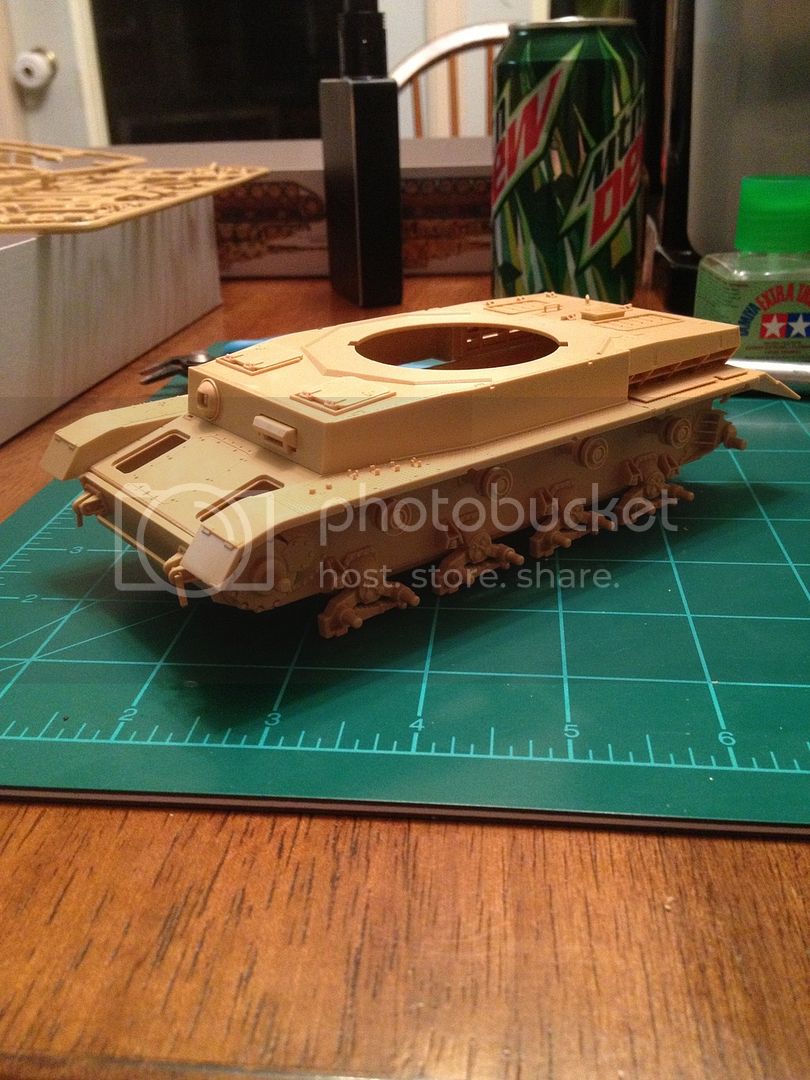
Small but of progress.
Cheers,
Dustin
"Only the dead have seen the end of war." - Plato
Oklahoma, United States
Joined: September 30, 2015
KitMaker: 2,493 posts
Armorama: 2,344 posts
Posted: Wednesday, October 28, 2015 - 06:29 PM UTC
Were these Panzers painted in Hull Red before the base coat was applied?
"Only the dead have seen the end of war." - Plato
Pennsylvania, United States
Joined: April 09, 2015
KitMaker: 1,063 posts
Armorama: 1,000 posts
Posted: Wednesday, October 28, 2015 - 11:52 PM UTC
Quoted Text
Were these Panzers painted in Hull Red before the base coat was applied?
Good job again so far. And yes the Germans used an oxide red primer but unless you are going to show areas that were not painted, i.e. the engine compartment, the primer is rarely visible. However, during late war there is evidence to support that some vehicles left the factory in primer which was then cammoed in the field by the units.
"No plan survives contact with the enemy." Helmuth von Moltke the Elder
Oklahoma, United States
Joined: September 30, 2015
KitMaker: 2,493 posts
Armorama: 2,344 posts
Posted: Thursday, October 29, 2015 - 02:41 AM UTC
Thanks for that info sir.
I was thinking that red would show through if I did chipping?
Is that correct, or would another color show through?
"Only the dead have seen the end of war." - Plato
Oklahoma, United States
Joined: September 30, 2015
KitMaker: 2,493 posts
Armorama: 2,344 posts
Posted: Thursday, October 29, 2015 - 02:57 AM UTC
What's the best way to show damage to the fenders, being as they are plastic.
"Only the dead have seen the end of war." - Plato
Arizona, United States
Joined: October 20, 2015
KitMaker: 304 posts
Armorama: 293 posts
Posted: Thursday, October 29, 2015 - 03:08 AM UTC
Looks like it should be an interesting build, can't wait to see the finished model.
Rob
Oklahoma, United States
Joined: September 30, 2015
KitMaker: 2,493 posts
Armorama: 2,344 posts
Posted: Thursday, October 29, 2015 - 03:16 AM UTC
Thank you sir. Hopefully I don't have issues with the clear on this one.
The Tiger is still giving me fits.
"Only the dead have seen the end of war." - Plato
Pennsylvania, United States
Joined: April 09, 2015
KitMaker: 1,063 posts
Armorama: 1,000 posts
Posted: Thursday, October 29, 2015 - 06:26 AM UTC
Quoted Text
What's the best way to show damage to the fenders, being as they are plastic.
Several options here. One is to get PE that includes the fenders. Anneal the pieces to be bent to make them easier to work with and have at it. Some guys are really good at this. Another method is to very carefully heat the plastic to soften it then use a blunt instrument to push it around. Danger here is that you will soften the plastic too much and end up with goop. Another downside is that any detail tends to get lost as the plastic softens and depending on what it is may be difficult to restore. Edges also tend to become rounded/soft as opposed to sharp and must be restored using a sharp blade and files. A third option would be to file/sand the part from the inside to thin the plastic until it is very thin, thus allowing you to make small holes and to "wrinkle" to simulate bent metal. I have had luck using the flame and thin method but not so much with the PE although I do not consider myself very adept with PE.
"No plan survives contact with the enemy." Helmuth von Moltke the Elder
Oklahoma, United States
Joined: September 30, 2015
KitMaker: 2,493 posts
Armorama: 2,344 posts
Posted: Thursday, October 29, 2015 - 06:55 AM UTC
Thanks for that info sir, I may try to do the damage lightly.
What about the chipping? Would the base coat being chipped, show through to the red?
"Only the dead have seen the end of war." - Plato
Pennsylvania, United States
Joined: April 09, 2015
KitMaker: 1,063 posts
Armorama: 1,000 posts
Posted: Thursday, October 29, 2015 - 07:17 AM UTC
Quoted Text
Thanks for that info sir, I may try to do the damage lightly.
What about the chipping? Would the base coat being chipped, show through to the red?
Generally a dark grey is used to show chipping.
I am personally not a fan of chipping, although it seems to be popular these days. While it may be artistically appealing for the most part in my opinion it tends to be over done. Consider this: In 1/35 scale a chip 1/35 of an inch is equal to a 1 inch chip in 1:1. Since most chipped areas on a model tend to be considerably lager it is easy to get carried away. Second I tend to model what can be seen at normal viewing distance. For example, if you look at a real vehicle from a "normal viewing distance say from 6-10 feet you really can't see chips in the paint unless they are pretty large. Same should be true of a scale model, at arms length "scale" chips would also not be visible. I am also of the mind that during WWII especially the latter stages German tanks in particular had a very short life and hence were not around long enough to get all chipped up as a vehicle in extended service might get. As I said I am not a big fan but it does seem to be popular.
"No plan survives contact with the enemy." Helmuth von Moltke the Elder


