

Hosted by Richard S.
Big Cats Mk.IV

Hudson29

#460

Joined: September 16, 2014
KitMaker: 1,156 posts
Armorama: 1,024 posts
Posted: Wednesday, December 07, 2016 - 12:35 AM UTC
Tat - Your Sturmmorser is a bruiser!

tatbaqui

#040

Joined: May 06, 2007
KitMaker: 2,713 posts
Armorama: 2,451 posts

Posted: Wednesday, December 07, 2016 - 06:09 AM UTC
Thanks Dustin, Paul!


ClaytonFromEllijay
#454
Joined: July 10, 2016
KitMaker: 1,273 posts
Armorama: 1,138 posts
Posted: Wednesday, December 07, 2016 - 07:31 PM UTC
Very nice camo on yout Sturmorser, Tat! I think the mortar base looks good as it is.

ltb073
Joined: March 08, 2010
KitMaker: 3,662 posts
Armorama: 3,078 posts
Posted: Sunday, December 11, 2016 - 04:29 AM UTC
Ok guys I think Im ready to call my kitty done. Here is progress


And then with the washes and weathering


oops looks like I forgot to put some residue on the muzzle
and the exhaust

Ill get on that right away, anyone have any other comments or suggestions


And then with the washes and weathering


oops looks like I forgot to put some residue on the muzzle

and the exhaust

Ill get on that right away, anyone have any other comments or suggestions


Thirian24
Joined: September 30, 2015
KitMaker: 2,493 posts
Armorama: 2,344 posts
Posted: Sunday, December 11, 2016 - 05:21 AM UTC
Looks great Sal. Great finish!
ClaytonFromEllijay
#454
Joined: July 10, 2016
KitMaker: 1,273 posts
Armorama: 1,138 posts
Posted: Sunday, December 11, 2016 - 07:07 AM UTC
Sharp Camo work, very nice!
supaderpa

Joined: March 28, 2016
KitMaker: 157 posts
Armorama: 140 posts
Posted: Sunday, December 11, 2016 - 12:11 PM UTC
Looks like someone has candy canes on their mind for this festive season 
I kid, I kid. Great work. Nice and clean.
I kid, I kid. Great work. Nice and clean.
ltb073
Joined: March 08, 2010
KitMaker: 3,662 posts
Armorama: 3,078 posts
Posted: Sunday, December 11, 2016 - 04:48 PM UTC
Thanks guys it's appreciated and I have to say it was a fun kit to build as well 
tatbaqui
#040
Joined: May 06, 2007
KitMaker: 2,713 posts
Armorama: 2,451 posts
Posted: Monday, December 12, 2016 - 05:55 AM UTC
Thanks Clayton -- yeah will just leave the mortar base color as is.
Sal, congrats on your finish. The two pipes that sandwich the left exhaust are intake pipes for cool air -- they don't get rusty as that of the exhaust pipes.
I've painted the wheels and tracks. Brushed on heavily diluted buff color to soften the camo colors.

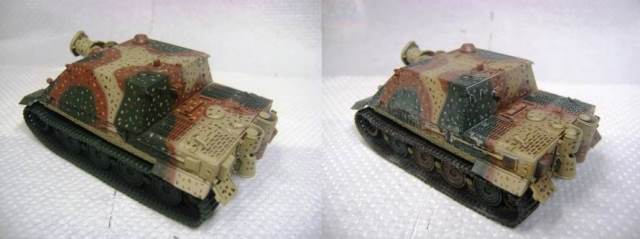
Now I see that I should have hidden the ends where the tracks meet. Will try to figure out a solution for it.
Cheers,
Tat
Sal, congrats on your finish. The two pipes that sandwich the left exhaust are intake pipes for cool air -- they don't get rusty as that of the exhaust pipes.
I've painted the wheels and tracks. Brushed on heavily diluted buff color to soften the camo colors.
Now I see that I should have hidden the ends where the tracks meet. Will try to figure out a solution for it.
Cheers,
Tat

LikesTanks

Joined: May 07, 2013
KitMaker: 242 posts
Armorama: 234 posts
Posted: Monday, December 12, 2016 - 08:59 AM UTC
Great builds here so far everyone.
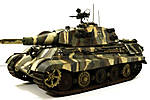
Kinda late posting this starter pic

Still thinking of getting indie tracks for this
Kinda late posting this starter pic
Still thinking of getting indie tracks for this
Hudson29
#460
Joined: September 16, 2014
KitMaker: 1,156 posts
Armorama: 1,024 posts
Posted: Tuesday, December 13, 2016 - 10:02 PM UTC
Sal - That is very interesting camo. What was the purpose of the white? Was it a winter scheme? It sure is striking!
Hudson29
#460
Joined: September 16, 2014
KitMaker: 1,156 posts
Armorama: 1,024 posts
Posted: Tuesday, December 13, 2016 - 10:05 PM UTC
Tat - Your bruiser is a pip! I had decided to taper off buying kits but your build is so attractive that I may have to soften my stance in this particular case and shell out for one . . .
tatbaqui
#040
Joined: May 06, 2007
KitMaker: 2,713 posts
Armorama: 2,451 posts
Posted: Wednesday, December 14, 2016 - 06:46 AM UTC
LOL, thanks Paul, I'd say go for it! Countless times I've resolved not to buy anymore, but I guess the itch of getting another kit always wins
ltb073
Joined: March 08, 2010
KitMaker: 3,662 posts
Armorama: 3,078 posts
Posted: Wednesday, December 14, 2016 - 06:51 AM UTC
Quoted Text
Sal - That is very interesting camo. What was the purpose of the white? Was it a winter scheme? It sure is striking!
Paul apparently this beast is or was at the Aberdeen Proving Grounds in Maryland

This Jagdpanther, hull number 303018 was issued to a Schwere Heeres-Panzerjäger-Abteilung (army heavy tank destroyer unit) for the Ardennes Offensive in December 1944 and captured by American troops. So I guess it was a Winter camo scheme. There is also this paint option with the kit instructions. I thought it looked different so decided to try it
ClaytonFromEllijay
#454
Joined: July 10, 2016
KitMaker: 1,273 posts
Armorama: 1,138 posts
Posted: Wednesday, December 14, 2016 - 07:33 PM UTC
That will really stand out on your display shelf, Sal! Very cool.
iakarch
Joined: May 19, 2007
KitMaker: 459 posts
Armorama: 421 posts

Posted: Sunday, December 18, 2016 - 05:55 AM UTC
I'm going to be building a Leopard 1 Early Batch using the Italeri kit as a base and Perfect Scale Modellbau's conversion.

Thirian24
Joined: September 30, 2015
KitMaker: 2,493 posts
Armorama: 2,344 posts
Posted: Sunday, December 18, 2016 - 07:28 AM UTC
Welcome aboard Irvin!
iakarch
Joined: May 19, 2007
KitMaker: 459 posts
Armorama: 421 posts
Posted: Monday, December 26, 2016 - 02:15 AM UTC
Making some progress on my batch 1 Leopard


Armored76

Joined: September 30, 2013
KitMaker: 1,615 posts
Armorama: 1,500 posts
Posted: Monday, December 26, 2016 - 12:04 PM UTC
Shaping up nicely, Irvin!
Hudson29
#460
Joined: September 16, 2014
KitMaker: 1,156 posts
Armorama: 1,024 posts
Posted: Tuesday, December 27, 2016 - 01:05 AM UTC
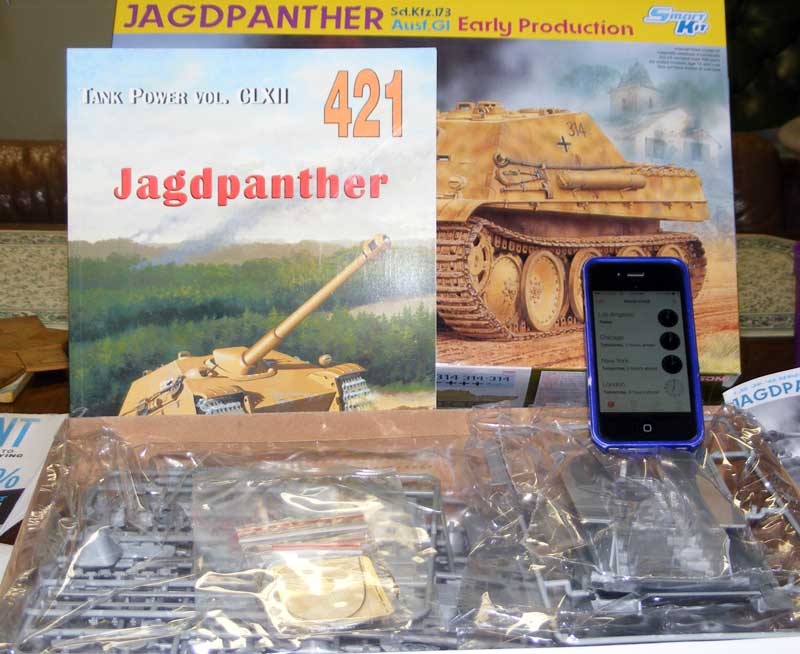
I'm finally getting a start on the Dragon JSd.Kfz.173 Jagdpanther Sd.Kfz.173 Ausf.G1 Early Production kit. Looking through the booklet I have on the Jagdpanthers it looks like most, if not ALL of them had Zim. The kit does not have it so I can leave well enough alone or plunge in and add it myself. I have seen aftermarket sets in photo etch & resin for some kits that folks were working on here on Armorama. Can anyone guide me on what is available for this Dragon 6458 kit? My skills are modest so I would smile on something fairly easy . . .
I shot some pics of the opening of the box and will post them a bit later.
I shot some pics of the opening of the box and will post them a bit later.

Tojo72
Joined: June 06, 2006
KitMaker: 4,691 posts
Armorama: 3,509 posts
Posted: Tuesday, December 27, 2016 - 01:33 AM UTC
Unfortunately all of the earlies had zimm,I'm sure some one could recommend a good AM Zimm set,myself,I bought the Dragon version with the molded zimm.
Hudson29
#460
Joined: September 16, 2014
KitMaker: 1,156 posts
Armorama: 1,024 posts
Posted: Tuesday, December 27, 2016 - 04:19 AM UTC
Thanks Anthony, I wish I had done that too. I found a set of resin zim that will cost fully as much as the kit did once shipping is factored in.
I hope someone has some other options?
I hope someone has some other options?
Hudson29
#460
Joined: September 16, 2014
KitMaker: 1,156 posts
Armorama: 1,024 posts
Posted: Tuesday, December 27, 2016 - 05:39 AM UTC
I originally had an old Tamiya Jagdpanther in mind for this campaign but decided that my skill level is up to trying something more advanced so this Dragon kit was hauled off of the shelf. It looks more detailed and has a lot more parts but still doesn't look too complicated. I'm going to try the Deformable Styrene kit tracks and see how they look. I build a Dragon M-46 Patton a few years ago and there were no issues and they still look terrific. I have a set of Fruils on hand should the DS ones come a cropper.
As mentioned a couple of posts ago, I'm looking to add the zim, steers are welcomed!
I always love this stage of a build when the kit is new and full of promise. Here are a couple of pics shot last night. Actual construction will start in a day or two after deciding which way to go with the zim. It might be best to see what the zim will require before committing to too much . . .
Tojo72
Joined: June 06, 2006
KitMaker: 4,691 posts
Armorama: 3,509 posts
Posted: Tuesday, December 27, 2016 - 06:04 AM UTC
Just one hint Paul,don't use enamel or Lacquer paint or washes on the DS tracks,they will go brittle and break after some time.You should be okay with acrylics,but you can't be sure with those tracks.


Hudson29
#460
Joined: September 16, 2014
KitMaker: 1,156 posts
Armorama: 1,024 posts
Posted: Wednesday, December 28, 2016 - 01:27 AM UTC
Quoted Text
Just one hint Paul,don't use enamel or Lacquer paint or washes on the DS tracks,they will go brittle and break after some time.You should be okay with acrylics,but you can't be sure with those tracks.
Oh! That is exactly what I do use on my tracks. Possibly I ought to think about the Fruils again . . .
 |

WEB HOSTING BY


Copyright ©2021 Armorama and Kitmaker Network, a subsidiary of Silver Star Enterprises
All Rights Reserved. Please read our Conditions of Use and Privacy Policy.
All Rights Reserved. Please read our Conditions of Use and Privacy Policy.