Georgia, United States
Joined: July 26, 2013
KitMaker: 2,272 posts
Armorama: 1,860 posts
Posted: Wednesday, December 28, 2016 - 05:10 AM UTC
On the Campaign Trail:
Tank Destroyer 2020
Pennsylvania, United States
Joined: April 09, 2015
KitMaker: 1,063 posts
Armorama: 1,000 posts
Posted: Wednesday, December 28, 2016 - 05:39 AM UTC
Nice cammo. Looking forward to the weathering. What paints are you using and are the colors straight or a custom mix? Thanks.
"No plan survives contact with the enemy." Helmuth von Moltke the Elder
Oklahoma, United States
Joined: September 30, 2015
KitMaker: 2,493 posts
Armorama: 2,344 posts
Posted: Wednesday, December 28, 2016 - 05:54 AM UTC
Very nice KT! Love the camo
"Only the dead have seen the end of war." - Plato
Georgia, United States
Joined: July 26, 2013
KitMaker: 2,272 posts
Armorama: 1,860 posts
Posted: Wednesday, December 28, 2016 - 06:06 AM UTC
The red oxide primer is AK Interactive surface primer red AK180. The rest are Tamiya but instead of the usual Dark Yellow/Red-Brown/Dark Green (XF60/61/64) I chose Desert Yellow/NATO Brown/NATO Green (XF59/67/68), all straight.
On the Campaign Trail:
Tank Destroyer 2020

#460
California, United States
Joined: September 16, 2014
KitMaker: 1,156 posts
Armorama: 1,024 posts
Posted: Wednesday, December 28, 2016 - 07:01 AM UTC
Shell - Your big kitty is taking shape rapidly! The colors look right on it. Do you think the tools would have been painted in place or would they have been removed and added later?
Vintage Paul
I'd happily live in the past but for air conditioning, the internet, mobile phones, modern medicine & dentistry and, and, and . . .
Georgia, United States
Joined: July 26, 2013
KitMaker: 2,272 posts
Armorama: 1,860 posts
Posted: Wednesday, December 28, 2016 - 08:32 AM UTC
Quoted Text
Shell - Your big kitty is taking shape rapidly! The colors look right on it. Do you think the tools would have been painted in place or would they have been removed and added later?
The wooden-handled stuff I paint so it looks like it was removed. The rest - like the jack - I paint as if it was left on.
On the Campaign Trail:
Tank Destroyer 2020

#460
California, United States
Joined: September 16, 2014
KitMaker: 1,156 posts
Armorama: 1,024 posts
Posted: Friday, December 30, 2016 - 01:00 AM UTC
Quoted Text
The wooden-handled stuff I paint so it looks like it was removed. The rest - like the jack - I paint as if it was left on.
Yes, that makes sense. I imagine there might have been differences between new from the factory and field painted finishes. EG-I have been carefully hand painting the tires rubber color but often wonder if this is realistic. I have seen American equipment where the tire sidewalls were painted OD like the rest of the vehicle. Our old Marine surplus jeep came to us that way from the sale of surplus equipment in Yermo CA back in 1960. Was this done during a repaint or was that the way it was done at the factory?
Vintage Paul
I'd happily live in the past but for air conditioning, the internet, mobile phones, modern medicine & dentistry and, and, and . . .

#460
California, United States
Joined: September 16, 2014
KitMaker: 1,156 posts
Armorama: 1,024 posts
Posted: Friday, December 30, 2016 - 01:03 AM UTC
My big kitty needs zim and hearing no suggestions I followed the only lead I could find and ordered the ATAK resin set which will come from Poland. It should be here in a week or two. I have no idea how time consuming this addition will be but feel it will be a worthwhile upgrade. Here is the review:
http://www.perthmilitarymodelling.com/reviews/vehicles/atak/atak35043.htmlVintage Paul
I'd happily live in the past but for air conditioning, the internet, mobile phones, modern medicine & dentistry and, and, and . . .
New York, United States
Joined: March 08, 2010
KitMaker: 3,662 posts
Armorama: 3,078 posts
Posted: Friday, December 30, 2016 - 07:52 AM UTC
Paul
I really like the ATAK Zimm that I used on a Jagdpanther a few years ago. It needs to be applied with apoxi. It was in my opinion better than the stick on Tamiya stuff of PE Zimm and a hell of a lot easier than home made Zimm.
Just my $.02


Active Campaigns on the bench:
Operation Fall Gelb - Pz.Kpfw. IV Ausf. C
Engineering the Future - M-26 Recovery Vehicle
115 Campaigns completed

#460
California, United States
Joined: September 16, 2014
KitMaker: 1,156 posts
Armorama: 1,024 posts
Posted: Friday, December 30, 2016 - 08:18 AM UTC
Thanks Sal, it is certainly good to hear that the ATAK zim gives good results. I'm a bit nervous about using epoxy. My experience with it is as a thick paste that would add a lot of thickness under the zim. Is there a thin version? In my ignorance, I had been thinking of good ole white glue thinned with water so I'm glad for the advice!
Vintage Paul
I'd happily live in the past but for air conditioning, the internet, mobile phones, modern medicine & dentistry and, and, and . . .
New York, United States
Joined: March 08, 2010
KitMaker: 3,662 posts
Armorama: 3,078 posts
Posted: Friday, December 30, 2016 - 07:43 PM UTC
A bit of an update here the PE zimm kit arrived
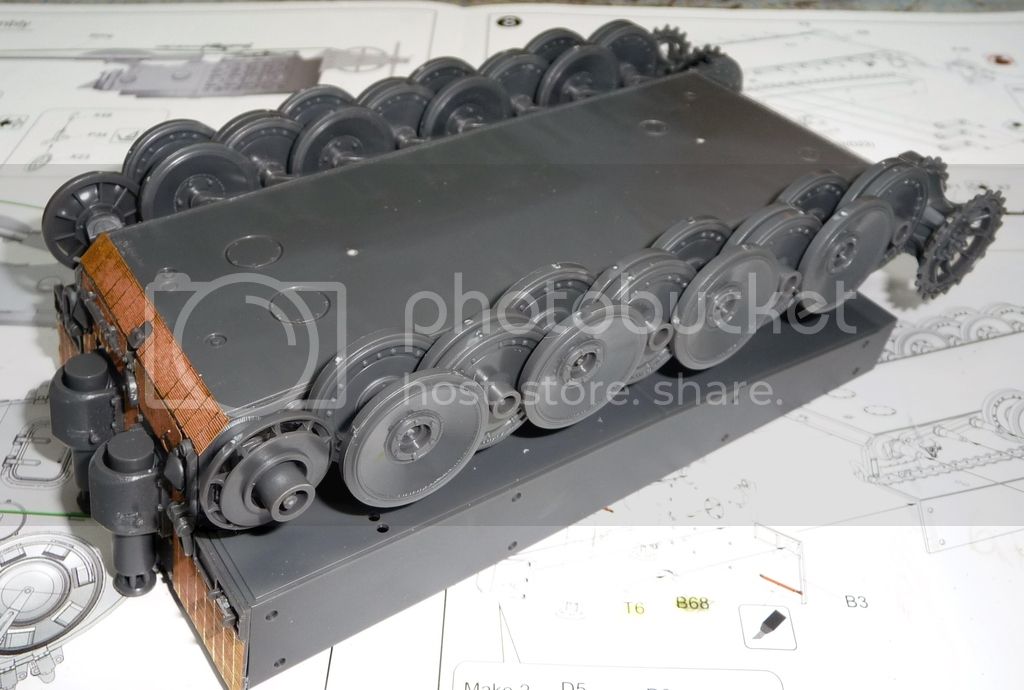
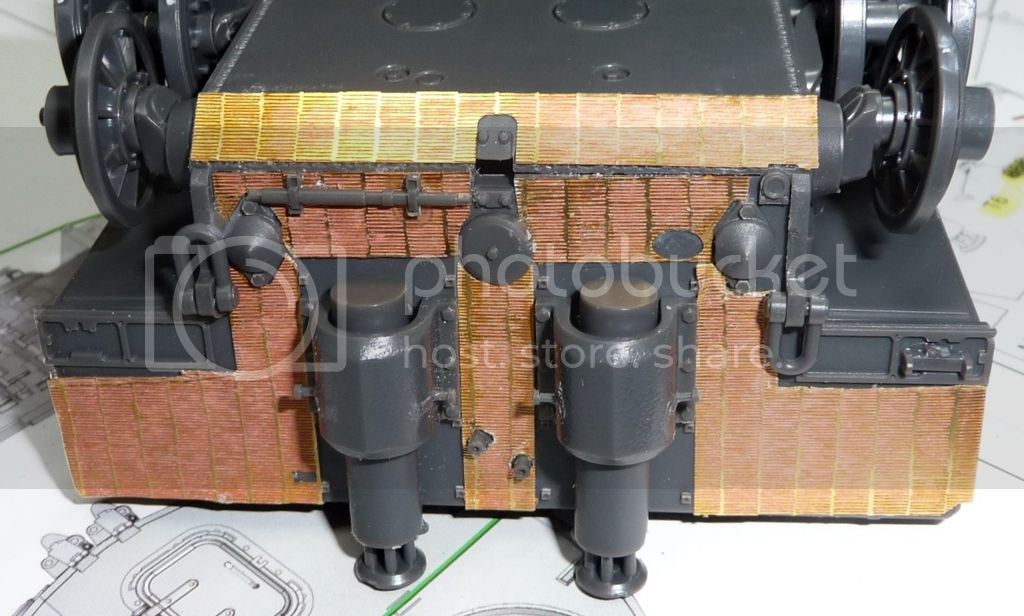
More soon

Active Campaigns on the bench:
Operation Fall Gelb - Pz.Kpfw. IV Ausf. C
Engineering the Future - M-26 Recovery Vehicle
115 Campaigns completed
North Carolina, United States
Joined: June 06, 2006
KitMaker: 4,691 posts
Armorama: 3,509 posts
Posted: Friday, December 30, 2016 - 07:49 PM UTC
Nice work on the zimm Sal,never tried any AM zimm

#460
California, United States
Joined: September 16, 2014
KitMaker: 1,156 posts
Armorama: 1,024 posts
Posted: Saturday, December 31, 2016 - 01:08 AM UTC
Sal - You PE zim looks great on the model. Was it a chore to install?
Vintage Paul
I'd happily live in the past but for air conditioning, the internet, mobile phones, modern medicine & dentistry and, and, and . . .
tatbaqui
 News Writer
#040
Metro Manila, Philippines
Joined: May 06, 2007
KitMaker: 2,713 posts
Armorama: 2,451 posts
Posted: Saturday, December 31, 2016 - 05:00 AM UTC
Quoted Text
The red oxide primer is AK Interactive surface primer red AK180. The rest are Tamiya but instead of the usual Dark Yellow/Red-Brown/Dark Green (XF60/61/64) I chose Desert Yellow/NATO Brown/NATO Green (XF59/67/68), all straight.
Nice camo Shell. Will keep those colors in mind. Cheers, Tat
Louisiana, United States
Joined: May 19, 2007
KitMaker: 459 posts
Armorama: 421 posts
Posted: Saturday, December 31, 2016 - 09:01 AM UTC
Added some Archer weld beads to my Leopard

New York, United States
Joined: March 08, 2010
KitMaker: 3,662 posts
Armorama: 3,078 posts
Posted: Saturday, December 31, 2016 - 10:59 AM UTC
Thanks Anthony and Paul, not that big of a problem that wasn't expected. If you notice I cut the rear piece anjimmied it in place

The turret was a bigger problem but I made it work

Active Campaigns on the bench:
Operation Fall Gelb - Pz.Kpfw. IV Ausf. C
Engineering the Future - M-26 Recovery Vehicle
115 Campaigns completed

#152
Texas, United States
Joined: December 07, 2002
KitMaker: 487 posts
Armorama: 441 posts
Posted: Sunday, January 01, 2017 - 09:08 AM UTC
Here are my start up photos.
The Kit is the Tamiya 35169 King Tiger Porsche Turret and I am going to add resin zimmerit.
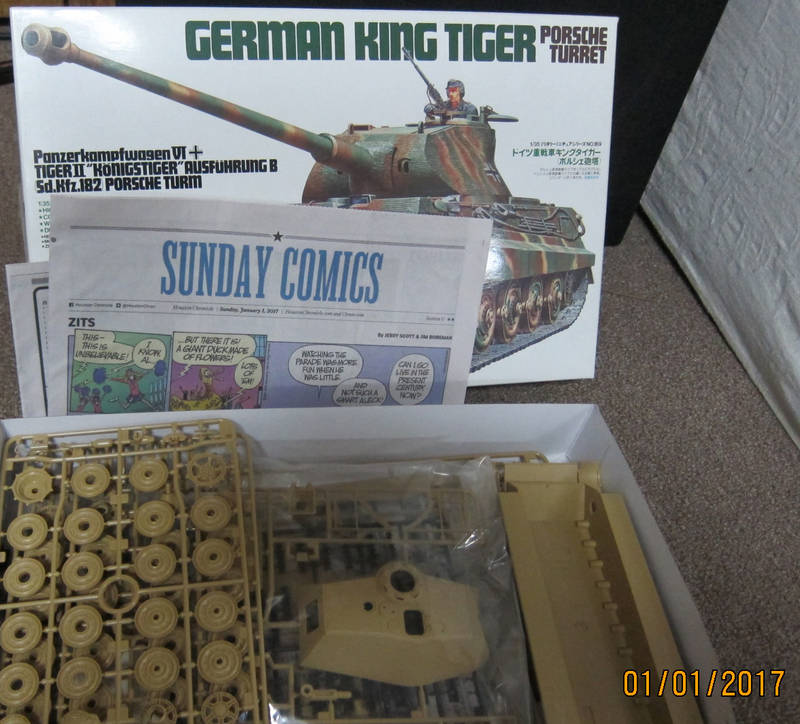
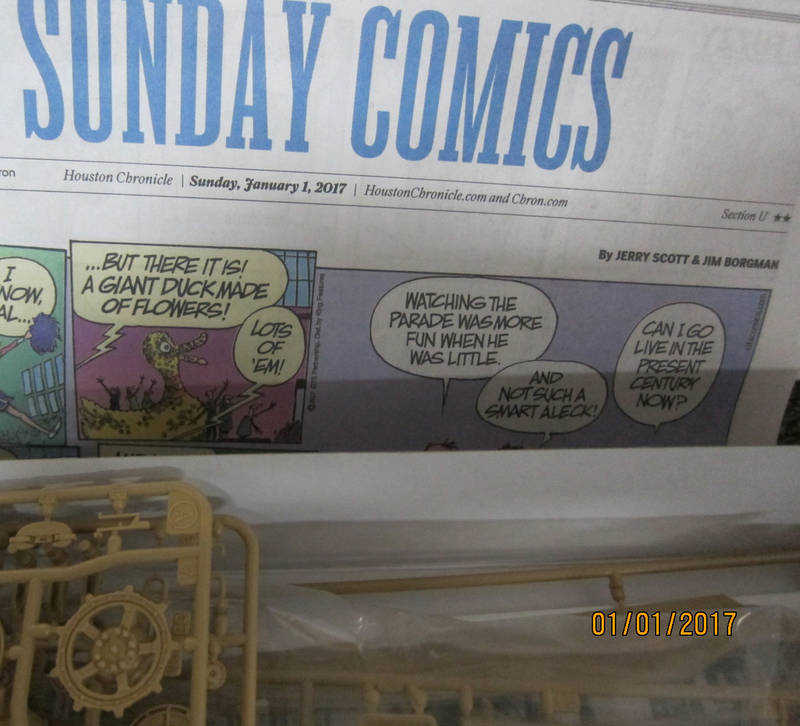
Tom
Long time modeller. Starting when I was a teenager, then I found out about girls and college and work and kids. But now that I have one girl, no school, no work and the kids are grown, I'm back to full time modelling. My prime area of interest is armor, b
Oklahoma, United States
Joined: September 30, 2015
KitMaker: 2,493 posts
Armorama: 2,344 posts
Posted: Sunday, January 01, 2017 - 02:57 PM UTC
Great choice. Welcome aboard.
"Only the dead have seen the end of war." - Plato

#152
Texas, United States
Joined: December 07, 2002
KitMaker: 487 posts
Armorama: 441 posts
Posted: Friday, January 06, 2017 - 08:30 PM UTC
Here are some of my WIP photos.
These are cleaned up and waiting for the Zimmerit to show up.
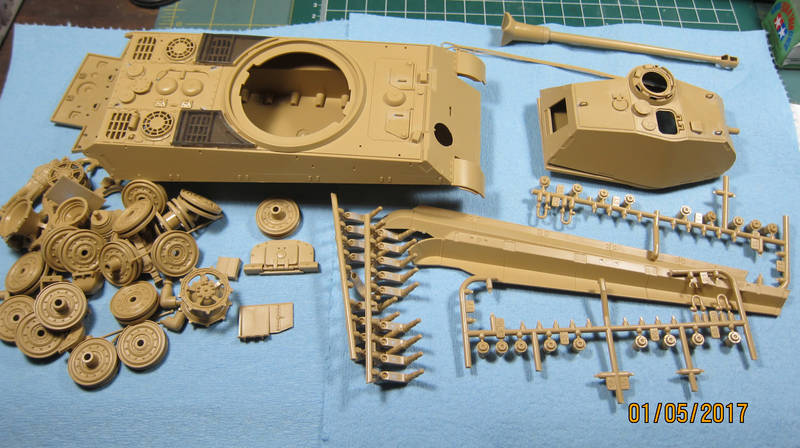
Tamiya Zimmerit has been applied.
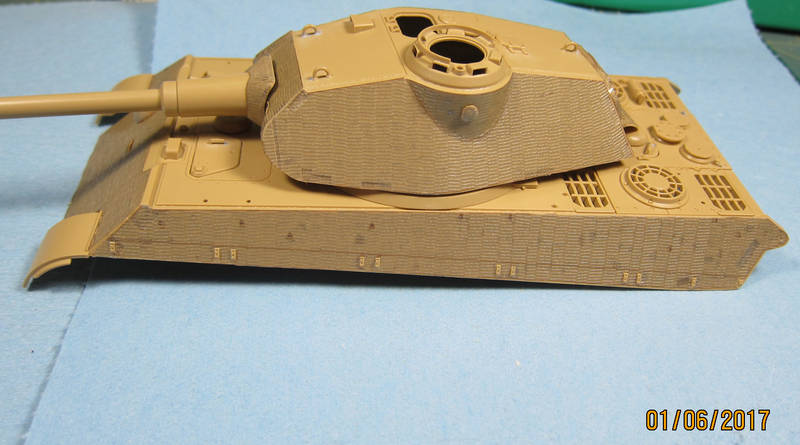
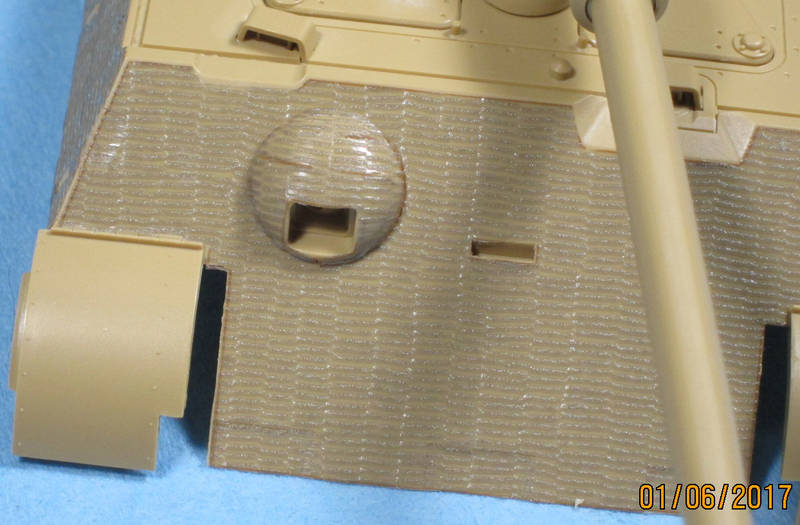
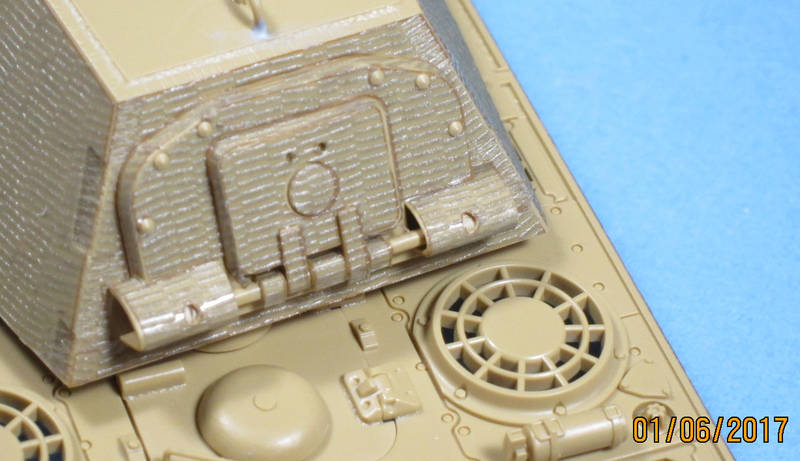
First pass thru the paint booth.
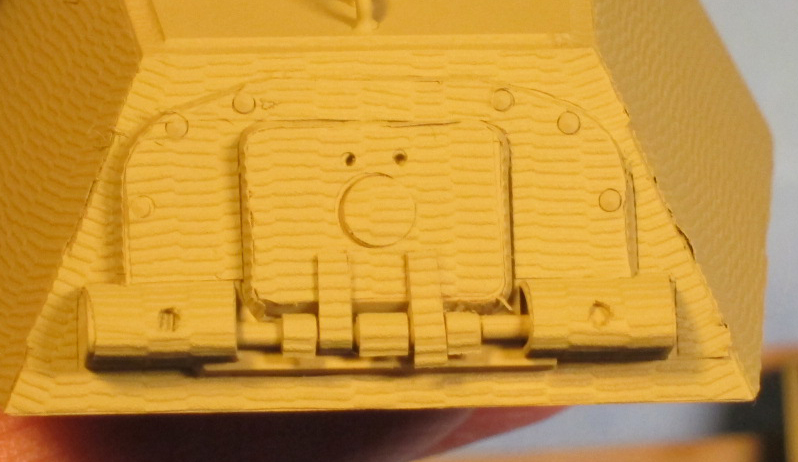
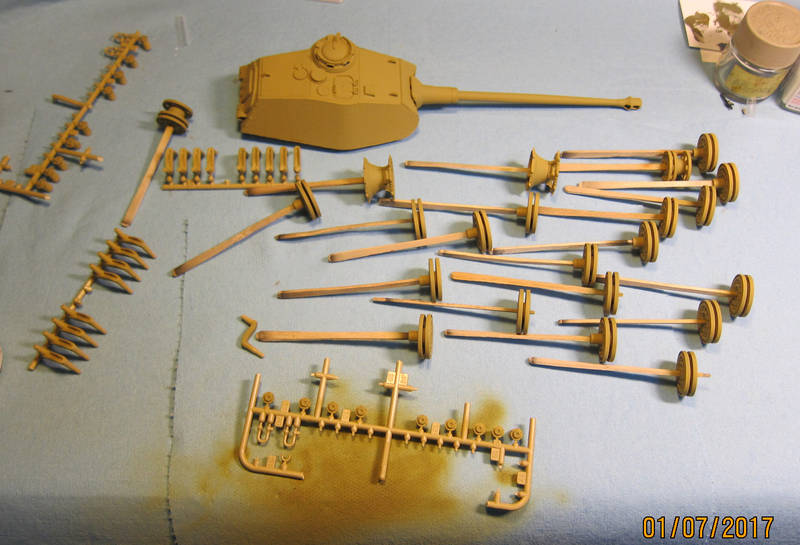
Will do some more assembly today to get the road wheels on, straight and properly aligned.
More tomorrow.
Tom
Long time modeller. Starting when I was a teenager, then I found out about girls and college and work and kids. But now that I have one girl, no school, no work and the kids are grown, I'm back to full time modelling. My prime area of interest is armor, b

#454
Georgia, United States
Joined: July 10, 2016
KitMaker: 1,273 posts
Armorama: 1,138 posts
Posted: Saturday, January 07, 2017 - 03:36 AM UTC
"I can make armored cars, safe and unassailable...and behind these our infantry will be able to follow quite unharmed and without any opposition."
-Leonardo da Vinci, 1487

#152
Texas, United States
Joined: December 07, 2002
KitMaker: 487 posts
Armorama: 441 posts
Posted: Sunday, January 08, 2017 - 03:20 AM UTC
Here are some more in progress photos.
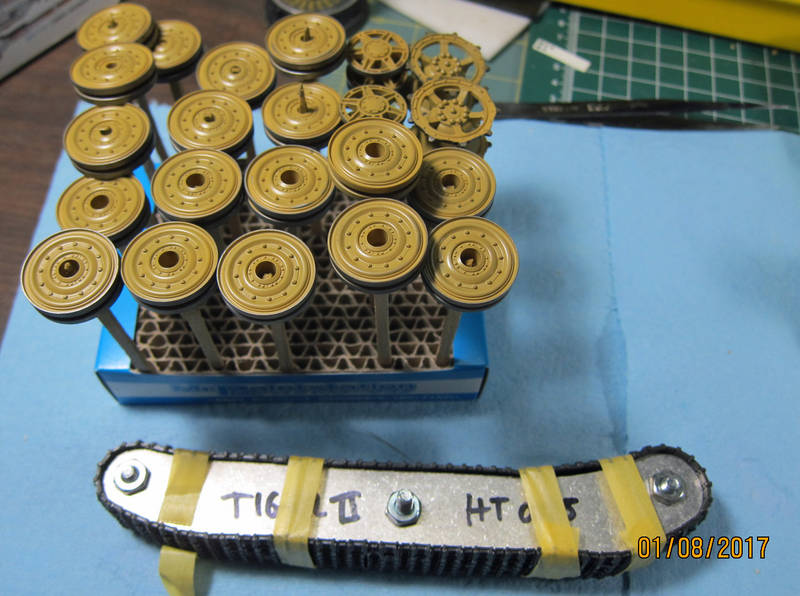
The wheels have a coat of Vallejo Polyuretane to allow me to do a pin wash to give the some depth. The tracks with the kit are a glue-able vinyl but they have to be formed to get the correct sag. I'm using the hobbytrax form to try and get that sag. I heat the tracks in hot water then try and set it in cold water. Tomorrow I'll remove them and see if it took.
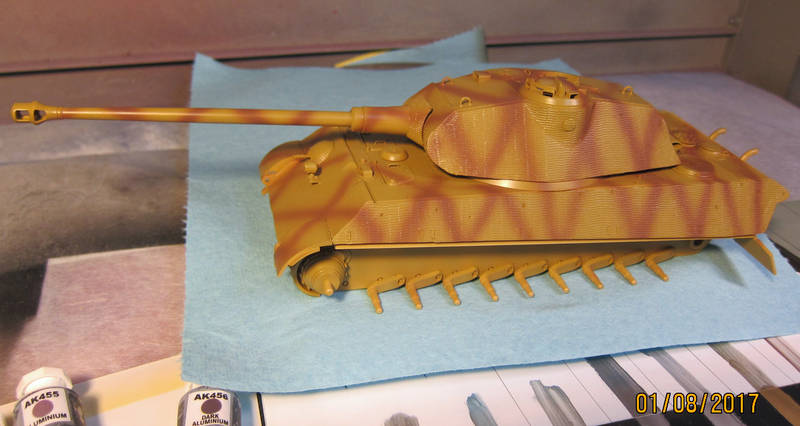
The photo is of the hull and turret with the base coat and the minimal camo. It also has a coat of the polyurethane. After it sets I'll add the decals and the small items that need painting. Jack Block, MG, etc. Then another coat of the polyurethane. Let that dry and set, then the pin washes, etc.
More posts tomorrow.
Tom
Long time modeller. Starting when I was a teenager, then I found out about girls and college and work and kids. But now that I have one girl, no school, no work and the kids are grown, I'm back to full time modelling. My prime area of interest is armor, b
Oklahoma, United States
Joined: September 30, 2015
KitMaker: 2,493 posts
Armorama: 2,344 posts
Posted: Sunday, January 08, 2017 - 06:12 AM UTC
Looking real nice! I've been wanting to build a Porsche KT.
"Only the dead have seen the end of war." - Plato
California, United States
Joined: March 03, 2016
KitMaker: 142 posts
Armorama: 137 posts
Posted: Thursday, January 12, 2017 - 12:11 AM UTC
Im now in the right campaign for my Tiger I Early!

JohnA
Oklahoma, United States
Joined: September 30, 2015
KitMaker: 2,493 posts
Armorama: 2,344 posts
Posted: Thursday, January 12, 2017 - 02:59 AM UTC
"Only the dead have seen the end of war." - Plato

#152
Texas, United States
Joined: December 07, 2002
KitMaker: 487 posts
Armorama: 441 posts
Posted: Friday, January 13, 2017 - 01:46 AM UTC
Here is the photo of the tracks after using the Hobbytrax form.

Tom
Long time modeller. Starting when I was a teenager, then I found out about girls and college and work and kids. But now that I have one girl, no school, no work and the kids are grown, I'm back to full time modelling. My prime area of interest is armor, b


