

Hosted by Richard S.
Big Cats Mk.IV

Thirian24

Joined: September 30, 2015
KitMaker: 2,493 posts
Armorama: 2,344 posts
Posted: Wednesday, February 22, 2017 - 11:59 PM UTC
Fellas, don't forget to post your pictures in the campaign gallery so you'll get credit for the campaign.

Yeti01012001

Joined: July 28, 2005
KitMaker: 360 posts
Armorama: 334 posts
Posted: Thursday, February 23, 2017 - 01:20 AM UTC
CLAYTON, JOHNA, ANTHONY, DUSTIN thanks for the comments troopsand
Clay the stripes on the barrel is a decal
Clay the stripes on the barrel is a decal
Yeti01012001
Joined: July 28, 2005
KitMaker: 360 posts
Armorama: 334 posts
Posted: Thursday, February 23, 2017 - 01:50 AM UTC
i am trying to upload photo's to the campaigns gallery.
I have signed in, close campaigns, then big cat, upload photos, chose photos and the press upload and they do not come on the photo album.
Am I doing something wrong, or does it take time to load up
I have signed in, close campaigns, then big cat, upload photos, chose photos and the press upload and they do not come on the photo album.
Am I doing something wrong, or does it take time to load up
Thirian24
Joined: September 30, 2015
KitMaker: 2,493 posts
Armorama: 2,344 posts
Posted: Thursday, February 23, 2017 - 02:10 AM UTC
Make sure you're using this link.
https://gallery.kitmaker.net/showgallery.php/cat/30443
Also, I make sure my photos are around 150 mb
https://gallery.kitmaker.net/showgallery.php/cat/30443
Also, I make sure my photos are around 150 mb
Yeti01012001
Joined: July 28, 2005
KitMaker: 360 posts
Armorama: 334 posts
Posted: Thursday, February 23, 2017 - 11:40 PM UTC
tried that, still no joy I have been taking the photo saved on my desk top. Is that were I am going wrong????
I have no room on my armorama gallery. as most my pictures are on photobucket
I have no room on my armorama gallery. as most my pictures are on photobucket

roman

Joined: July 20, 2004
KitMaker: 99 posts
Armorama: 95 posts

Posted: Friday, February 24, 2017 - 12:38 AM UTC
pantherturm
Zvezda Panther D, base scratch, terrain Model Scene


Zvezda Panther D, base scratch, terrain Model Scene
Thirian24
Joined: September 30, 2015
KitMaker: 2,493 posts
Armorama: 2,344 posts
Posted: Friday, February 24, 2017 - 12:52 AM UTC
Gary I'm not real sure. Maybe message one of the staff?

tatbaqui

#040

Joined: May 06, 2007
KitMaker: 2,713 posts
Armorama: 2,451 posts

Posted: Friday, February 24, 2017 - 05:06 AM UTC
Quoted Text
tried that, still no joy I have been taking the photo saved on my desk top. Is that were I am going wrong????
I have no room on my armorama gallery. as most my pictures are on photobucket
There were issues in the last couple of days. Try it again, as it may have been resolved. See here:
https://armorama.kitmaker.net/forums/255819


iflytb20

#501

Joined: August 25, 2009
KitMaker: 292 posts
Armorama: 91 posts

Posted: Monday, February 27, 2017 - 11:33 PM UTC
Calling it done. Thanks a lot for a great campaign. See y'all in the next one.
Cheers


Cheers

Thirian24
Joined: September 30, 2015
KitMaker: 2,493 posts
Armorama: 2,344 posts
Posted: Tuesday, February 28, 2017 - 12:20 AM UTC
Very nice looking! Congrats on the finish.

ClaytonFromEllijay

#454
Joined: July 10, 2016
KitMaker: 1,273 posts
Armorama: 1,138 posts
Posted: Tuesday, February 28, 2017 - 04:31 AM UTC
Very nice, Raj!
Removed by original poster on 03/02/17 - 02:22:50 (GMT).
JohnDoe4th
Joined: March 03, 2016
KitMaker: 142 posts
Armorama: 137 posts
Posted: Wednesday, March 01, 2017 - 11:17 PM UTC
Very well done Raj!
Sadly to say, that I have to bow out of this campaign. My 3 year old decided to play with the Tiger with the rest of his cars.

 " BORDER="0">
If there is another Big Cats campaign, count me in!
JohnA
Sadly to say, that I have to bow out of this campaign. My 3 year old decided to play with the Tiger with the rest of his cars.
" BORDER="0"> If there is another Big Cats campaign, count me in!
JohnA

LikesTanks

Joined: May 07, 2013
KitMaker: 242 posts
Armorama: 234 posts
Posted: Thursday, March 02, 2017 - 01:14 AM UTC
Ouch, the poor kitty!
Lovely builds here so far, will be putting mine to shame.
Speaking of, as photobucket is working for me again at last, some progress shots of my Italeri Panther G (WoT edition).


Using a spare Dragon barrel and sprayed the wonderfully smooth turret with a little sprue dissolved in cellulose thinners to give it some texture.
Lovely builds here so far, will be putting mine to shame.
Speaking of, as photobucket is working for me again at last, some progress shots of my Italeri Panther G (WoT edition).
Using a spare Dragon barrel and sprayed the wonderfully smooth turret with a little sprue dissolved in cellulose thinners to give it some texture.
LikesTanks
Joined: May 07, 2013
KitMaker: 242 posts
Armorama: 234 posts
Posted: Thursday, March 02, 2017 - 01:28 AM UTC


Dragon tracks and Tamiya grille set.
Primed


LikesTanks
Joined: May 07, 2013
KitMaker: 242 posts
Armorama: 234 posts
Posted: Thursday, March 02, 2017 - 01:43 AM UTC
Camo colours on:


Thirian24
Joined: September 30, 2015
KitMaker: 2,493 posts
Armorama: 2,344 posts
Posted: Thursday, March 02, 2017 - 03:07 AM UTC
Nice looking Panther!

Hudson29
#460
Joined: September 16, 2014
KitMaker: 1,156 posts
Armorama: 1,024 posts
Posted: Tuesday, March 07, 2017 - 12:00 AM UTC
Raj & Richard, your Panthers are looking great.
John - Sorry to see the end of your Tiger project. My cat found a set of resin tracks drying taped to a board and thought they were toys. She crunched'em pretty good which set me back a coupla hours . . .
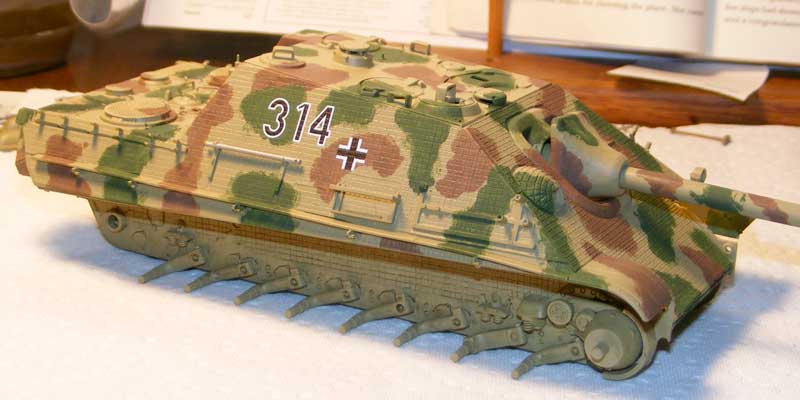
The Dragon Jagdpanther is coming along. The camo has been daubed on in stages and the Archer transfers rubbed on followed by a very light filter to blend the colors and marking together:

Typical forest of Panther wheels:
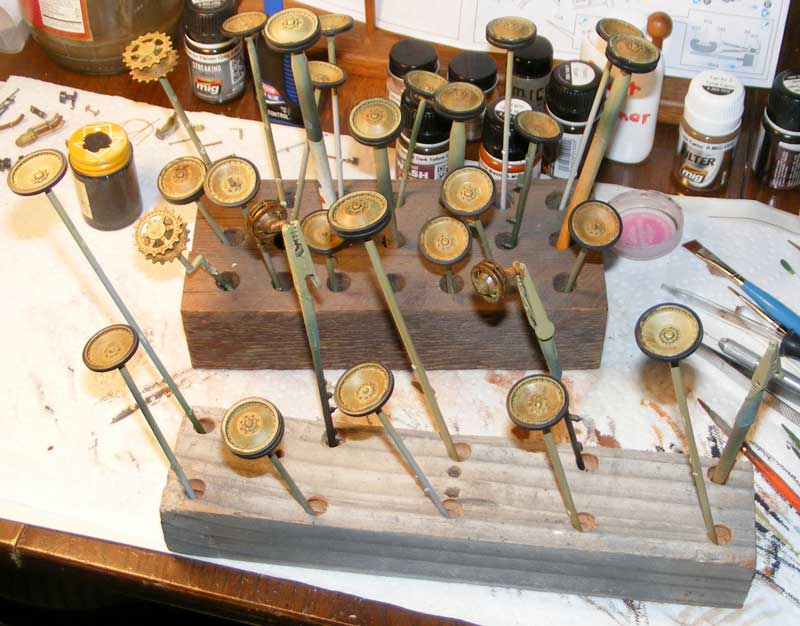
I over thinned the old pot of Pactra Scale Black and found that while the paint flowed well from the brush, it could bleed here and there which will require some touchup . . .
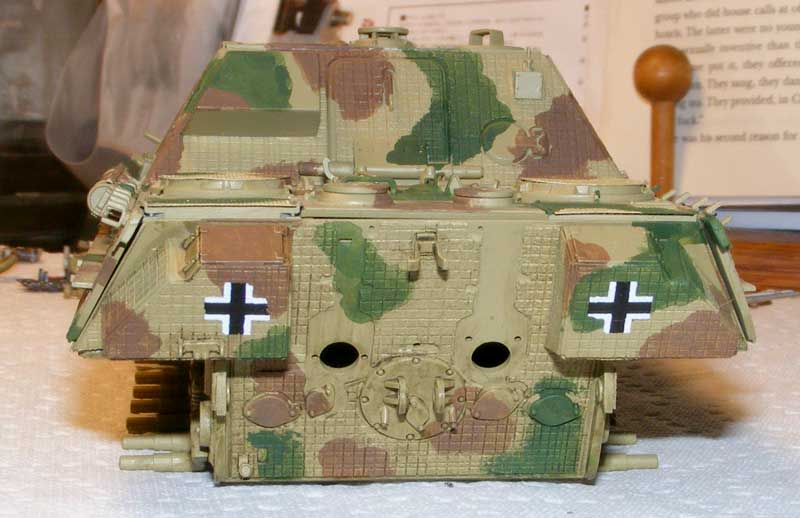
Here are the big bits with some washes applied:

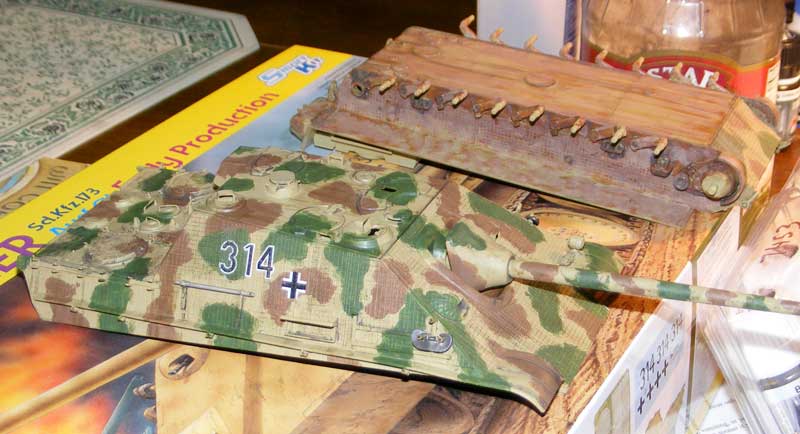
I am being careful with the washes to keep them out of the holes in the zim where they will tend to show the problems. I'm trying to hide the problems in plain view.
In the last two pictures the marking look a bit worn. The transfers really did look painted on to the zim, very convincing. I found that by rubbing the wash with a finger the markings started to look distressed somewhat like they might have been rubbed by the boots & pants of the crew clambering around the vehicle. I did not intend this but kinda like the look . . .
John - Sorry to see the end of your Tiger project. My cat found a set of resin tracks drying taped to a board and thought they were toys. She crunched'em pretty good which set me back a coupla hours . . .
The Dragon Jagdpanther is coming along. The camo has been daubed on in stages and the Archer transfers rubbed on followed by a very light filter to blend the colors and marking together:
Typical forest of Panther wheels:
I over thinned the old pot of Pactra Scale Black and found that while the paint flowed well from the brush, it could bleed here and there which will require some touchup . . .
Here are the big bits with some washes applied:
I am being careful with the washes to keep them out of the holes in the zim where they will tend to show the problems. I'm trying to hide the problems in plain view.
In the last two pictures the marking look a bit worn. The transfers really did look painted on to the zim, very convincing. I found that by rubbing the wash with a finger the markings started to look distressed somewhat like they might have been rubbed by the boots & pants of the crew clambering around the vehicle. I did not intend this but kinda like the look . . .
Thirian24
Joined: September 30, 2015
KitMaker: 2,493 posts
Armorama: 2,344 posts
Posted: Thursday, March 09, 2017 - 03:05 AM UTC
Looking real nice there Paul!
Fellas, don't waste any time, we have 11 days left!
Fellas, don't waste any time, we have 11 days left!
ComradeMP
#0
Joined: July 31, 2011
KitMaker: 472 posts
Armorama: 453 posts
Posted: Friday, March 10, 2017 - 08:15 AM UTC
On it. Went a long time with no progress, but I started right back up. Painted, glossed,washed, and flatted most of the parts. Just working on the road wheels on the opposite side as well as working the skirts. Can't see it to well, but I took a pencil to the road wheels outer rim and the part of the inner road wheels that make contact with the outer road wheels (I remember someone mentioned something like that once). Also some silver paint here and there. Soon as that's done, it'll be down to just painting/washing the tracks. Then,I'll finish up by adding the side skirts, AA gun, and tools. Been really taking my time on this one, it'll be my first completed German tank
Where I last left off:

And after a few days of slow work:
 .
.
Where I last left off:

And after a few days of slow work:
 .
. Thirian24
Joined: September 30, 2015
KitMaker: 2,493 posts
Armorama: 2,344 posts
Posted: Friday, March 10, 2017 - 08:21 AM UTC
Looking real nice! I really like the camo, you did a great job.
ClaytonFromEllijay
#454
Joined: July 10, 2016
KitMaker: 1,273 posts
Armorama: 1,138 posts
Posted: Friday, March 10, 2017 - 07:59 PM UTC
Very precise camo!
Thirian24
Joined: September 30, 2015
KitMaker: 2,493 posts
Armorama: 2,344 posts
Posted: Tuesday, March 14, 2017 - 10:38 PM UTC
5 days left fellas. Get those Cats finished up!
brekinapez
Joined: July 26, 2013
KitMaker: 2,272 posts
Armorama: 1,860 posts
Posted: Tuesday, March 14, 2017 - 11:46 PM UTC
Quoted Text
5 days left fellas. Get those Cats finished up!
My second cat should be done tonight!
Or what I am going to call done.
brekinapez
Joined: July 26, 2013
KitMaker: 2,272 posts
Armorama: 1,860 posts
Posted: Thursday, March 16, 2017 - 07:08 AM UTC
Okay, I am done - for now. While working on this and the AFV campaign I came too some ideas on displaying my growing collection of built kits and for now I am going to do light weathering so I can adapt my kits for specific diorama ideas once I get my setup finished. Then they'll get their final weathering.
To refresh everyone's memory, as it has been a while since I finished the first kit, I began with Dragon 9045 Panther G, except I left off the IR gear and finished it as a late '44 vehicle. Decal film popped when I hit it with a filter that got through my acrylic seal, which was disappointing, but otherwise the kit went together well pretty much OOB except for the tow cables, which I made from thin wire twisted in a pin vise.


Then, since there was a lot of time left, I decided to tackle Cyber Hobby 9144 Tiger II with production turret. This was another OOB, other than adding wire for the headlight and PE screens since the kit had none. This was done as a late war in 3-tone over red primer. The DS tracks were terrible, and I had to cut out a link and splice them to get the correct tension for a relatively new vehicle (Depicted as built, the war was ending soon).


And then, in the midst of building the KT, I thought, "Why not build one of your Jagdtigers while you're at it?" And so I present Dragon 6051 Jagdtiger with Porsche suspension done as either the 9th or 10th chassis; I don't recall. Again, out of box except for headlight wiring.


Everything painted with Tamiya acrylics over AK primers, then various pigments for dust and mud followed by a graphite pencil for chips and scratches.
To refresh everyone's memory, as it has been a while since I finished the first kit, I began with Dragon 9045 Panther G, except I left off the IR gear and finished it as a late '44 vehicle. Decal film popped when I hit it with a filter that got through my acrylic seal, which was disappointing, but otherwise the kit went together well pretty much OOB except for the tow cables, which I made from thin wire twisted in a pin vise.
Then, since there was a lot of time left, I decided to tackle Cyber Hobby 9144 Tiger II with production turret. This was another OOB, other than adding wire for the headlight and PE screens since the kit had none. This was done as a late war in 3-tone over red primer. The DS tracks were terrible, and I had to cut out a link and splice them to get the correct tension for a relatively new vehicle (Depicted as built, the war was ending soon).
And then, in the midst of building the KT, I thought, "Why not build one of your Jagdtigers while you're at it?" And so I present Dragon 6051 Jagdtiger with Porsche suspension done as either the 9th or 10th chassis; I don't recall. Again, out of box except for headlight wiring.
Everything painted with Tamiya acrylics over AK primers, then various pigments for dust and mud followed by a graphite pencil for chips and scratches.
 |

WEB HOSTING BY


Copyright ©2021 Armorama and Kitmaker Network, a subsidiary of Silver Star Enterprises
All Rights Reserved. Please read our Conditions of Use and Privacy Policy.
All Rights Reserved. Please read our Conditions of Use and Privacy Policy.