

Guy,
Coming along nicely. Will have to look at adding that kit to my stash.
Hosted by Richard S.
Campaign 500+ Mk. II

d111298pw

#456

Joined: September 22, 2016
KitMaker: 654 posts
Armorama: 638 posts
Posted: Tuesday, November 14, 2017 - 11:48 AM UTC
petbat

Joined: August 06, 2005
KitMaker: 3,353 posts
Armorama: 3,121 posts
Posted: Tuesday, November 14, 2017 - 01:21 PM UTC
Great progress there guys. Nice work.


d6mst0
#453
Joined: August 28, 2016
KitMaker: 1,925 posts
Armorama: 601 posts

Posted: Tuesday, November 14, 2017 - 05:54 PM UTC
Very nice clean work. Looking forward to the next posting.

Charlie-66
#186
Joined: May 24, 2006
KitMaker: 771 posts
Armorama: 750 posts
Posted: Wednesday, November 15, 2017 - 03:23 AM UTC
Quoted Text
Guy,
Coming along nicely. Will have to look at adding that kit to my stash.
Thanks Mark,
Been a fun build and so far zero gripes about the kit.

d6mst0
#453
Joined: August 28, 2016
KitMaker: 1,925 posts
Armorama: 601 posts
Posted: Wednesday, November 15, 2017 - 06:59 AM UTC
My munitionsschlepper is ready for painting. Many parts will have to be painted separate and then installed afterwards. My plan is to display the vehicle with the ammo storage open.
A few to photos to show my progress.


These six support brackets were a total of 106 pieces.


A few to photos to show my progress.
These six support brackets were a total of 106 pieces.
Charlie-66
#186
Joined: May 24, 2006
KitMaker: 771 posts
Armorama: 750 posts
Posted: Wednesday, November 15, 2017 - 07:29 AM UTC
Mark, actually seeing that built makes a real impact. That is one very impressive looking vehicle! Damned! I️ will have to get one for the stash!
petbat
Joined: August 06, 2005
KitMaker: 3,353 posts
Armorama: 3,121 posts
Posted: Wednesday, November 15, 2017 - 08:32 AM UTC
Quoted Text
Mark, actually seeing that built makes a real impact. That is one very impressive looking vehicle! Damned! I️ will have to get one for the stash!
Where most of the people that bought one still have it Guy!

It does look impressive if you have the patience to go the extra required to fix fit and seams, etc, just like Mark has done here.
Way to go Mark. Looking great. It is all downhill from here. Looking forward to the finish
Charlie-66
#186
Joined: May 24, 2006
KitMaker: 771 posts
Armorama: 750 posts
Posted: Wednesday, November 15, 2017 - 10:14 AM UTC
Quoted Text
Quoted TextMark, actually seeing that built makes a real impact. That is one very impressive looking vehicle! Damned! I️ will have to get one for the stash!
Where most of the people that bought one still have it Guy!
It does look impressive if you have the patience to go the extra required to fix fit and seams, etc, just like Mark has done here.
Way to go Mark. Looking great. It is all downhill from here. Looking forward to the finish
Busted! Intentionally said for the stash, not that Id ever build it,

d111298pw
#456
Joined: September 22, 2016
KitMaker: 654 posts
Armorama: 638 posts
Posted: Wednesday, November 15, 2017 - 01:34 PM UTC
Mark, that munitionsschlepper looks amazing. All that extra work shows.
The tools are painted and ready for installation. Traveling the next few weeks, so no chance to get anymore work done until I'm back.
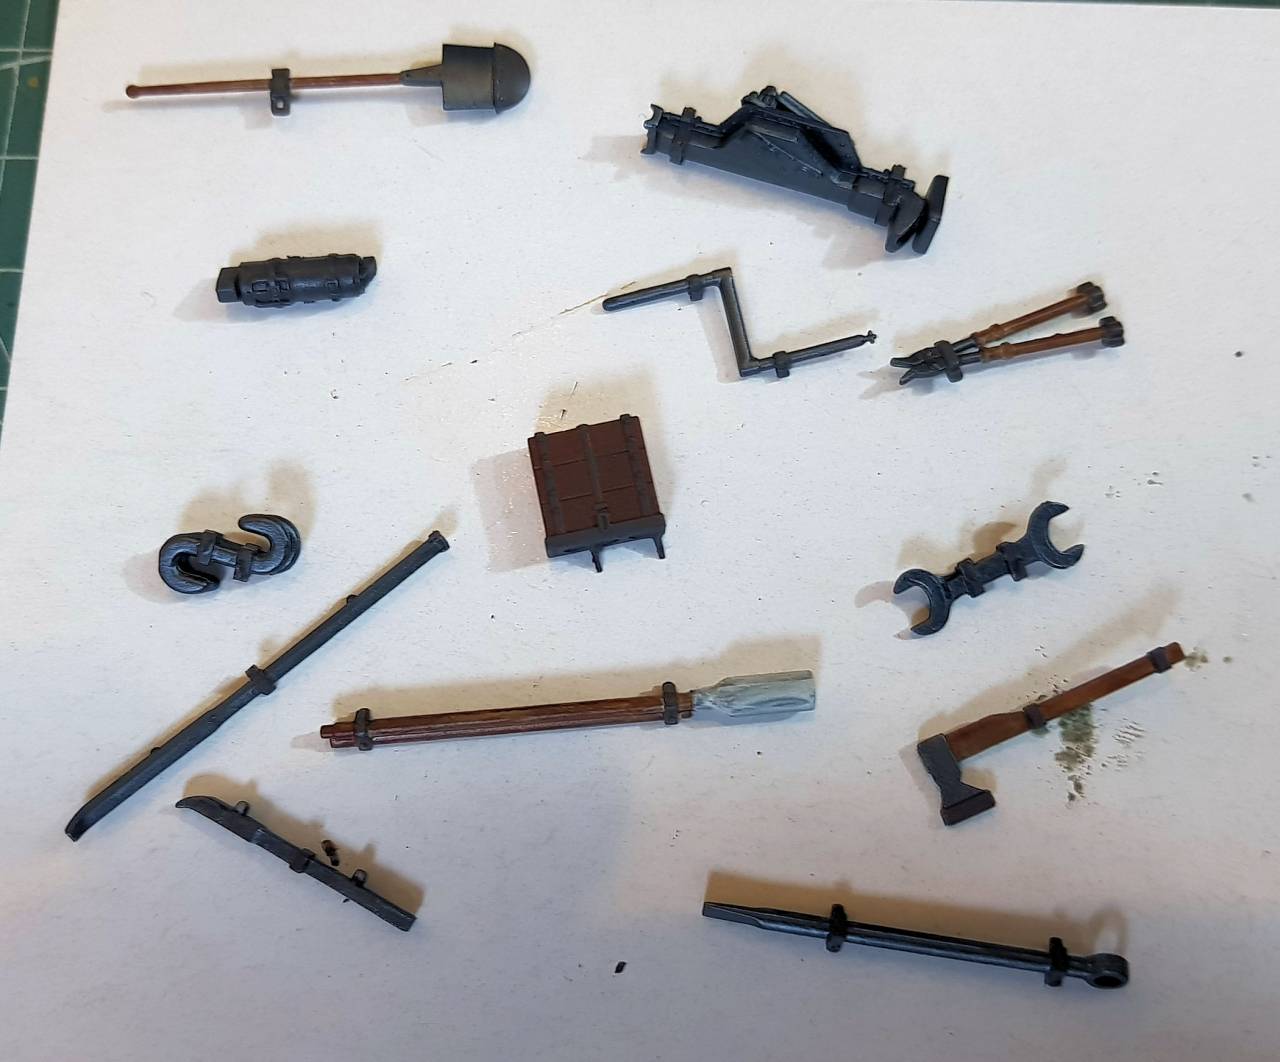
The tools are painted and ready for installation. Traveling the next few weeks, so no chance to get anymore work done until I'm back.
petbat
Joined: August 06, 2005
KitMaker: 3,353 posts
Armorama: 3,121 posts
Posted: Wednesday, November 15, 2017 - 03:49 PM UTC
Have a safe trip Mark.
d6mst0
#453
Joined: August 28, 2016
KitMaker: 1,925 posts
Armorama: 601 posts
Posted: Wednesday, November 15, 2017 - 05:54 PM UTC
Everyone,
Thank you for the feedback. Mark have a safe trip and I will be looking forward to your next post.
Thank you for the feedback. Mark have a safe trip and I will be looking forward to your next post.
petbat
Joined: August 06, 2005
KitMaker: 3,353 posts
Armorama: 3,121 posts
Posted: Thursday, November 16, 2017 - 12:13 PM UTC
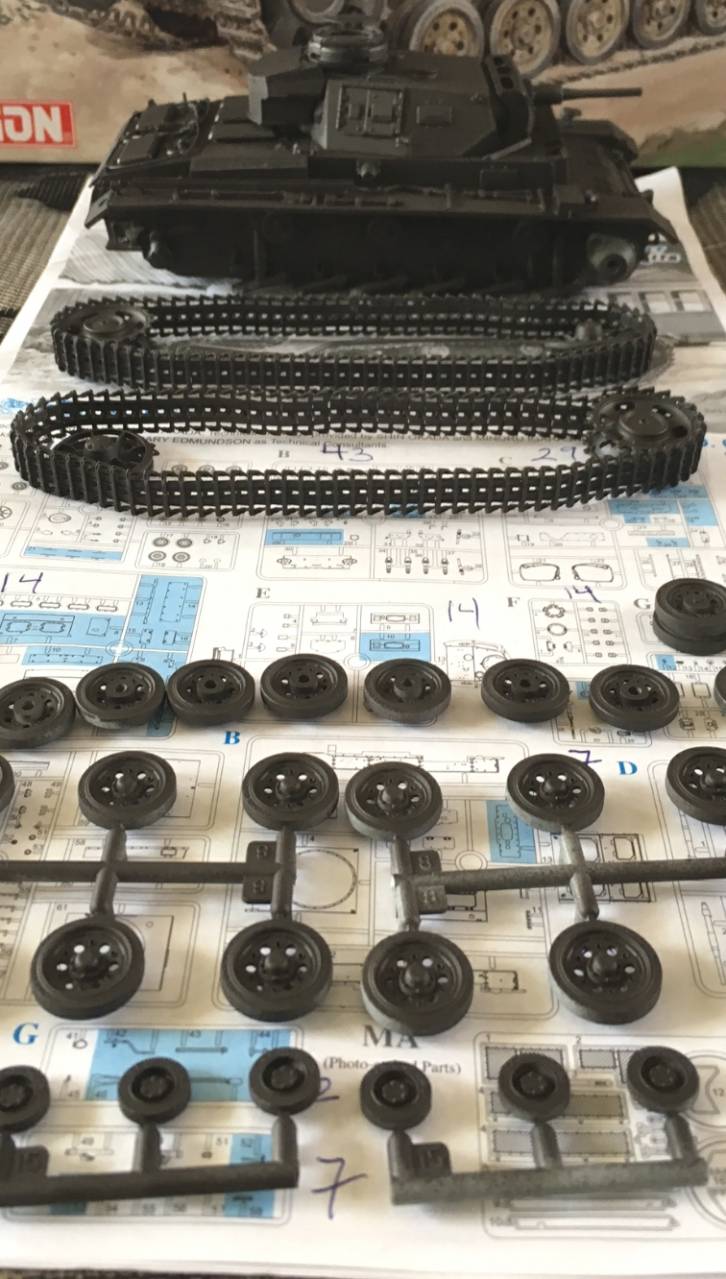
Okay my turn to show some progress. Have cleaned up the ejection marks on one sides tracks and started the other. But also have done some work on the turret and its ground mounts as well. The Etch bracing in those accounts for a fair parts count.
Also started scratch building a rudimentary driver's compartment. Not a lot can be seen with the turret on, but the 'Big Empty' is too noticeable to ignore. Working on the Shep Payne principle - it does not need to be 100% accurate unless it is in full view - as I have not been able to source any pics of the interior or the inside of the Turret of the remaining Grasshopper. I think that is unusual given it is open topped and so many other pics are available. Just means some guesswork will be involved.
Transmission roughed out in shape from card - just the initial basic shape at the moment. Seats are going to be conversions from the spares box - made a start on those. I'm theorising the seats are both the same, as a fold up seat for the co driver like in the Panzer IV would not be used in this since there is no escape hatch through the bottom. The Hummel had a square frame bolted at the rear on the floor channel between suspension mounts and this is basically the same hull, so I am going that way. You will not see any of the plastic under the seat bottom due to the raised floor in the fighting compartment - which is too long in the kit any way. I cut a section out of the middle of that and cut out the drive shaft section so the drive shaft housing comes to the end where it fits to the Tranny.

Having second thoughts about a reloading scene.. seems an error in dimensions has crept in Dragon

a bit hard to put the lid down me thinks:

You can see the false floor and the channel that runs between the suspension mounts I have added here and where the cuts in the floor were made

Also started scratch building a rudimentary driver's compartment. Not a lot can be seen with the turret on, but the 'Big Empty' is too noticeable to ignore. Working on the Shep Payne principle - it does not need to be 100% accurate unless it is in full view - as I have not been able to source any pics of the interior or the inside of the Turret of the remaining Grasshopper. I think that is unusual given it is open topped and so many other pics are available. Just means some guesswork will be involved.
Transmission roughed out in shape from card - just the initial basic shape at the moment. Seats are going to be conversions from the spares box - made a start on those. I'm theorising the seats are both the same, as a fold up seat for the co driver like in the Panzer IV would not be used in this since there is no escape hatch through the bottom. The Hummel had a square frame bolted at the rear on the floor channel between suspension mounts and this is basically the same hull, so I am going that way. You will not see any of the plastic under the seat bottom due to the raised floor in the fighting compartment - which is too long in the kit any way. I cut a section out of the middle of that and cut out the drive shaft section so the drive shaft housing comes to the end where it fits to the Tranny.
Having second thoughts about a reloading scene.. seems an error in dimensions has crept in Dragon
a bit hard to put the lid down me thinks:
You can see the false floor and the channel that runs between the suspension mounts I have added here and where the cuts in the floor were made
d6mst0
#453
Joined: August 28, 2016
KitMaker: 1,925 posts
Armorama: 601 posts
Posted: Thursday, November 16, 2017 - 06:44 PM UTC
Nice start. It will be interesting to see how you tackle the drivers area.

ClaytonFromEllijay
#454
Joined: July 10, 2016
KitMaker: 1,273 posts
Armorama: 1,138 posts
Posted: Thursday, November 16, 2017 - 11:23 PM UTC
Looks great, Peter! 
Charlie-66
#186
Joined: May 24, 2006
KitMaker: 771 posts
Armorama: 750 posts
Posted: Saturday, November 18, 2017 - 02:26 AM UTC
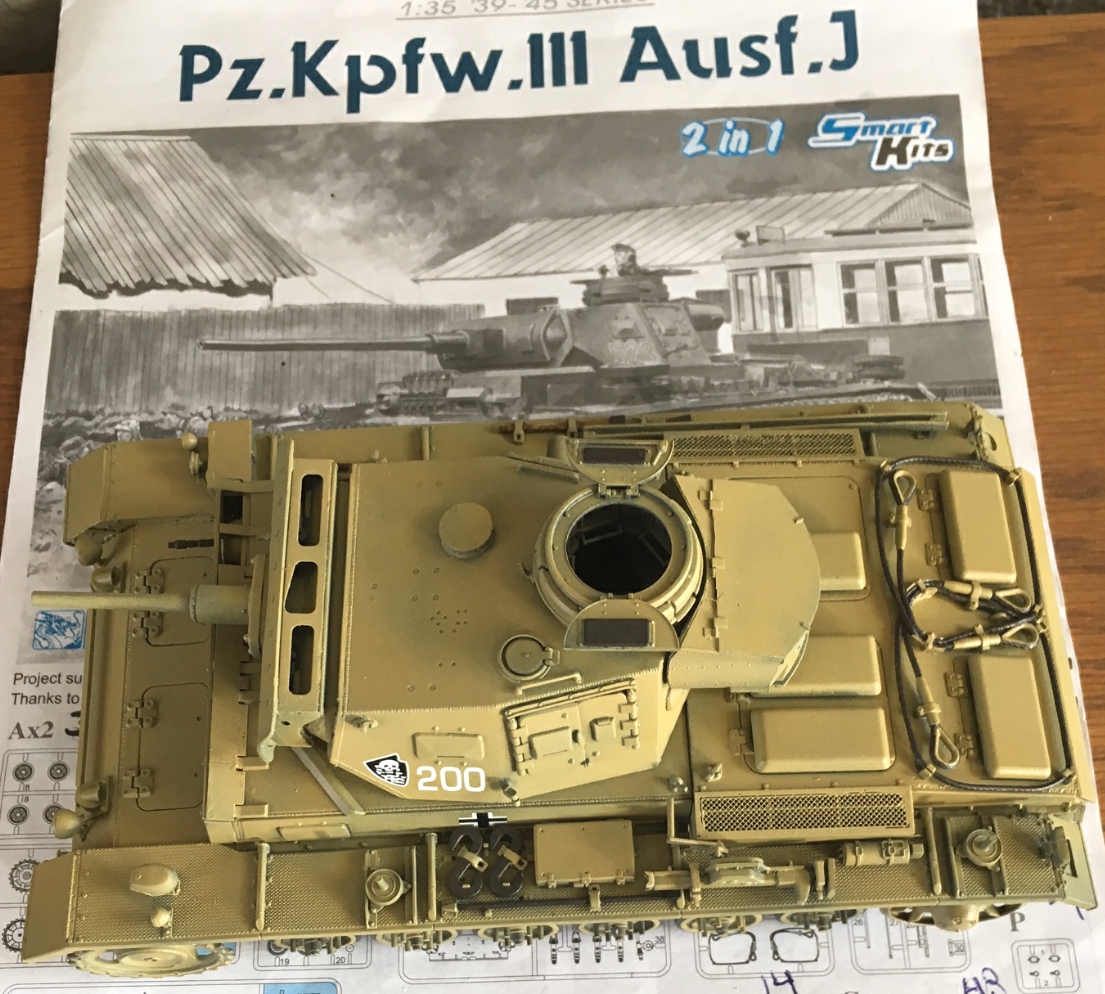
Basic painting is done. Start out with an undercoat of burnt umber, and then panzer yellow on top.
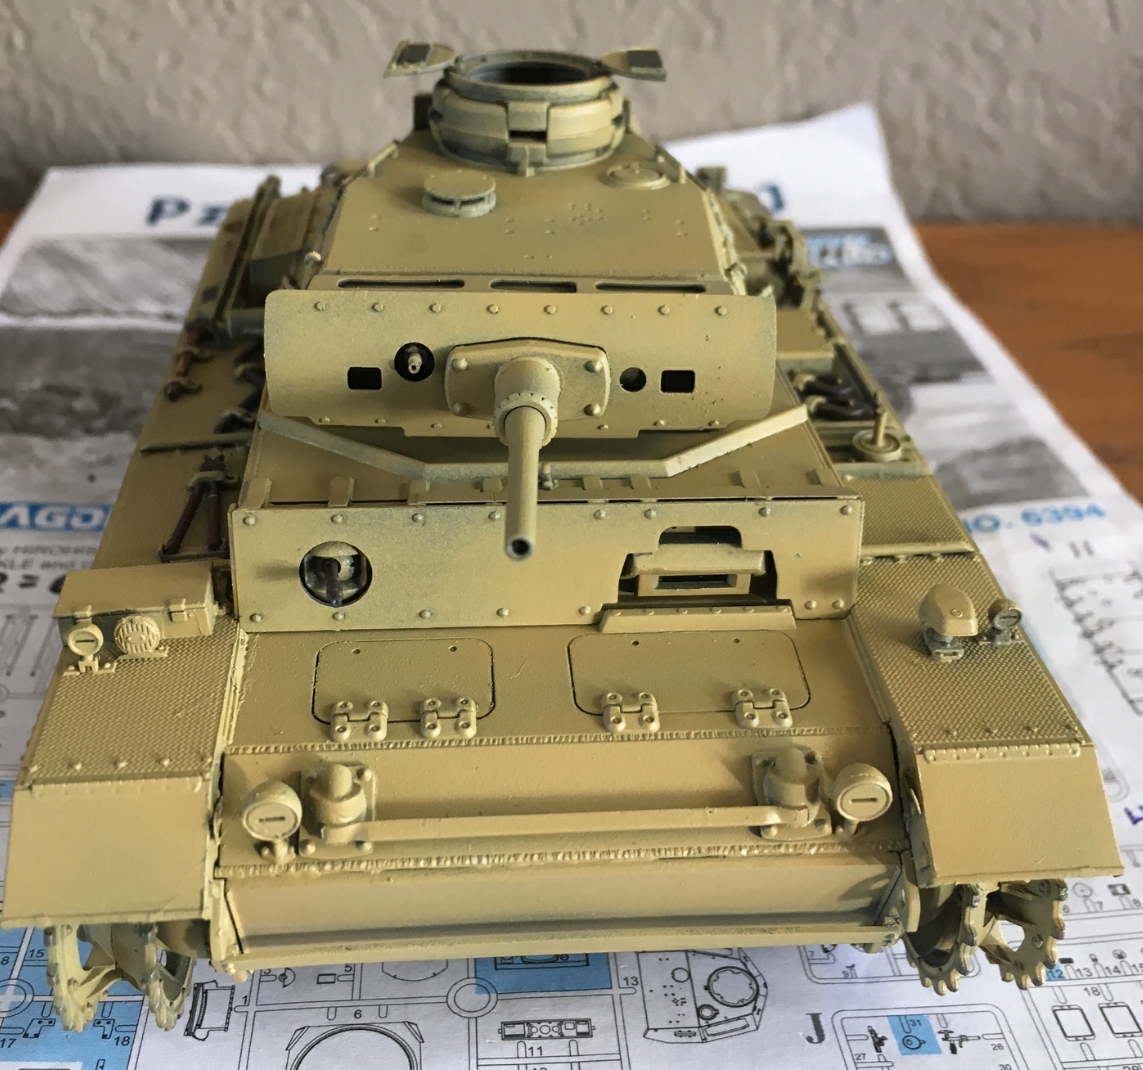
of course all the flaws show up in the pics, so I have some work to go back and do!
of course all the flaws show up in the pics, so I have some work to go back and do!
petbat
Joined: August 06, 2005
KitMaker: 3,353 posts
Armorama: 3,121 posts
Posted: Saturday, November 18, 2017 - 04:01 AM UTC
Flaws, what flaws? I see artistic licence and interpretation
Still looking good Guy
Still looking good Guy
Charlie-66
#186
Joined: May 24, 2006
KitMaker: 771 posts
Armorama: 750 posts
Posted: Saturday, November 18, 2017 - 04:03 AM UTC
Quoted Text
Flaws, what flaws? I see artistic licence and interpretation
Still looking good Guy
Thanks Pete!MichaelSatin
Joined: January 19, 2008
KitMaker: 3,909 posts
Armorama: 510 posts
Posted: Saturday, November 18, 2017 - 08:01 PM UTC
I seem to be drawn to this campaign for some reason (it's not like I don't have anything else to do). While I appreciate opening it up to wingy thingies, I've already set up a Bombers campaign on AeroScale so that's where the B-17 will go. But I still kind of want to get in on this one. So, how about:
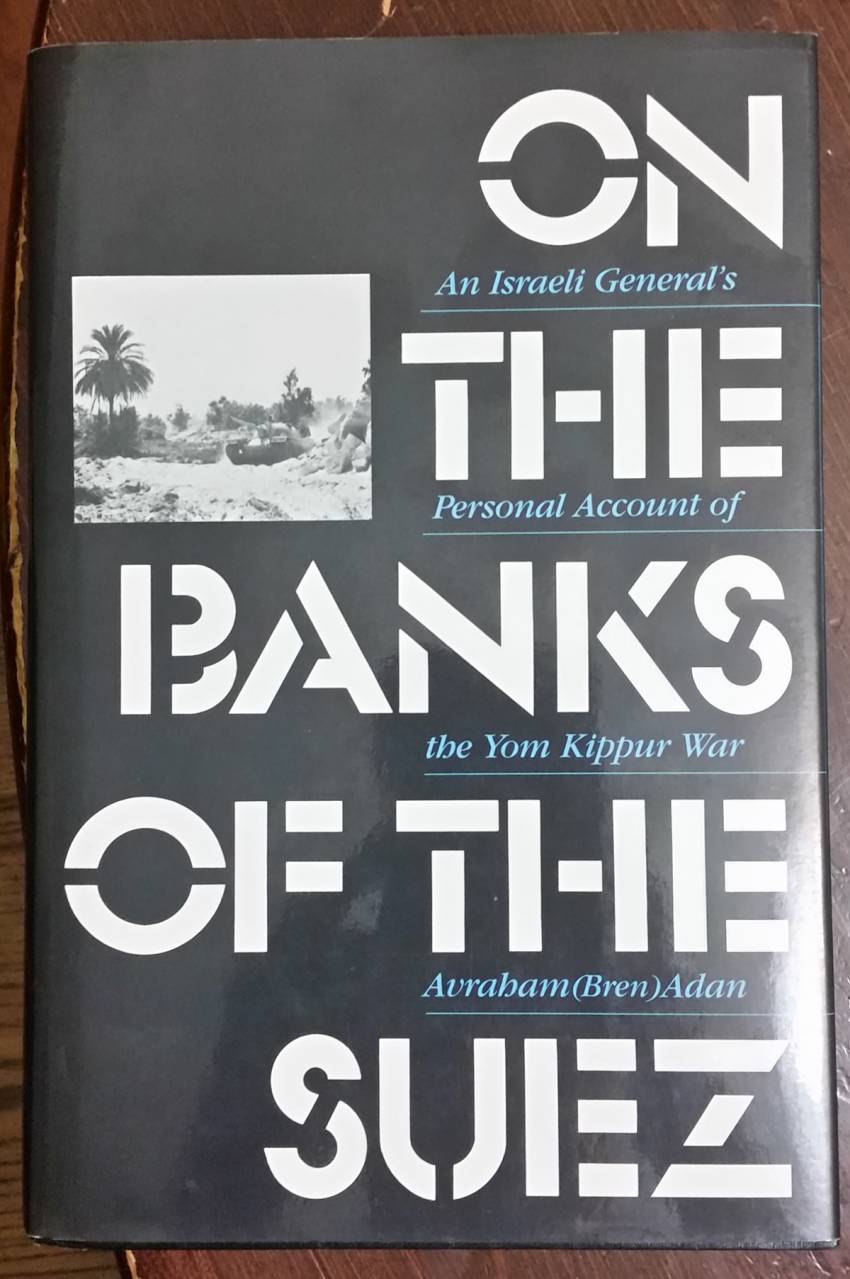
In a move that will surprise no one who knows me, I'll be doing mine IDF in 1973. The perfect excuse to read this gem that's been sitting on my shelf for a few years:
Now to actually follow through!
Michael
In a move that will surprise no one who knows me, I'll be doing mine IDF in 1973. The perfect excuse to read this gem that's been sitting on my shelf for a few years:
Now to actually follow through!
Michael
Charlie-66
#186
Joined: May 24, 2006
KitMaker: 771 posts
Armorama: 750 posts
Posted: Saturday, November 18, 2017 - 09:00 PM UTC
Michael,
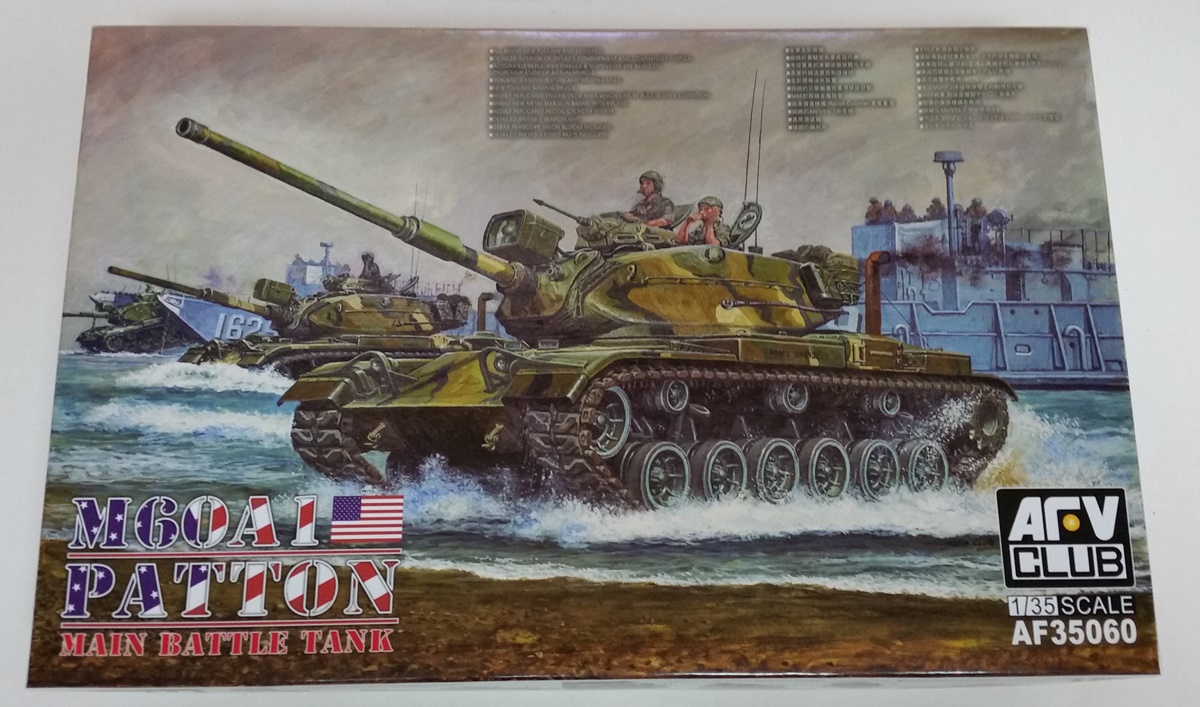
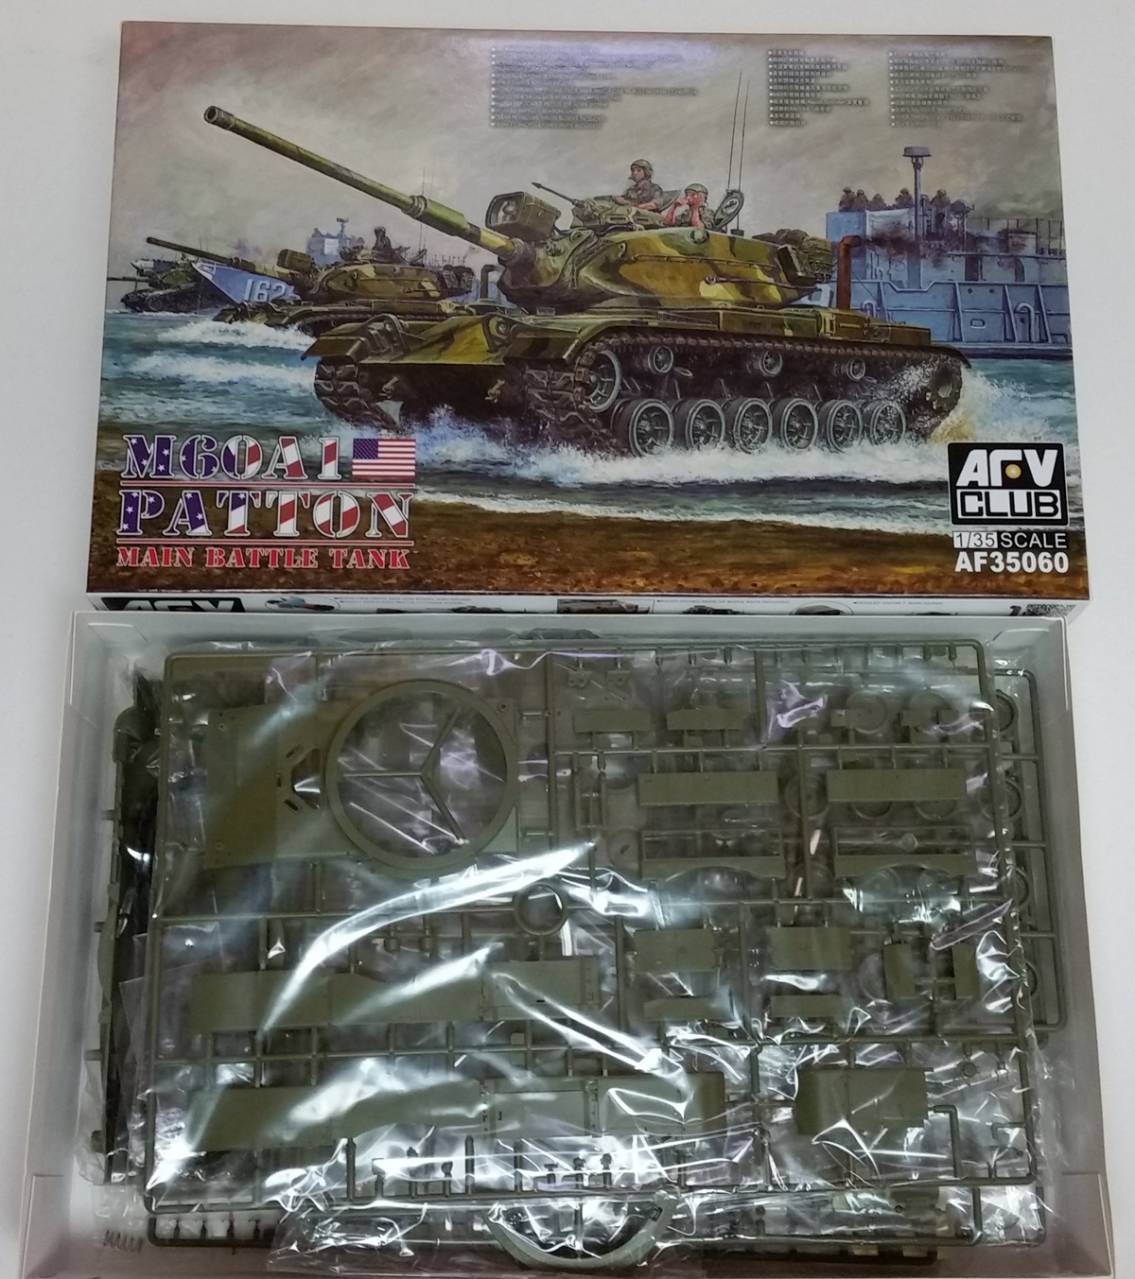
Having crewed the old Dino, M60A1, for 3 years Im anxious to see how that kit shakes out. Oh, 3rd Cavalry at Fort Bliss, TX; not the IDF.
Having crewed the old Dino, M60A1, for 3 years Im anxious to see how that kit shakes out. Oh, 3rd Cavalry at Fort Bliss, TX; not the IDF.

Armored76

Joined: September 30, 2013
KitMaker: 1,615 posts
Armorama: 1,500 posts
Posted: Sunday, November 19, 2017 - 04:08 PM UTC
Fantastic progress everyone! 
Gopher4

Joined: November 17, 2015
KitMaker: 18 posts
Armorama: 17 posts
Posted: Tuesday, November 28, 2017 - 02:46 AM UTC
Hi everyone - lots of inspiring work going on here.
I've had this 1/35 Dicker Max by Dragon in the stash for quite a while. Figured out that a campaign might be the thing to get started. Guess the kit qualifies with the Voyager PE and Friuls?
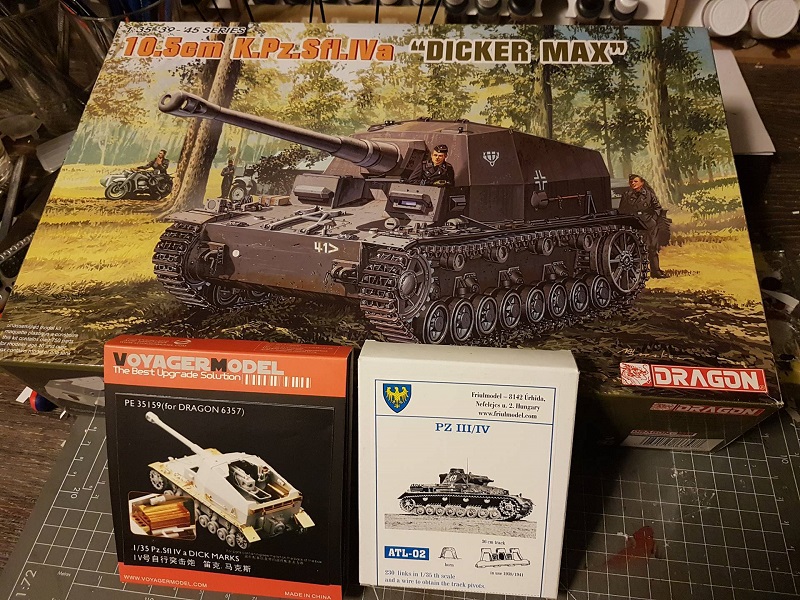
I've had this 1/35 Dicker Max by Dragon in the stash for quite a while. Figured out that a campaign might be the thing to get started. Guess the kit qualifies with the Voyager PE and Friuls?
d6mst0
#453
Joined: August 28, 2016
KitMaker: 1,925 posts
Armorama: 601 posts
Posted: Tuesday, November 28, 2017 - 05:00 AM UTC
Excellent timing with the Dicker Max. I have the same kit, PE and tracks. This will be one build I will be very interested in following. Details, give me details.....
Gopher4
Joined: November 17, 2015
KitMaker: 18 posts
Armorama: 17 posts
Posted: Tuesday, November 28, 2017 - 12:59 PM UTC
I'm a slow builder, but I'll try to post some progress photoes. Just have to clear a Jagdpanther of the bench before I start :-)
Will you do your Dicker Max for the capaign?
Will you do your Dicker Max for the capaign?
petbat
Joined: August 06, 2005
KitMaker: 3,353 posts
Armorama: 3,121 posts
Posted: Tuesday, November 28, 2017 - 01:30 PM UTC
Nice Choice Atle. There were a lot of reviews around when the Fat Max was first released, and many complained about the fit of the rear and inner hull components. However, when I built mine I had no gaps or trouble at all because I took my time and test fit everything. The key is have the major components cleaned up and ready to assemble and do them together... don't do part and then come back later or you may find it difficult to get parts lined up properly.
I assembled the upper hull components and fit to the hull as one assembly after painting too - leaving the episcopes that poke up through the roof off of course. It takes a bit of patience to get it into place that way but I thought it was worth the effort.
Have fun.
I assembled the upper hull components and fit to the hull as one assembly after painting too - leaving the episcopes that poke up through the roof off of course. It takes a bit of patience to get it into place that way but I thought it was worth the effort.
Have fun.
d6mst0
#453
Joined: August 28, 2016
KitMaker: 1,925 posts
Armorama: 601 posts
Posted: Tuesday, November 28, 2017 - 06:10 PM UTC
Quoted Text
I'm a slow builder, but I'll try to post some progress photoes. Just have to clear a Jagdpanther of the bench before I start :-)
Will you do your Dicker Max for the capaign?
No, I am building a Panzer IV Ausf. D for the campaign.
 |

WEB HOSTING BY


Copyright ©2021 Armorama and Kitmaker Network, a subsidiary of Silver Star Enterprises
All Rights Reserved. Please read our Conditions of Use and Privacy Policy.
All Rights Reserved. Please read our Conditions of Use and Privacy Policy.