

Hosted by Richard S.
Campaign 500+ Mk. II

Gopher4

Joined: November 17, 2015
KitMaker: 18 posts
Armorama: 17 posts
Posted: Friday, January 05, 2018 - 09:01 PM UTC
Yes - they were kind of fiddely 😝 I even lost one to the carpetmonster. I'll see if I find something in the spare box or keep it as damage.

Charlie-66

#186

Joined: May 24, 2006
KitMaker: 771 posts
Armorama: 750 posts
Posted: Sunday, January 07, 2018 - 04:46 AM UTC
mark,
very nice work.
Atle, that's an insane level of detail!
very nice work.
Atle, that's an insane level of detail!

d111298pw
#456
Joined: September 22, 2016
KitMaker: 654 posts
Armorama: 638 posts
Posted: Sunday, January 07, 2018 - 10:44 AM UTC
To everyone, thanks for the comments. On to the Dragon campaign
Charlie-66
#186
Joined: May 24, 2006
KitMaker: 771 posts
Armorama: 750 posts
Posted: Thursday, January 25, 2018 - 04:42 AM UTC
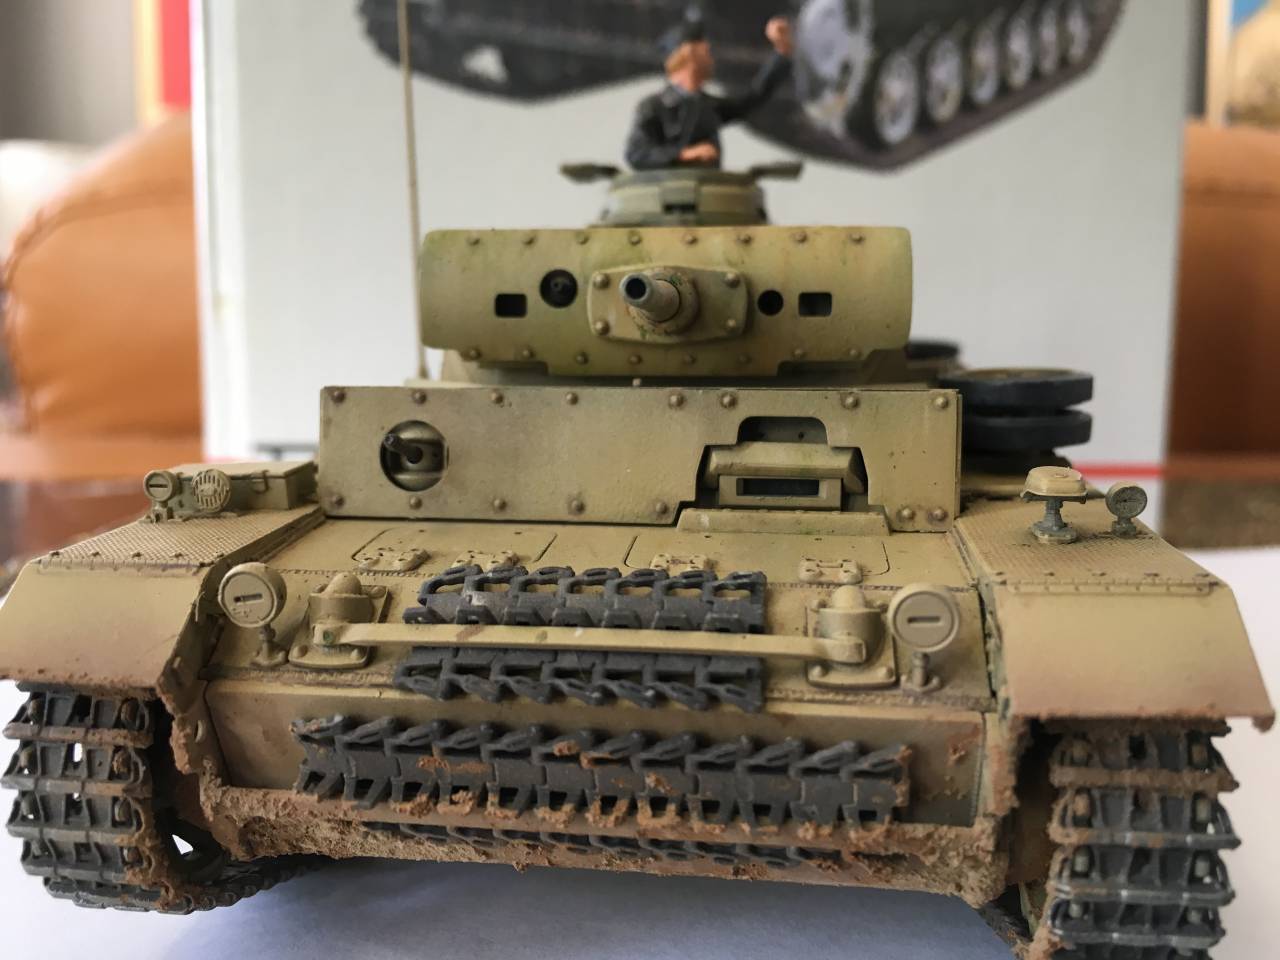
OK fellas, calling this one done. there are a few things I'll tighten up when I get the chance, but I need to get to my Pacific Campaign build. Clock is ticking down on that one.
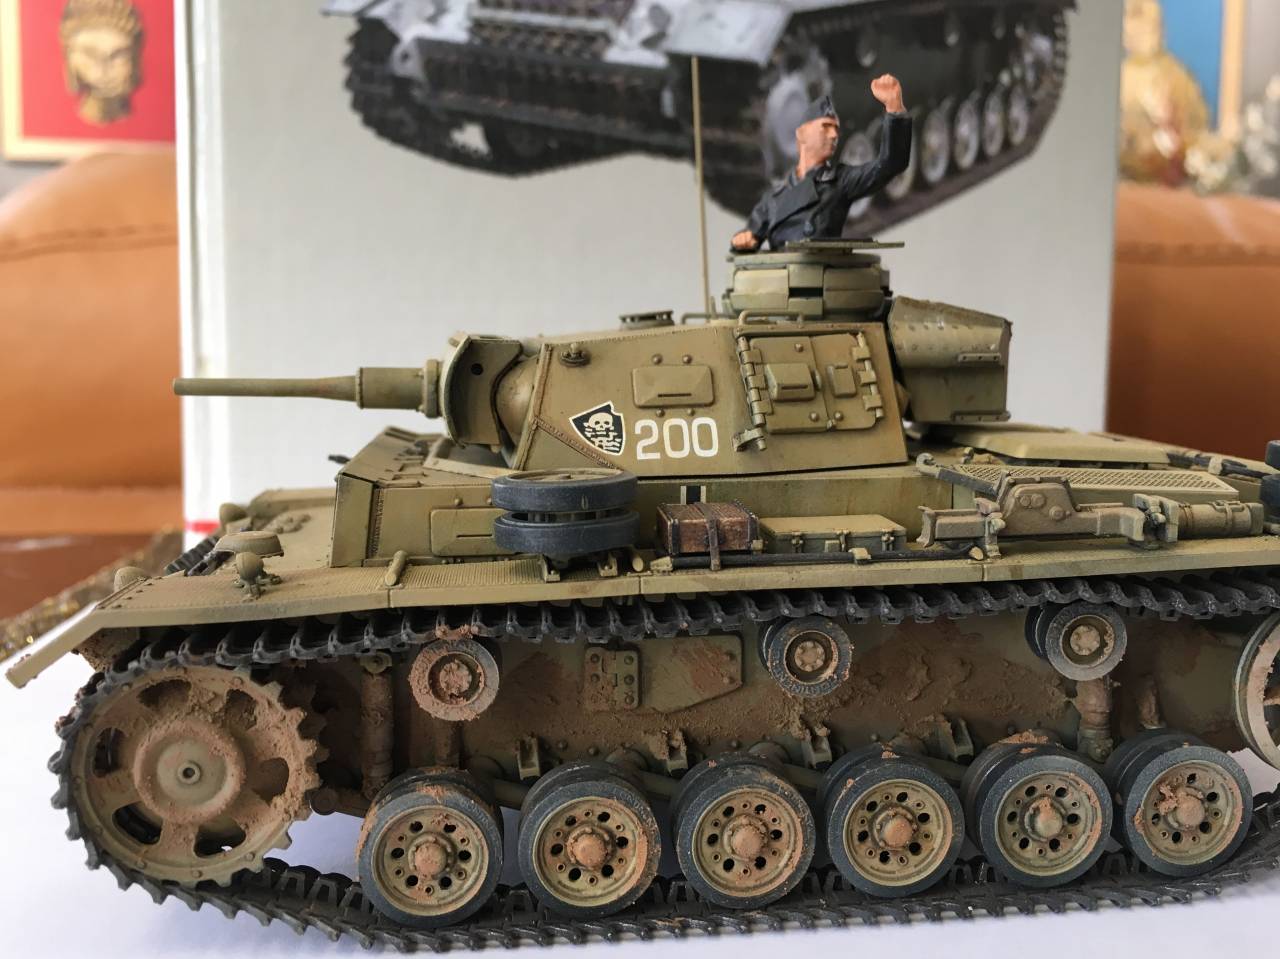

fun campaign, will be watching to see other builds move to completion.
fun campaign, will be watching to see other builds move to completion.
petbat

Joined: August 06, 2005
KitMaker: 3,353 posts
Armorama: 3,121 posts
Posted: Thursday, January 25, 2018 - 08:14 AM UTC
Atle. Great work with those etch mounts. Very Nice.
Guy. Fantastic job on the Panzer 3. Nicely rendered. Thanks for joining in
Guy. Fantastic job on the Panzer 3. Nicely rendered. Thanks for joining in


Armored76

Joined: September 30, 2013
KitMaker: 1,615 posts
Armorama: 1,500 posts
Posted: Thursday, January 25, 2018 - 03:35 PM UTC
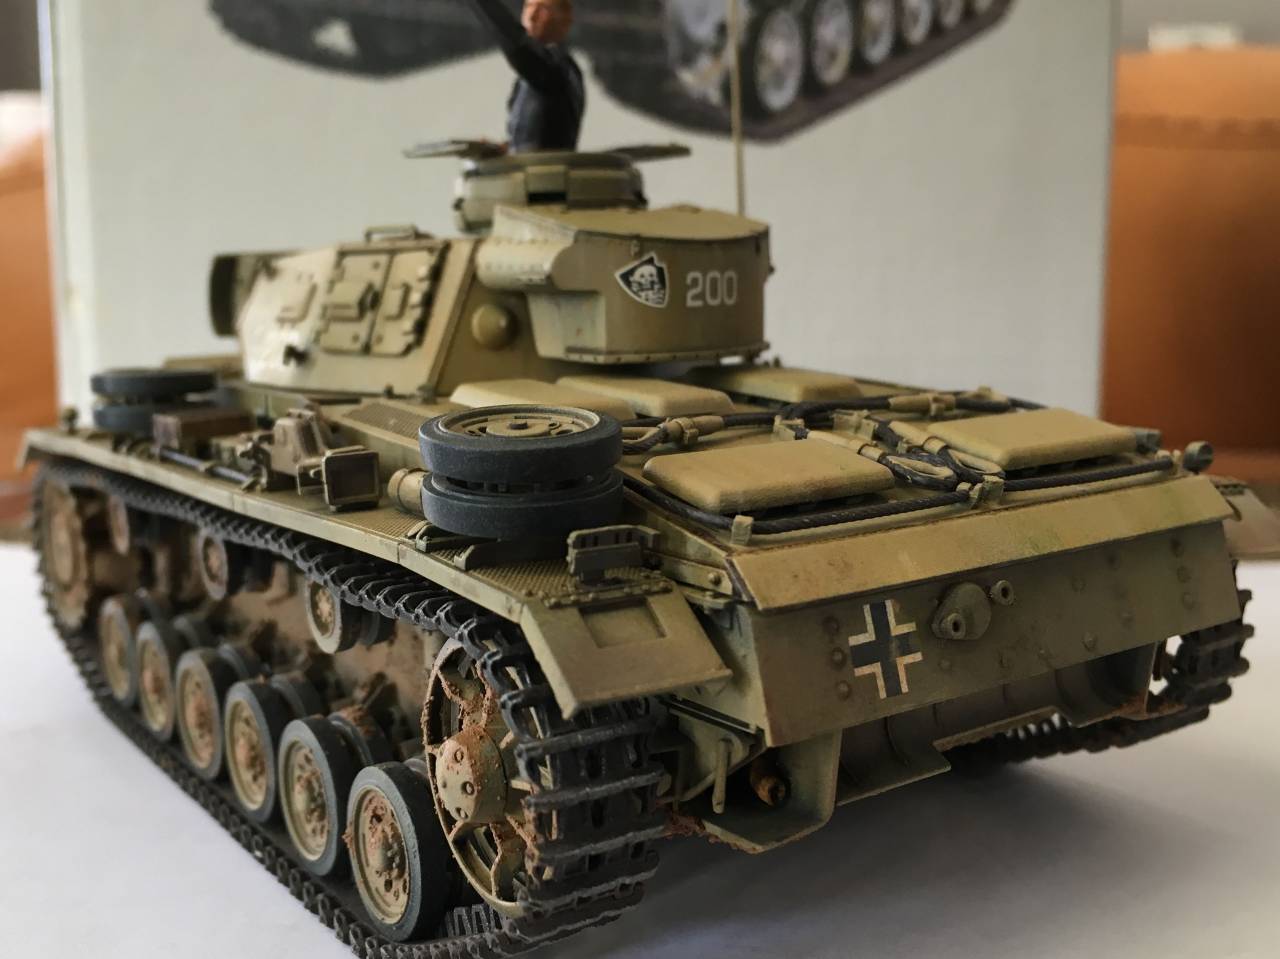
Excellent build and finish, Guy! I really like the panel shading and weathering you did.

d6mst0
#453
Joined: August 28, 2016
KitMaker: 1,925 posts
Armorama: 601 posts

Posted: Thursday, January 25, 2018 - 09:48 PM UTC
Guy,
Sweet looking Panzer III.
Mark
Sweet looking Panzer III.
Mark
Gopher4
Joined: November 17, 2015
KitMaker: 18 posts
Armorama: 17 posts
Posted: Thursday, January 25, 2018 - 09:53 PM UTC
Very good looking PzIII Guy - I really like the subtil difference in color on panels. Well done
Charlie-66
#186
Joined: May 24, 2006
KitMaker: 771 posts
Armorama: 750 posts
Posted: Friday, January 26, 2018 - 06:11 AM UTC
Peter, Cristian, mark, and Alte,
thank you one and all. Thanks for a fun campaign.
thank you one and all. Thanks for a fun campaign.

Kanguroo

Joined: May 07, 2006
KitMaker: 416 posts
Armorama: 312 posts
Posted: Saturday, January 27, 2018 - 07:45 AM UTC
A perfect model, Guy DeYoung.
I restart my one.


:)
Regards,
K.
I restart my one.
:)
Regards,
K.
Armored76
Joined: September 30, 2013
KitMaker: 1,615 posts
Armorama: 1,500 posts
Posted: Saturday, January 27, 2018 - 12:26 PM UTC
Good to have you back, K!
Nice idea of a track assembly jig Home-made, I guess. Care to share a few words about it? Thanks!
Are those sinks marks on the inside of each track link or supposed to be there? Looks like an aweful lot of work to fill if those don't belong in-there.
Nice idea of a track assembly jig
Home-made, I guess. Care to share a few words about it? Thanks!Are those sinks marks on the inside of each track link or supposed to be there?
Looks like an aweful lot of work to fill if those don't belong in-there.Kanguroo
Joined: May 07, 2006
KitMaker: 416 posts
Armorama: 312 posts
Posted: Saturday, January 27, 2018 - 06:37 PM UTC
Thanks, Cristian.
The purpose of that job is keeping the track links in line, with adjustment the gaps. It was made from wooden bars of dental tools.
And about the inside pins, maybe it's difficult to see them when applying the weathering stuff. I think so.

K.
The purpose of that job is keeping the track links in line, with adjustment the gaps. It was made from wooden bars of dental tools.
And about the inside pins, maybe it's difficult to see them when applying the weathering stuff. I think so.
K.
Armored76
Joined: September 30, 2013
KitMaker: 1,615 posts
Armorama: 1,500 posts
Posted: Sunday, January 28, 2018 - 12:55 PM UTC
I would certainly not care too much about them
Charlie-66
#186
Joined: May 24, 2006
KitMaker: 771 posts
Armorama: 750 posts
Posted: Monday, January 29, 2018 - 08:22 PM UTC
Thank you "K'.
My god! What is that you are working on? Looks cool!
My god! What is that you are working on? Looks cool!
d6mst0
#453
Joined: August 28, 2016
KitMaker: 1,925 posts
Armorama: 601 posts
Posted: Saturday, February 10, 2018 - 07:42 AM UTC
All,
A quick update on my Trumpeter Panzer IV Auf F. Munition Shulpper.
All Assembled and painted. Still have to weather her and do a few touch ups.

These vehicles were rarely used so the weathering will be light, most likely a few chips and light dust. After I finish the Karl Morse artillery piece I will mate this vehicle with it on a diorama.
Few more progress pictures until next time.
Mark


A quick update on my Trumpeter Panzer IV Auf F. Munition Shulpper.
All Assembled and painted. Still have to weather her and do a few touch ups.
These vehicles were rarely used so the weathering will be light, most likely a few chips and light dust. After I finish the Karl Morse artillery piece I will mate this vehicle with it on a diorama.
Few more progress pictures until next time.
Mark
Armored76
Joined: September 30, 2013
KitMaker: 1,615 posts
Armorama: 1,500 posts
Posted: Saturday, February 10, 2018 - 12:49 PM UTC
Really-really nice, Mark!
d6mst0
#453
Joined: August 28, 2016
KitMaker: 1,925 posts
Armorama: 601 posts
Posted: Sunday, February 11, 2018 - 05:35 PM UTC
Quoted Text
Really-really nice, Mark!
Cristian,
Thank you.
Mark
d6mst0
#453
Joined: August 28, 2016
KitMaker: 1,925 posts
Armorama: 601 posts
Posted: Tuesday, February 27, 2018 - 07:35 AM UTC
All,
I am ready to call my Trumpeter Panzer IV Ausf. F Munitions Shulpper finished. The only weathering I did was a double coat of dust. This vehicle was only used once during the Warsaw Uprising in 1944 so there wasn't any wear to the vehicle. The MIG dust I used just seem to darken the colors and after the mat coat was put on I really couldn't see the dust effect anymore. I believe after six months of sitting on a shelf and the dust effect will return..LOL.
A few pictures for the post and the rest I will post in the campaign gallery.
Mark
petbat
Joined: August 06, 2005
KitMaker: 3,353 posts
Armorama: 3,121 posts
Posted: Tuesday, February 27, 2018 - 02:21 PM UTC
Excellent work Mark. Looks very nice indeed.
I have been looking everywhere to find out if the bands around the shells were made of Brass, copper or another metal, but had no joy. I painted mine Brass too.
Just a couple of things I have noticed though, I hope you don't mind:
- The jack block and mount are on upside down. The block rests on the tray. The tray has the bracket supports under it. The block is held in place by the strap.

- The 4 lenses on the rear Notek light convey light should be very dark green (or lighter green if the light is on) not red. The 2 elliptical lenses under the cover below these lights were red.

I have been looking everywhere to find out if the bands around the shells were made of Brass, copper or another metal, but had no joy. I painted mine Brass too.
Just a couple of things I have noticed though, I hope you don't mind:
- The jack block and mount are on upside down. The block rests on the tray. The tray has the bracket supports under it. The block is held in place by the strap.
- The 4 lenses on the rear Notek light convey light should be very dark green (or lighter green if the light is on) not red. The 2 elliptical lenses under the cover below these lights were red.
Armored76
Joined: September 30, 2013
KitMaker: 1,615 posts
Armorama: 1,500 posts
Posted: Tuesday, February 27, 2018 - 04:54 PM UTC
Fantastic job, Mark! Congrats on the finished build
d6mst0
#453
Joined: August 28, 2016
KitMaker: 1,925 posts
Armorama: 601 posts
Posted: Tuesday, February 27, 2018 - 06:13 PM UTC
Peter,
Thanks for the feed back. I will make the corrections to the block and lights.
Mark
Thanks for the feed back. I will make the corrections to the block and lights.
Mark

RobinNilsson

Joined: November 29, 2006
KitMaker: 6,693 posts
Armorama: 5,562 posts
Posted: Tuesday, February 27, 2018 - 06:21 PM UTC
B&W photos from the war, with the jack block in position:


Kanguroo
Joined: May 07, 2006
KitMaker: 416 posts
Armorama: 312 posts
Posted: Saturday, March 03, 2018 - 07:27 PM UTC
Hi all,
My progress until today for the 500+ campaign.


My progress until today for the 500+ campaign.
Armored76
Joined: September 30, 2013
KitMaker: 1,615 posts
Armorama: 1,500 posts
Posted: Saturday, March 03, 2018 - 08:59 PM UTC
Excellent pre-shading job!
Kanguroo
Joined: May 07, 2006
KitMaker: 416 posts
Armorama: 312 posts
Posted: Sunday, March 04, 2018 - 05:35 AM UTC
Thanks Cristian.
I'm looking for the scene of the diorama (like Call of duty game - The modern warfare).
I'm looking for the scene of the diorama (like Call of duty game - The modern warfare).
 |

WEB HOSTING BY


Copyright ©2021 Armorama and Kitmaker Network, a subsidiary of Silver Star Enterprises
All Rights Reserved. Please read our Conditions of Use and Privacy Policy.
All Rights Reserved. Please read our Conditions of Use and Privacy Policy.