Campaigns: Active Campaigns
Campaigns that are either in planning or underway should be grouped here.
Campaigns that are either in planning or underway should be grouped here.
Hosted by Richard S.
MBT Campaign
petbat

Joined: August 06, 2005
KitMaker: 3,353 posts
Armorama: 3,121 posts

Posted: Wednesday, July 17, 2019 - 01:57 PM UTC
Wow, that looks like a CAD drawing! I hope the toning down helps you get the look you want.

BravoTwoZero

Joined: June 11, 2009
KitMaker: 461 posts
Armorama: 370 posts

Posted: Thursday, July 18, 2019 - 05:24 AM UTC
Quoted Text
Can you post some photos, I'd love to see it before the weathering?
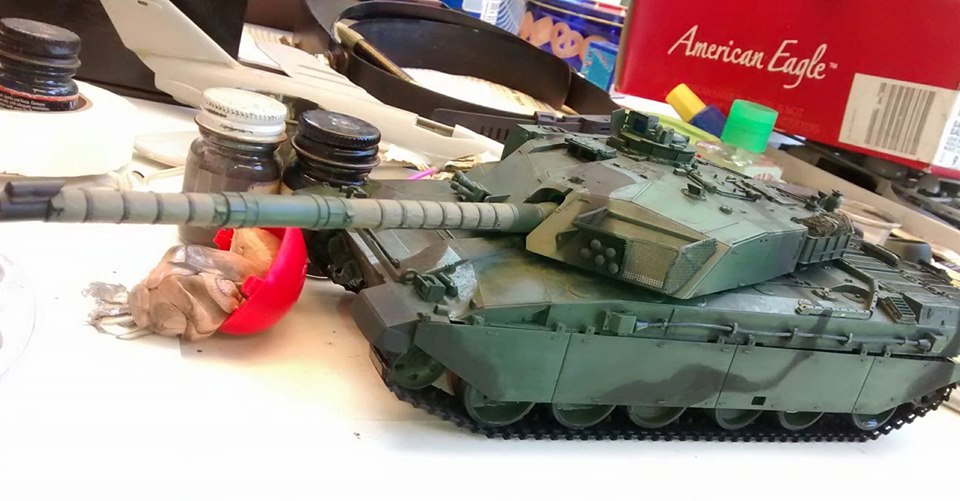
Sprayed the camo pattern freehand last night. Next step is to touch up to clear over spray and then detail painting. Here are the resulting pictures.
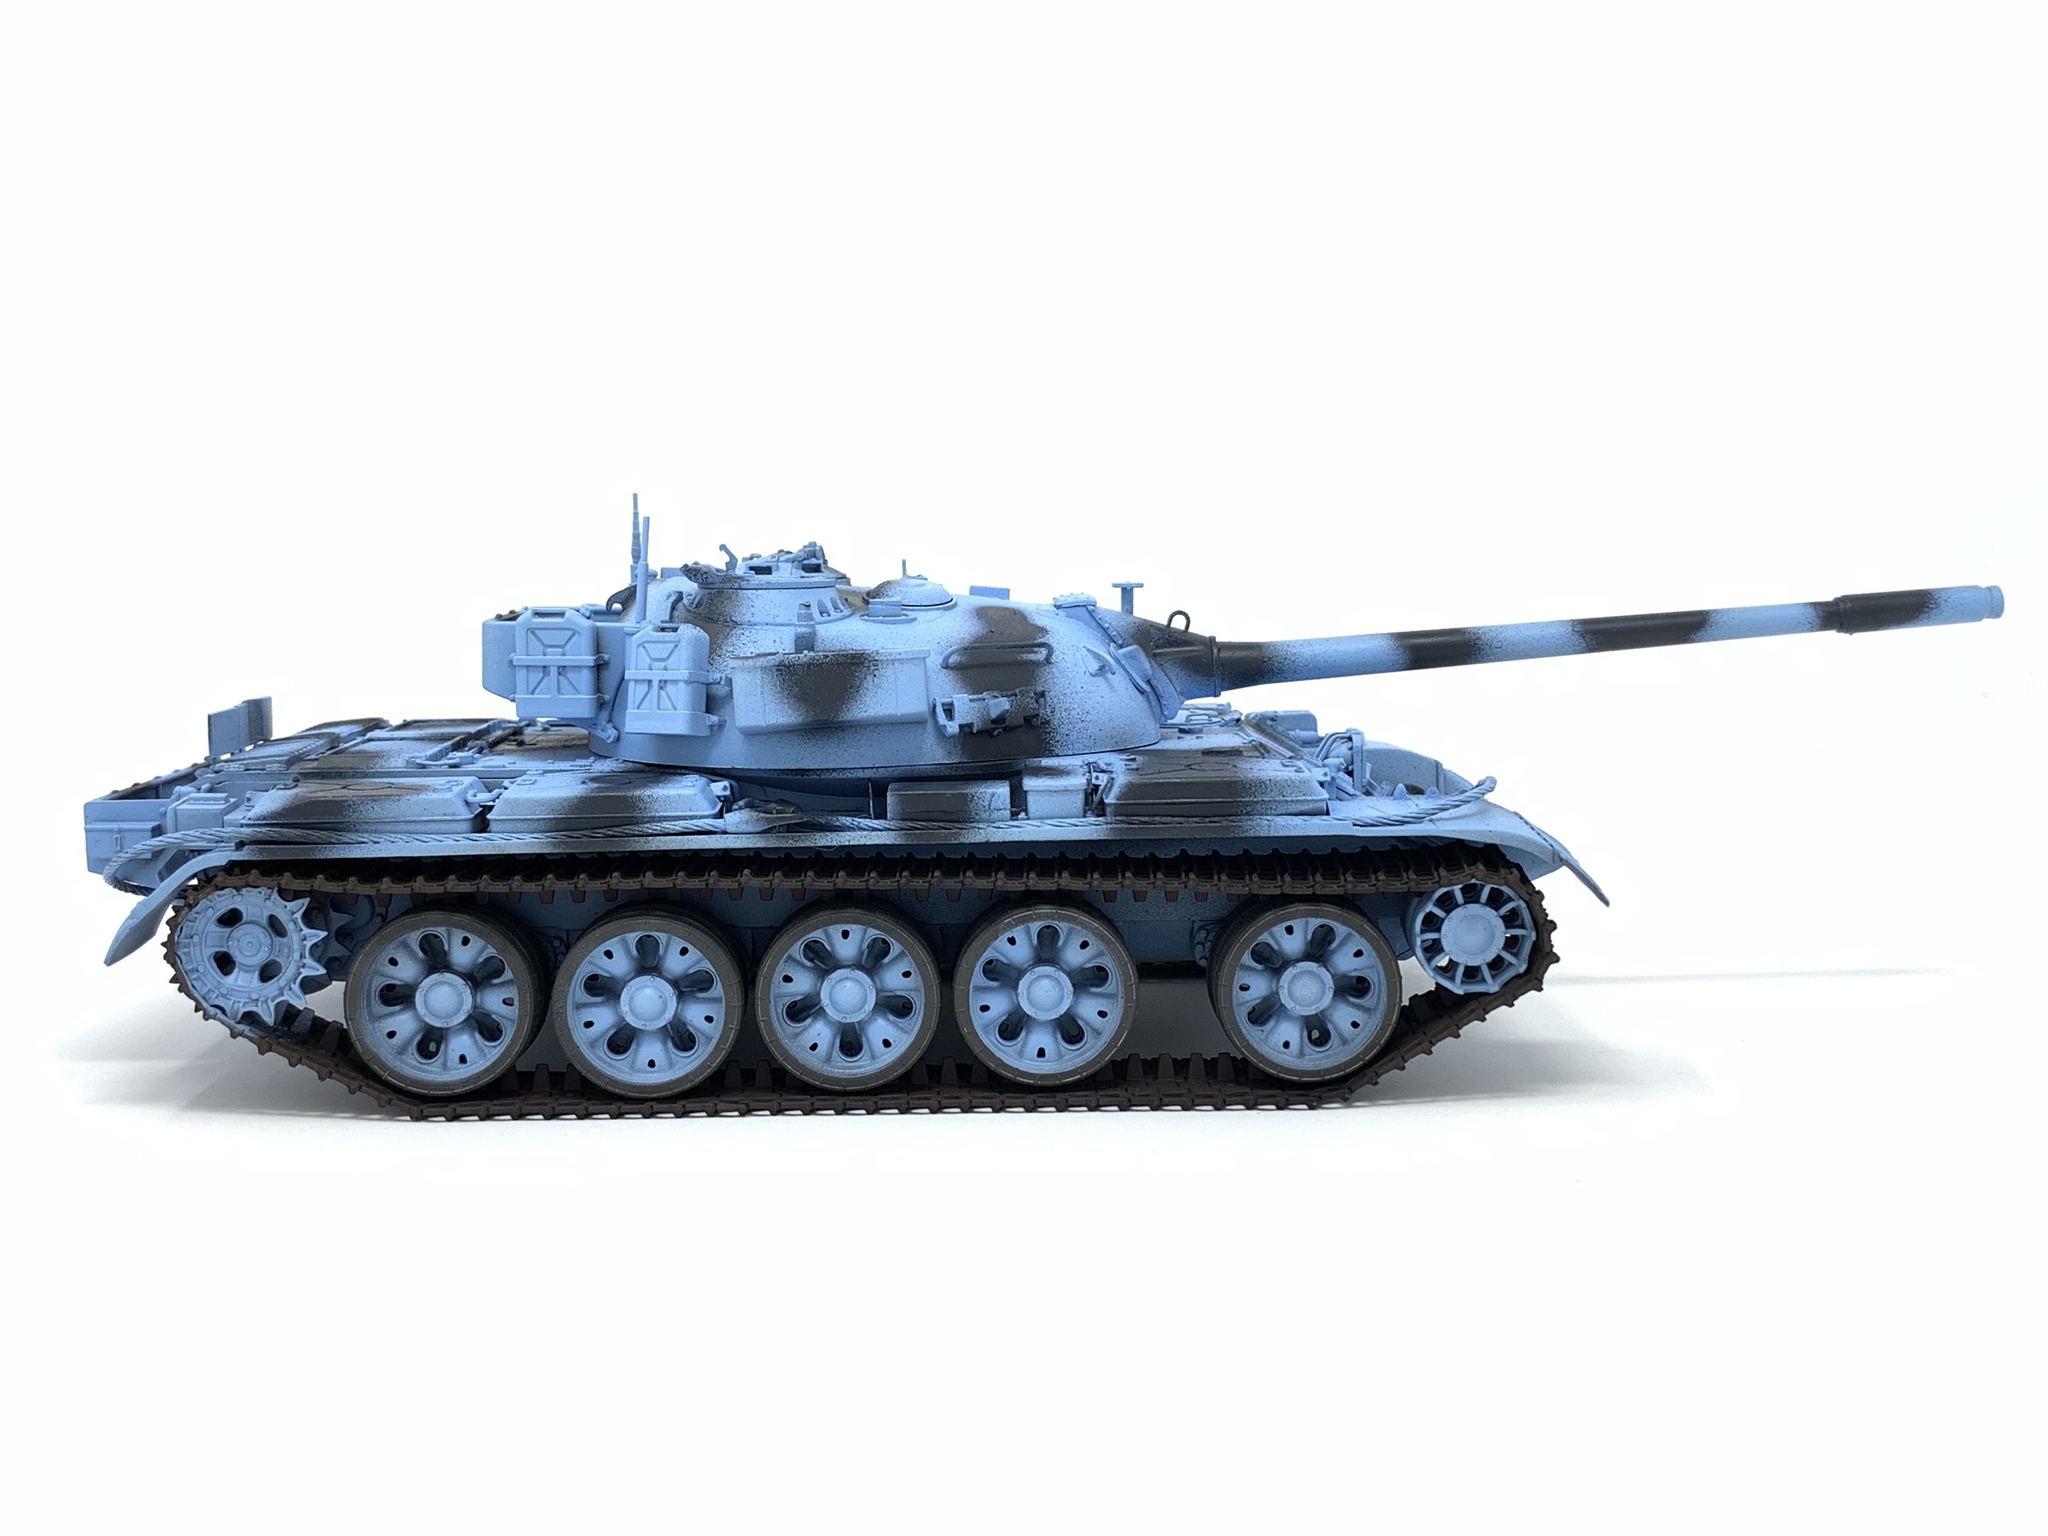
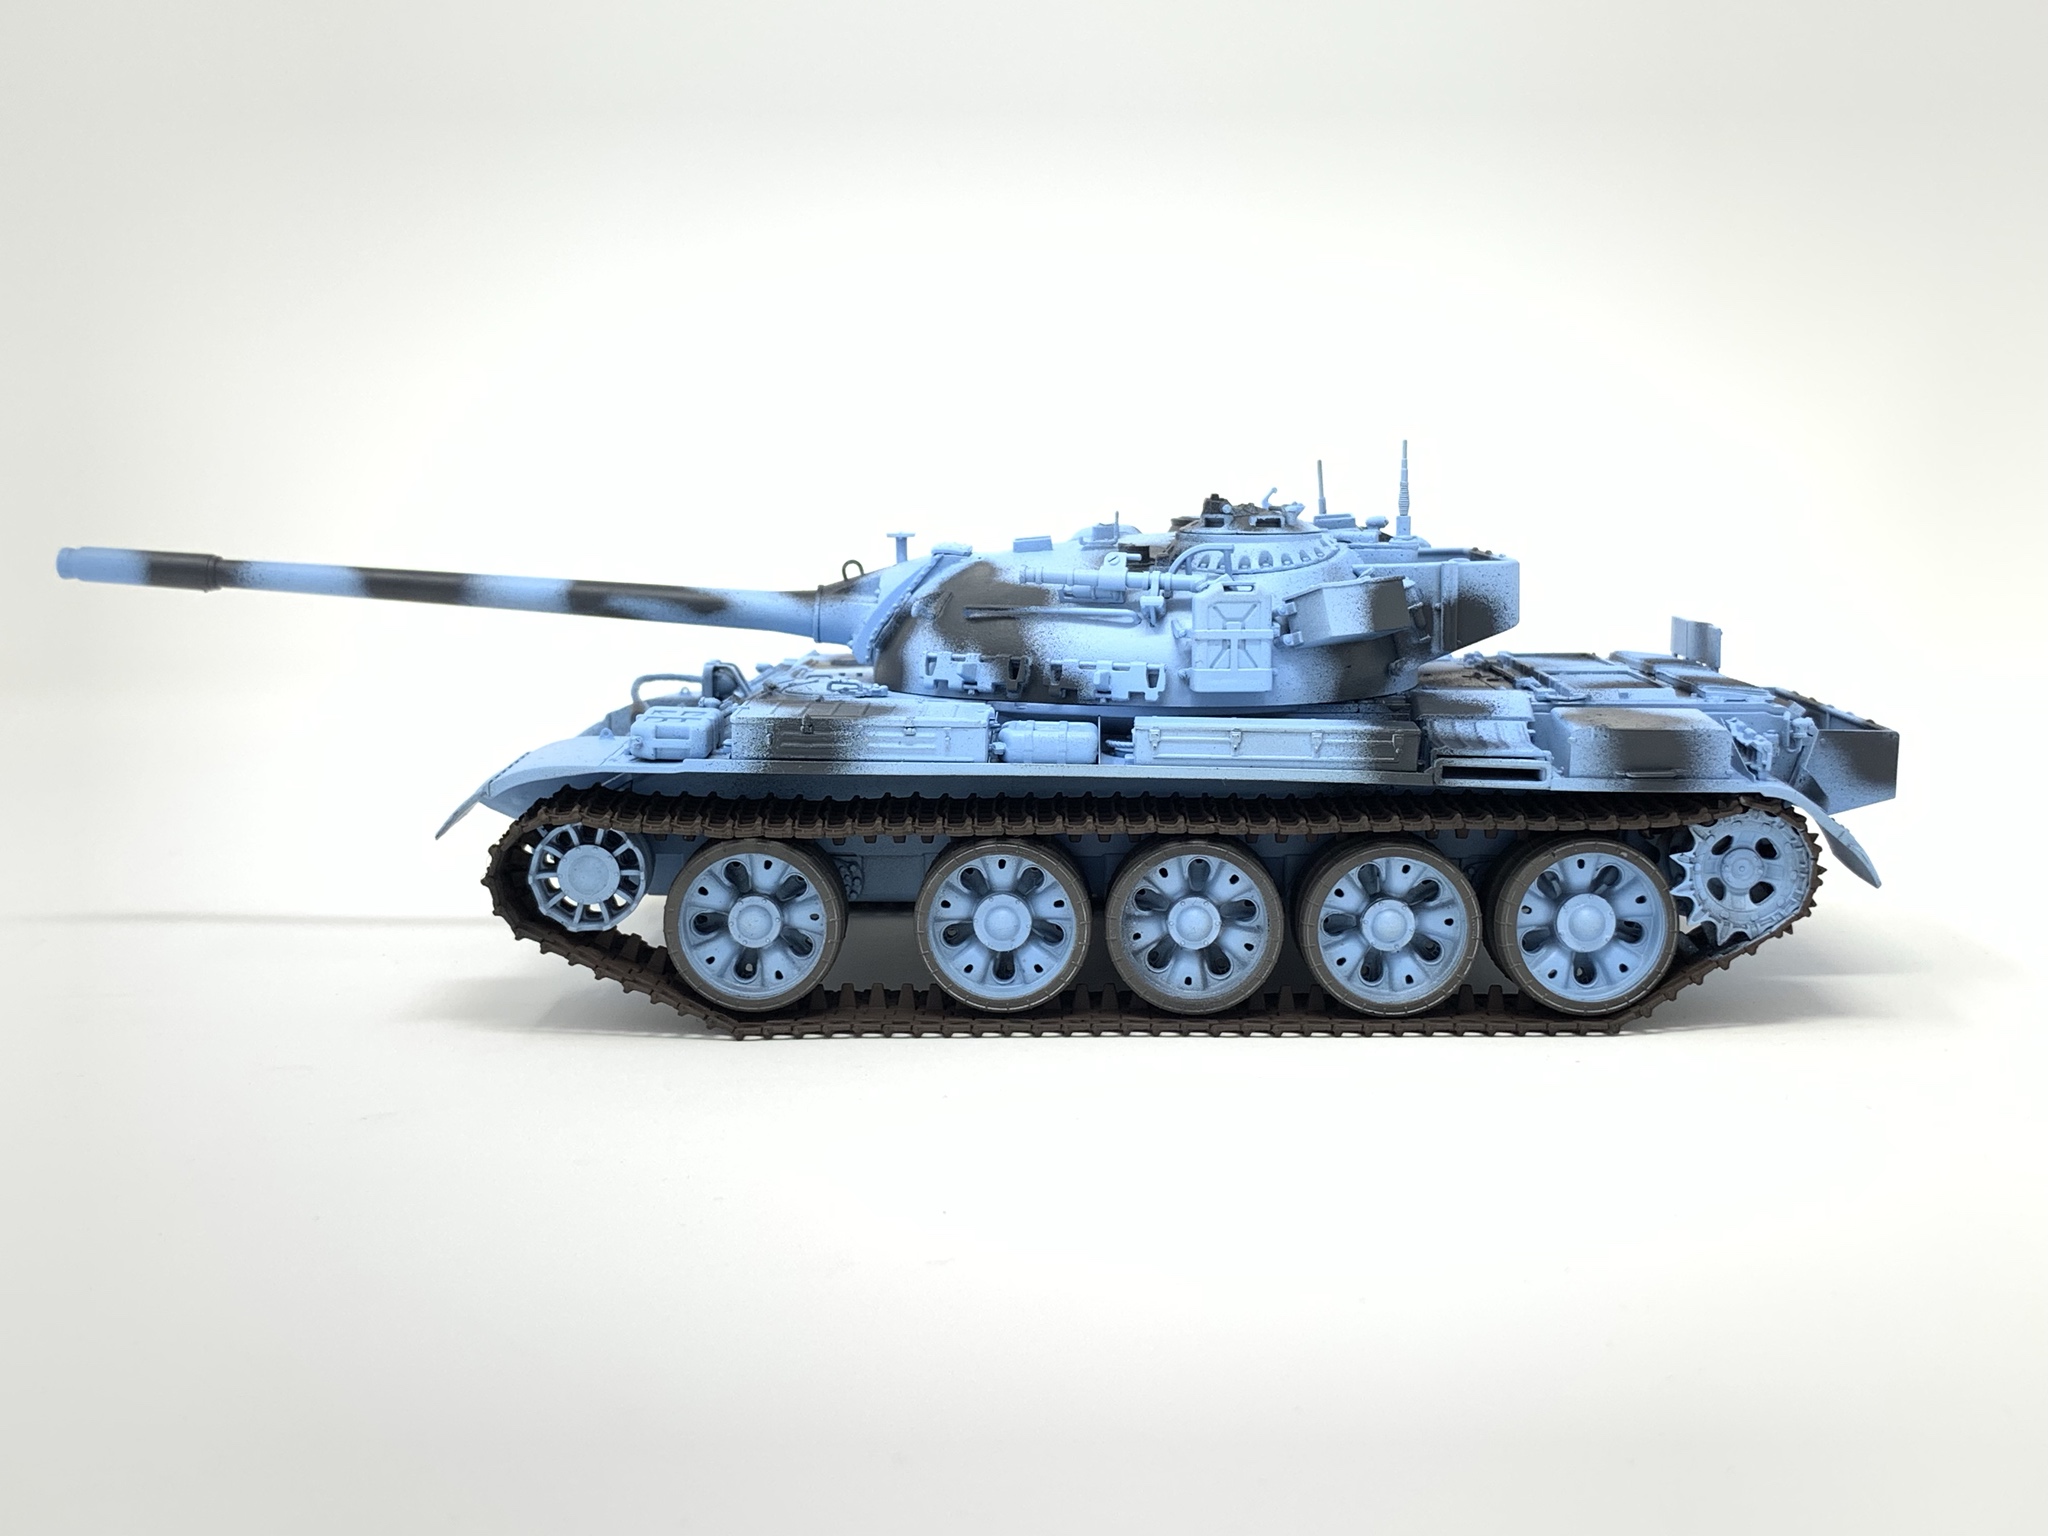

BTW, a lot of the parts are just dry-fitted right now. I will disassemble this for the detail painting.
Thanks,
Joseph
Mrclark7

Joined: June 04, 2017
KitMaker: 503 posts
Armorama: 477 posts

Posted: Thursday, July 18, 2019 - 07:20 PM UTC
Posted: Saturday, July 20, 2019 - 02:15 AM UTC
Well, my C1 Ariete is done! Just put the tracks and skirts on today and grabbed some phone pics that are a tad overexposed, but will do for now. (I won't get time to get proper shots before the deadline...)
One thing to note is the Bronco tracks come out a link too long - something I did not test in time. Fortunately the slack can be hidden under the skirts, but the tracks hang down every time I pick it up...
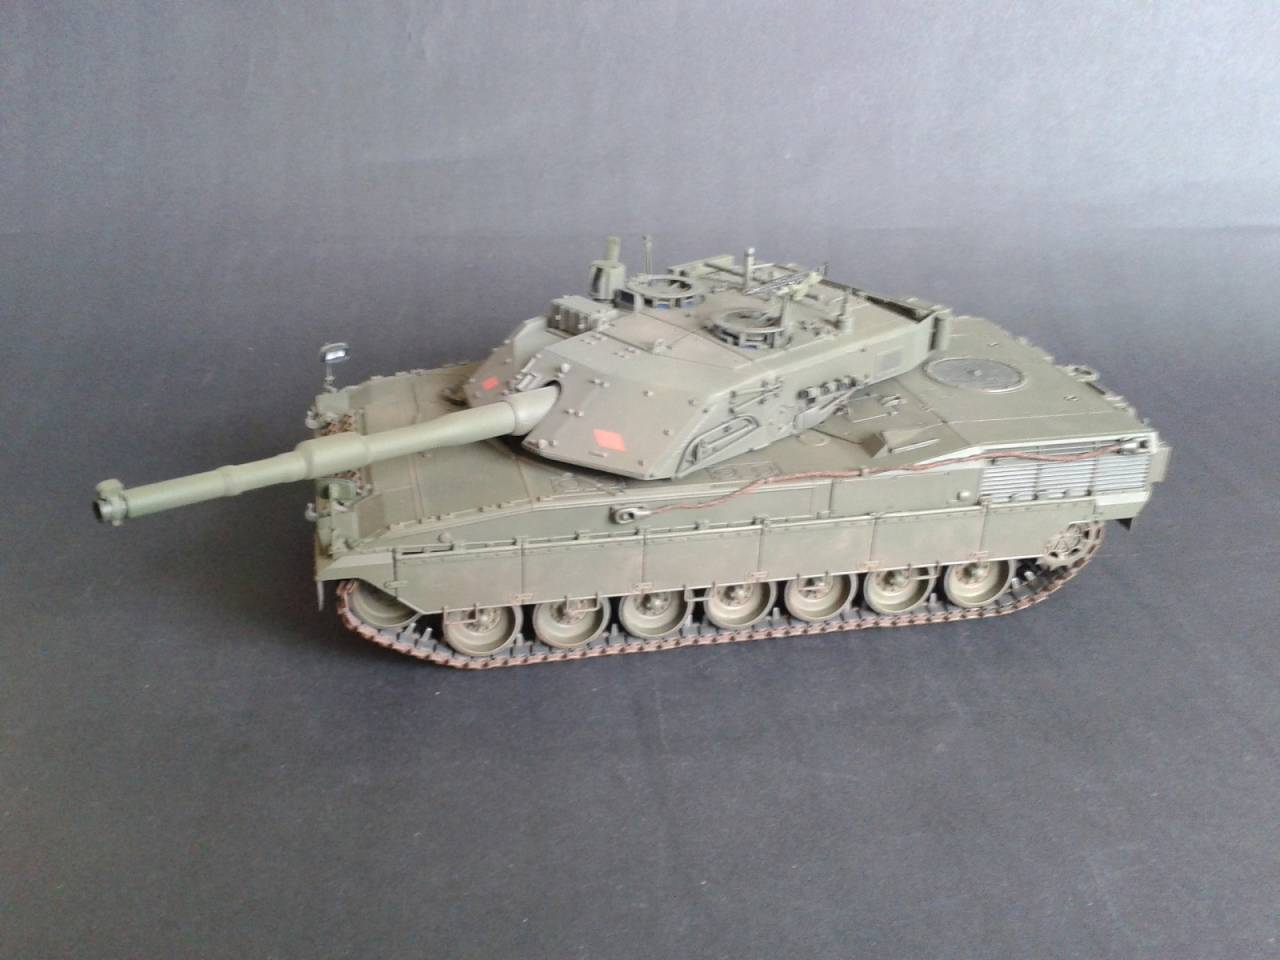
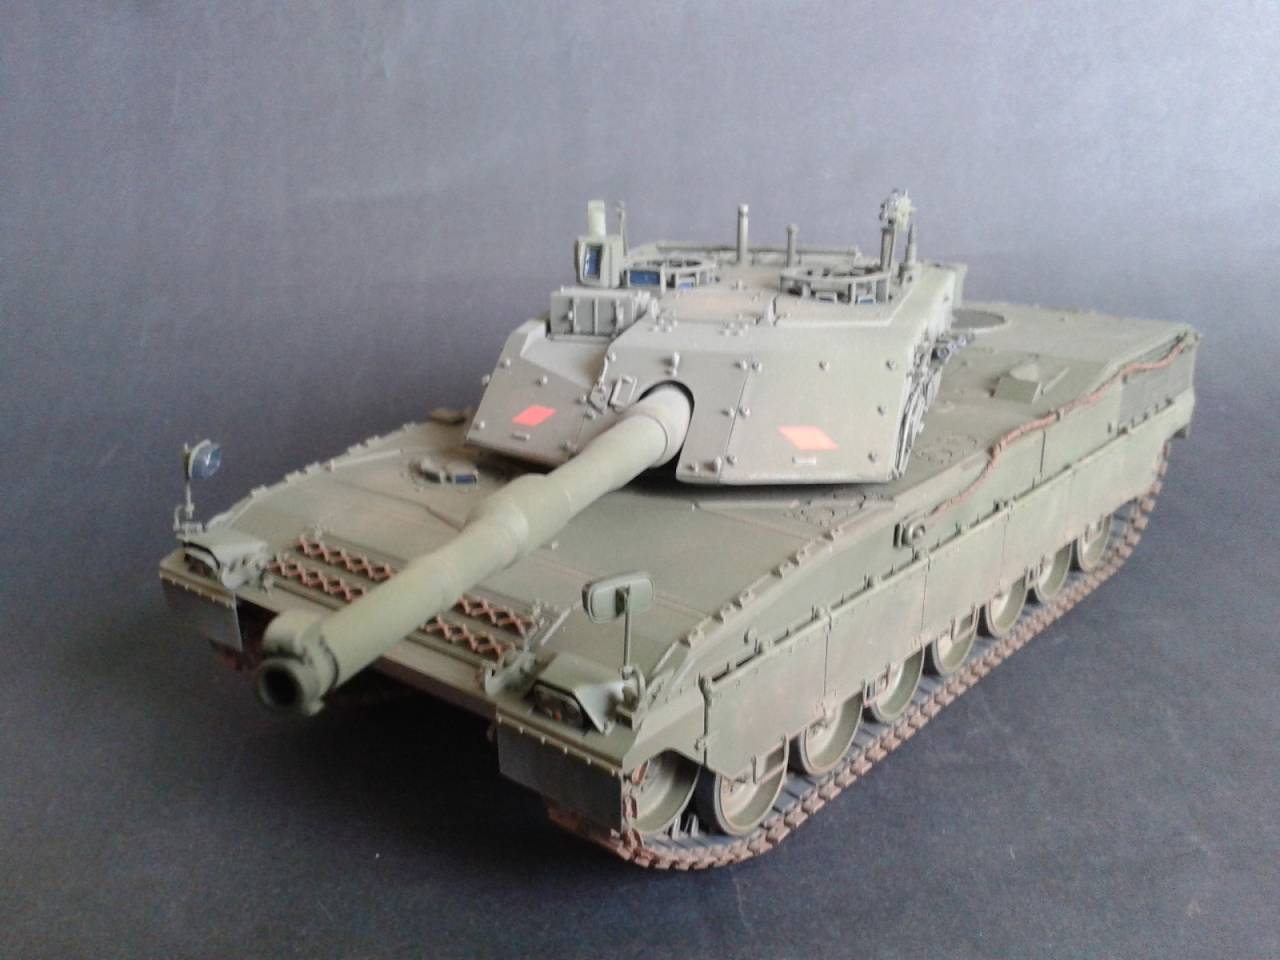
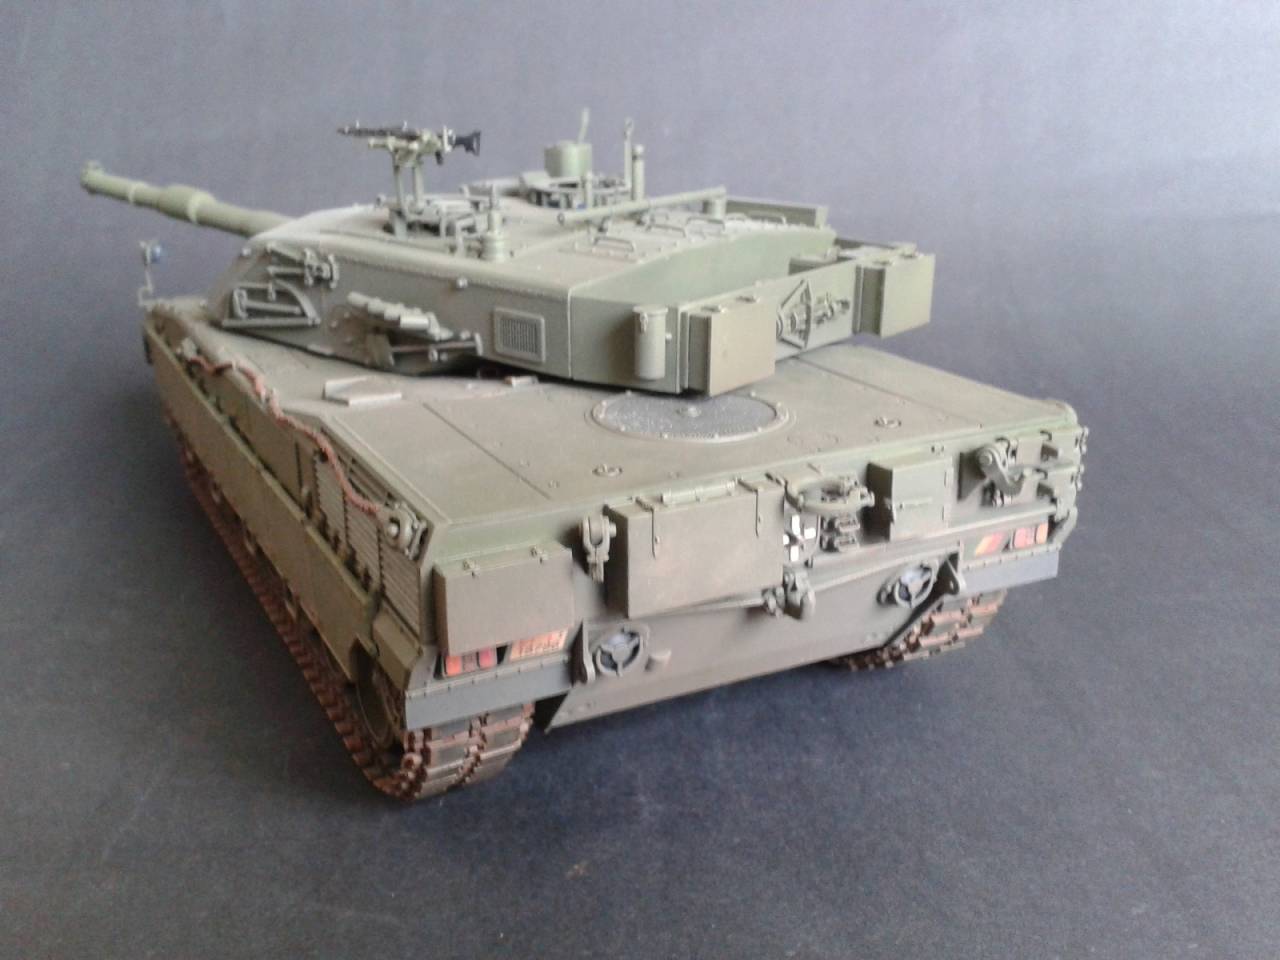
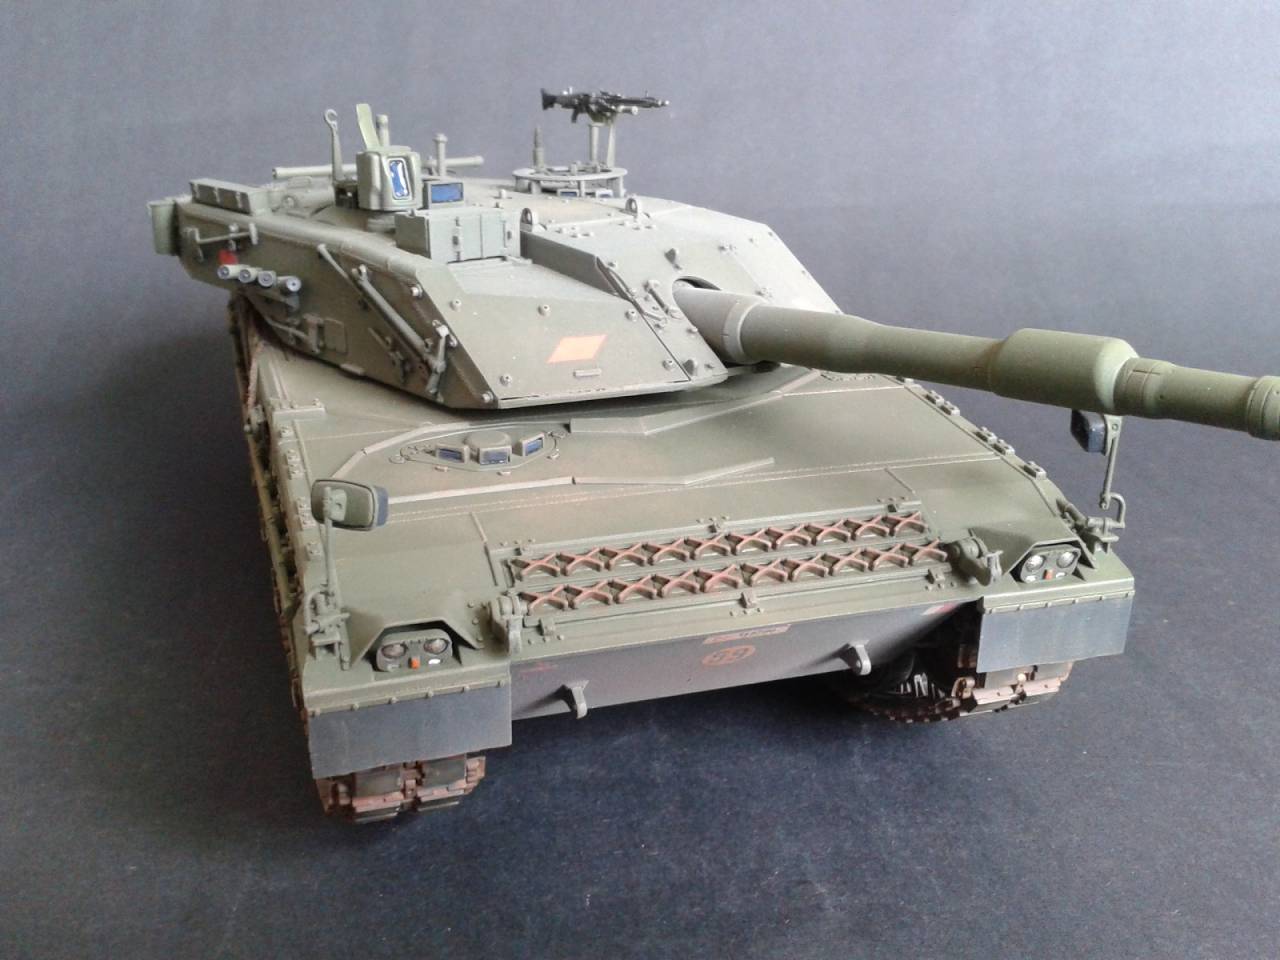
It's been a fun campaign - thanks!
Kelly, that's some serious colour-shift under those lights! What paint was it in the first place?
One thing to note is the Bronco tracks come out a link too long - something I did not test in time. Fortunately the slack can be hidden under the skirts, but the tracks hang down every time I pick it up...


It's been a fun campaign - thanks!
Kelly, that's some serious colour-shift under those lights! What paint was it in the first place?
petbat

Joined: August 06, 2005
KitMaker: 3,353 posts
Armorama: 3,121 posts

Posted: Saturday, July 20, 2019 - 12:18 PM UTC
Great finish Tom. Really well done. Bummer about the tracks, but let he, that has not done this themselves, cast the first stone...
The Ariete looks like the love child of a Leopard 2 and Challenger doesn't it.
Interesting Kelly. Colour is just one of those things that never shows up like it should in pics.
The Ariete looks like the love child of a Leopard 2 and Challenger doesn't it.
Interesting Kelly. Colour is just one of those things that never shows up like it should in pics.

agriamodeling

Joined: March 09, 2018
KitMaker: 206 posts
Armorama: 205 posts

Posted: Saturday, July 20, 2019 - 08:25 PM UTC
Hi Tom,
Very nice result with the Ariete! It was my pleaseure to see your progress, had so e nice memories coming about mine with the same kit, several yrs before.
Congratulations and hope to participate in another campaign soon!
Tamas
Very nice result with the Ariete! It was my pleaseure to see your progress, had so e nice memories coming about mine with the same kit, several yrs before.
Congratulations and hope to participate in another campaign soon!
Tamas
Posted: Saturday, July 20, 2019 - 08:50 PM UTC
Tom, cool Ariete!
Mrclark7

Joined: June 04, 2017
KitMaker: 503 posts
Armorama: 477 posts

Posted: Sunday, July 21, 2019 - 09:48 AM UTC
Tom the paint used in the pic is Vallejo 71.022. it doesnt look anything like it in should in the pics. The paint I am going to try staying with is 71.096. But even that will be buffed later so many might not want to use it as is.
So many good builds going on here also. Ive counted 6 so far that I am liking.
I love the interior builds going on in this thread. I myself right now am focusing on attempting so many paint styles that I want to try learning that I am focusing on builds with large surface areas to try painting.
A few random pics of my progress.
Came across this flyer for 2019 armor EXPO at hobby store yesterday.


Mrclark7

Joined: June 04, 2017
KitMaker: 503 posts
Armorama: 477 posts

Posted: Sunday, July 21, 2019 - 09:57 AM UTC
Posted: Sunday, July 21, 2019 - 10:45 AM UTC
Thanks guys, the Ariete was a fun speed-build! (I normally take months or years to finish a kit...)
Pete, funny you should mention its parentage - the Italians were building Leopard 1 under license, and had at least seen Leopard 2 from a distance, so it makes sense that they borrowed heavily. The turret is definitely Challenger at the front! Not sure how well the real things perform, as the tracks are narrow for a big MBT and the turret side armour is a tad thin by today's standards...
Kelly, that Chally of yours is interesting! I'm in the process of painting my Airfix (reboxed Trumpeter) Challenger 2, and went with Tamiya XF65 Field Grey as a base under black camo. I haven't tried spraying any Vallejo recently - is it any good? Still debating about the kit tracks.
Mrclark7

Joined: June 04, 2017
KitMaker: 503 posts
Armorama: 477 posts

Posted: Sunday, July 21, 2019 - 11:13 AM UTC
Tom I am very happy with the vallejo for all my airbrushing. I assume you are going green and gray scheme also?
sneak peek of the vision blocks color. This is very close to many of the pics I come across even though I am tempted to do them in blue.
note the reflection it gives off onto the turret and the actual mirror reflection of the turret mold in front of it. I used this idea on a Abrams build and feel it really draws the eye once done.

 closest mobile station
sneak peek of the vision blocks color. This is very close to many of the pics I come across even though I am tempted to do them in blue.
note the reflection it gives off onto the turret and the actual mirror reflection of the turret mold in front of it. I used this idea on a Abrams build and feel it really draws the eye once done.

 closest mobile station
Ruffus

Joined: April 12, 2005
KitMaker: 343 posts
Armorama: 223 posts

Posted: Wednesday, July 24, 2019 - 08:51 AM UTC
Ok! it's finish!! to me at least!!
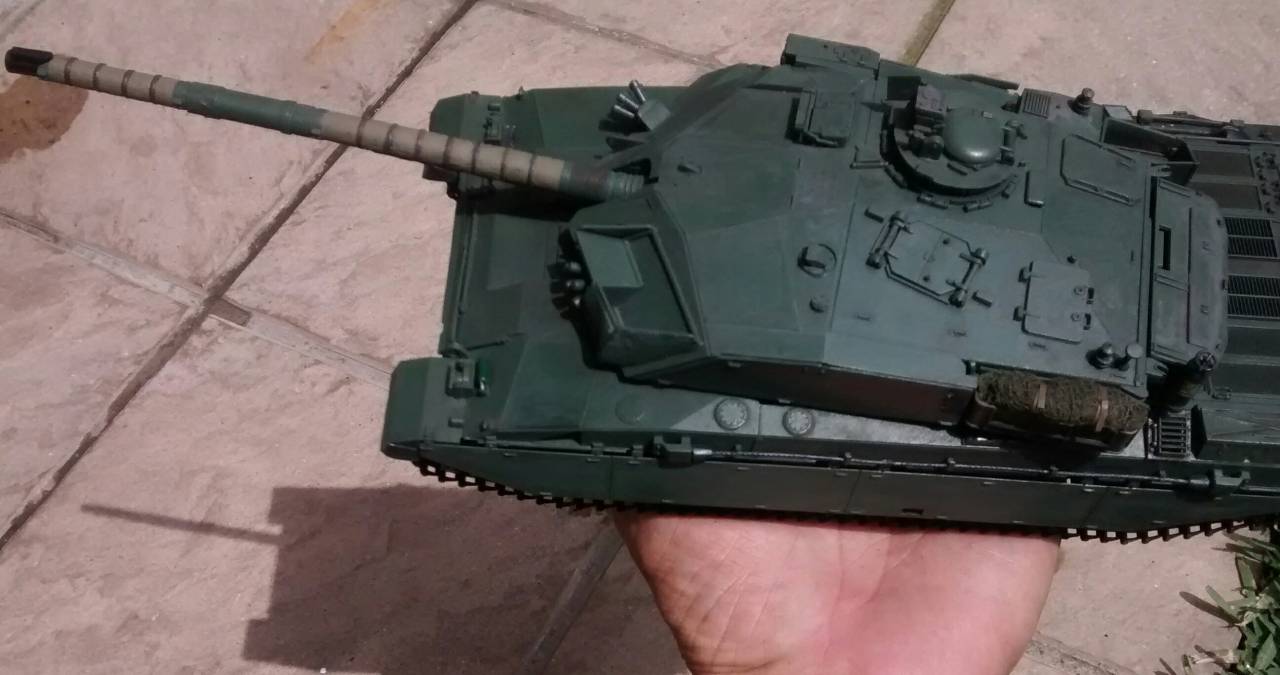
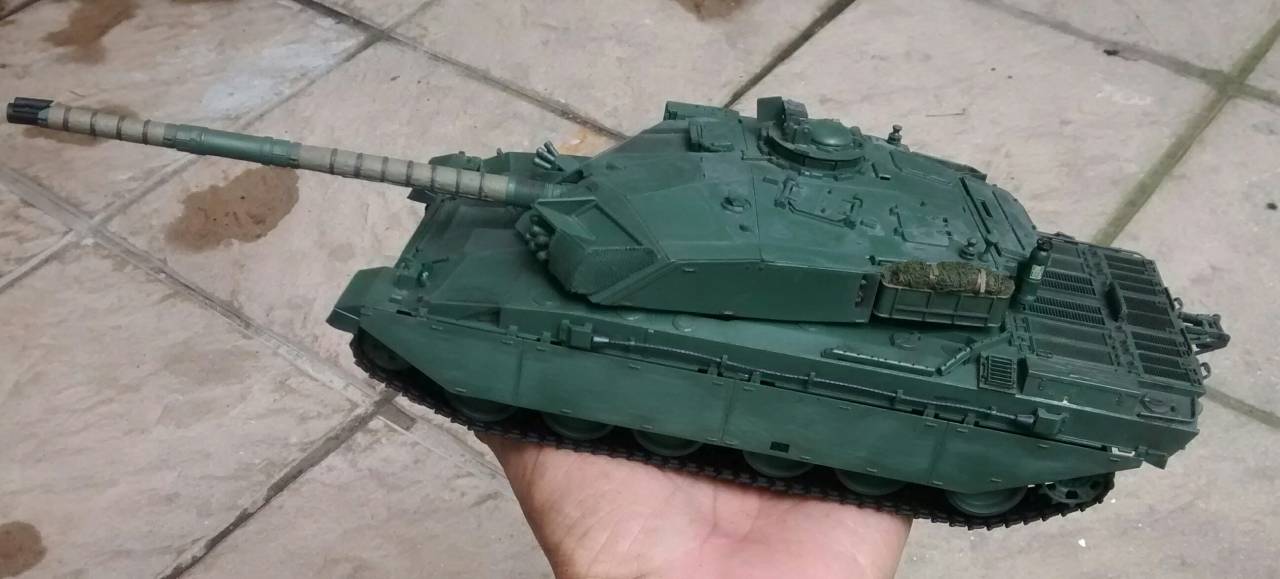
excelents works around here!!


excelents works around here!!
petbat

Joined: August 06, 2005
KitMaker: 3,353 posts
Armorama: 3,121 posts

Posted: Wednesday, July 24, 2019 - 09:38 AM UTC
Kelly, the Chally 2 is looking good. Still a bit iffy on the colour, but the buff may help as you say. We all live and learn.
A bargain is only a bargain if you use it.... so plan big!!!
Byron, love your Chally too. I note you did not add the ammo boxes and retaining frame. Was yours a mess of sink marks and warpage too? I ended up scratch building a frame for mine.
A bargain is only a bargain if you use it.... so plan big!!!
Byron, love your Chally too. I note you did not add the ammo boxes and retaining frame. Was yours a mess of sink marks and warpage too? I ended up scratch building a frame for mine.
petbat

Joined: August 06, 2005
KitMaker: 3,353 posts
Armorama: 3,121 posts

Posted: Wednesday, July 24, 2019 - 09:53 AM UTC
Time to put my pics where my mouth is. I am pushing the envelope for time to finish before the deadline, so may only get it to base colour stage (unless we get a little extension - hint, hint, Michael)
Here is where I am now. Turret still needs straps made for the side stowage bin covers, but the rest is done. This is the mark 2 rear stowage bin, made some rookie errors on the mark one. You can also see the ammo bin and cover as mentioned above (the vehicle I depicted had no boxes installed which complicated things...). The covers on the smoke grenade tubes are also absent, so they had to be scratched too. Also added little details like the wiring from the solenoid to the light on the MG and the front of the mount, rear hatch retaining flange, etc.


A comparison between the kits Mk1 stowage bin and the Mk3 that was fitted to the Operation Granby version of the challenger

Here is where I am now. Turret still needs straps made for the side stowage bin covers, but the rest is done. This is the mark 2 rear stowage bin, made some rookie errors on the mark one. You can also see the ammo bin and cover as mentioned above (the vehicle I depicted had no boxes installed which complicated things...). The covers on the smoke grenade tubes are also absent, so they had to be scratched too. Also added little details like the wiring from the solenoid to the light on the MG and the front of the mount, rear hatch retaining flange, etc.


A comparison between the kits Mk1 stowage bin and the Mk3 that was fitted to the Operation Granby version of the challenger

petbat

Joined: August 06, 2005
KitMaker: 3,353 posts
Armorama: 3,121 posts

Posted: Wednesday, July 24, 2019 - 09:53 AM UTC
And the hull which has also had the treatment:


And the front armour and side armour which is next on the agenda for detail:

and the other important bits:


And the front armour and side armour which is next on the agenda for detail:

and the other important bits:

MichaelSatin

Joined: January 19, 2008
KitMaker: 3,909 posts
Armorama: 510 posts

Posted: Wednesday, July 24, 2019 - 12:24 PM UTC
Quoted Text
Time to put my pics where my mouth is. I am pushing the envelope for time to finish before the deadline, so may only get it to base colour stage (unless we get a little extension - hint, hint, Michael)
I'm not against an extension if members want one.
Michael

petbat

Joined: August 06, 2005
KitMaker: 3,353 posts
Armorama: 3,121 posts

Posted: Wednesday, July 24, 2019 - 01:50 PM UTC
Thanks Michael. I may be the only straggler though.....
Posted: Wednesday, July 24, 2019 - 06:29 PM UTC
No you are not! 
Cheers Rob.

Cheers Rob.

agriamodeling

Joined: March 09, 2018
KitMaker: 206 posts
Armorama: 205 posts

Posted: Wednesday, July 24, 2019 - 07:08 PM UTC
Quoted Text
Quoted TextTime to put my pics where my mouth is. I am pushing the envelope for time to finish before the deadline, so may only get it to base colour stage (unless we get a little extension - hint, hint, Michael)
I'm not against an extension if members want one.
Michael
Hi Michael,
How long extension period would you accept?
I have no open project in this campaign, but it would be time consuming to complete a new a build.
Tamas
MichaelSatin

Joined: January 19, 2008
KitMaker: 3,909 posts
Armorama: 510 posts

Posted: Thursday, July 25, 2019 - 12:54 AM UTC
I'd be willing to tack on an extra month, if it's alright with John.
Michael
Michael

Ruffus

Joined: April 12, 2005
KitMaker: 343 posts
Armorama: 223 posts

Posted: Thursday, July 25, 2019 - 07:15 AM UTC
Quoted Text
Ok! it's finish!! to me at least!!


excelents works around here!!
It looks a little plain, some disruptive scheme was needed.
petbat

Joined: August 06, 2005
KitMaker: 3,353 posts
Armorama: 3,121 posts

Posted: Thursday, July 25, 2019 - 08:35 AM UTC
Quoted Text
I'd be willing to tack on an extra month, if it's alright with John.
Michael
That would be heaps of time for me. Thanks.
BunkerBuster

Joined: March 29, 2017
KitMaker: 157 posts
Armorama: 122 posts

Posted: Thursday, July 25, 2019 - 02:27 PM UTC
Quoted Text
Quoted TextI'd be willing to tack on an extra month, if it's alright with John.
Michael
That would be heaps of time for me. Thanks.
I second that, Summer activities have kept me away from the bench too much these last two months.
Mrclark7

Joined: June 04, 2017
KitMaker: 503 posts
Armorama: 477 posts

Posted: Thursday, July 25, 2019 - 07:15 PM UTC
I think I can finish in the next 5 days. but Ill take the extra time. Its will easily take me 5 days just staring at the model and nick picking the weathering I am doing.
Pic before my chosen colors.

Pieces being painted
And swatch of tested colors. The bottom color was the color it was. middle I usually use for shermans, and top is what I ended up going with.

And the tracks.

Pic before my chosen colors.

Pieces being painted

And swatch of tested colors. The bottom color was the color it was. middle I usually use for shermans, and top is what I ended up going with.

And the tracks.

Posted: Thursday, July 25, 2019 - 07:24 PM UTC
I might make it with a month. 
Cheers Rob.

Cheers Rob.
 |


