Nordrhein-Westfalen, Germany
Joined: March 22, 2015
KitMaker: 671 posts
Armorama: 45 posts
Posted: Friday, October 04, 2019 - 04:32 AM UTC
Tim: Thank´s a lot for the tutorial. It really works perfectly!
Oliver

On the desk: Probably a Panzer III.
Philippines
Joined: October 27, 2013
KitMaker: 520 posts
Armorama: 488 posts
Posted: Friday, October 04, 2019 - 05:31 AM UTC
Thank you all for your wonderful feedback! (Special shoutout to Petbat who always has a ton of great advice and good reference photos for everyone). Looks like I'm not quite finished with the lass yet (I wish I could move on to the warhammer 40k figures and Tamiya Churchill I've been working on, but I really wanna get this Panzer IV right haha). I'm going to do a bit more work on her before taking her back to the hobby shop to display.
@Timreynaga - wow, that's actually a really neat trick! I'll change my settings accordingly. Hopefully the last batch of photos come out
Queensland, Australia
Joined: August 06, 2005
KitMaker: 3,353 posts
Armorama: 3,121 posts
Posted: Friday, October 04, 2019 - 07:43 AM UTC
Interesting Tim. You learn something new every day.
I have always resized my pics to 800 x 600 and to 96 DPI using Irfanview first and then posted on Imgur. I will be interested to do a comparison now...
Nigel. You are welcome. The whole point of the Forums is for people to share tips (like Tim) and to share information and hopefully we all become better modellers for it. Some people have access to photos and information that may be out of the reach of others and I believe we should share to the benefit all.
Oliver. 'Hadfield Steel' is a general term for alloy steel with around 12% - 14% manganese, named after the man who discovered the technique's virtues. It is more often called Mangalloy these days.
The German tracks had a little more manganese (about 15% from memory), but I guess you could say they were made from the Hadfield type of process. The manganese made the tracks less brittle and less prone to abrasion than standard carbon steel, so they withstood impact better - hence an ideal metal for the purpose.
On the Bench:
Dust, styrene scraps, paint splotches and tears.
Nordrhein-Westfalen, Germany
Joined: March 22, 2015
KitMaker: 671 posts
Armorama: 45 posts
Posted: Friday, October 04, 2019 - 10:16 PM UTC
Quoted Text
...
The German tracks had a little more manganese (about 15% from memory), but I guess you could say they were made from the Hadfield type of process. The manganese made the tracks less brittle and less prone to abrasion than standard carbon steel, so they withstood impact better - hence an ideal metal for the purpose.
Peter:
Thank You for Your answer. Some time ago, I have examined such steel, but I did not know it was used for tracks, too.
As the steel hardens in the area where it is plastically deformed it is used for snow plows or jail bars, too. What a nice idea. A bar that will get even harder if You try to rasp through it

.
Oliver
On the desk: Probably a Panzer III.
barkingdigger
 Associate Editor
#013
England - East Anglia, United Kingdom
Joined: June 20, 2008
KitMaker: 3,981 posts
Armorama: 3,403 posts
Posted: Saturday, October 05, 2019 - 05:55 AM UTC
Hi Folks, I'm overdue an update and a bit of bad news. The Bronco A13 Cruiser has been a real pig of a build - the fit has been less than perfect in a number of areas so far. I started by building the basic hull, and the parts were warped enough to need a set of four internal bulkheads cut from 0.060" sheet just to force it all square. Some parts are ok, but others are downright vague in their location, such as the armour plating over the lower hull sides. And I'm really glad I ignored the instructions about adding detail - the number of clamps I needed just to get all the hull plates together was insane without tiny parts to break off! In fairness I think this was Bronco's first big kit back in 2008, but still...
A similar issue of vague fit plagues the wheels, and there is the added complication of PE used where more clever tooling would have allowed the details to be plastic. And the big PE sheet is mighty thin and bendy, especially when trying to peel off the clear plastic stuck on both sides.
All of this is building towards me withdrawing from the Campaign, as there is simply no way I can get this kit assembled, let alone painted, in the time left. (Did I mention the need for Bronco's indy-link tracks? The kit vinyl bands are about four links too short to go round properly...) I'll just have to add this to the next "Unfinished Business" Campaign. So I'm afraid this is where I run to the beaches in hope of rescue - good luck to you who remain and fight to the end!
"Glue, or Glue Not - there is no Dry-Fit" - Yoda (original script from Return of the Jedi...)
#424
Queensland, Australia
Joined: April 23, 2015
KitMaker: 4,648 posts
Armorama: 2,248 posts
Posted: Saturday, October 05, 2019 - 08:21 AM UTC
That's a bummer Tom. But I understand. If it ain't fun, don't do it. But I always hate that 'wasted time and money' feeling I get when I have to trash a kit. But it goes away...lol
Gaz
"Artillery adds dignity, to what would otherwise be an ugly brawl."
Frederick The Great
barkingdigger
Associate Editor #013
England - East Anglia, United Kingdom
Joined: June 20, 2008
KitMaker: 3,981 posts
Armorama: 3,403 posts
Posted: Saturday, October 05, 2019 - 10:02 AM UTC
Hi Gary, it's not as bad as that - I'll build it in due course, but just not by this side of Christmas! I like all the Christie derivatives - the A13, the BT series, and the T3 of course - so it's worth the pain.
Tom
"Glue, or Glue Not - there is no Dry-Fit" - Yoda (original script from Return of the Jedi...)
Texas, United States
Joined: February 22, 2008
KitMaker: 5,026 posts
Armorama: 1,604 posts
Posted: Saturday, October 05, 2019 - 12:45 PM UTC
If it aint broke dont fix it.
Queensland, Australia
Joined: August 06, 2005
KitMaker: 3,353 posts
Armorama: 3,121 posts
Posted: Saturday, October 05, 2019 - 01:12 PM UTC
Just dragged my A13 out of the stash. I think I lucked out as the hull parts seem to be square and flat... Bummer on yours Tom.
Bob, I find that if I do the lower run up to half way on the idler and to 10 o'clock/2 o'clock (depending on your orientation) over the sprocket then tape the tack ends to the wheels and let it set, then do the upper run later, I have less trouble keeping the run straight and keeping the links together. It also means you have the ability to play with the sag on the upper run without pulling the lower ones apart at the same time. I also find it stops the tracks from a toe-in / toe out set when looked at straight on.
On the Bench:
Dust, styrene scraps, paint splotches and tears.
Texas, United States
Joined: February 22, 2008
KitMaker: 5,026 posts
Armorama: 1,604 posts
Posted: Sunday, October 06, 2019 - 04:10 AM UTC
If it aint broke dont fix it.
Philippines
Joined: October 27, 2013
KitMaker: 520 posts
Armorama: 488 posts
Posted: Sunday, October 06, 2019 - 04:52 AM UTC
Love your progress with the 38(t) Bob. I'd recommend blending the weathering on the muffler - get a better transition between the shades of brown and red you have.
Texas, United States
Joined: February 22, 2008
KitMaker: 5,026 posts
Armorama: 1,604 posts
Posted: Sunday, October 06, 2019 - 10:20 AM UTC
I am calling this one done.


If it aint broke dont fix it.
Queensland, Australia
Joined: August 06, 2005
KitMaker: 3,353 posts
Armorama: 3,121 posts
Posted: Sunday, October 06, 2019 - 10:26 AM UTC
Looking good Bob.
Don't forget to paint the bit of wheel rim between the tyre and bolts bare metal where the guide horns of the track rub against them.
On the Bench:
Dust, styrene scraps, paint splotches and tears.
Texas, United States
Joined: February 22, 2008
KitMaker: 5,026 posts
Armorama: 1,604 posts
Posted: Sunday, October 06, 2019 - 10:29 AM UTC
Quoted Text
Looking good Bob.
Don't forget to paint the bit of wheel rim between the tyre and bolts bare metal where the guide horns of the track rub against them.
Peter, once the oil dries I will use a silver pencil.
Where is the campaign gallery?
If it aint broke dont fix it.
#424
Queensland, Australia
Joined: April 23, 2015
KitMaker: 4,648 posts
Armorama: 2,248 posts
Posted: Sunday, October 06, 2019 - 02:10 PM UTC
"Artillery adds dignity, to what would otherwise be an ugly brawl."
Frederick The Great
#477
Pest, Hungary
Joined: March 21, 2007
KitMaker: 133 posts
Armorama: 131 posts
Posted: Monday, October 07, 2019 - 12:22 AM UTC
Dear all,
What a great forum this is! Thanks for all the advices (especially the Panzer IV related one

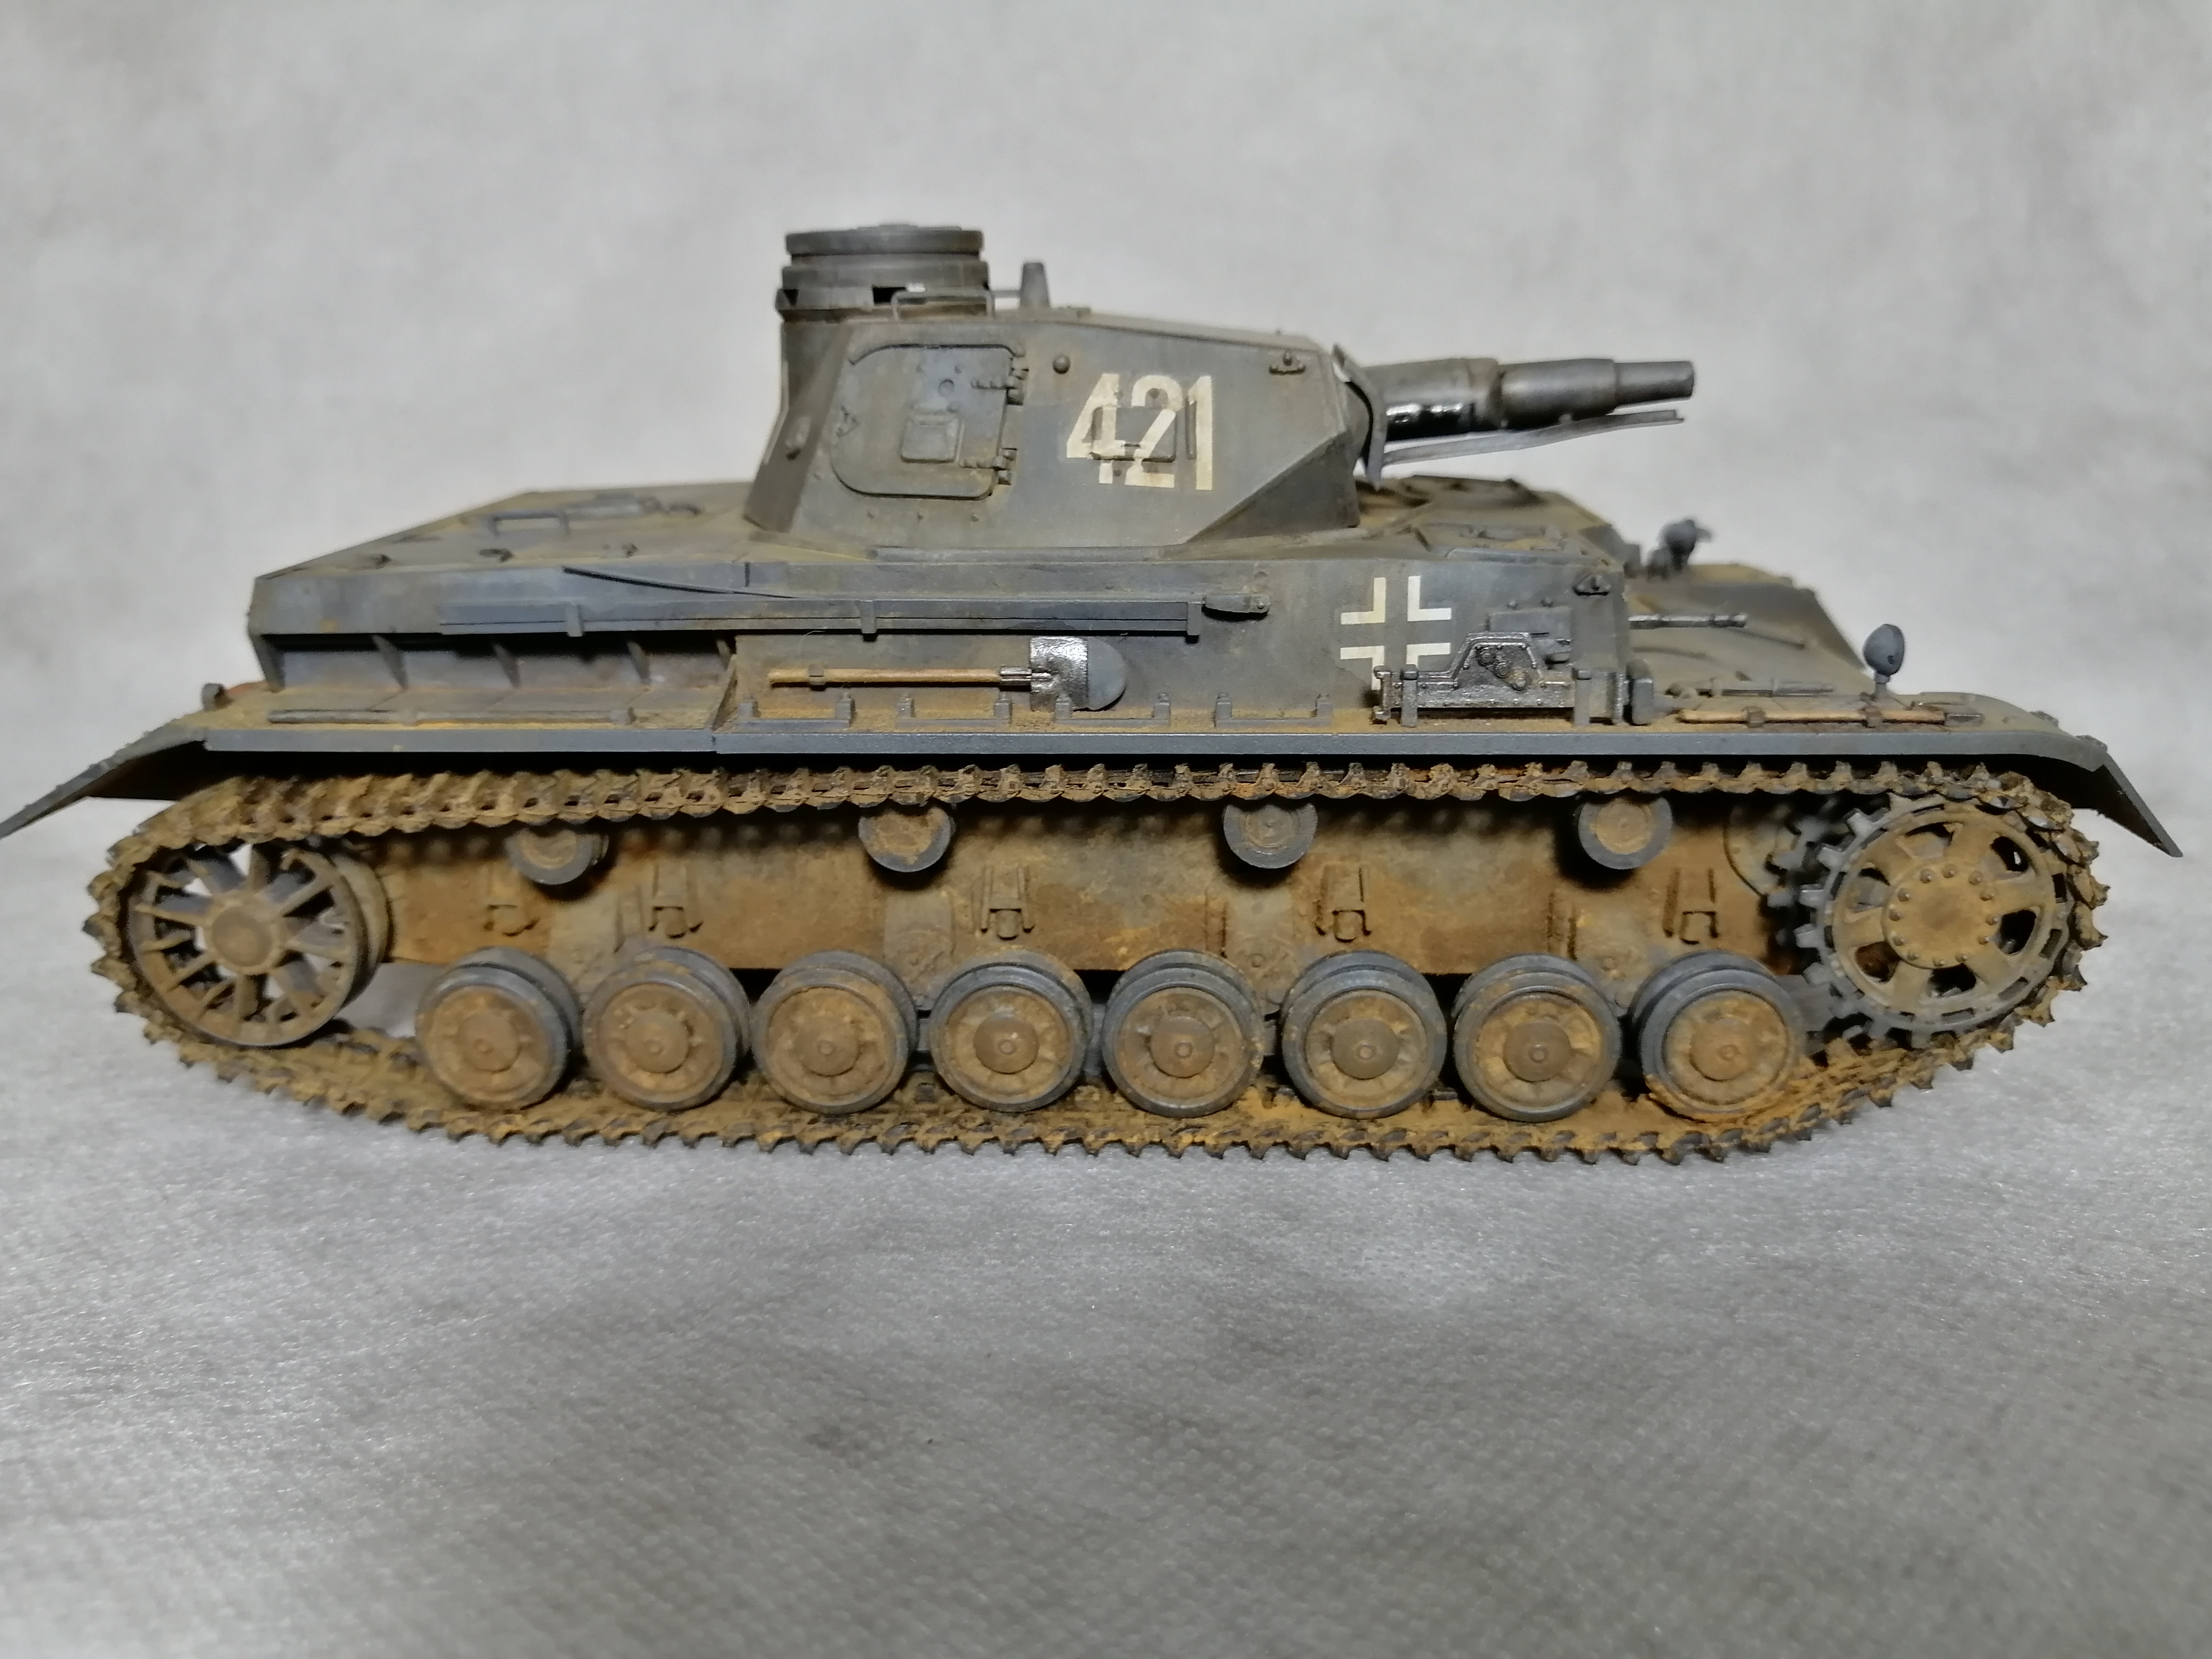
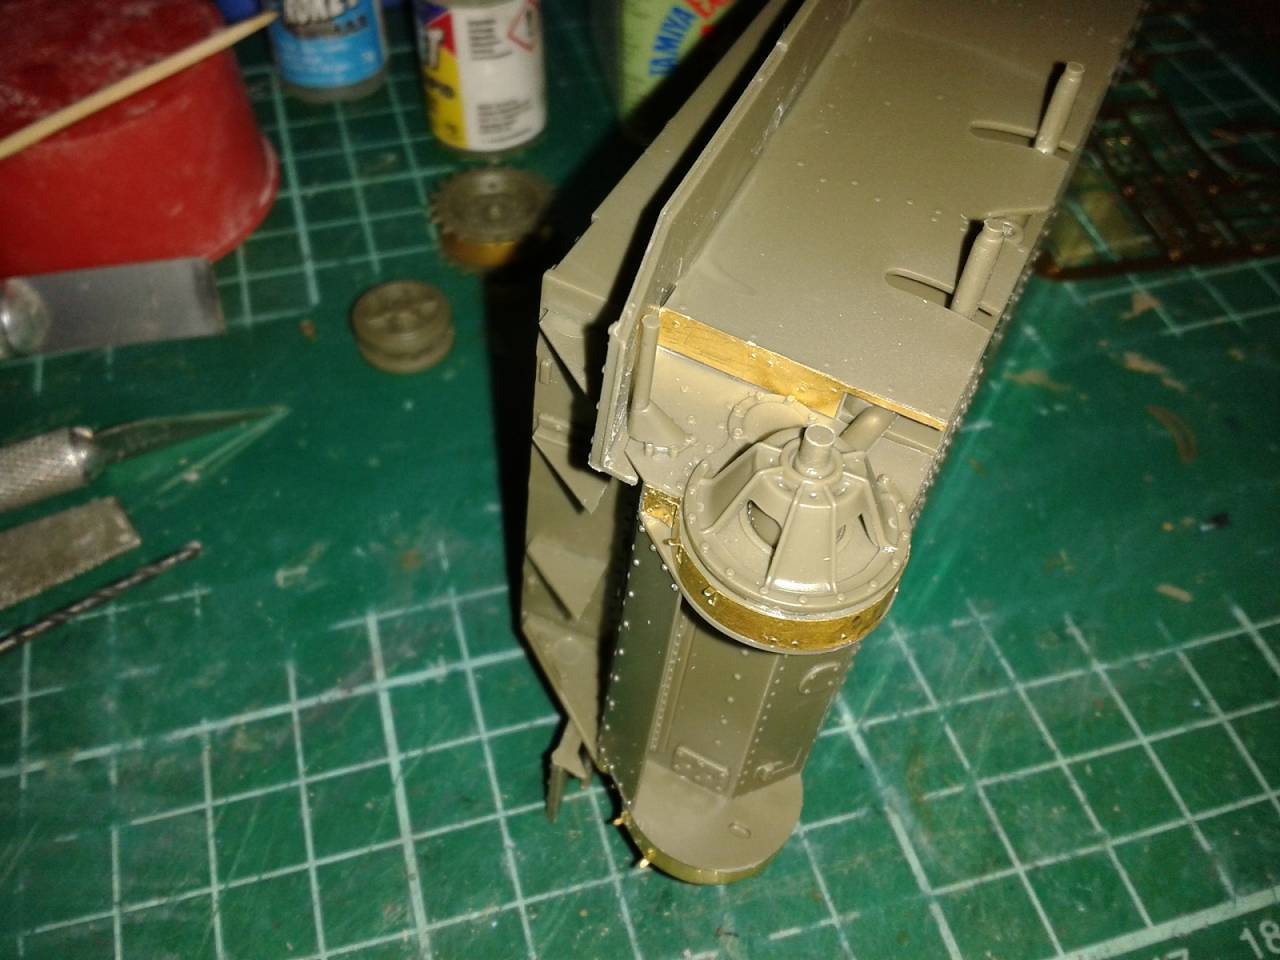
) and grats to all finished models so far! I'm (still) optimistic about my finish though the summer months were quite inefficient (from modelling point of view) - That is where I am at the moment with the Tristar Panzer IV ausf. B:

The kit is OK, there were some minor fit issues but nothing that a little putty or stretched sprue could not solve. The only mistake I'm angry about that I glued the turret top without checking the manual - and of course I glued on the wrong part, not the ausf. B version...
I planned to build it out-of-the-box but I could not resist to enhance the muffler area with some PE and brass tubes.

cheers,
Zsolt
On the bench:
- Tristar Panzer IV ausf. B. 1:35 - France 1940 Campaign
- Dragon Panzerjäger I ausf. B 1:35
- Revell Leopard 2A4 1:35
My blog: http://muanyagforgacs.blogspot.com/
Philippines
Joined: October 27, 2013
KitMaker: 520 posts
Armorama: 488 posts
Posted: Monday, October 07, 2019 - 02:09 AM UTC
Queensland, Australia
Joined: August 06, 2005
KitMaker: 3,353 posts
Armorama: 3,121 posts
Posted: Monday, October 07, 2019 - 07:19 AM UTC
Looks great Bob. Very nice indeed.
Zsolt. Nice detail work. That really does look like a big improvement. Glad the pics were of use to you too.
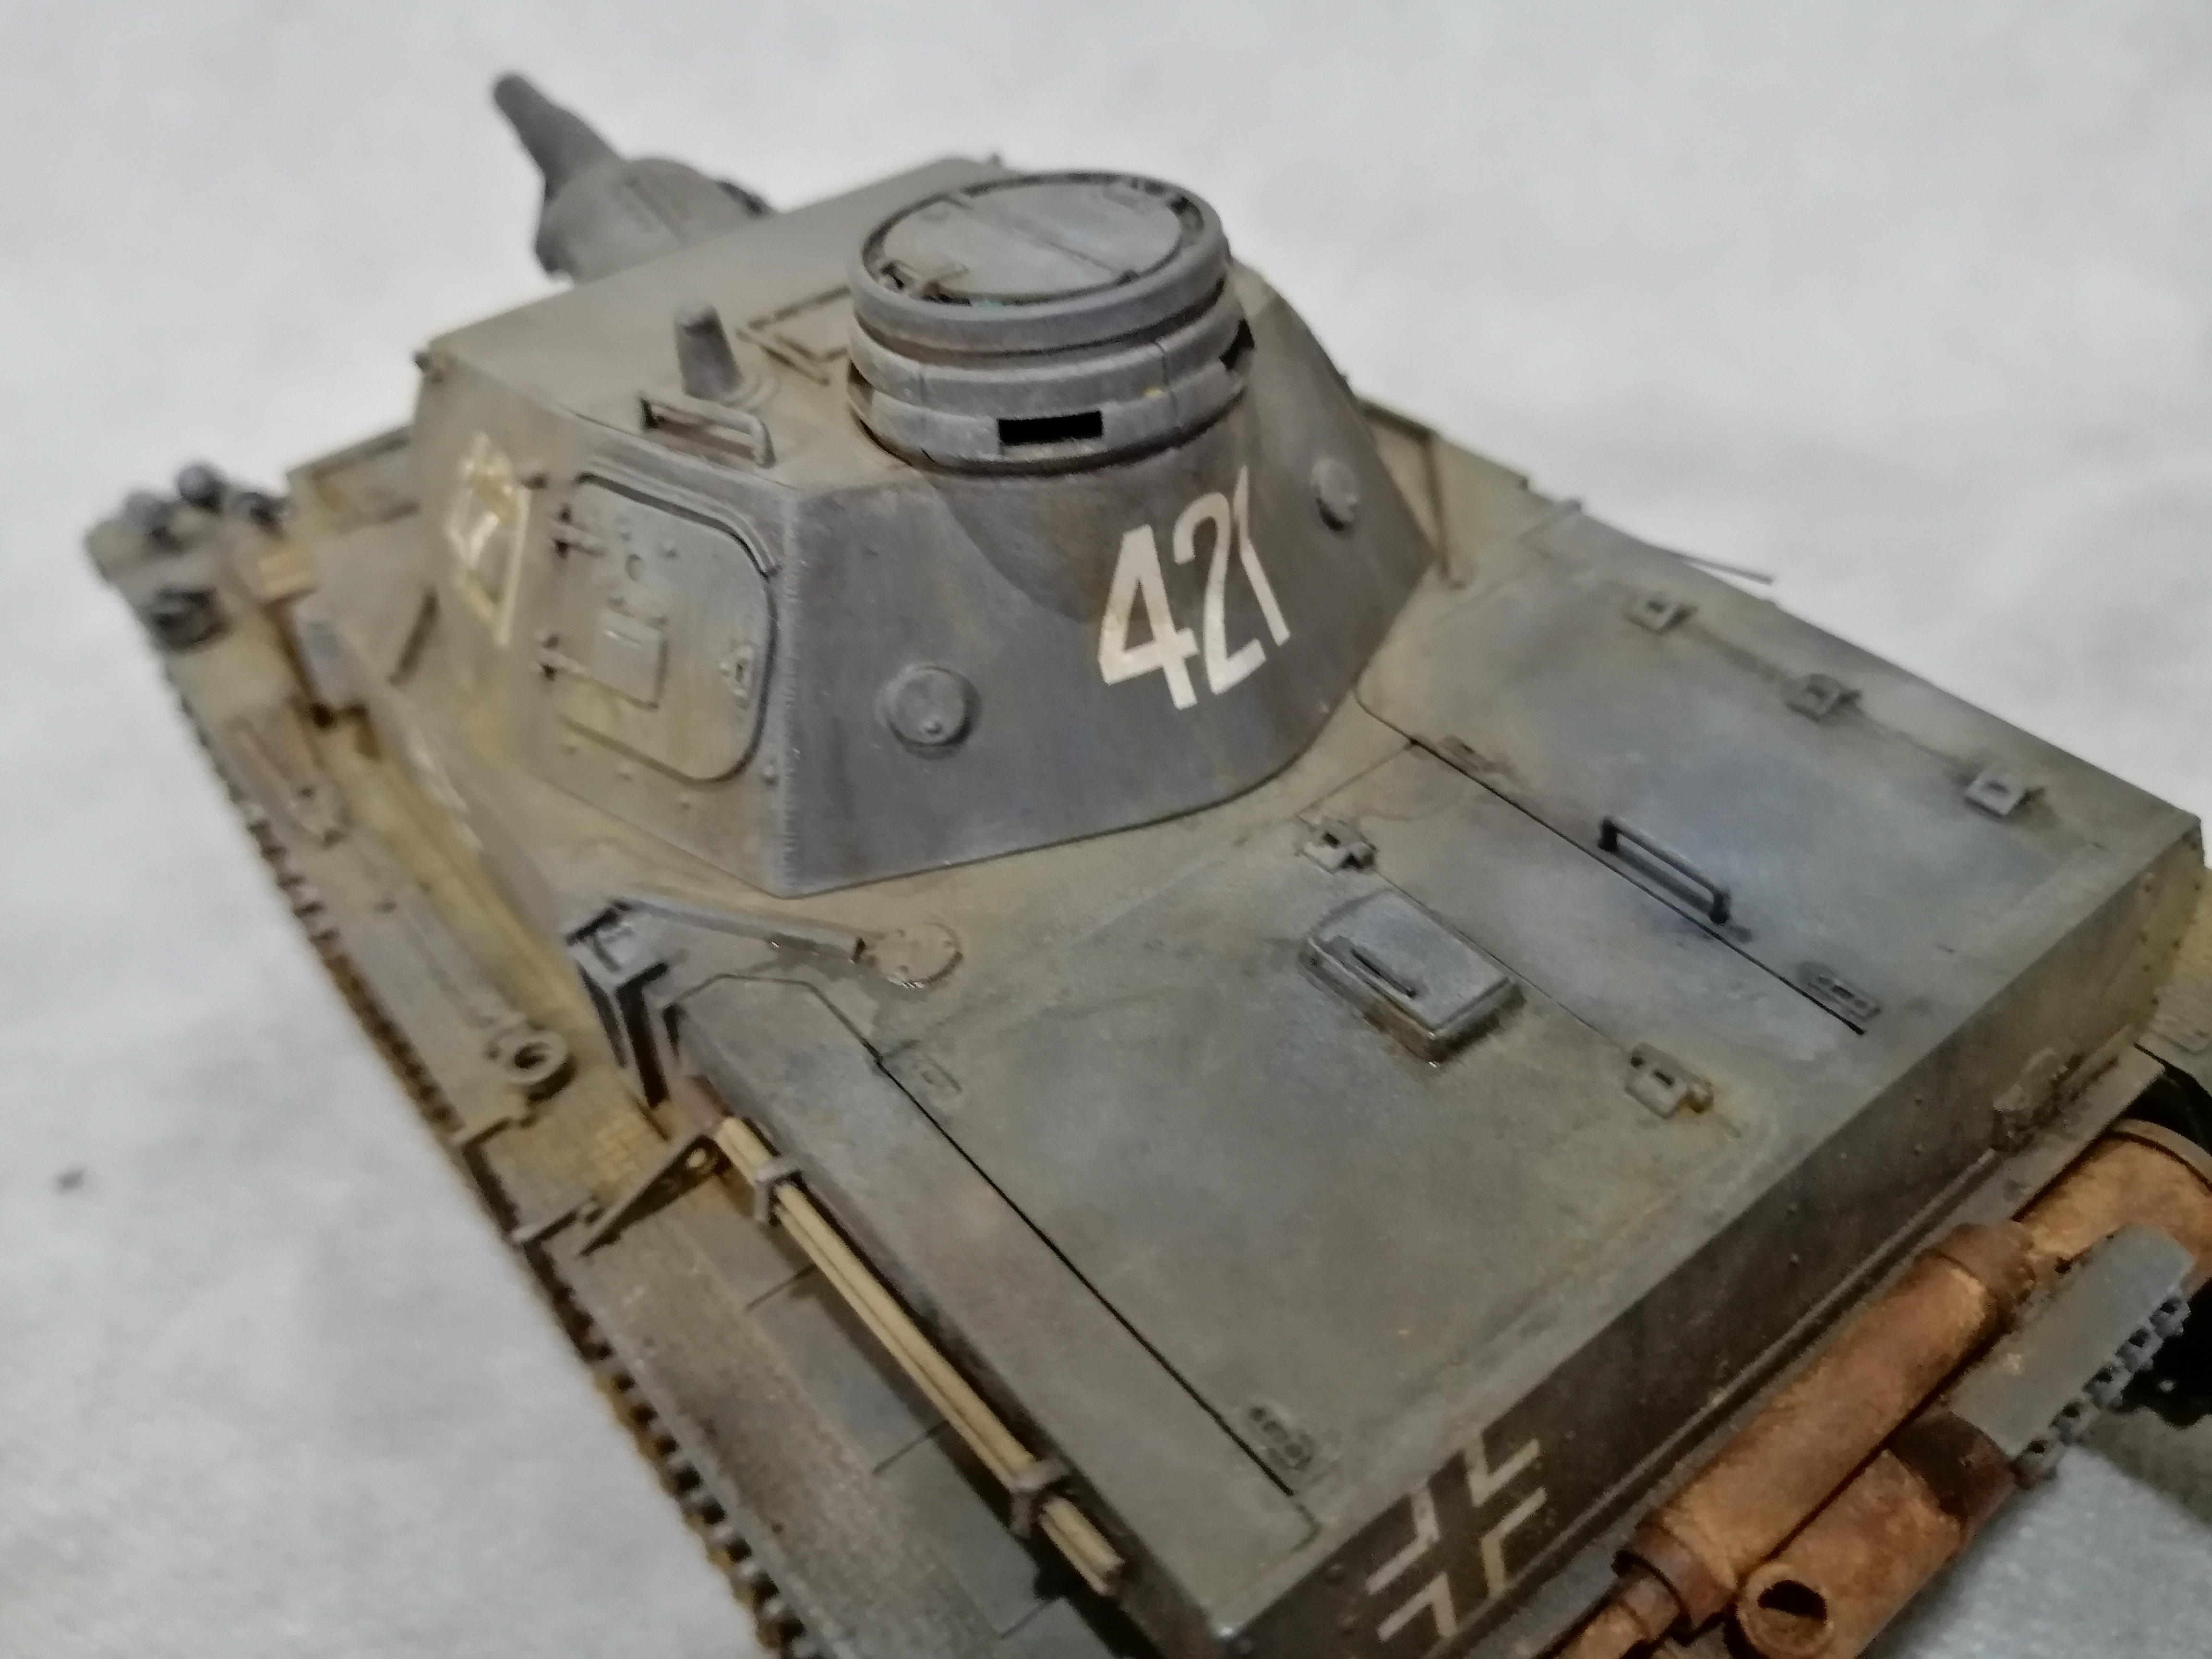
Nigel. I think it looks fantastic. Pigments are hard to work with as you really have little control over them especially if mixed with a fixer. I really only use them for tracks these days, and rely on paint for the dust effect when needed. When I do add them elsewhere, I use a small brush and slowly add them to crevices, etc, building up layers rather than trying to add a one coat coverage. Like everything in the hobby, it takes practice to get the effect you like.
On the Bench:
Dust, styrene scraps, paint splotches and tears.
#453
Texas, United States
Joined: August 28, 2016
KitMaker: 1,925 posts
Armorama: 601 posts
Posted: Monday, October 07, 2019 - 07:30 AM UTC
Nigel,
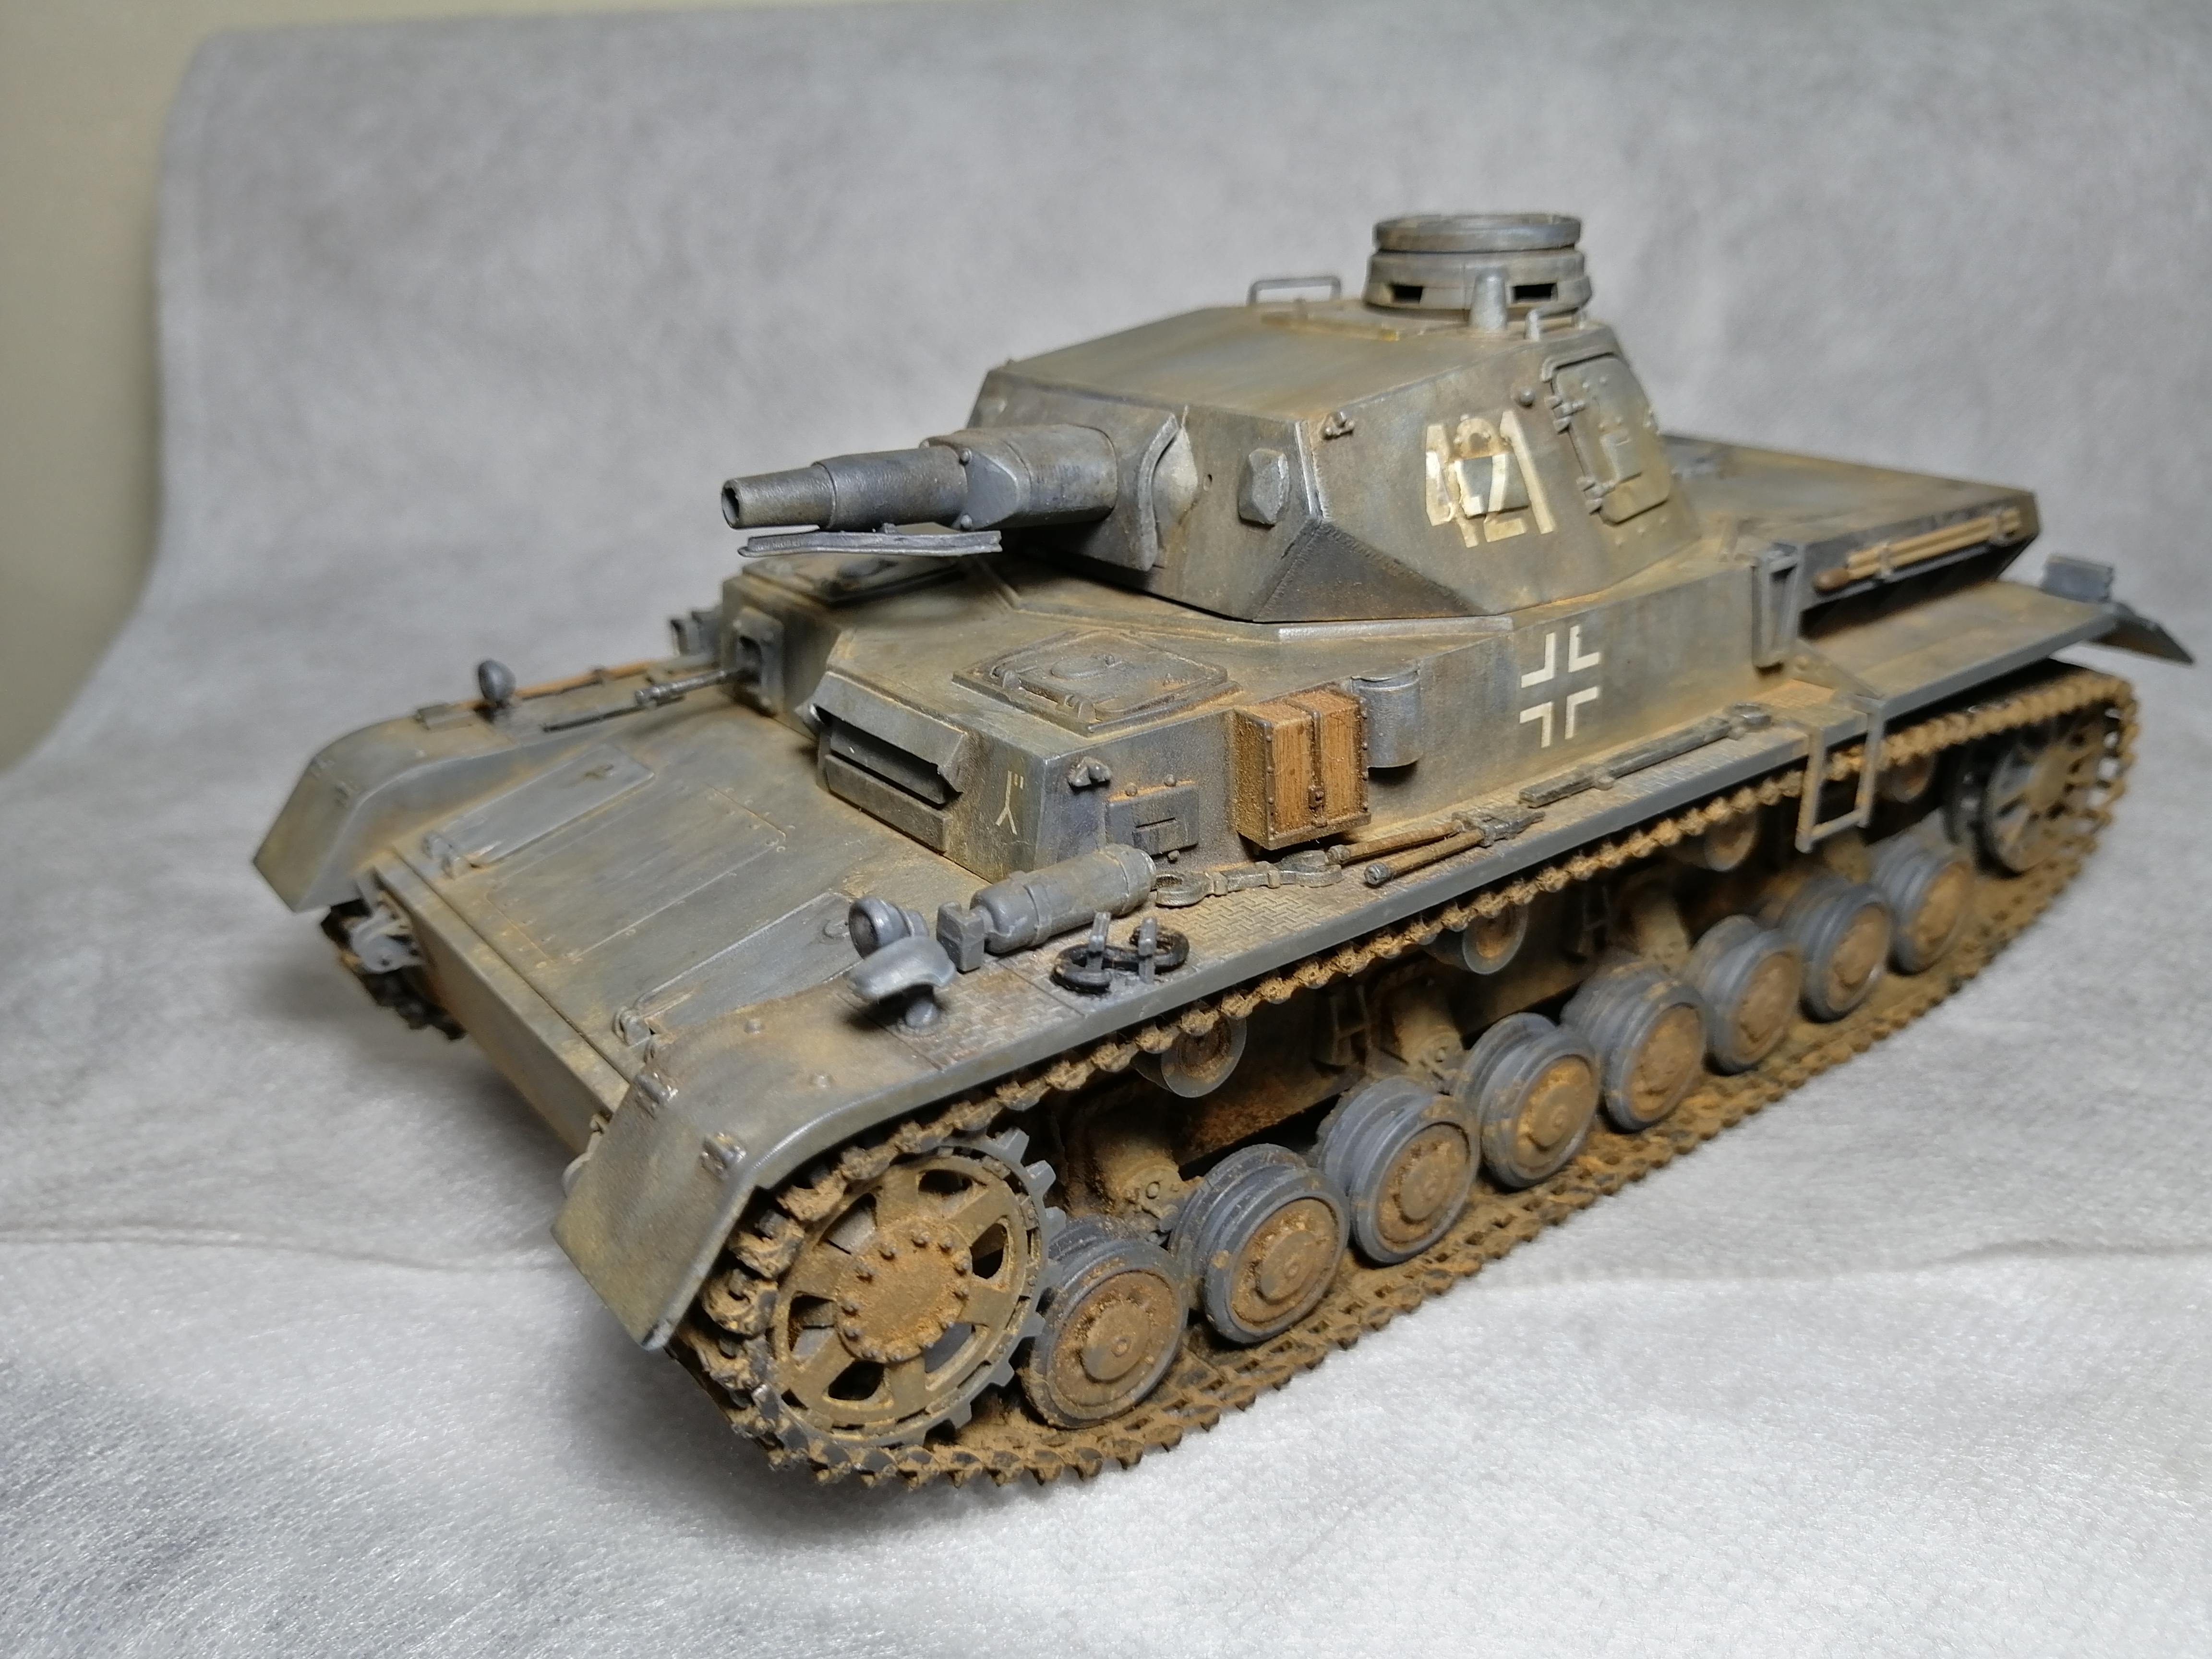
I wouldn't have worried about the amount of dust unless you weren't planning on having a heavy cover. During the drive across France these vehicles didn't have time to be cleaned and collected alot of dirt and dust. The Germans lost a large amount of AFV during that campaign and pressed every serviceable vehicle to keep moving and fighting. Compared to photos of Panzer IVs in Russia yours looks well maintained.
Mark

Texas, United States
Joined: February 22, 2008
KitMaker: 5,026 posts
Armorama: 1,604 posts
Posted: Monday, October 07, 2019 - 09:56 AM UTC
Nigel. she looks good.
Bob
If it aint broke dont fix it.
Texas, United States
Joined: February 22, 2008
KitMaker: 5,026 posts
Armorama: 1,604 posts
Posted: Tuesday, October 08, 2019 - 12:37 PM UTC
OK! Where is the gallery? I could not find it anywhere.
Bob
If it aint broke dont fix it.
Queensland, Australia
Joined: August 06, 2005
KitMaker: 3,353 posts
Armorama: 3,121 posts
Posted: Wednesday, October 09, 2019 - 12:07 AM UTC
Quoted Text
OK! Where is the gallery? I could not find it anywhere.
Bob
Here Bob:
Go to 'Gallery' (link on right side of the page). Then click on 'Campaigns', followed by '2019 Campaigns', and lastly 'France 1940' is near the bottom.
Direct link:
https://gallery.kitmaker.net/showgallery.php/cat/31723On the Bench:
Dust, styrene scraps, paint splotches and tears.
Texas, United States
Joined: February 22, 2008
KitMaker: 5,026 posts
Armorama: 1,604 posts
Posted: Wednesday, October 09, 2019 - 04:44 AM UTC
If it aint broke dont fix it.
TimReynaga
Associate Editor California, United States
Joined: May 03, 2006
KitMaker: 2,500 posts
Armorama: 297 posts
Posted: Friday, October 11, 2019 - 12:33 AM UTC

Quoted Text
Tim: Wow. This one is really neat. I do not know what is more difficult. Building such a small thing or painting it! I would go for the round turret version!
Oliver
Hi Oliver,
Yes, I like the round (Berliet style) cast turret too. Brengun provided decals and illustrations to depict any of five vehicles. Three of these have the cast turret, and two are from 1940. I found the multicolor French Air Force scheme to be more interesting than the plain gray German machine.

Some of the schemes appear to be derived from Steve Zalogas 1988 book, The Renault FT Light Tank (Osprey Vanguard No. 46), such as the Renault FT Char Canon of the French Air Force, used for airfield security in 1940:

According to Zaloga, these FTs used the usual cocarde (roundel) insignia and, were repainted in the late 1930s with the French scheme typical of that period, an ochre color somewhat darker than the Great War shade, with red-brown and dark green horizontal bands.
TimReynaga
Associate Editor California, United States
Joined: May 03, 2006
KitMaker: 2,500 posts
Armorama: 297 posts
Posted: Friday, October 11, 2019 - 01:20 PM UTC
Painting starts with an airbrushed coat of Tamiya Desert Yellow acrylic (XF-59) with some yellow added...


then Tamiya Deep Green (XF-26), Red Brown (XF-64), and Dark Grey acrylics (XF-24) were applied by brush.


Brenguns decals are amazingly petite and dead sharp, with the colorful roundels printed beautifully.