Golden Memories (campaign idea)
Nordrhein-Westfalen, Germany
Joined: March 22, 2015
KitMaker: 671 posts
Armorama: 45 posts
Posted: Friday, March 20, 2020 - 02:04 AM UTC
Kalin: Great work on that BTR. Looks already very nice, even without weathering.
Angel: Wow! I am impressed by all those details You added. An the generator is a real eye-catcher itself!
I started the Marder kit and had some problems with the tracks, as they did not fit exactly. So I cut one link in halves to glue it in. As it will be hidden below the fender, no one will see!
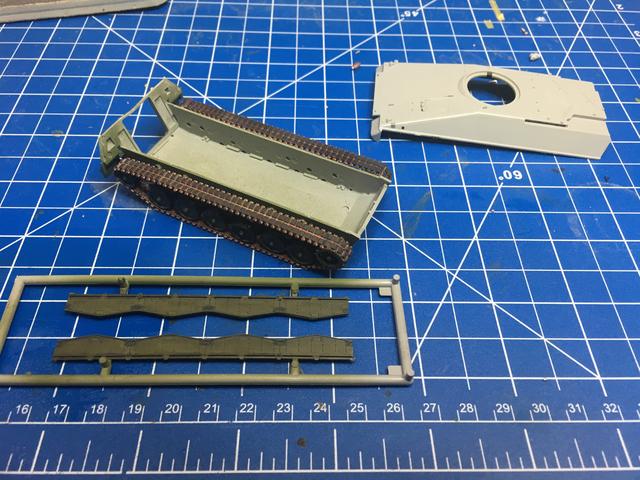
The kit has some impressive details. Even the fenders are detailed on the inside.
The tracks were the only trap of the kit. The fitting of the other parts was excellent.
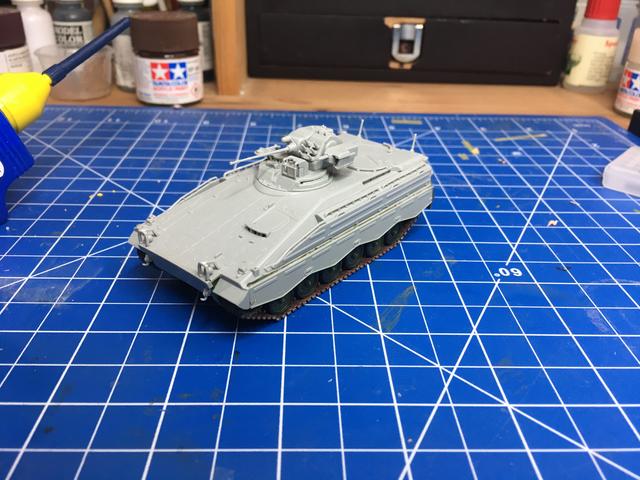
First color and modulation is now on. Next will be the weathering part.
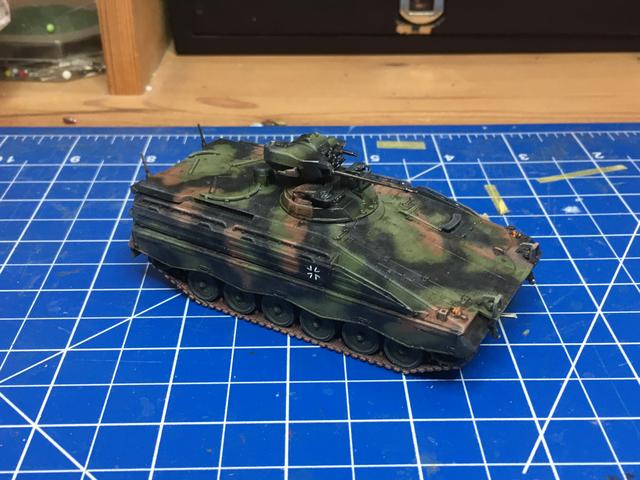
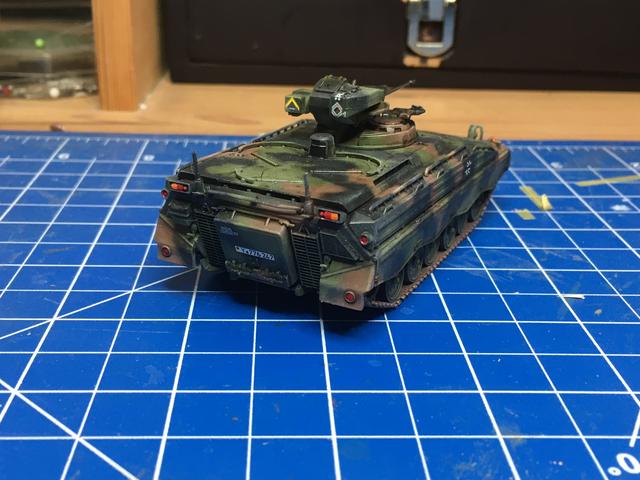
Keep on building!
Oliver

On the desk: Probably a Panzer III.
England - South West, United Kingdom
Joined: June 29, 2019
KitMaker: 604 posts
Armorama: 506 posts
Posted: Friday, March 20, 2020 - 03:10 AM UTC
Oliver, that Marder is looking really great, you got it together very quick and the finish looks great with what you've done, and it does look nicely detailed, very impressed.

#490
Sofiya, Bulgaria
Joined: September 22, 2016
KitMaker: 1,432 posts
Armorama: 1,390 posts
Posted: Friday, March 20, 2020 - 03:25 AM UTC
Thanks Oliver!
Kudos for the workaround you found with the track fit issue.
Your Marder looks the part- even without weathering!

Queensland, Australia
Joined: August 06, 2005
KitMaker: 3,353 posts
Armorama: 3,121 posts
Posted: Friday, March 20, 2020 - 08:26 AM UTC
Looking fantastic Oliver.
On the Bench:
Dust, styrene scraps, paint splotches and tears.

#490
Sofiya, Bulgaria
Joined: September 22, 2016
KitMaker: 1,432 posts
Armorama: 1,390 posts
Posted: Saturday, March 21, 2020 - 03:46 AM UTC
Bit more progress on my Deymos build to report:
1.Generator painted
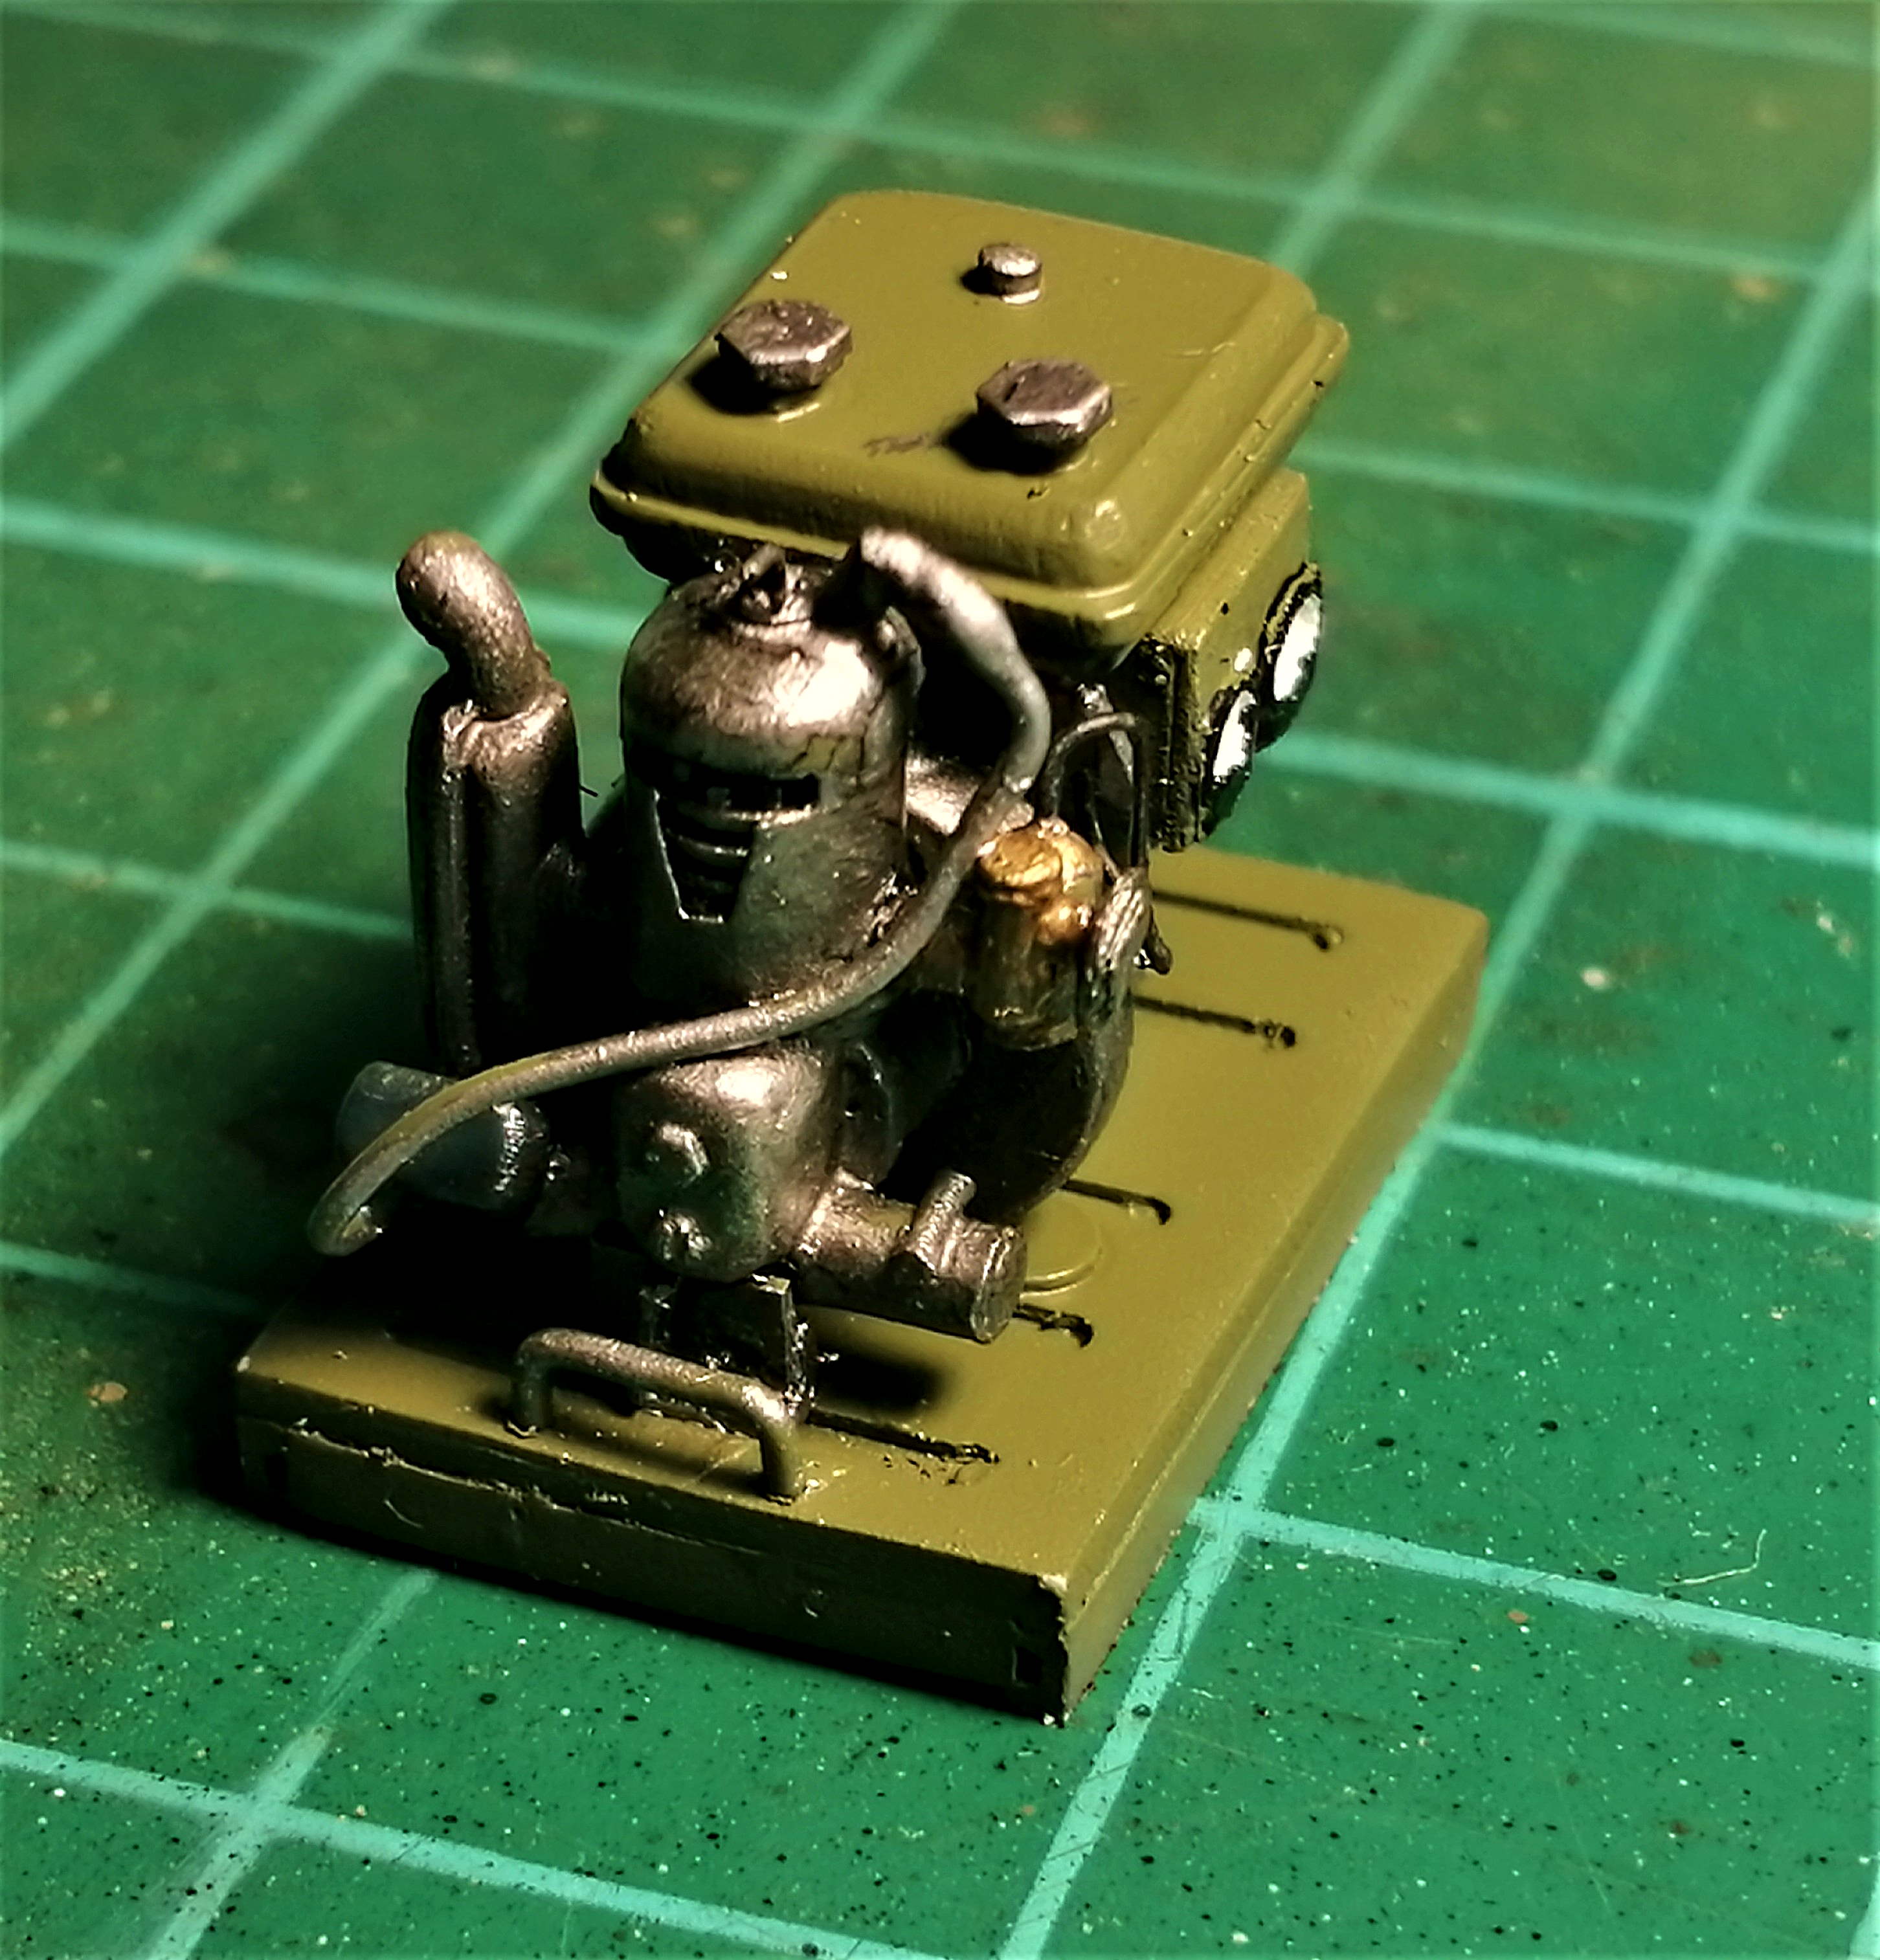
2.Generator compartment built, detailed and painted
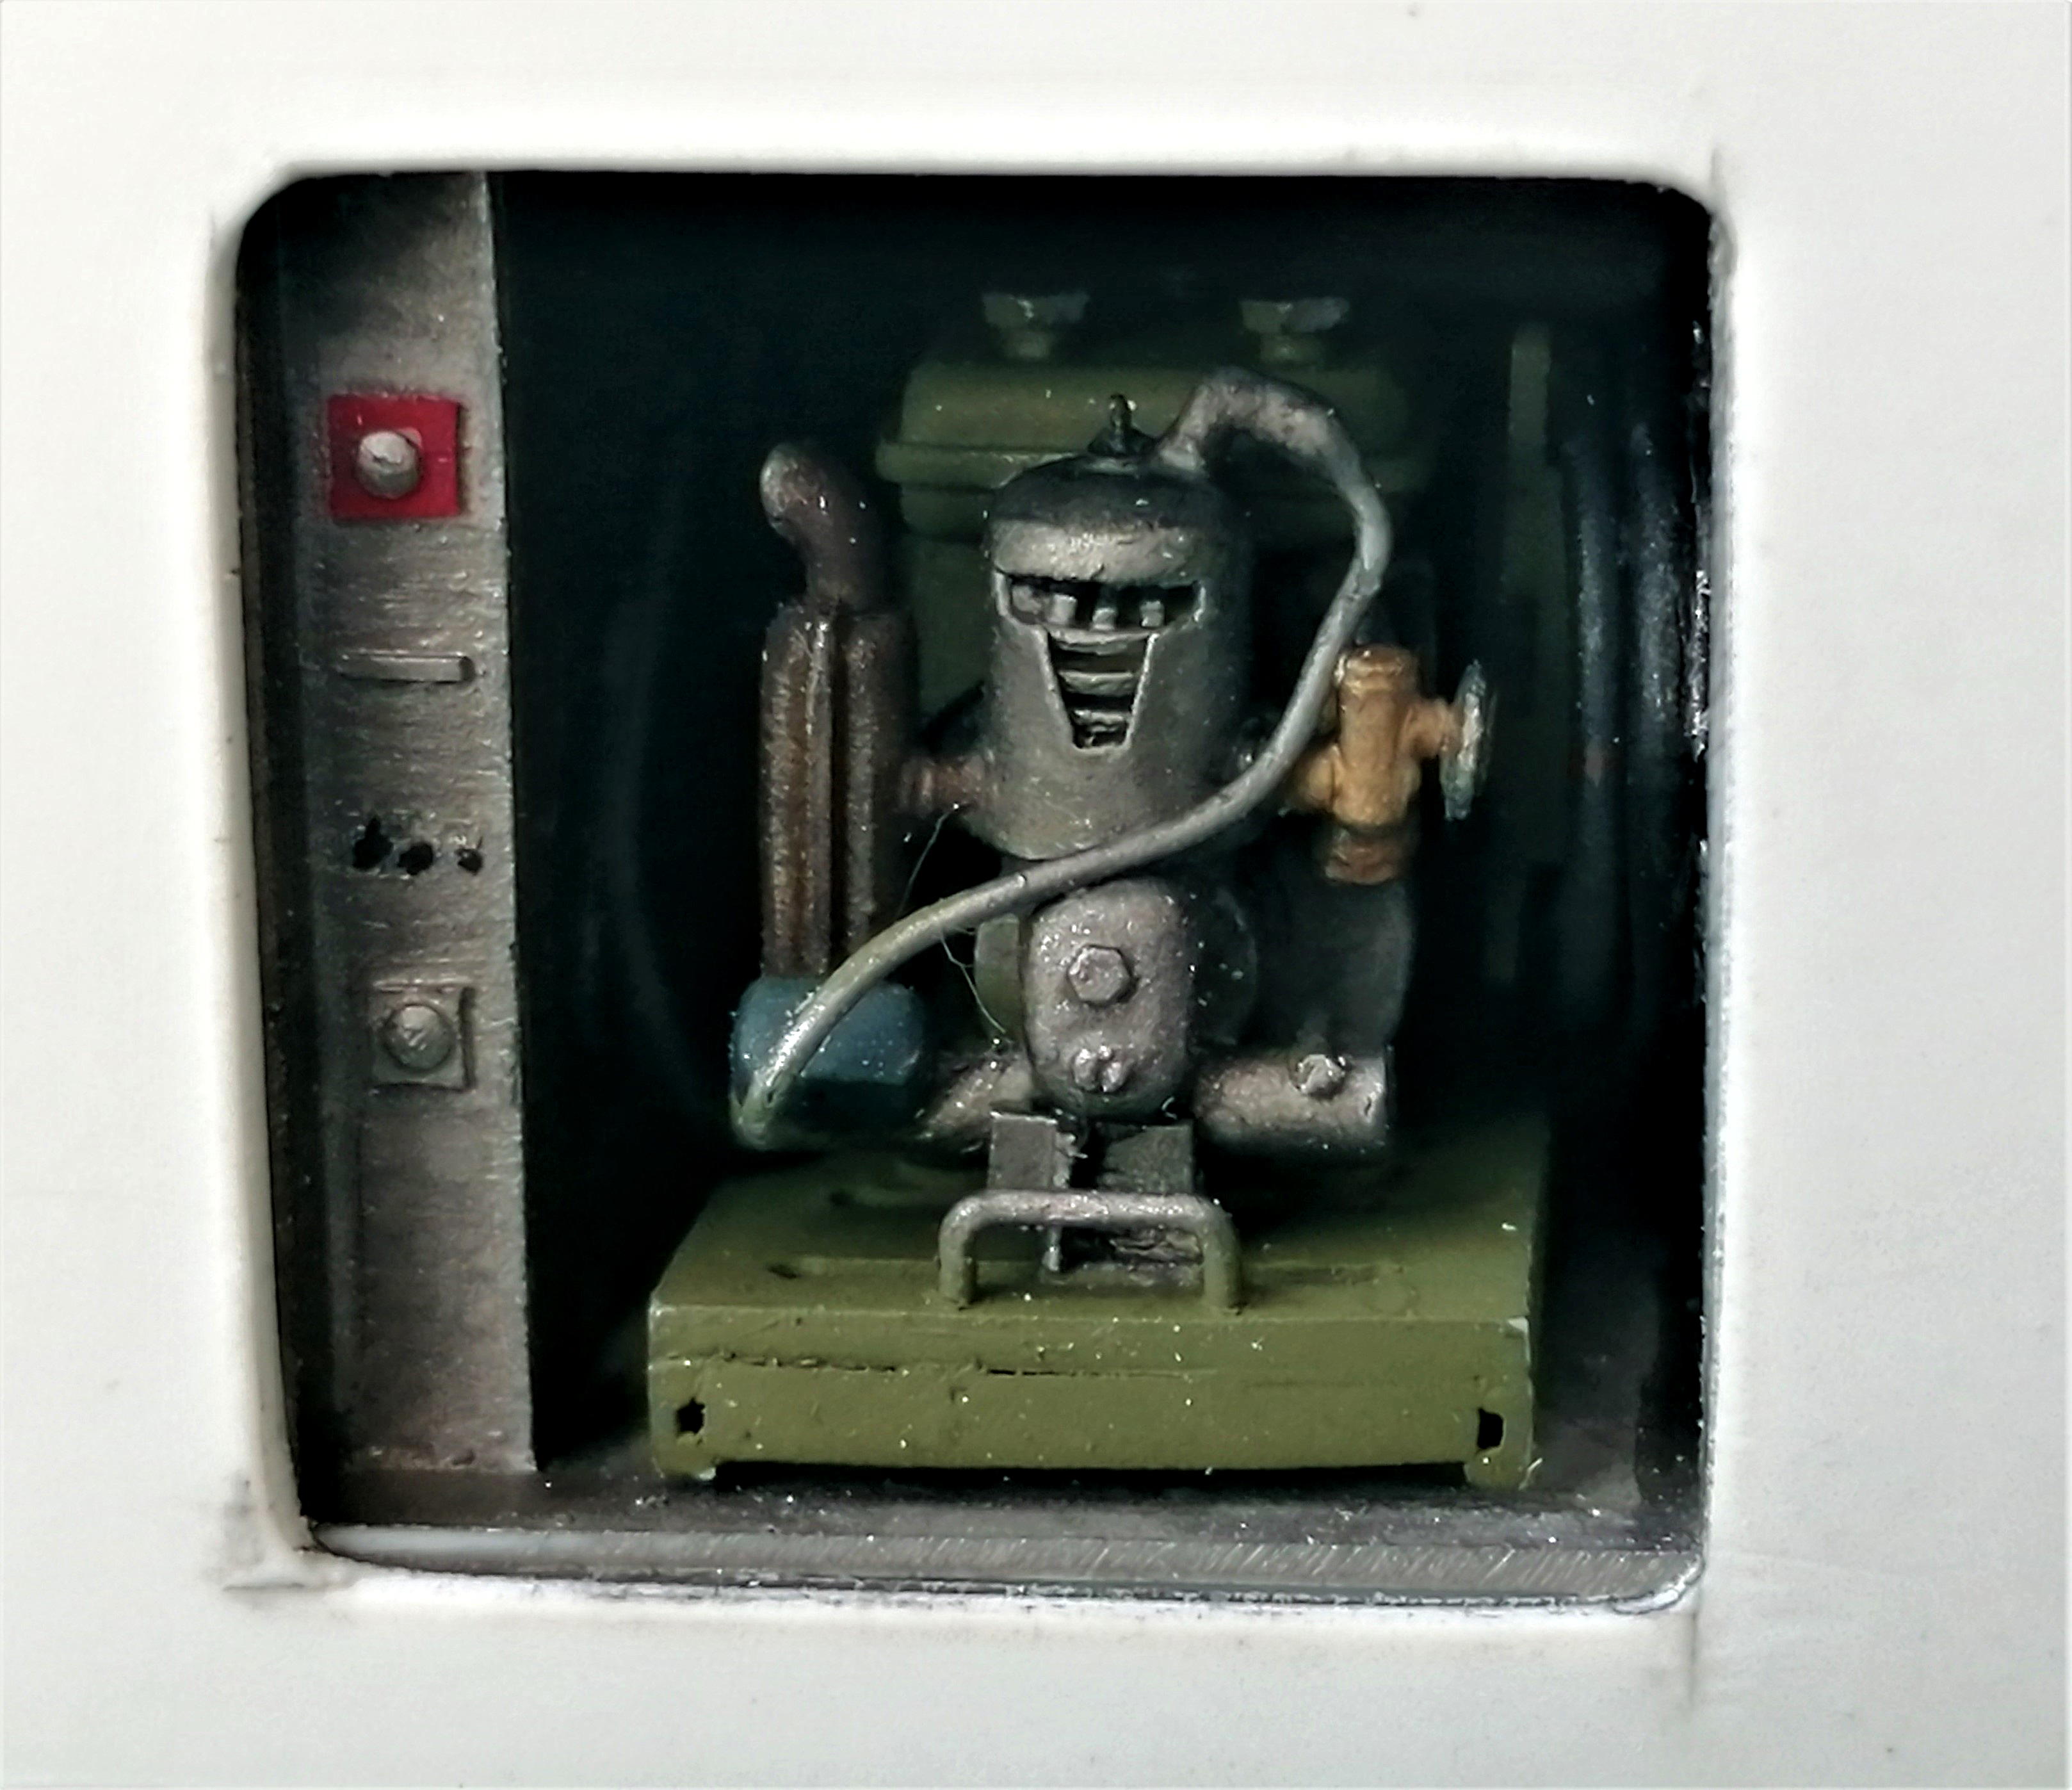
3.Generator compartment installed in box body
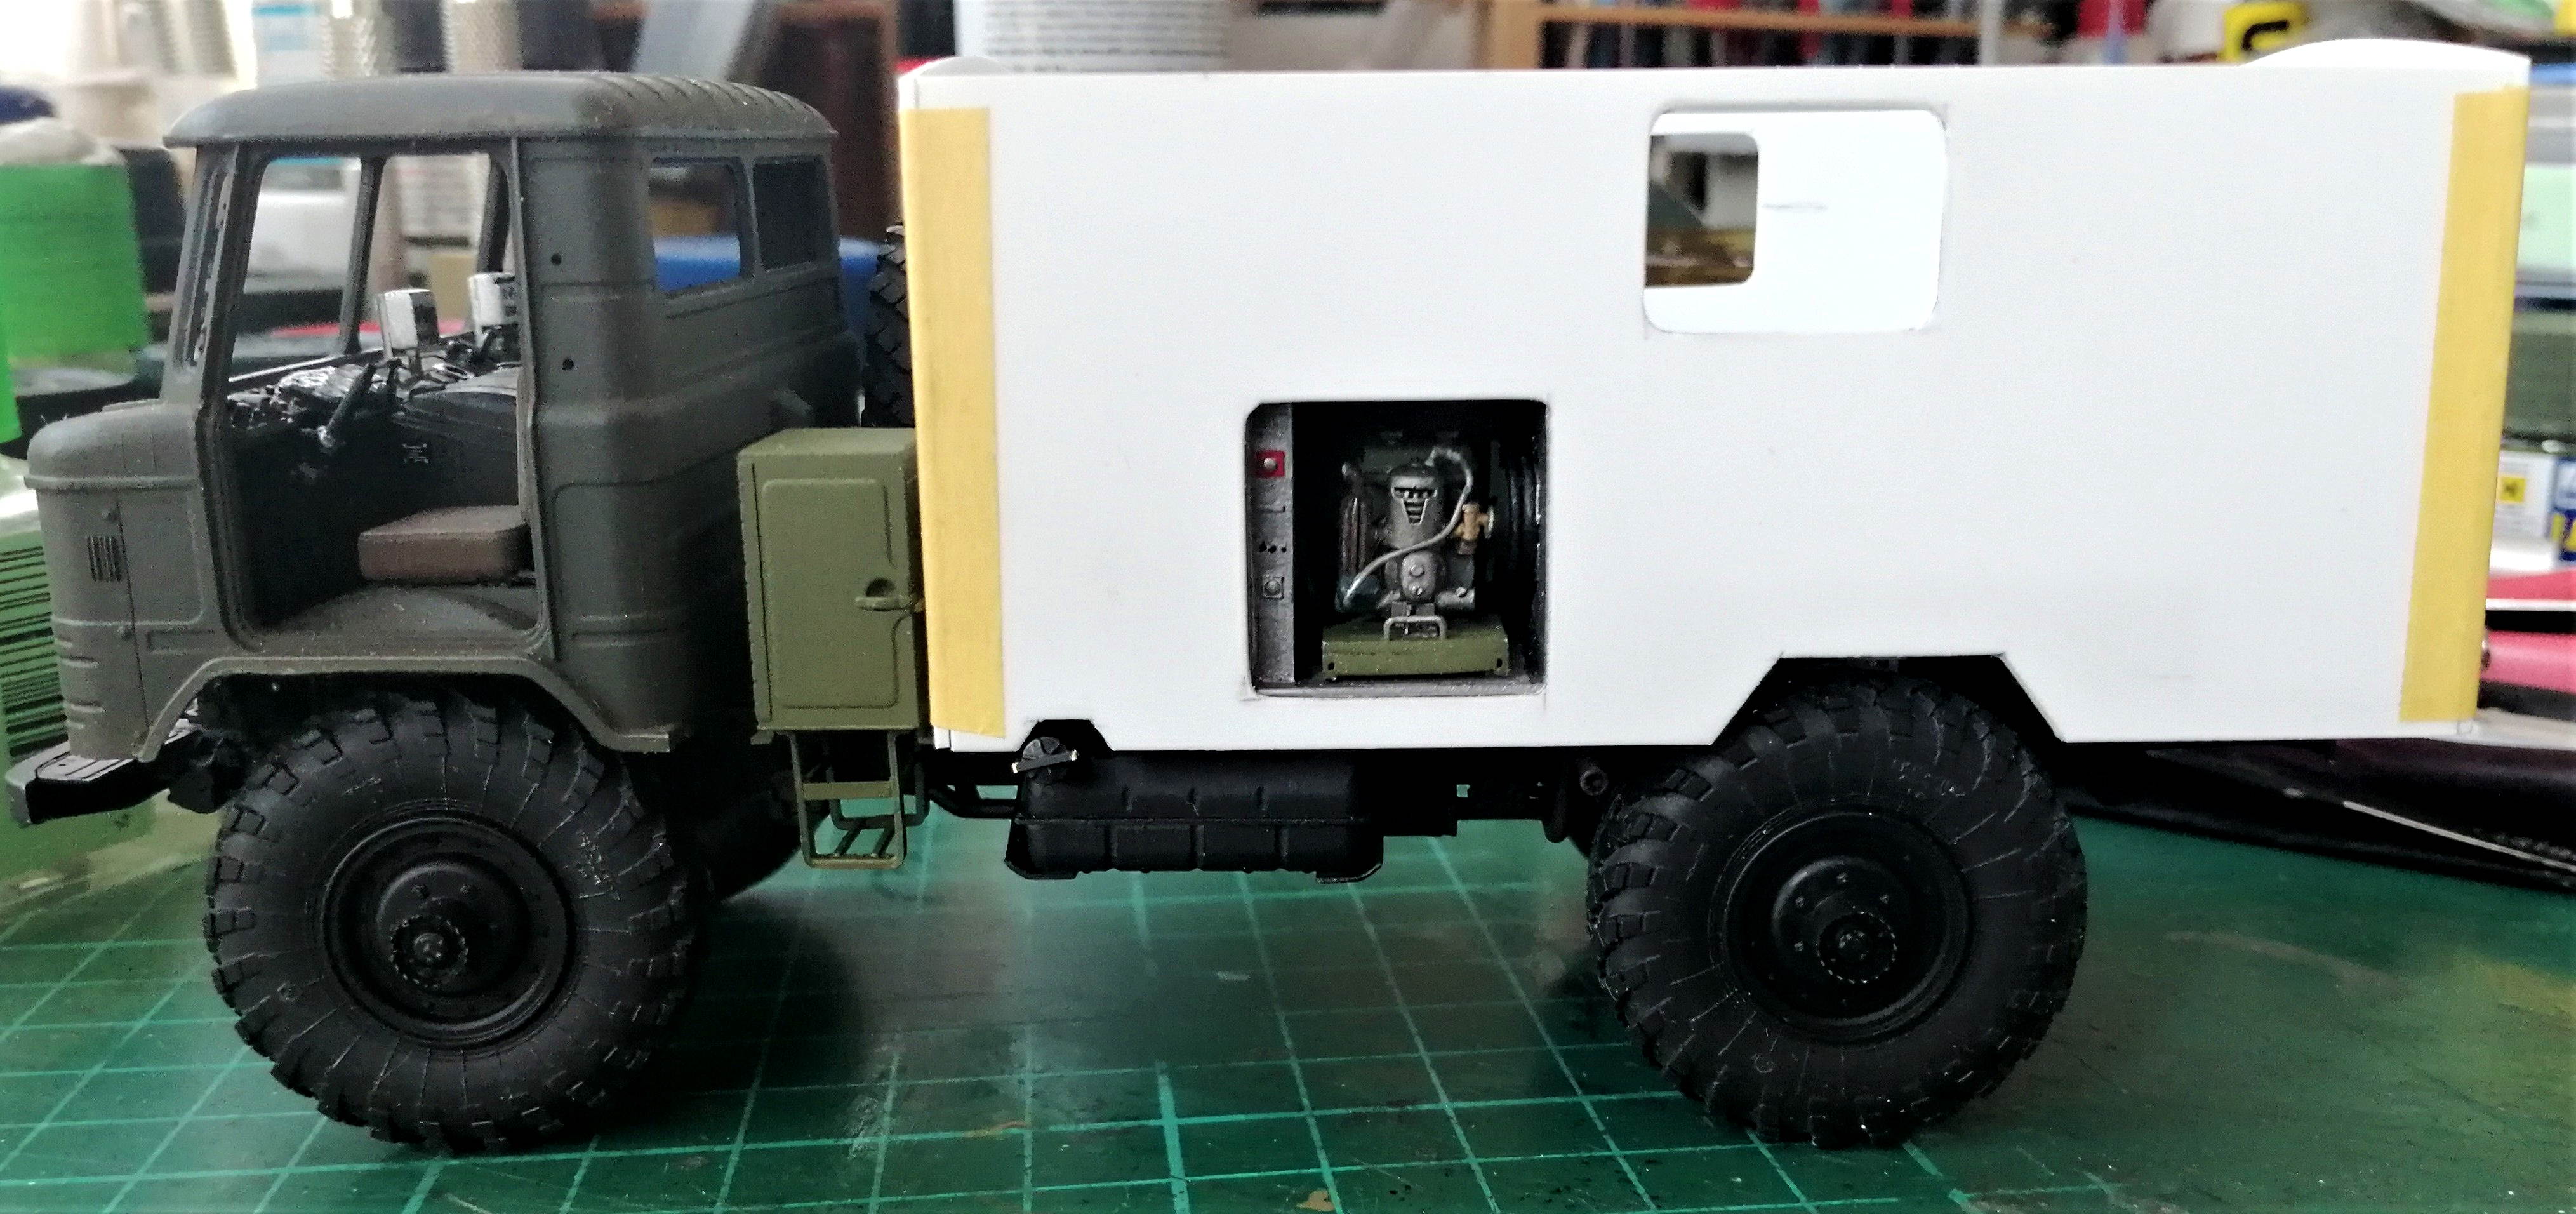
Next I'll work on the radiomen compartment of box body,
Stay safe all,

England - South West, United Kingdom
Joined: June 29, 2019
KitMaker: 604 posts
Armorama: 506 posts
Posted: Saturday, March 21, 2020 - 07:42 AM UTC
Angel, I will say it again, that generator is out of this world. It looks like an actual produced and shop bought model. It's amazing.
Västra Götaland, Sweden
Joined: May 29, 2018
KitMaker: 397 posts
Armorama: 388 posts
Posted: Saturday, March 21, 2020 - 08:33 AM UTC
Angel, you should visit a specialist. Something is seriously wrong with you.


#490
Sofiya, Bulgaria
Joined: September 22, 2016
KitMaker: 1,432 posts
Armorama: 1,390 posts
Posted: Saturday, March 21, 2020 - 08:59 AM UTC
John,
The generator is nothing more than a bunch of Plastruct tubes,rods, angles, channels and sheets, plus some wire.
All cut to size and "machined-by-hand" to fit desired shape.

Bogi,
I'm having a hard time finding The specialist, who will state the opposite

Thanks, mates!


#490
Sofiya, Bulgaria
Joined: September 22, 2016
KitMaker: 1,432 posts
Armorama: 1,390 posts
Posted: Monday, March 23, 2020 - 08:30 AM UTC
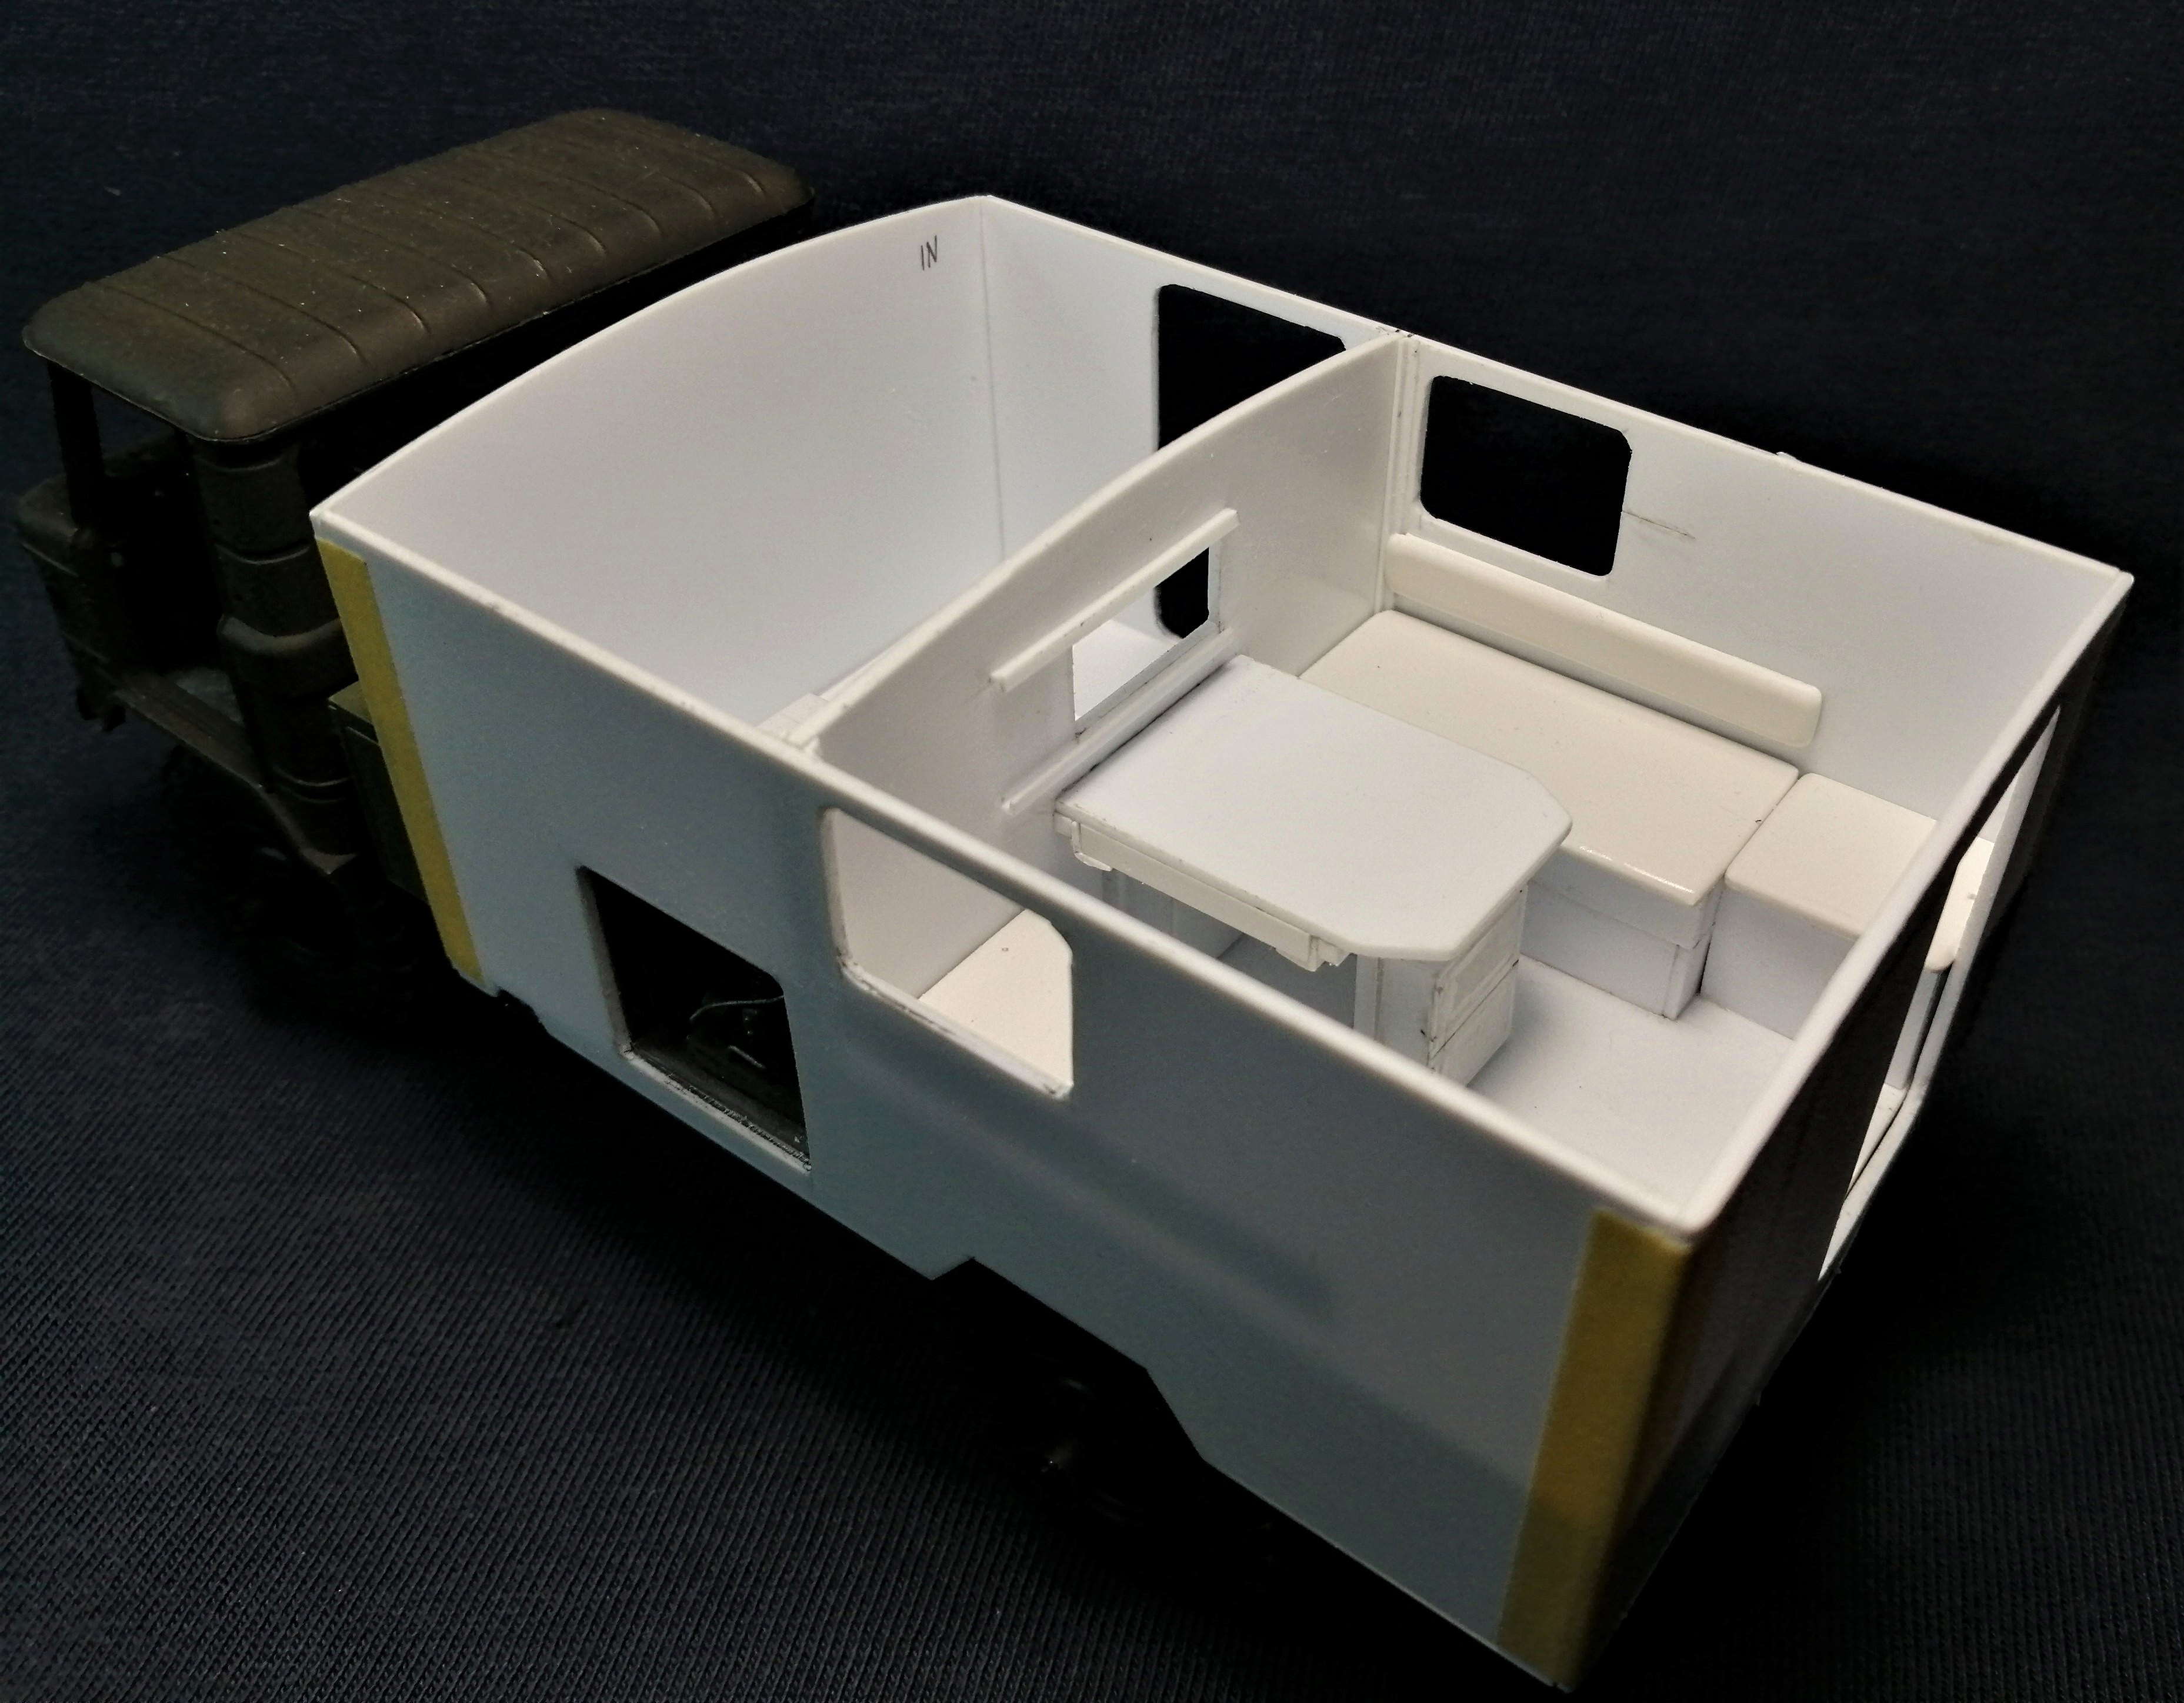
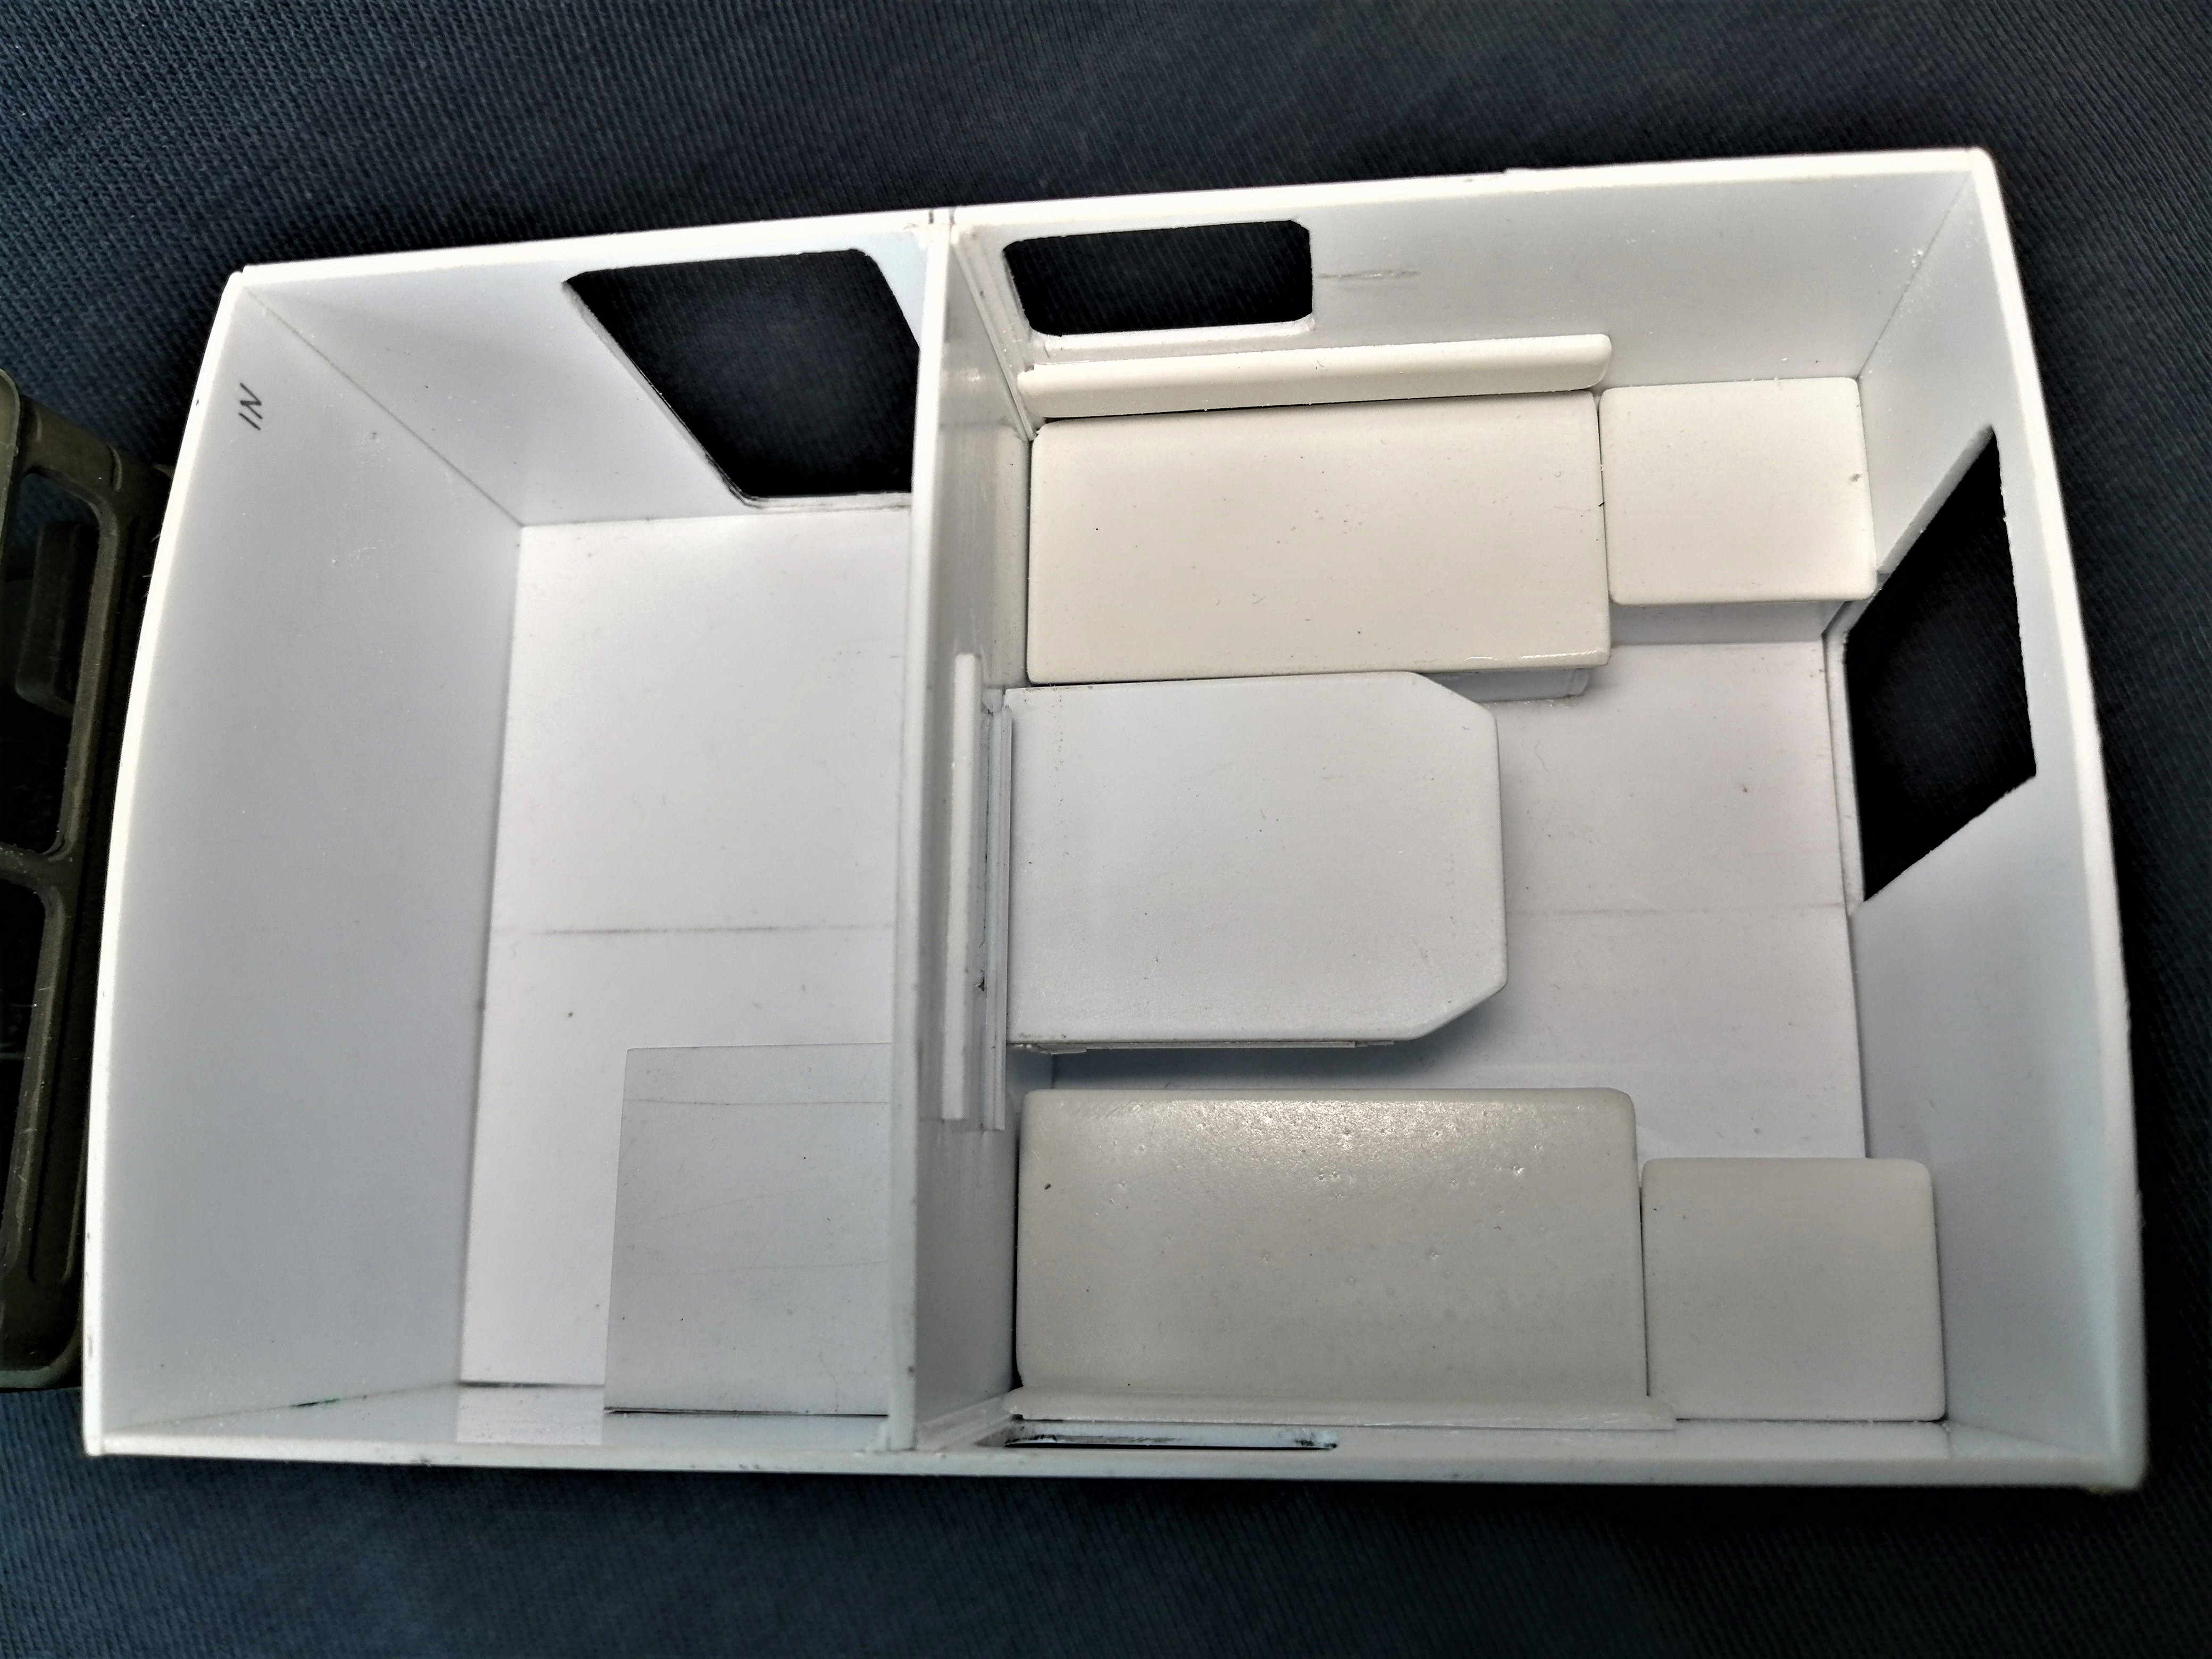
Moving on with the build of the GAZ-66 based R-142N radiotruck, I made the interior wall, that separates radiomen and HQ compartments and did some construction in HQ compartment.
In the HQ compartment I've built the benches with their cushions, both battery boxes and the staff table(the table has 2 drawers and 2 document lockers):
Peeking inside HQ compartment through its access door:
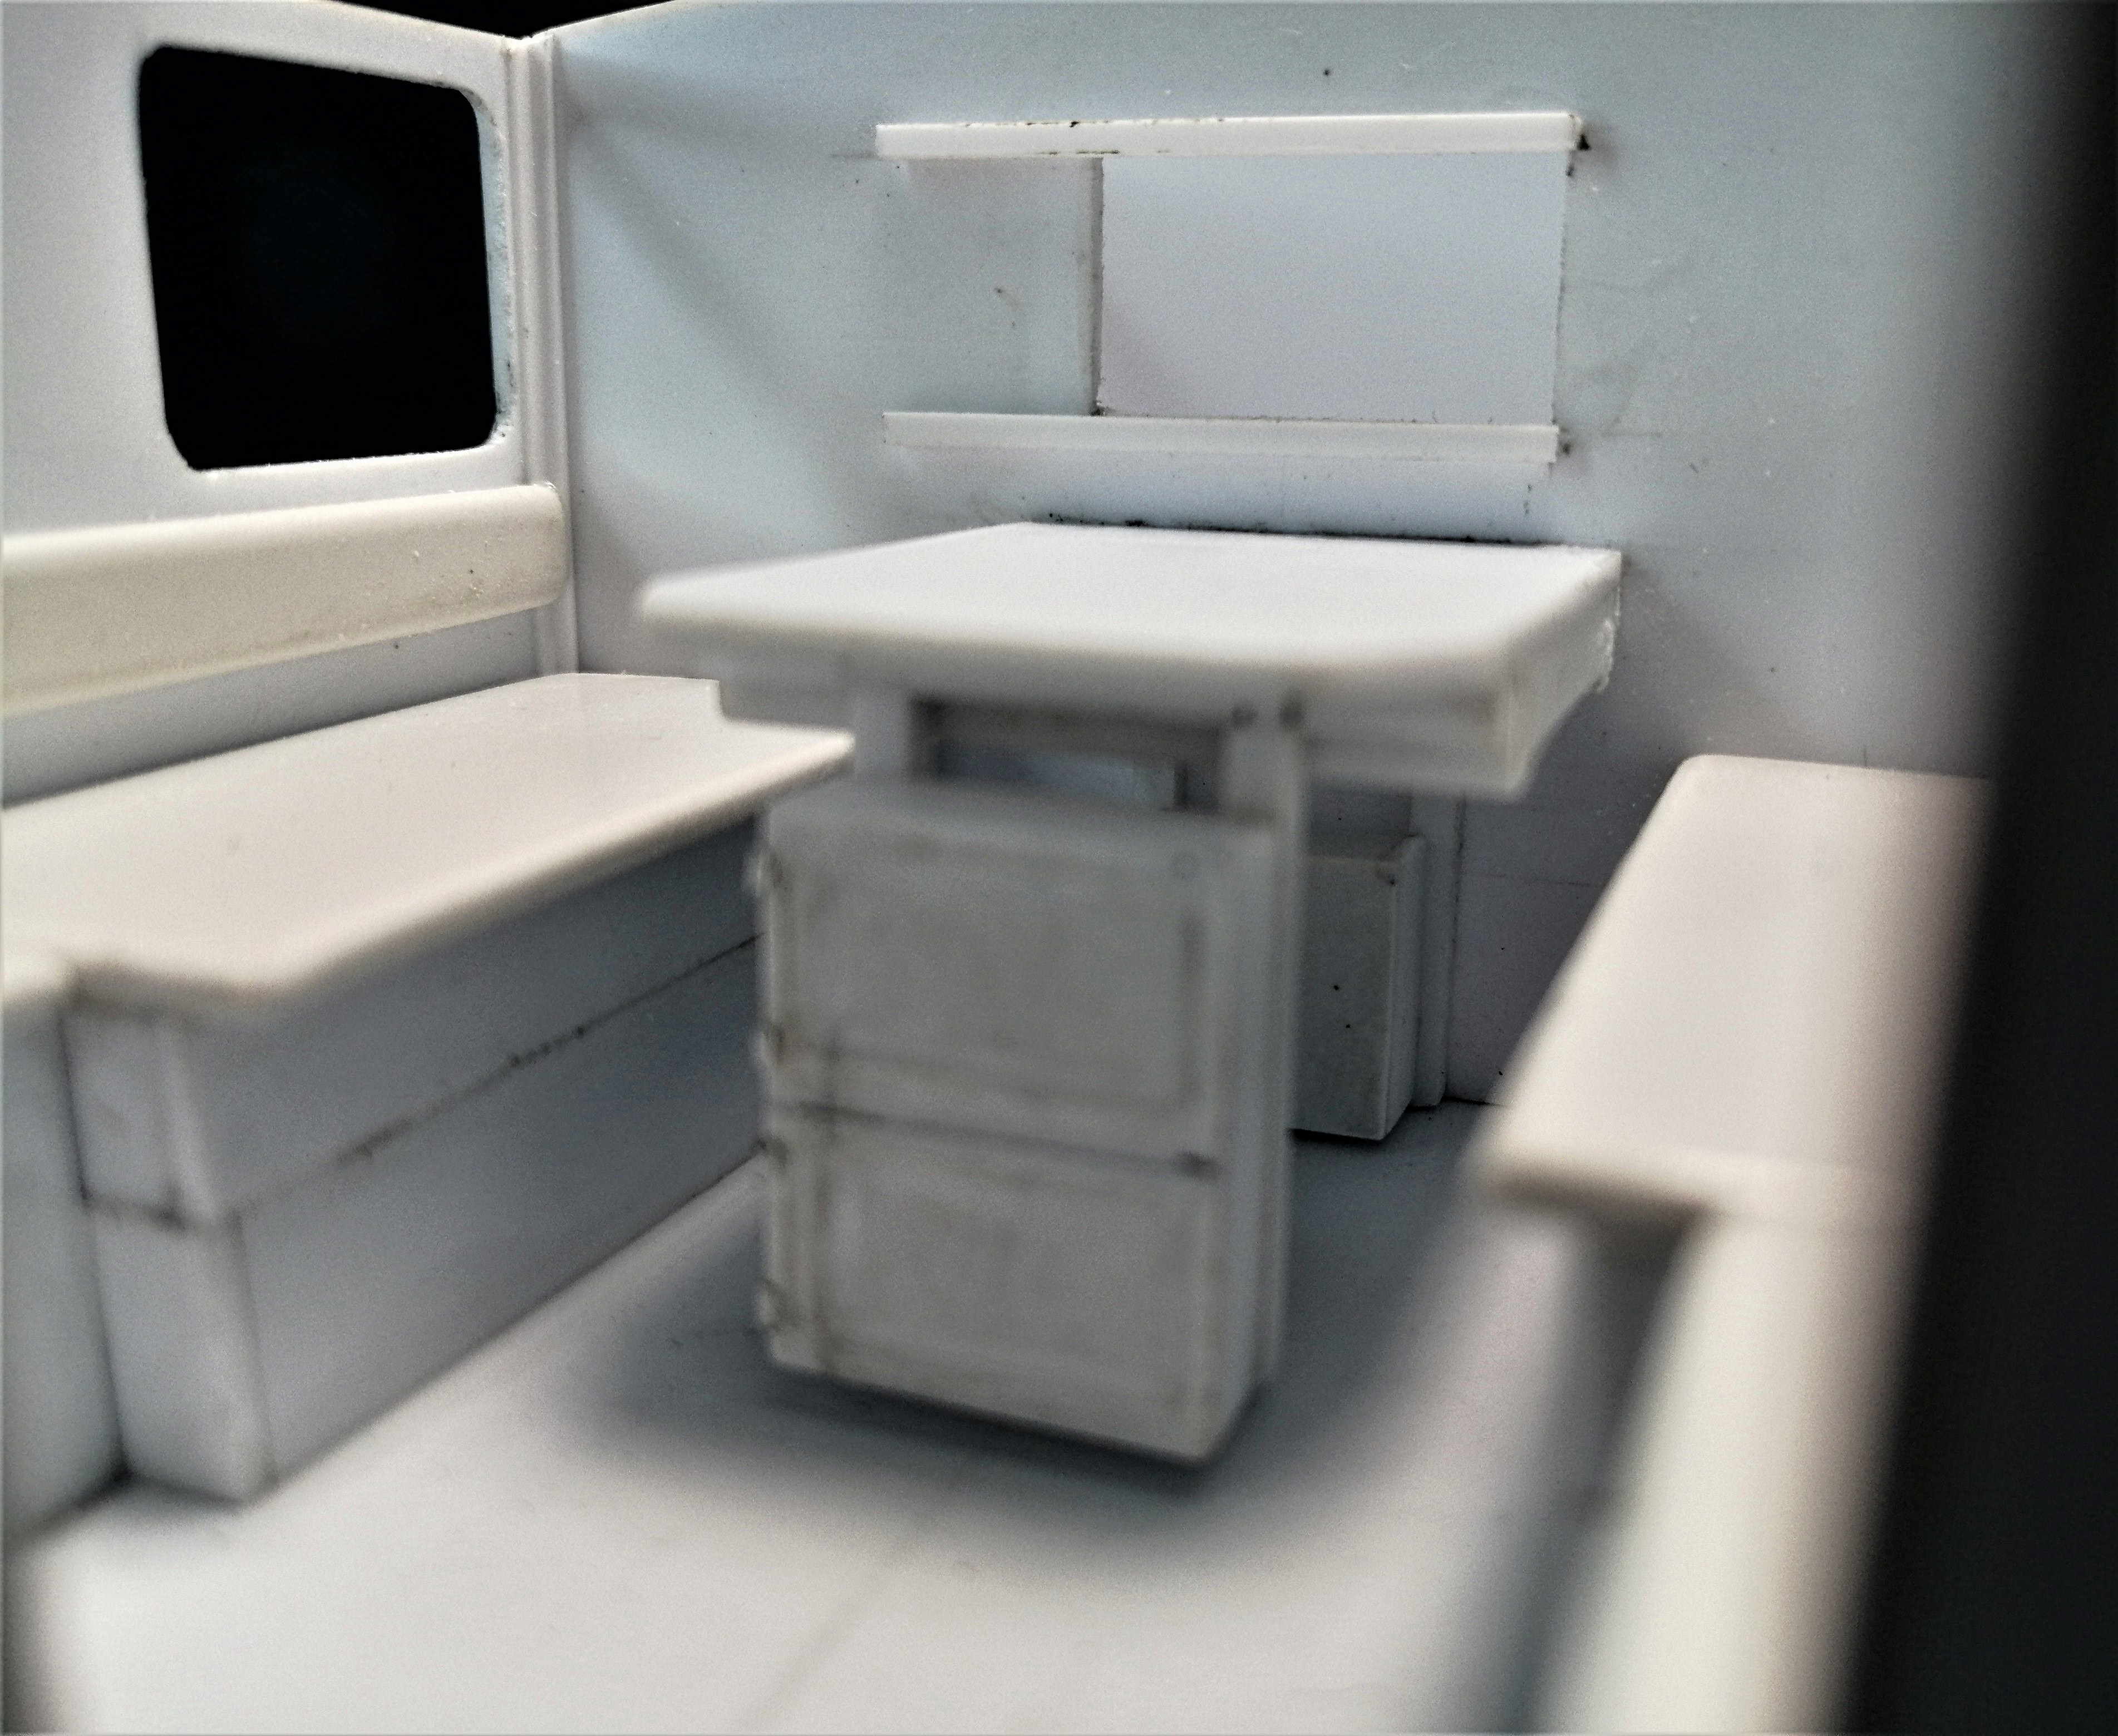
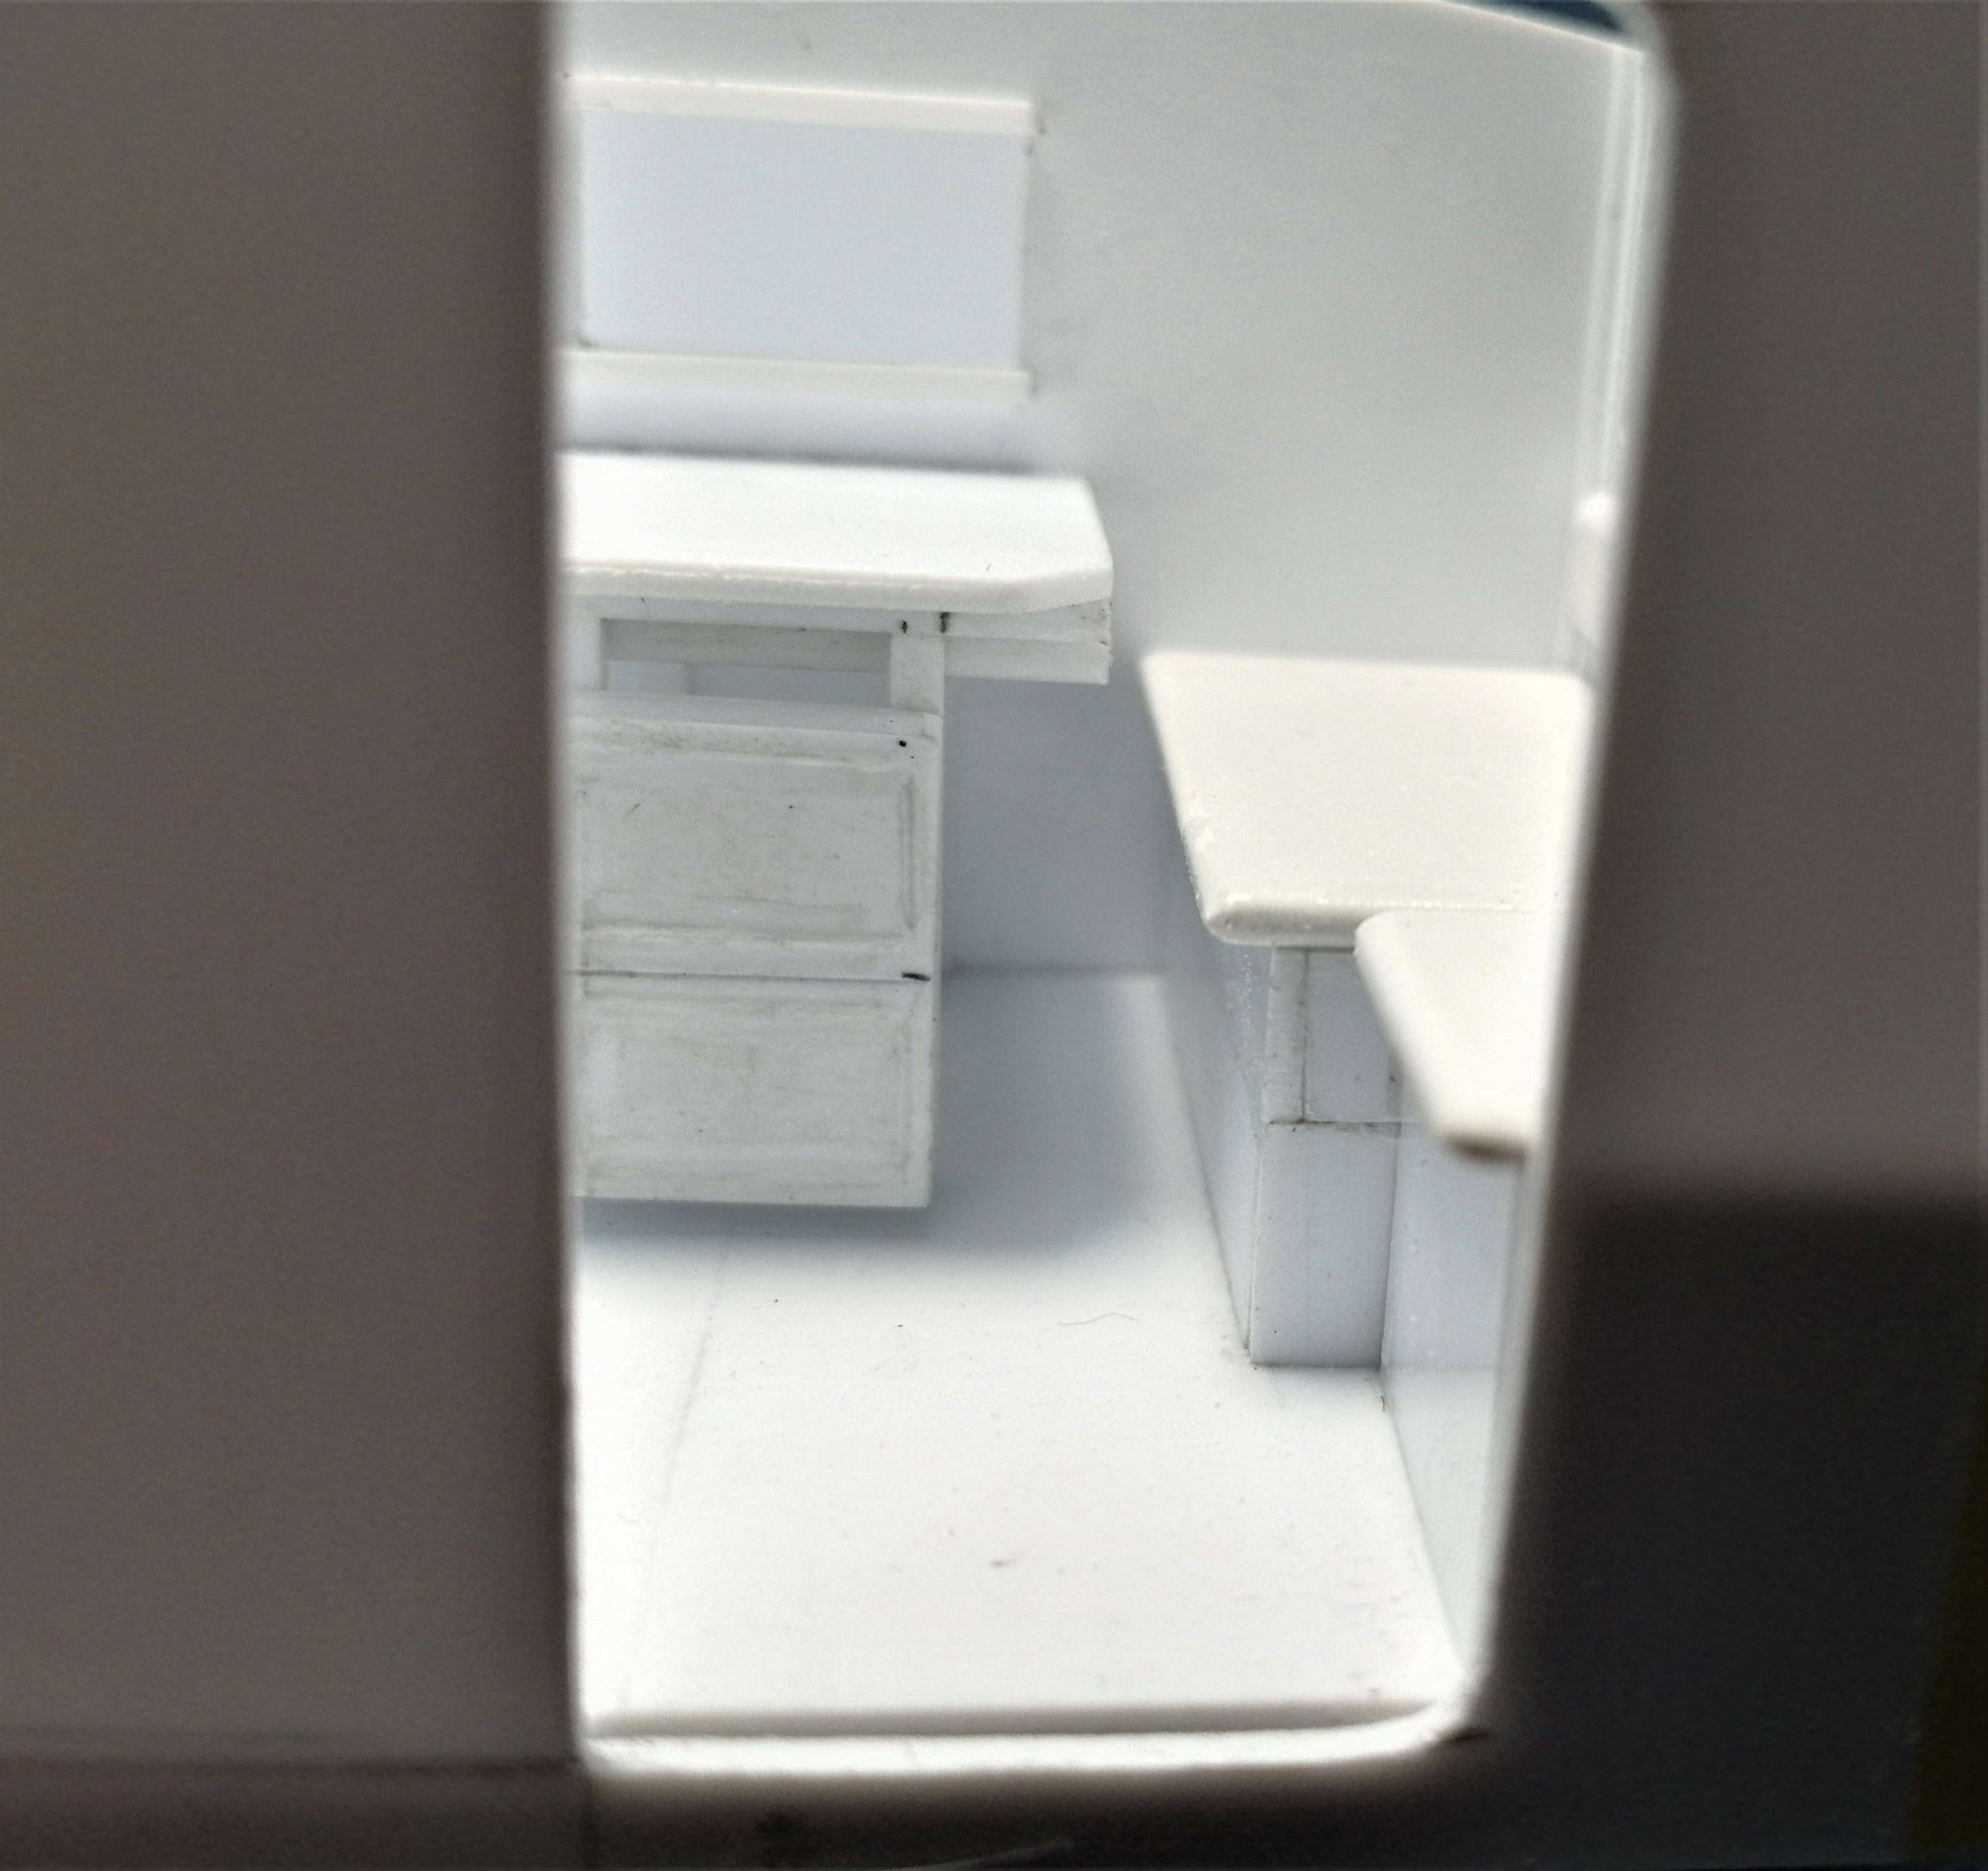
To make painting possible at all, the interior wall is not glued in place, but is sliding in 2 "channels" made by angles.Thus it can be removed for painting and weathering.The staff table is glued to the interior wall, so it moves with it.
All other features are glued to box bottom, while box walls are only temporarily attached to box bottom to allow taking right measurements for parts that need to be built.
Next will be radiomen bench.
And then the big fun
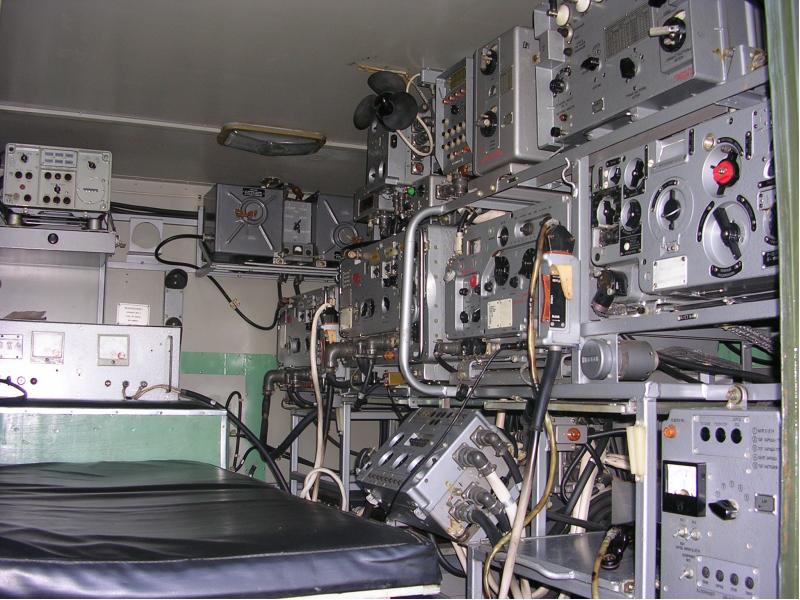
starts


England - South West, United Kingdom
Joined: June 29, 2019
KitMaker: 604 posts
Armorama: 506 posts
Posted: Monday, March 23, 2020 - 08:52 AM UTC
Angel, your Gaz radio truck is inspiring my friend, it's going to be an epic build, and as you do it, I really hope it brings back fond memories of you serving inside one.

#490
Sofiya, Bulgaria
Joined: September 22, 2016
KitMaker: 1,432 posts
Armorama: 1,390 posts
Posted: Monday, March 23, 2020 - 09:43 AM UTC
Yes John, it does bring some memories:
- the bumpy ride of the truck,
- the clatter and the stink of the portable generator,
- the inconvinience of sleeping on the HQ compartment banks.
But above all- the neverending beeping and squeaking of the receivers.
Golden memories, my friend!


Queensland, Australia
Joined: August 06, 2005
KitMaker: 3,353 posts
Armorama: 3,121 posts
Posted: Monday, March 23, 2020 - 09:33 PM UTC
Wow Angel, you certainly have some work ahead of you. What you have done so far is fantastic.
On the Bench:
Dust, styrene scraps, paint splotches and tears.

#490
Sofiya, Bulgaria
Joined: September 22, 2016
KitMaker: 1,432 posts
Armorama: 1,390 posts
Posted: Monday, March 30, 2020 - 07:19 AM UTC
I built the radiomen compartment and the radio rack:
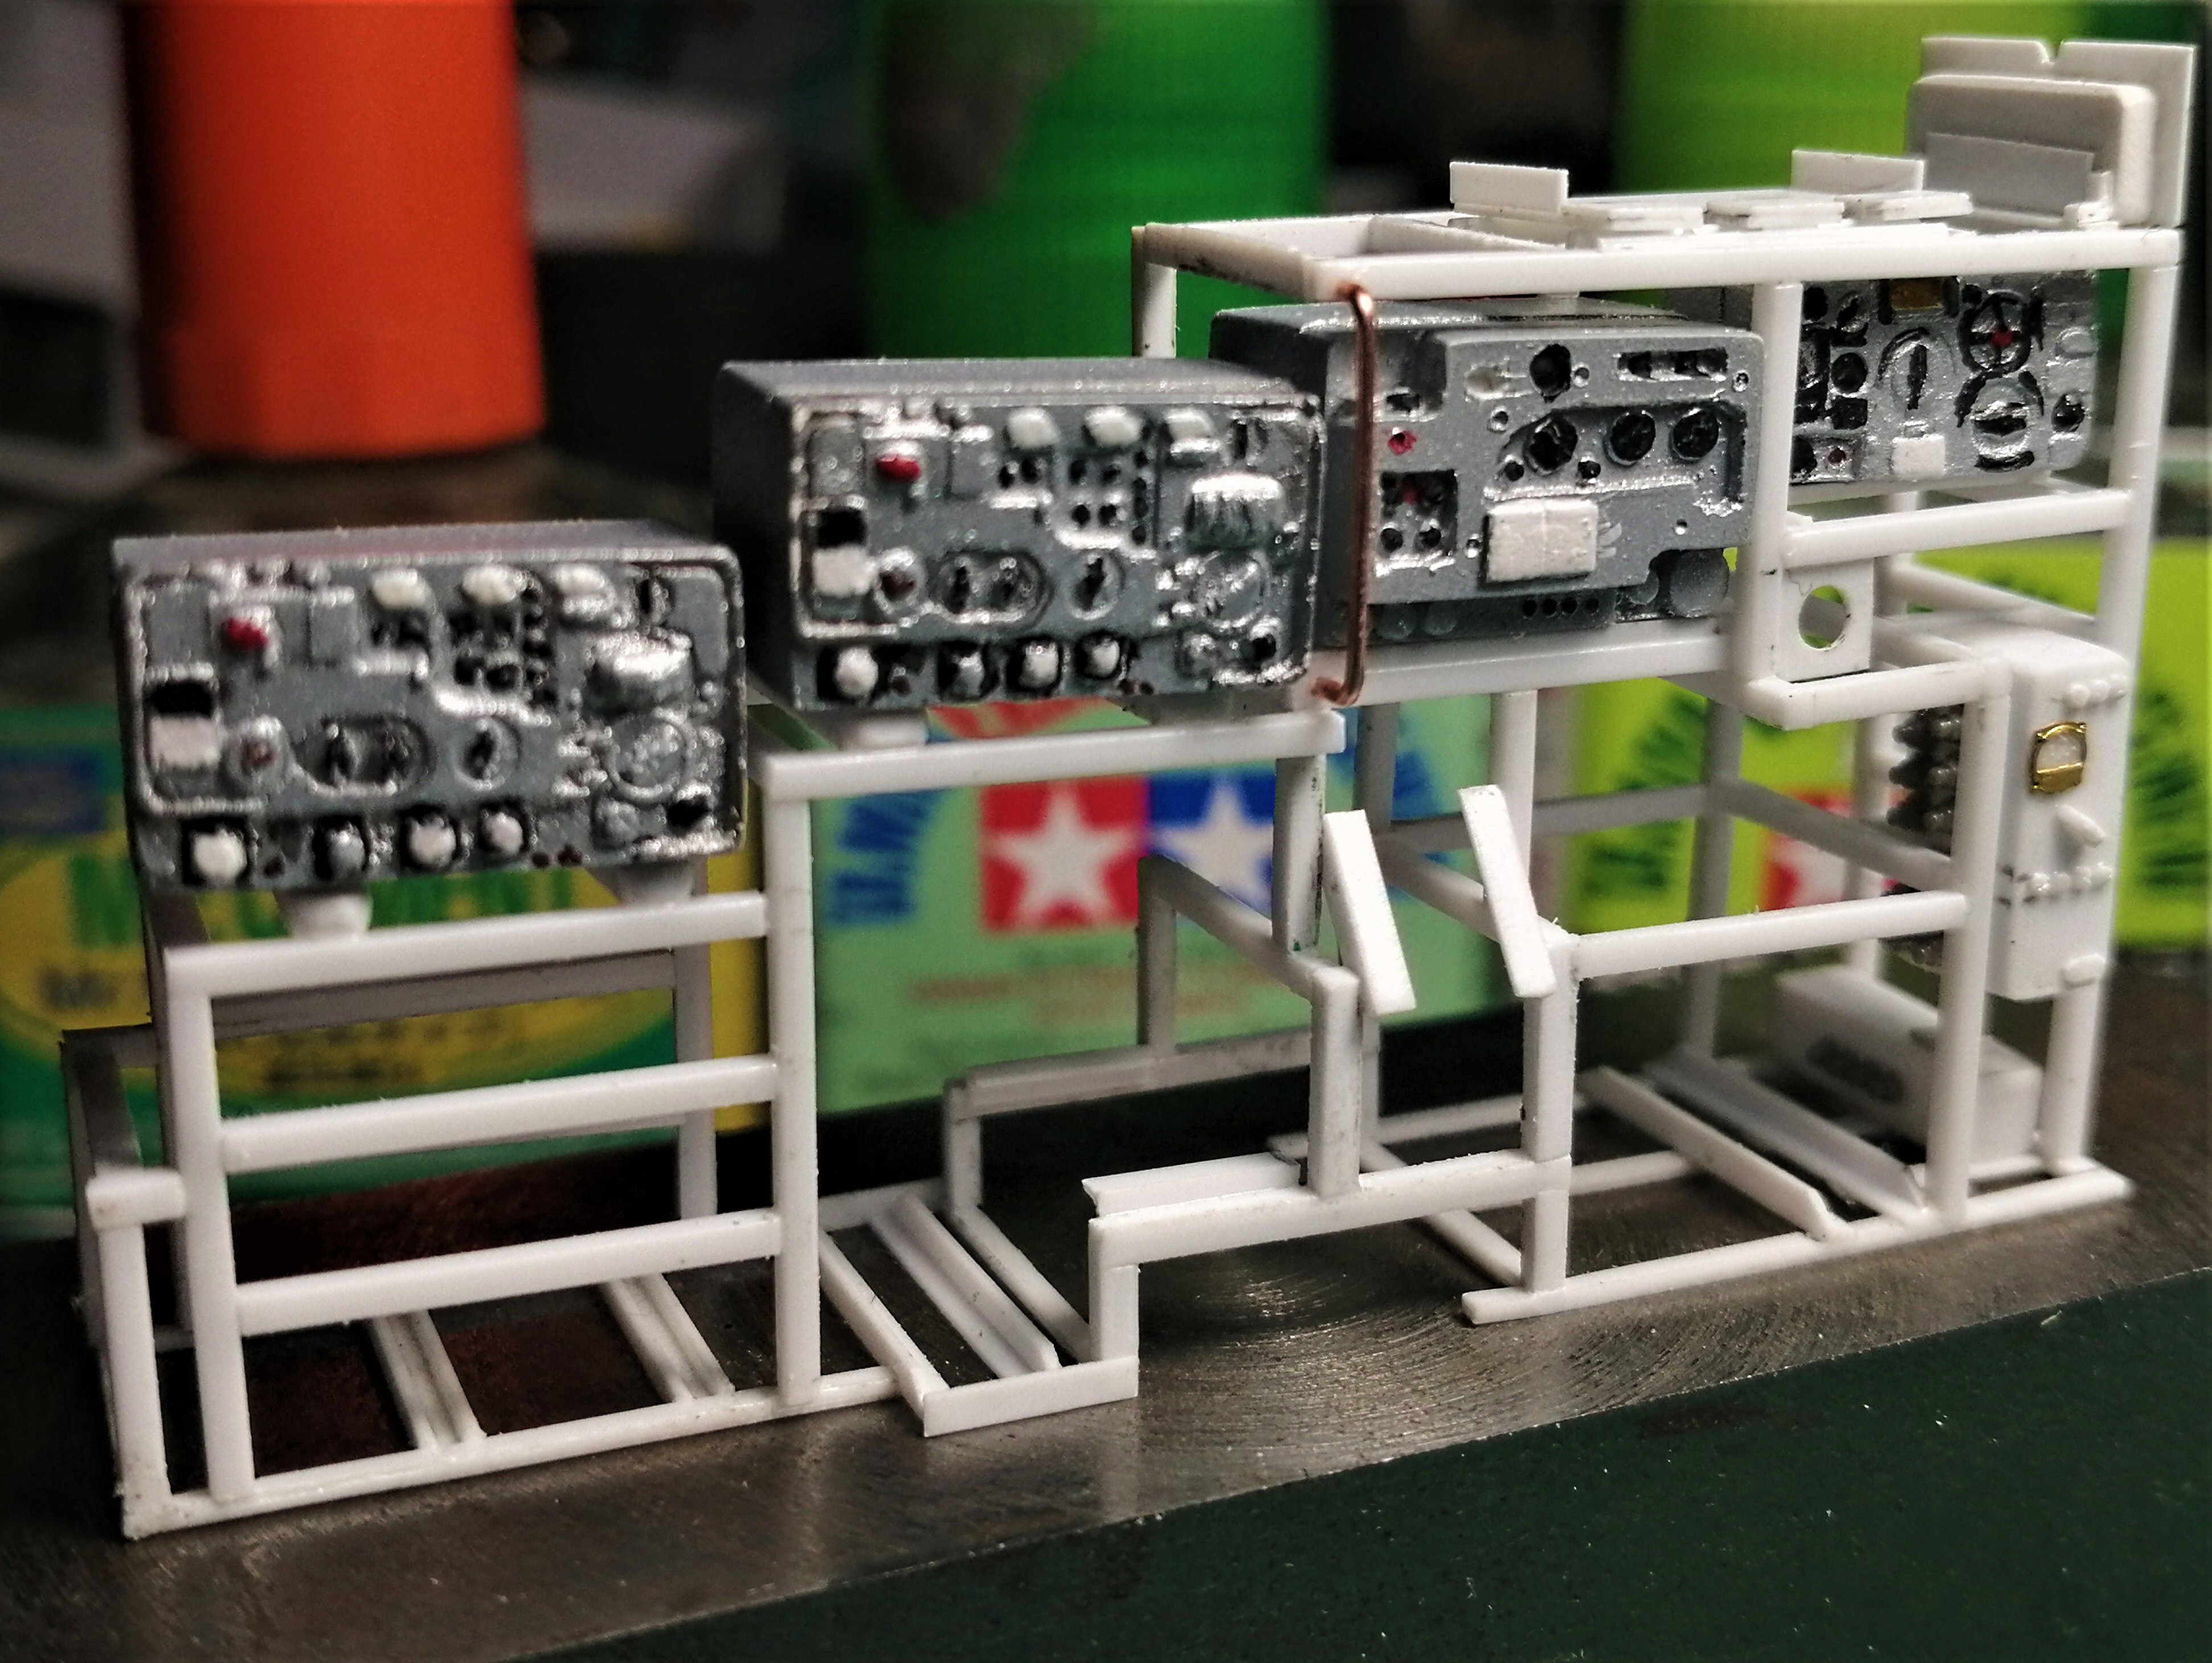
I'm in the process of adding various power units, switchboxes, antenna(e) feeders e.t.c.
Will see whether I can add some wiring (boy, there was plenty of it in the real thing)- problem is I'm not quite sure it's feasible, especially for painting the cables...
The radiomen compartment access door will be open, so pretty much of the interior will be visible:
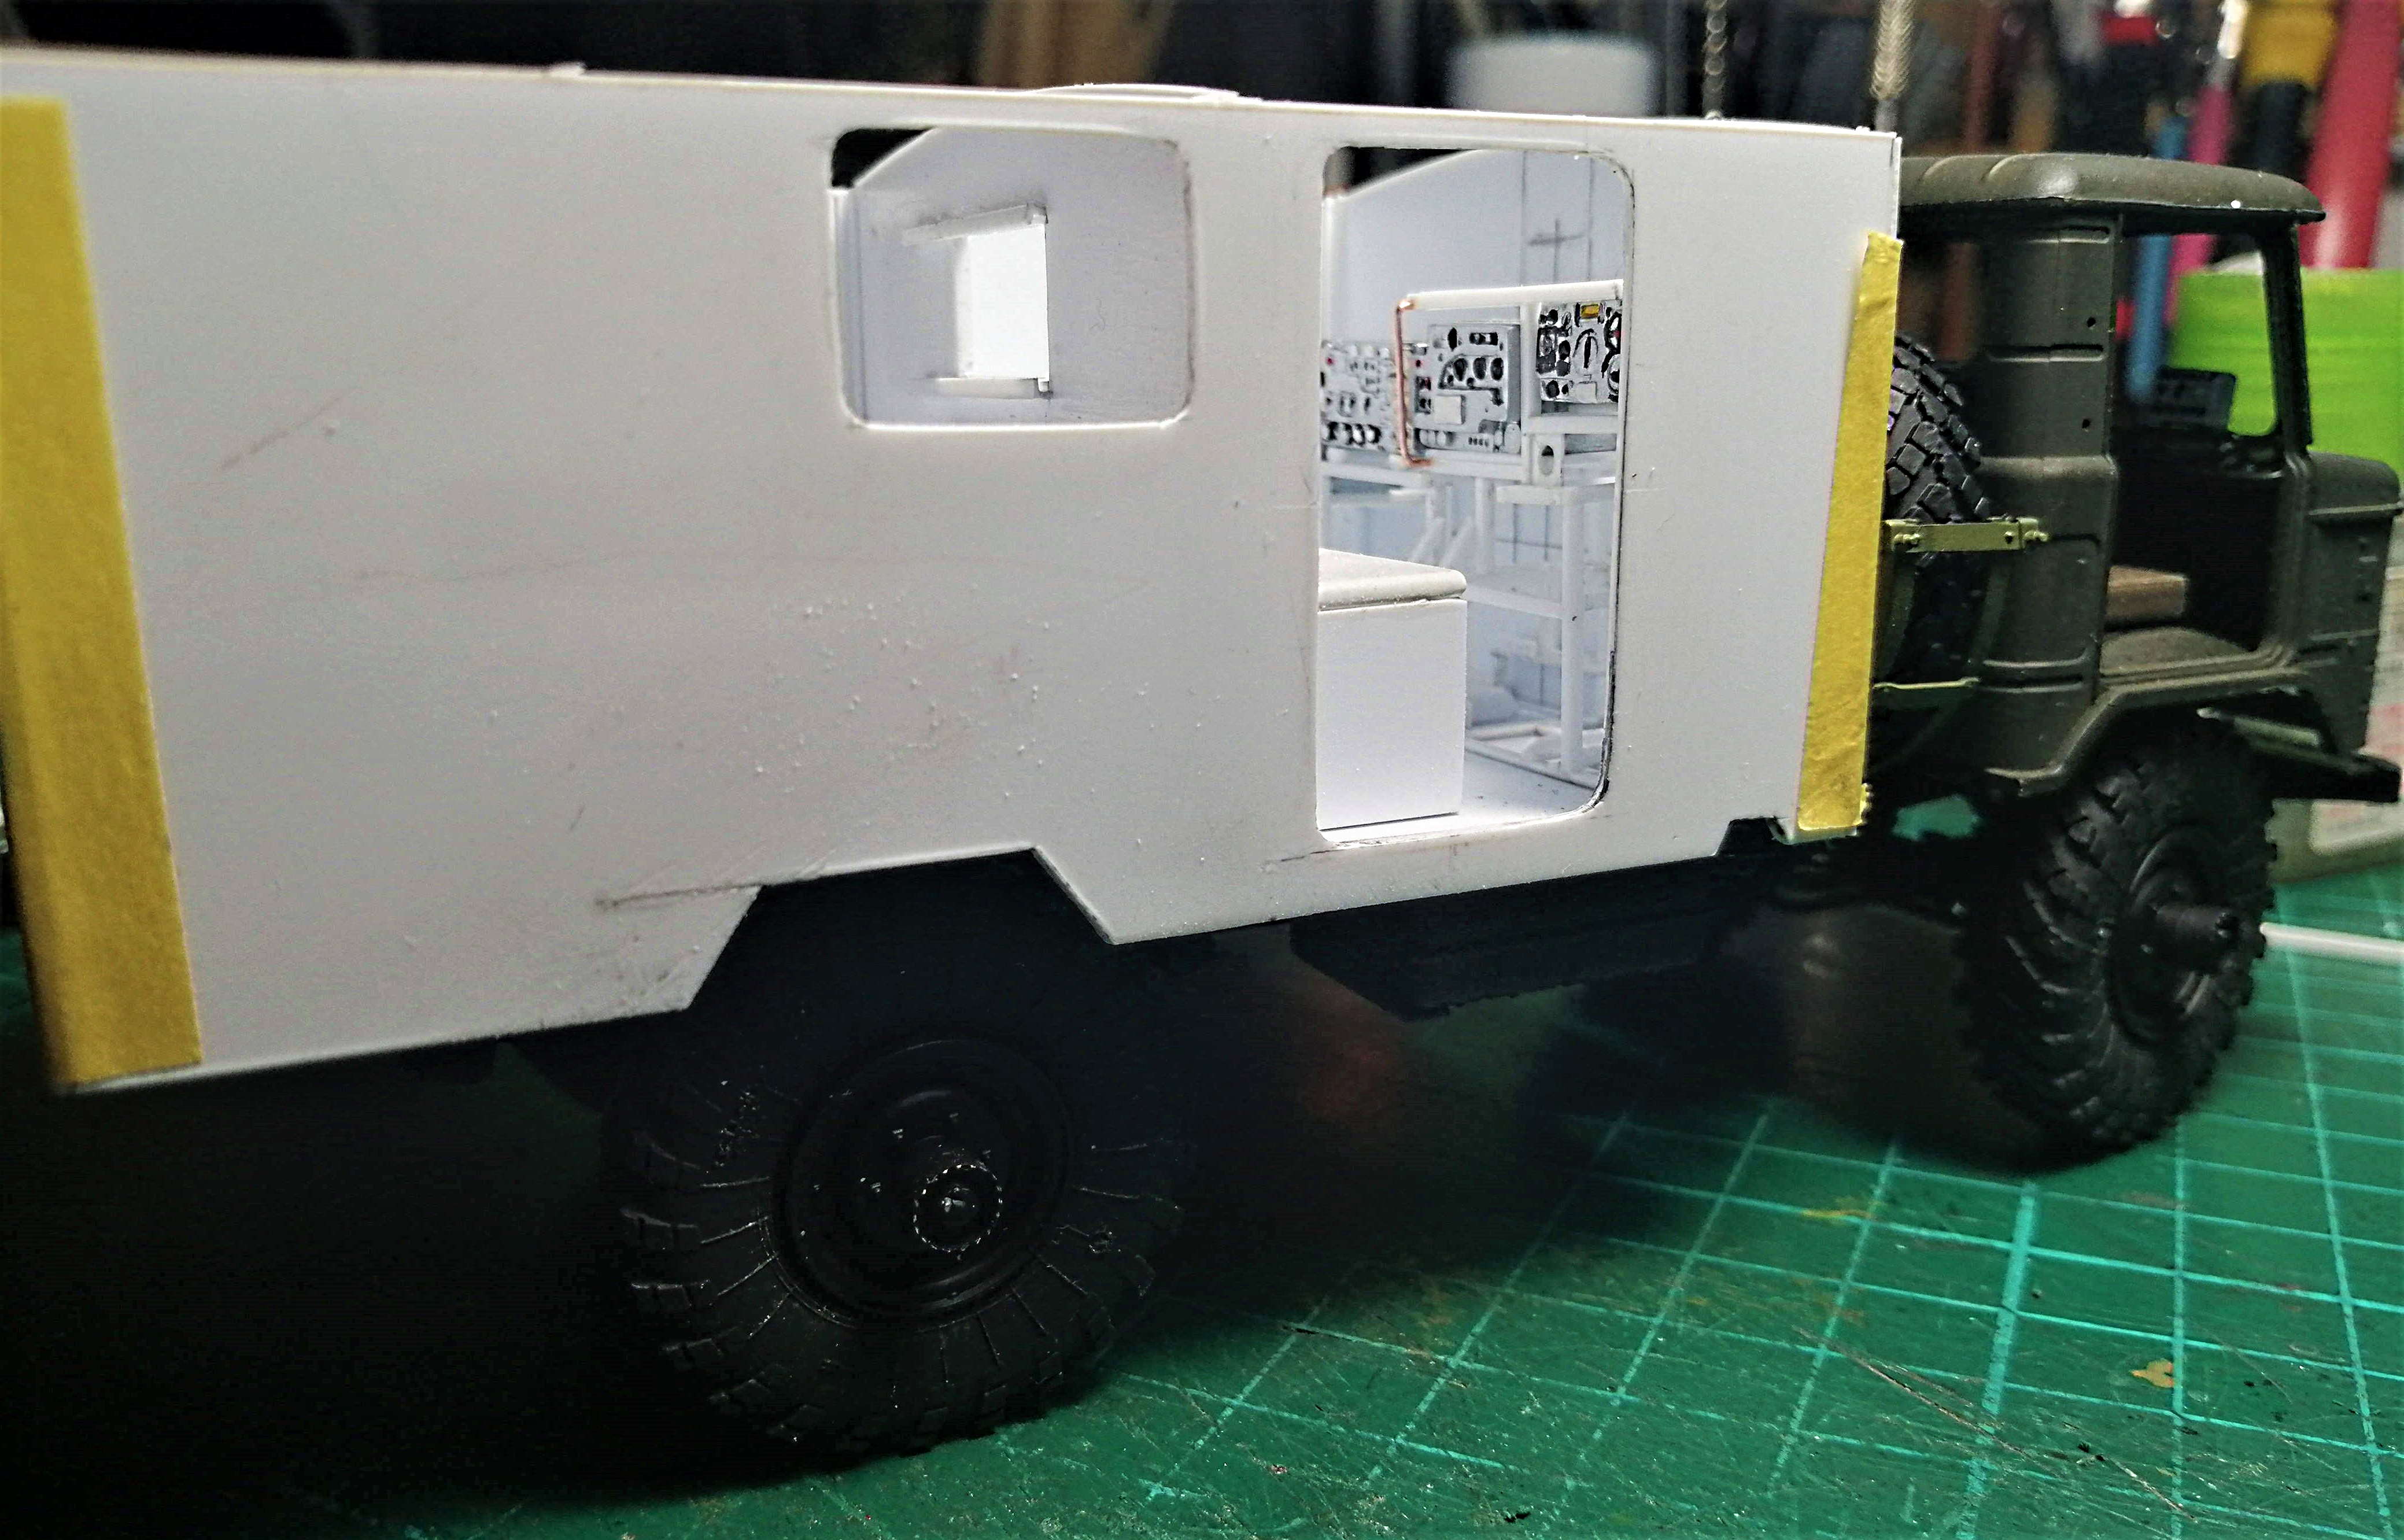
I can always "close" the door if I don't get the look I'm after

Take care and keep modelling!

England - South West, United Kingdom
Joined: June 29, 2019
KitMaker: 604 posts
Armorama: 506 posts
Posted: Monday, March 30, 2020 - 08:30 AM UTC
It's looking amazing Angel, and you have to keep the door open... After all that effort, hard work ( and tears )it would be crime to close it and hide all your beautiful craftsmanship.
England - South West, United Kingdom
Joined: June 29, 2019
KitMaker: 604 posts
Armorama: 506 posts
Posted: Friday, April 03, 2020 - 09:56 PM UTC
Well, a bit of an update with the Scimitar. have got round to putting on a base green coat. used tamiya nato green and then will add the black for the 2 tone. wheels need the rims doing in black and then its weathering and final touches.
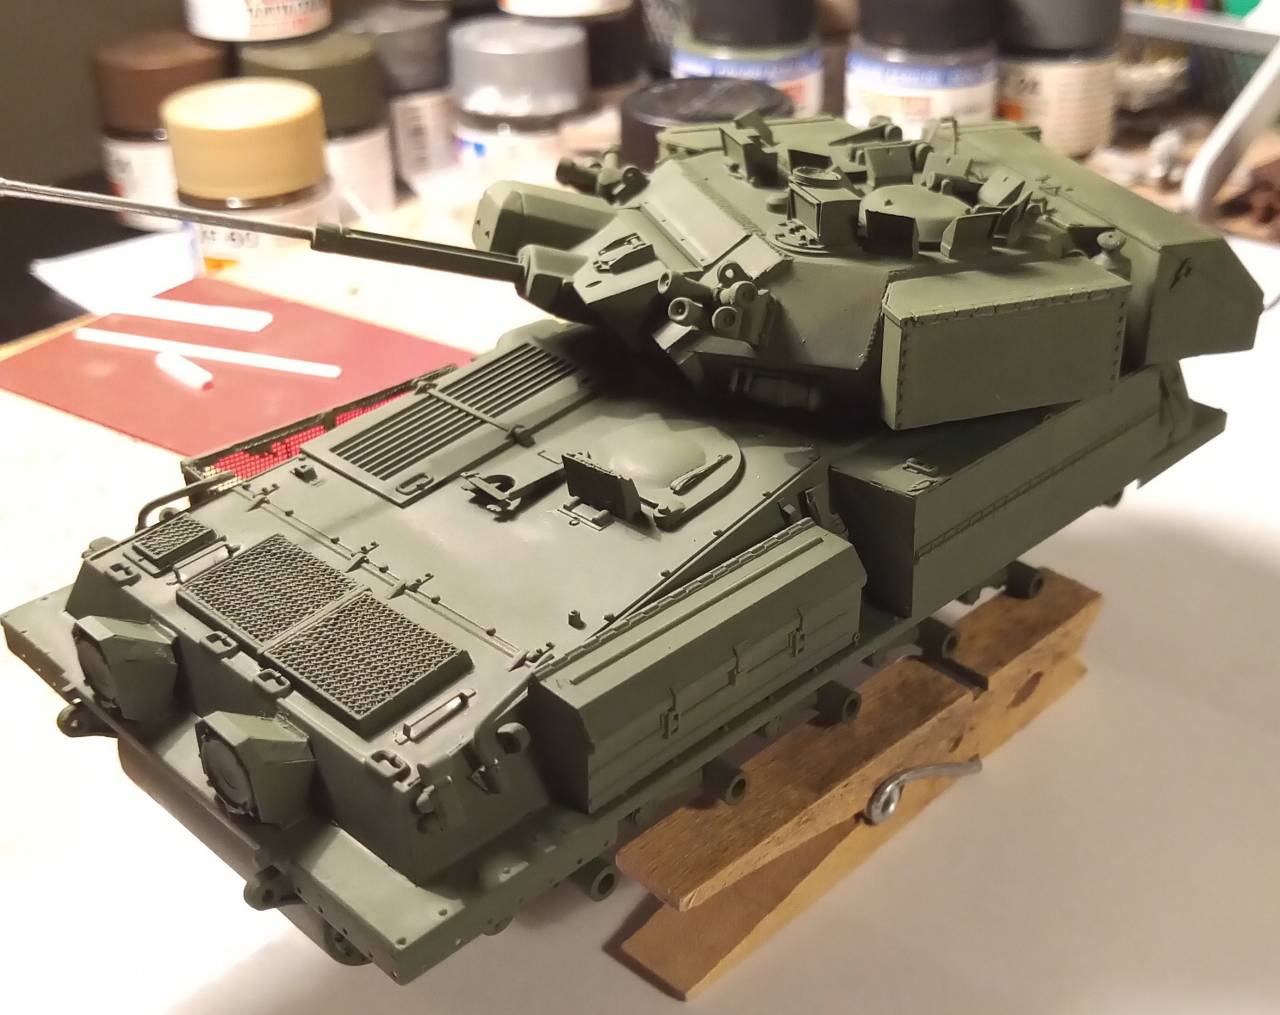
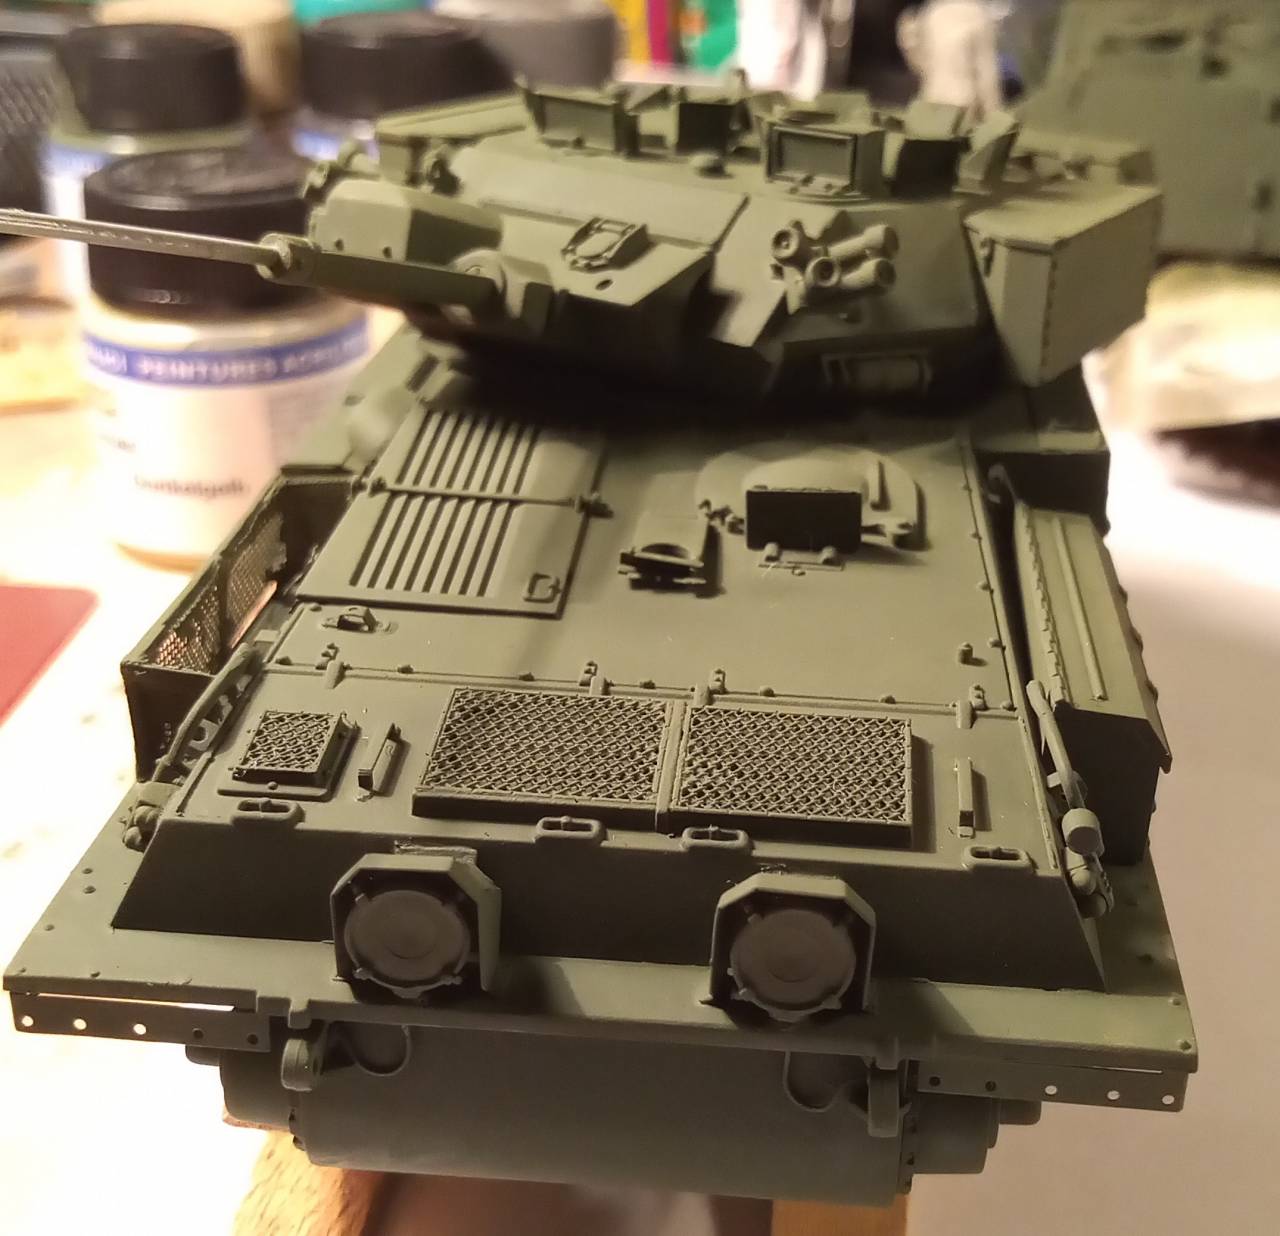
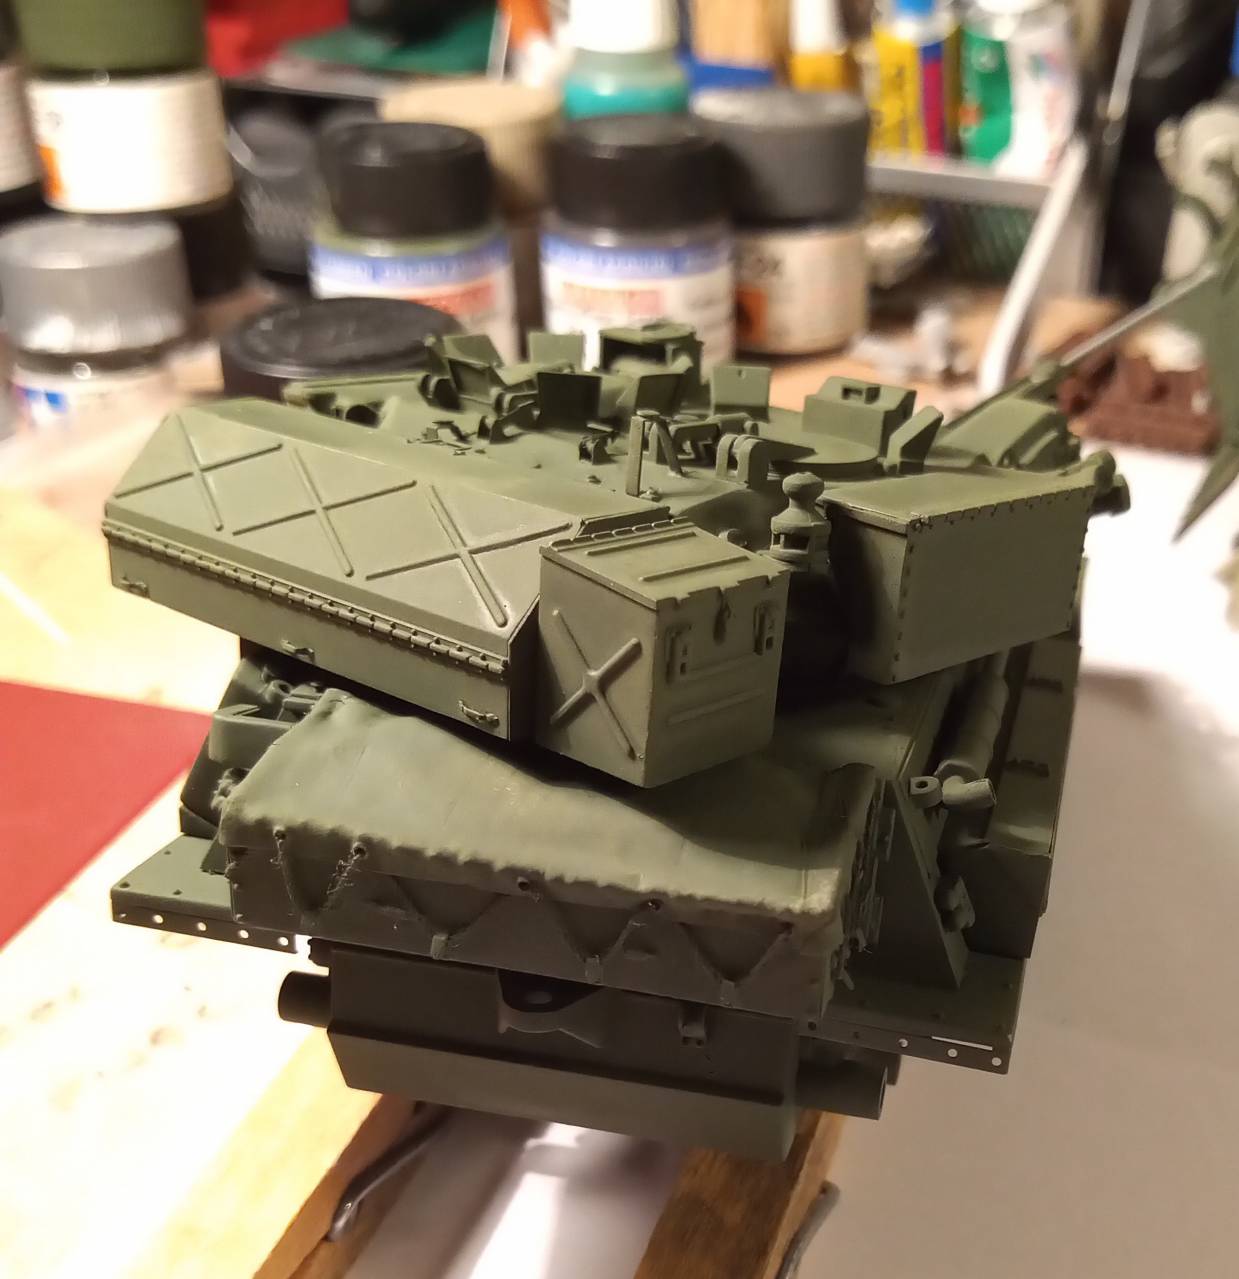
hope everyone is keeping safe and healthy.
John

#490
Sofiya, Bulgaria
Joined: September 22, 2016
KitMaker: 1,432 posts
Armorama: 1,390 posts
Posted: Saturday, April 04, 2020 - 08:38 PM UTC
Awesome John!
All the super detailing you added makes your Scimitar a one-off vehicle!
I've seen you are commited to other campaign builds too, but I hope you'll find time to build your CVRT Striker within your campaign too!
I continue building the radio rack of my R-142N.
I'm going through a lot of pictures in a quest to identify and build the features, I don't recall so clear(25 years are a lot of time).
My in-progress picture, where indidvidual items are identified and ones that are constructed are crossed with an X:
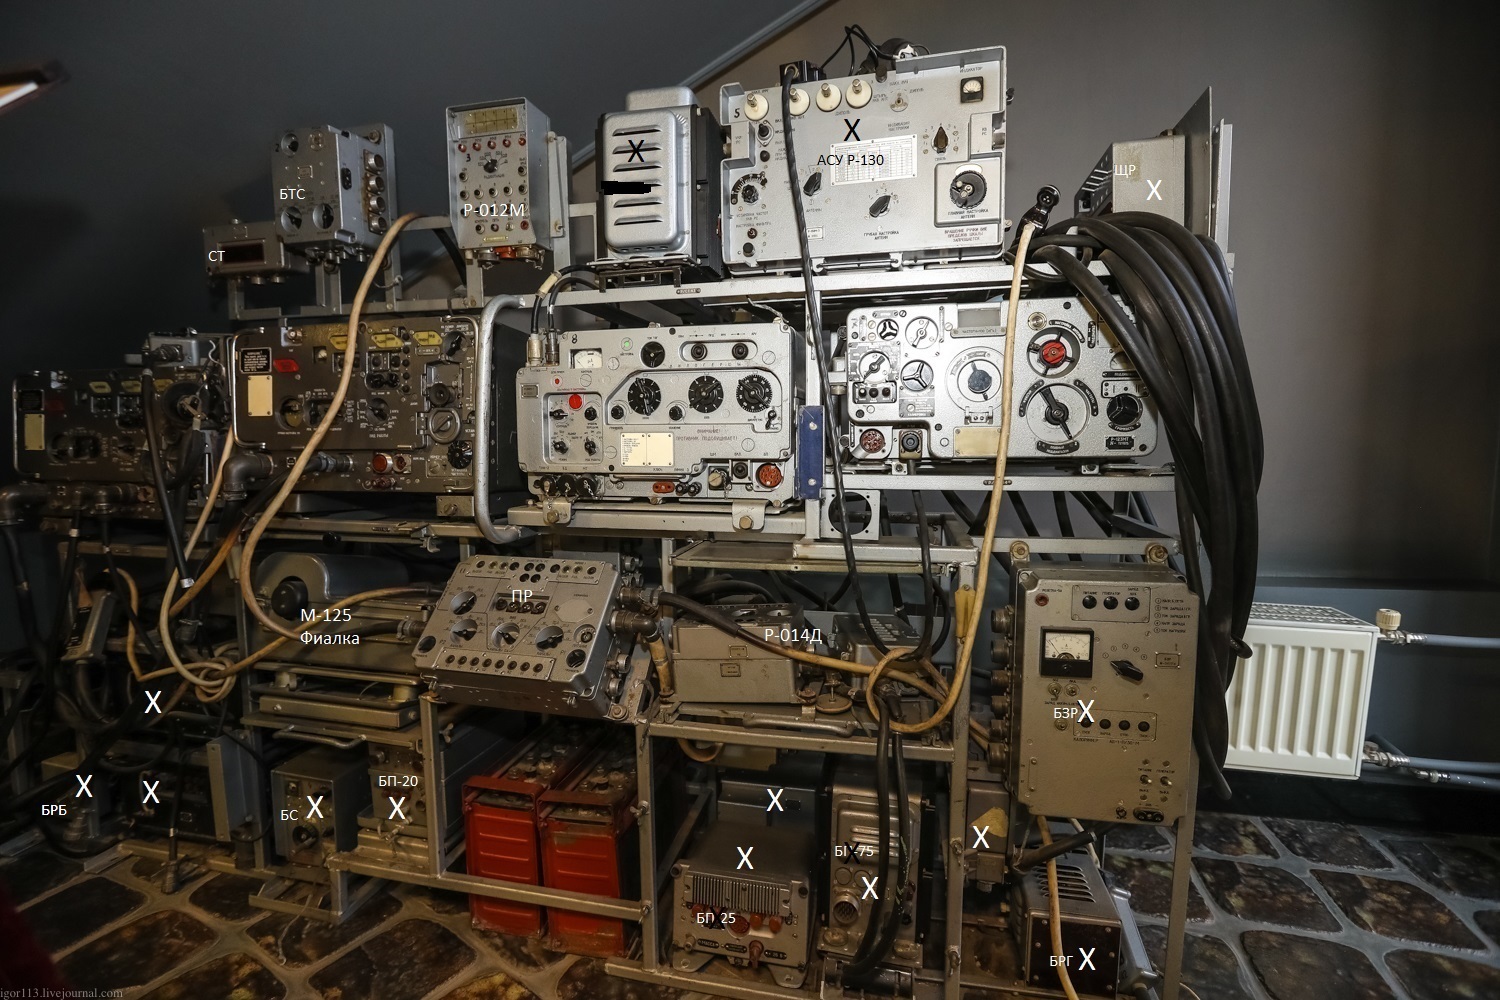
My radio-rack:
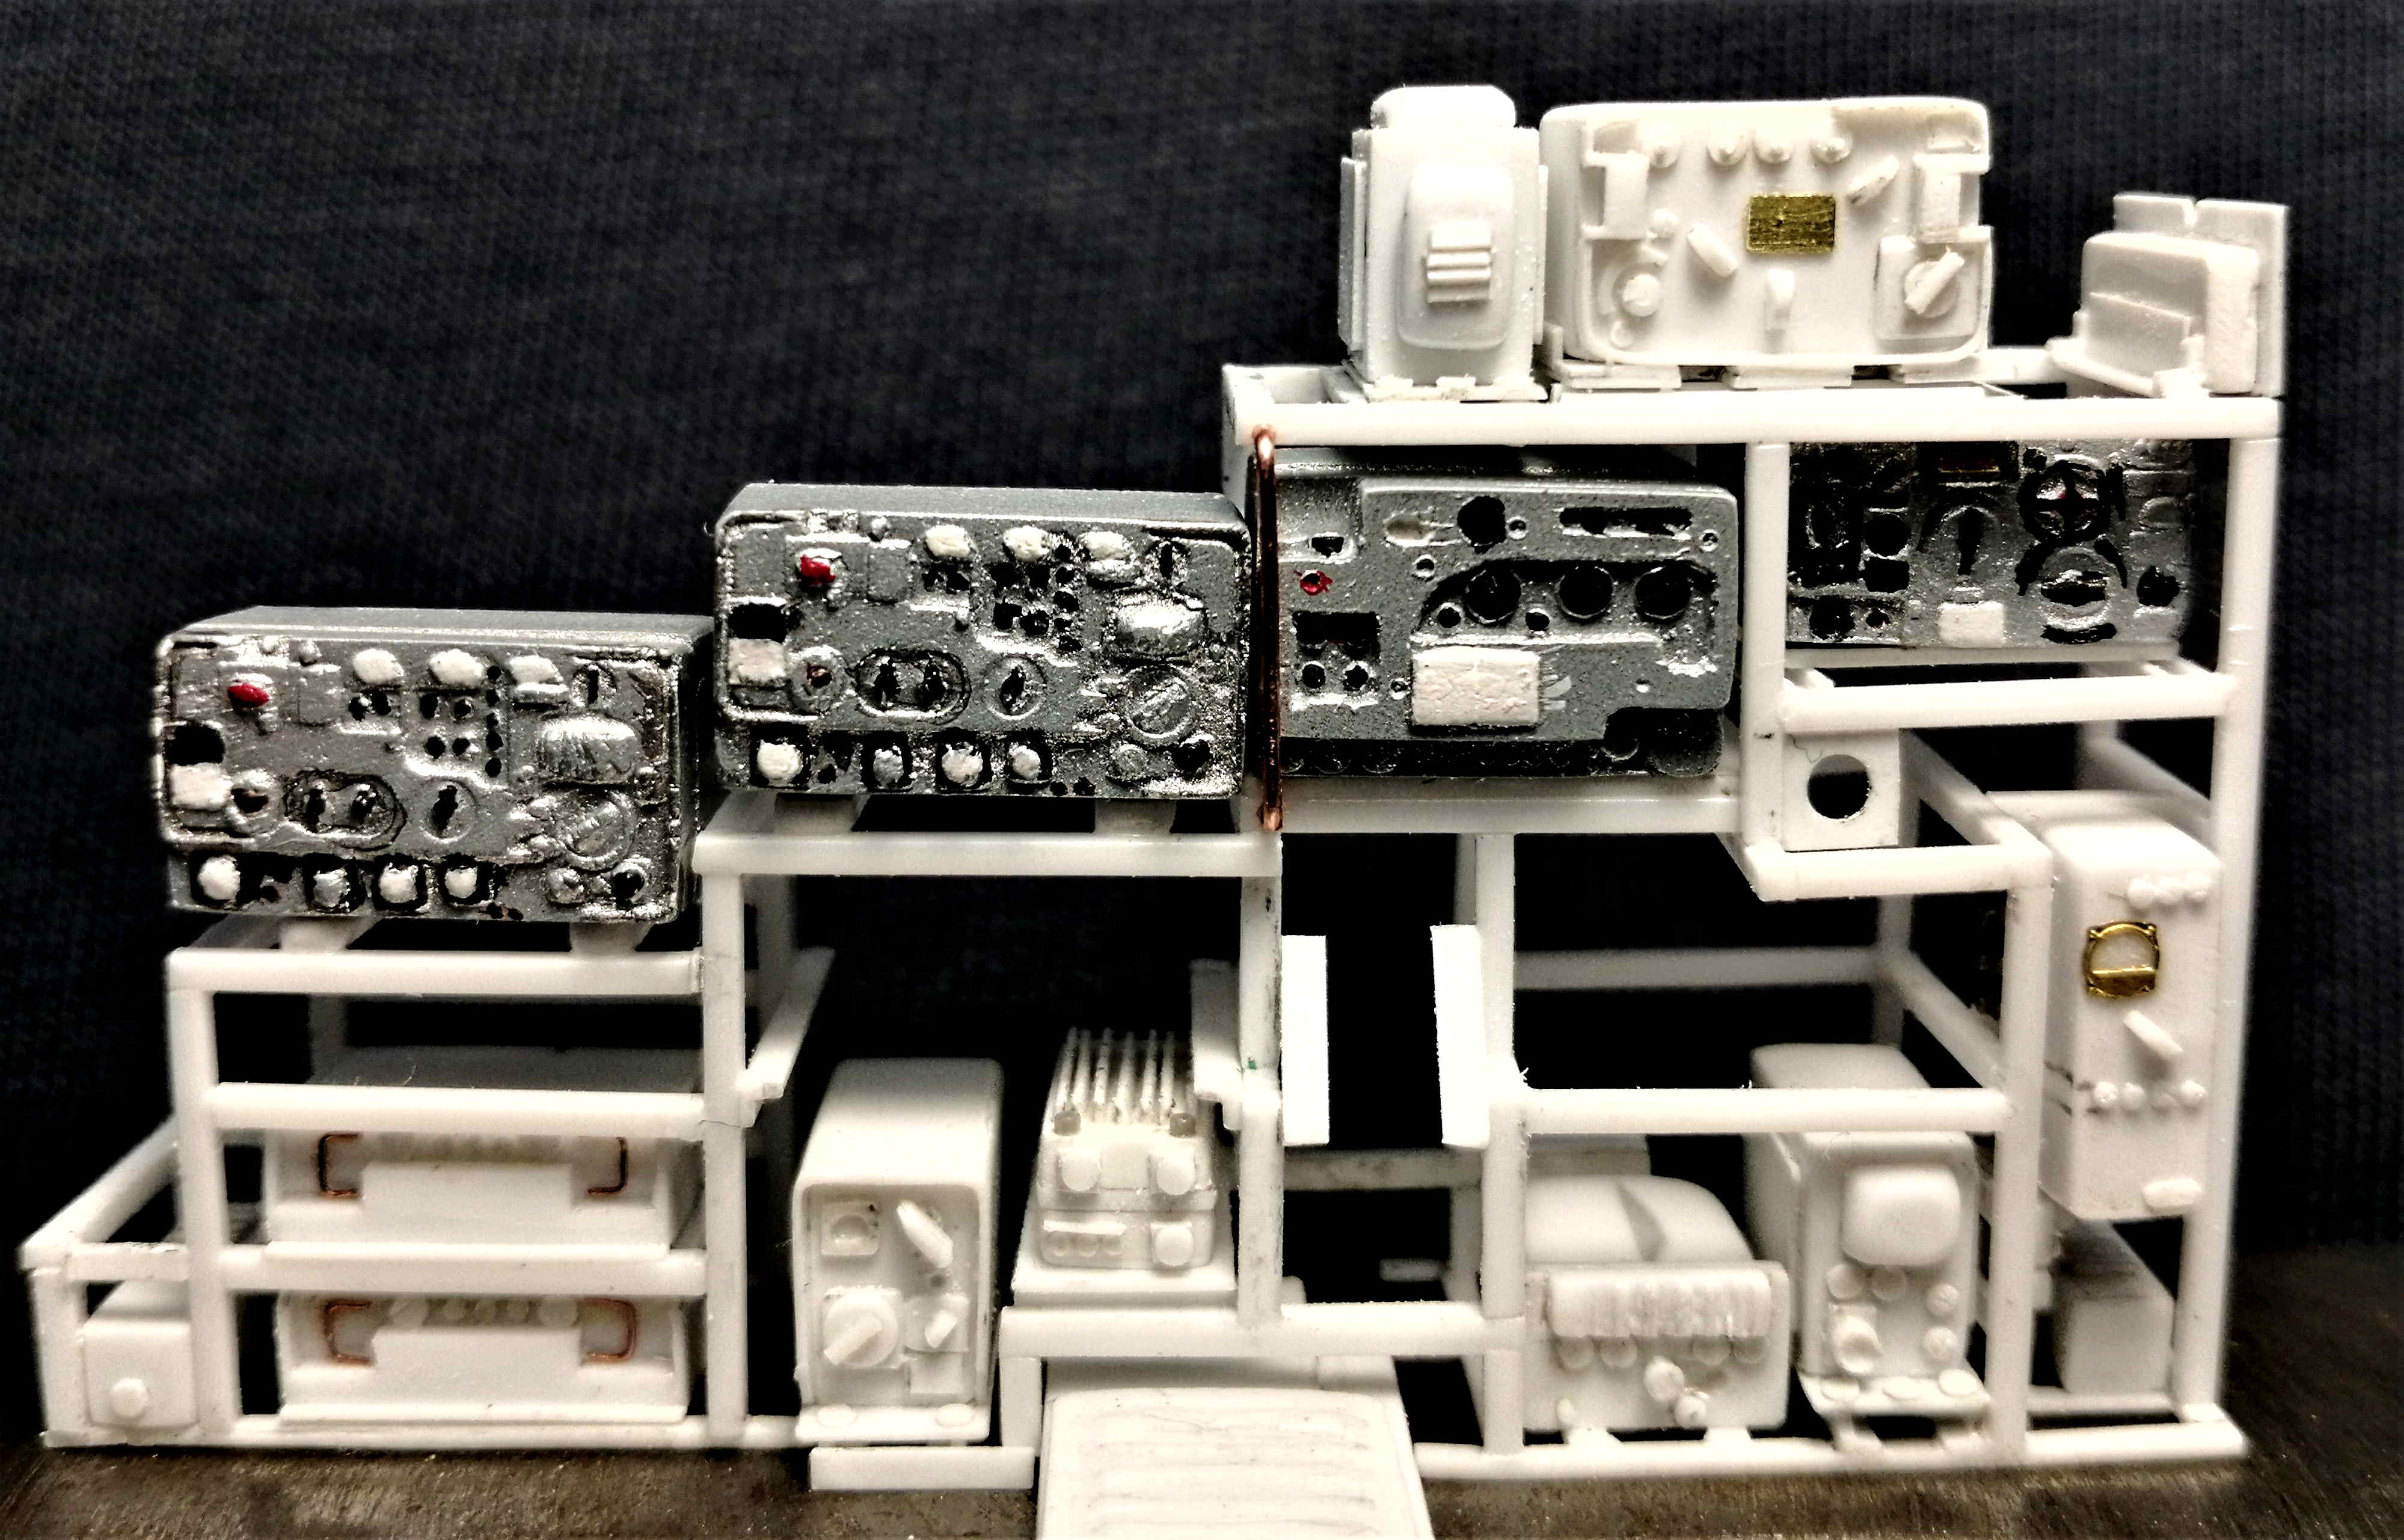
Take care and keep modelbuilding!


#429
Massachusetts, United States
Joined: October 14, 2003
KitMaker: 1,086 posts
Armorama: 964 posts
Posted: Monday, April 06, 2020 - 12:44 AM UTC
Finally got around to getting started on my entry, it's been sitting in the USPS box for weeks waiting for me to get off my butt and open it. Pop it open, get ready to take pics and what do I discover? Oh, nothing major - just had something gouge the crap out of one of the foamboards I use for taking pics (and the places that sell them are closed today); what to do? We adapt and proceed as best we can. So, here is 1 each LAV25 (aka The Combat Rollerskate by Marine DATs), unstarted for the moment:

Doc Ski
HM1(ret.) USN
"Those who deny freedom to others deserve it not for themselves; and under a just God, cannot long retain it." Abraham Lincoln
England - South West, United Kingdom
Joined: June 29, 2019
KitMaker: 604 posts
Armorama: 506 posts
Posted: Monday, April 06, 2020 - 04:59 AM UTC
Some fantastic work Angel, it's going to look amazing once the cable detailing is added and the paints on.
Welcome John, great you're able to get started on the LAV. Hope you have a great time putting it together .
Queensland, Australia
Joined: August 06, 2005
KitMaker: 3,353 posts
Armorama: 3,121 posts
Posted: Monday, April 06, 2020 - 09:17 AM UTC
Angel and John. Outstanding work guys.
Angel, you sure you have no Masochistic tendencies?
On the Bench:
Dust, styrene scraps, paint splotches and tears.

#429
Massachusetts, United States
Joined: October 14, 2003
KitMaker: 1,086 posts
Armorama: 964 posts
Posted: Monday, April 06, 2020 - 11:34 AM UTC
John, they're an enjoyable build I've built the US variants that have been kitted. They each have their share of short comings like any kit, but with a bit of TLC they build up nicely. I remember you saying you were considering building one at some point, go for it when time allows!
Doc Ski
HM1(ret.) USN
"Those who deny freedom to others deserve it not for themselves; and under a just God, cannot long retain it." Abraham Lincoln
England - South West, United Kingdom
Joined: June 29, 2019
KitMaker: 604 posts
Armorama: 506 posts
Posted: Monday, April 06, 2020 - 05:52 PM UTC
John, yes, the LAV is definitely on my to do tick list, they just look good fun kits, so will be watching closely as yours come together, as I said before, my usual area is German WW2 armour so will be nice to steer away from that with something more currant.

#490
Sofiya, Bulgaria
Joined: September 22, 2016
KitMaker: 1,432 posts
Armorama: 1,390 posts
Posted: Tuesday, April 07, 2020 - 09:14 AM UTC
Quoted Text
...Angel, you sure you have no Masochistic tendencies?
I don't know, mate, I don't know...
I guess it's the lockdown fault


#490
Sofiya, Bulgaria
Joined: September 22, 2016
KitMaker: 1,432 posts
Armorama: 1,390 posts
Posted: Thursday, April 09, 2020 - 07:26 AM UTC
Radio rack construction almost finished:
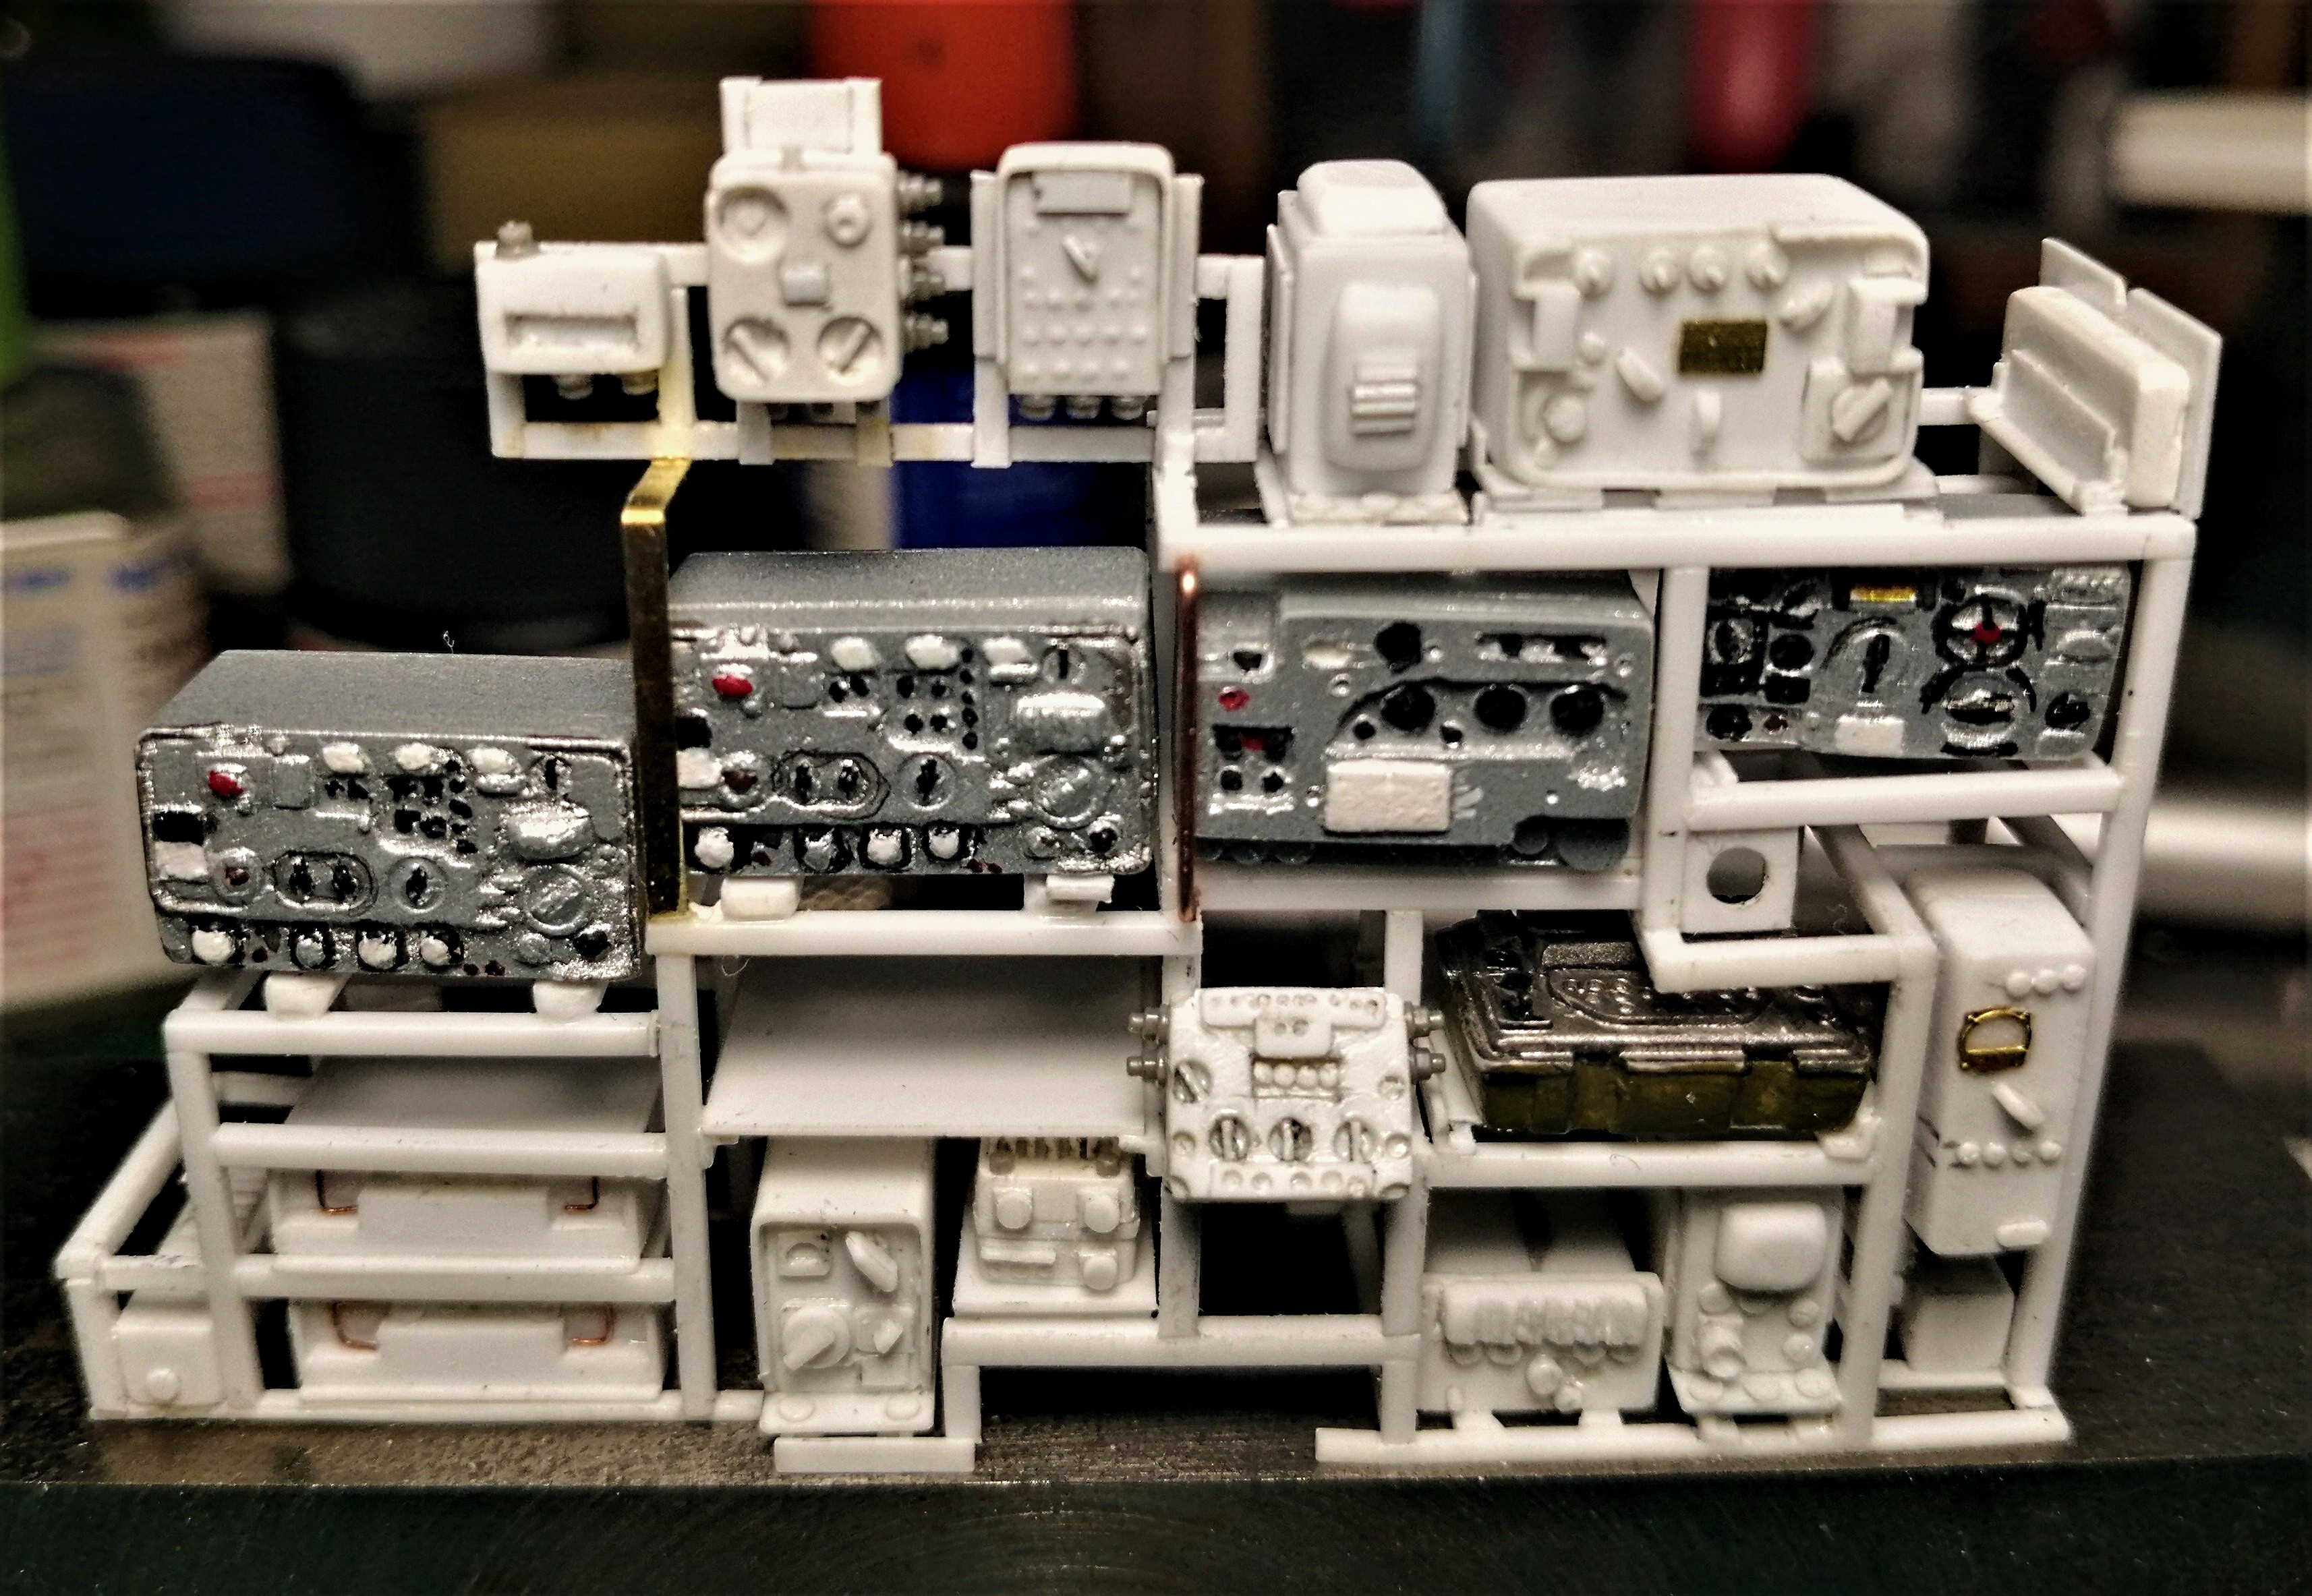
I still need to add some bits here and there(these will hardly be visible) and need to decide whether I'll add the M-125 "Fialka" cypher machine or not.Some wiring is also due, plus headsets, Morse keys and TAPs(field phones).

England - South West, United Kingdom
Joined: June 29, 2019
KitMaker: 604 posts
Armorama: 506 posts
Posted: Thursday, April 09, 2020 - 08:38 AM UTC
That is some amazing work there Angel, the attention to detail is superb. Once you have finished the detailing you mentioned like the Morse keys/wiring / headsets etc it would be worthy of being displayed as a stand alone model in its own right.
.... And just think .. all those hours you spent sitting in front of those sets for real .. listening ... Decoding... transmitting..
Keep up the fantastic work mate.

#490
Sofiya, Bulgaria
Joined: September 22, 2016
KitMaker: 1,432 posts
Armorama: 1,390 posts
Posted: Thursday, April 09, 2020 - 09:49 PM UTC
Thanks,John!
It's pitty the rack will be hidden, but that's how it goes with interiors.


