Hi Guys,
Just an update as I keep checking this post to see if anyones added anymore pics of work in progress ...and no one has
Just have to weather my turret then all is complete!!
Hope to have finished pics up within a week.
I have an online gallery now of all pics so far
http://uk.pg.photos.yahoo.com/ph/toony30/album?.dir=8033
Carl
Hosted by Darren Baker
Amazing T-34 model
majorproblem
England - West Midlands, United Kingdom
Joined: June 27, 2004
KitMaker: 132 posts
Armorama: 0 posts
Joined: June 27, 2004
KitMaker: 132 posts
Armorama: 0 posts
Posted: Tuesday, August 17, 2004 - 08:13 AM UTC
sgirty
Ohio, United States
Joined: February 12, 2003
KitMaker: 1,315 posts
Armorama: 0 posts
Joined: February 12, 2003
KitMaker: 1,315 posts
Armorama: 0 posts
Posted: Tuesday, August 17, 2004 - 07:16 PM UTC
Hi, majorproblem: always great to see photos of your work. You inspire us all. Can't wait to see the over all finished model. It's really going to be something!
Have been in kind of a lull the last week or so, but will get back in gear here before too long. I have been experimenting with adding the Milliput 'welds' to some extra side armor I'm putting on the turret of the /42 and I think I' ve finally got something that doesn't look all that bad. It works really well, but is kind of messy while putting it on, what with all the water being used to keep it from getting sticky.
I also need to figure out how to remove the photos from my gallery so I can post some new ones too.
Take care and good luck, Larry
majorproblem
England - West Midlands, United Kingdom
Joined: June 27, 2004
KitMaker: 132 posts
Armorama: 0 posts
Joined: June 27, 2004
KitMaker: 132 posts
Armorama: 0 posts
Posted: Tuesday, August 17, 2004 - 09:46 PM UTC
Hi SGIRTY,
Thank you for your comments....must admit to being a bit dumbfounded by them!
I don't know if the finished model will be very good?....but am doing my best.
I personally am happy enough with it for a first effort in 3 or so years....it is flattering to think it may inspire some people.
I remember you saying your in to 1/16 scale now in quite a way.....you should take a look at the Tamiya static 1/16 kublewagen, it has great details, such as engine, transmission, working suspension, steering, etc.
I used to have the 1/16 RC version,.. that was a nice kit and I am quite tempted now to get the static version but the 43 t-34 will certainly come first!
Regarding making weld seams, I used to cut little bits of sprue up and put them into a 3/4 empty glass bottle of Humbrol liquid poly, this would melt down into a nice paste which could be brushed on, then moulded with a screwdriver, etc for the weld lines....I used to find this method much easier than using milliput putty, but its all personal preference
Carl
sgirty
Ohio, United States
Joined: February 12, 2003
KitMaker: 1,315 posts
Armorama: 0 posts
Joined: February 12, 2003
KitMaker: 1,315 posts
Armorama: 0 posts
Posted: Wednesday, August 18, 2004 - 08:28 AM UTC
Hi majorproblem: Yes, have seen the Tamiya 1/16 scale VW around. Luckily it was at the one hobby shop in the area that is guaranteed to have the highest prices in this part of the state. But that's okay, as it just didn't 'jump out and grab me' anyway. Know what I mean? And for that kind of money a kit has to GRAB me real good. Sort of like the 1/9 scale German motorcycle halftrack from Dragon here awhile back as well. Maybe it has something to do with the vehicle or how it was used or some such thing. Who knows for sure. It just didn't do the trick, at least at the moment. Ha, ha!
Yes, I've heard of the liquid glue/spur method of welding, but hadn't got around to trying that yet. Have to see how this Milliput looks once the turret is painted up. May give the method you mentioned a try on those extra grab handles where just a little 'weld' is needed here and there. I have a feeling this Milliput is going to be a real mess getting it on in those small areas. Or not.
Take care, Larry
majorproblem
England - West Midlands, United Kingdom
Joined: June 27, 2004
KitMaker: 132 posts
Armorama: 0 posts
Joined: June 27, 2004
KitMaker: 132 posts
Armorama: 0 posts
Posted: Thursday, August 19, 2004 - 11:56 PM UTC
Phew, finally finished for now
Please see new post for pics
Amazing T-34 kit finally finished!
Carl
Dam....I seem to have somehow posted it in the AFV section, rather than the large scale section!...is there any way it can be moved?
Please see new post for pics
Amazing T-34 kit finally finished!
Carl
Dam....I seem to have somehow posted it in the AFV section, rather than the large scale section!...is there any way it can be moved?
mahoon
England - South West, United Kingdom
Joined: August 23, 2004
KitMaker: 12 posts
Armorama: 0 posts
Joined: August 23, 2004
KitMaker: 12 posts
Armorama: 0 posts
Posted: Monday, August 23, 2004 - 05:52 PM UTC
Hi Folks,
Inspired by sgirty and majorproblem amongst others, I got myself a T34/76 (1943). This is the first model I've tried painting myself (I've got a Tamiya 1/16 Tiger that a friend sprayed up for me - and a most excellent job he did).
I have to agree with everyone else, this Trumpeter T34 is a great kit. Here are some pics of the interior I've just about finished. Bear in mind the camera was not the best, and there are a few things I'm not entirely happy with (the left exhaust pipe for instance). Naturally, having just discovered the joys of silver drybrushing, I think I might have over-weathered it a bit.
I had a half-hearted attempt to add extras (wires and the like), but rather than ruin the whole thing, I gave up before I got carried away. On reflection I think I'll hang fire on the extras until I'm a little more experienced with this modelling lark (so I'll be getting carried away on the T34/85).
I too had problems bending the brake bands (C33). In the end I used superglue and held the bands under a hot lightbulb while I bent them round. Maybe that helped or maybe I just imagined it helping. Anyway, you should find a selection of shots here: http://uk.pg.photos.yahoo.com/ph/[email protected]/album?.dir=c0ee&.src=ph&store=&prodid=&.done=http%3a//uk.pg.photos.yahoo.com/ph//my_photos
I'll be getting myself an airbrush soon so will either completely ruin the rest of the model, or make it look half-decent on the outside too
sgirty
Ohio, United States
Joined: February 12, 2003
KitMaker: 1,315 posts
Armorama: 0 posts
Joined: February 12, 2003
KitMaker: 1,315 posts
Armorama: 0 posts
Posted: Monday, August 23, 2004 - 07:49 PM UTC
Hi, Welocme to the site. Your model looks very, very good indeed. I really like the chipped paint effect , esp. those air cleaners and in that general area. That's something I'm going to have to work on some more.
I agree about getting carried away with the detailing of the first model. It's usually all I can do to put the thing together the first time around just OOTB. Once I'm more familiar with the kit and the actual vehicle in question, then if I build another one, that will be the time to do the 'extras.'
I was a tad less than excited about Trumpeter's selection of decals for this kit, not to mention the /42 model as well. I see that Archer now is listing a couple of sets for this particular kit, so I'm going to junk the kit decals when I get that far on the /42.
Personally I've never had much luck with air brushes, but there are many on the site who get great results from them. All my models are brush painted, except for the primer, which is auto primer stuff from the local Pet Boys store up the road.
Looking forward to seeing your T-34 all together. I'm sure it will be really great.
Good luck and take care, Sgirty
majorproblem
England - West Midlands, United Kingdom
Joined: June 27, 2004
KitMaker: 132 posts
Armorama: 0 posts
Joined: June 27, 2004
KitMaker: 132 posts
Armorama: 0 posts
Posted: Tuesday, August 24, 2004 - 03:26 AM UTC
Hi guys,
Mahoon FANTASTIC detail painting and weathering!
Its really good to see other models, especially when they are to this sort of standard, I keep telling myself my tanks would look much better if I used an airbrush....just enjoy brush painting too much and I wouldnt like the masking up involved with airbrushing!
Chuck if you saw my last post in my finished model thread, I said I would post more here.
I picked up the 1943 version at the weekend (just before I got the news of the death in the family)
I have had the last 2 days of work, and have plunged myself into this kit full steam, its a great tool to take my mind of things in the real world at the moment.
I intend fixing the top hull on to the chassis of the 43.......heres where things get a little complicated.
I am swaping the 42 chassis (that I have finished) to be used with the 43 kit (this gives me chance to rectify the firewall and interior issue problems that the 42 suffers from and the 43 can get away with, with a bit of licence )
I have cut ALL the engine deck of the top hull, and scratch built the internal fixings welded to the inside of the top hull as the pic below:
The top engine deck now clicks nicely into place along with the rear exhaust pannel.
This is an alternative method to be able to view the engine / transmission with having the top hull fixed in place.
I have had to swap the wheels over from chassis to chassis and much more has yet to be done.....I will get some pics up when I am at some sort of viewable stage
Carl
MrMox
Aarhus, Denmark
Joined: July 18, 2003
KitMaker: 3,377 posts
Armorama: 1,088 posts
Joined: July 18, 2003
KitMaker: 3,377 posts
Armorama: 1,088 posts
Posted: Wednesday, August 25, 2004 - 12:48 AM UTC
Today my T34/76 model 42 arrived, and WOW
I am considering making it as a beutepanzer as i have a surplus kübelwagen driver from Tamiya, it should also provide some interesting painting possibilitys, from gray w/o whitewash to yellow with the full treatment ...
Just can´t wait to put the kids to bed and get started ! :-)
I am considering making it as a beutepanzer as i have a surplus kübelwagen driver from Tamiya, it should also provide some interesting painting possibilitys, from gray w/o whitewash to yellow with the full treatment ...
Just can´t wait to put the kids to bed and get started ! :-)
mahoon
England - South West, United Kingdom
Joined: August 23, 2004
KitMaker: 12 posts
Armorama: 0 posts
Joined: August 23, 2004
KitMaker: 12 posts
Armorama: 0 posts
Posted: Wednesday, August 25, 2004 - 12:49 AM UTC
Cheers for the encouragement folks will keep you posted with more pics as they happen
majorproblem
England - West Midlands, United Kingdom
Joined: June 27, 2004
KitMaker: 132 posts
Armorama: 0 posts
Joined: June 27, 2004
KitMaker: 132 posts
Armorama: 0 posts
Posted: Thursday, August 26, 2004 - 08:10 AM UTC
Hi Guys,
Just a quick update on my 43 version
I'm impressed how much easier the turret is to work on with this version.
I intend on leaving the lower turret ring and top half un-glued, and to model a loader sitting on the loaders chair inside the turret.
Thus removing the top half of the turret will show him sat there nicely whilst still in the hull of the tank
Pics below show the extra detailing, wiring I have done.
Hope you like, and I am not becoming boring with this!
Carl
sgirty
Ohio, United States
Joined: February 12, 2003
KitMaker: 1,315 posts
Armorama: 0 posts
Joined: February 12, 2003
KitMaker: 1,315 posts
Armorama: 0 posts
Posted: Thursday, August 26, 2004 - 08:43 AM UTC
Hi majorproblem: all I get here are those dreaded little red x's.
Take care, Sgirty
Take care, Sgirty
majorproblem
England - West Midlands, United Kingdom
Joined: June 27, 2004
KitMaker: 132 posts
Armorama: 0 posts
Joined: June 27, 2004
KitMaker: 132 posts
Armorama: 0 posts
Posted: Thursday, August 26, 2004 - 08:52 AM UTC
Strange, I just got that also!
The pics were there before.
I just right clicked on the red x's and chose "show picture" and they came back.
The pics were there before.
I just right clicked on the red x's and chose "show picture" and they came back.
mahoon
England - South West, United Kingdom
Joined: August 23, 2004
KitMaker: 12 posts
Armorama: 0 posts
Joined: August 23, 2004
KitMaker: 12 posts
Armorama: 0 posts
Posted: Thursday, August 26, 2004 - 05:21 PM UTC
Hi. I can get to the pics by clicking on your 'visit my selected link' and then the 'back to toony30s photos' link at the top of that page. Turret's looking very, very good. I'm hoping mine turns out as well. I know that I, for one, am certainly far from bored from seeing/chatting about these kits
sgirty
Ohio, United States
Joined: February 12, 2003
KitMaker: 1,315 posts
Armorama: 0 posts
Joined: February 12, 2003
KitMaker: 1,315 posts
Armorama: 0 posts
Posted: Thursday, August 26, 2004 - 07:07 PM UTC
HI, Thanks mahoon for those instructions there. I finally got the new photos. This infernal mahine and I do not get along very well. Most all of it my fault. Just too old for the electonical generation mostly. Ha, ha! Always afraid I'm going to screw something up really good on it one of these days by pushing the wrong button at the wrong time.
majorproblem: always a real pleasure viewing your work. You make my stuff look strickly amature. Am going to study your interior weathering you did on the /43 and see if I can recreate something similar on the inside of the /42. I like your blending of the weathering colors. Looks really good.I did add two wires to the radio unit up on the commander's side of the turret on the /42 (just where these go I have no idea), but I will try to route them along the walls so the won't just hang there. Also liked your addition of the radio speaker--I think that'swhat it is--on the turret's top too.
Decided to just leave those little turret plugs in the wall, as they were just to small for me to do anything with. And I took your advice and just added wire to connect the plug itself to its little 'holder' there. I just couldn't get that chain to work so that it looked right. Oh well.
Looking forward to seeing more from you both.
Take care and good luck there. Larry
jejack2
Maryland, United States
Joined: April 09, 2002
KitMaker: 322 posts
Armorama: 0 posts
Joined: April 09, 2002
KitMaker: 322 posts
Armorama: 0 posts
Posted: Thursday, August 26, 2004 - 08:49 PM UTC
Long time no post for me on this subject. I got stuck midway thru my turret on my '43. Since then, I have purchased an 85 (much cooler looking IHMO). Now that I have finished painting my modelling room (my wife said it looked like it needed a coat of paint) I can get back to modelling these behemoths! Pics forthcoming!
sgirty
Ohio, United States
Joined: February 12, 2003
KitMaker: 1,315 posts
Armorama: 0 posts
Joined: February 12, 2003
KitMaker: 1,315 posts
Armorama: 0 posts
Posted: Thursday, August 26, 2004 - 09:14 PM UTC
Hi, good to hear from you jejack2. Looking forward to seeing some of your work. Which of the /85s did you get? And do you know what the differences are between the two /85 kits would be? So far I've seen very little on either one of them. The boss says I can have one of them , but only one. Ha, ha!
Thanks and take care, Sgirty
majorproblem
England - West Midlands, United Kingdom
Joined: June 27, 2004
KitMaker: 132 posts
Armorama: 0 posts
Joined: June 27, 2004
KitMaker: 132 posts
Armorama: 0 posts
Posted: Thursday, August 26, 2004 - 11:25 PM UTC
Hi Larry,
Once again thank you for your comments
Its funny because in no way do I think your work looks amaturish compared to mine.
I have great admiration for your work and still enjoy viewing your pics now!
The wires for the radio, from what I can work out route down to the pipe / conduit under the gun, which projects down to the centre of the hull floor (where the main electrical harness is)...neither of these parts are modelled (I scratch built mine) but I believe the main box is modelled in the 85 version?...perhaps anyone can correct me on this (jason?)?
The wiring on the drivers side of the radio plugs in for the commanders headphones and throat mike, the turret front end of the radio wiring runs down underneath the gun into the pipe that bends down to the centre of the hull floor.
It looks like the wiring would be the same for the 42 and 43 version, other than the 43 has 1 extra wire for the turret fan....in any case, it appears that 2 main thicker wires run up the pipe, then split into thinner wires to power the radio, turret traverse, etc.
This link http://uk.pg.photos.yahoo.com/ph/toony30/detail?.dir=98ad&.dnm=c622.jpg shows the 2 main wires running into the base connection for the tube
This link http://www.thetankmaster.com/ENGLISH/AFV/t34-76_2.asp is great for trying to work it all out!!!
The foot trigger wires go directly from the pedals to the gun and it looks like 1 goes to the hull roof but I'm not sure?
The other object on my turret roof is the internal light, I scratchbuilt it to be the same as the one on the side pannel inside the hull (I don't know if this is correct, but I know some form of roof light was there)
This link http://pmms.webace.com.au/reviews/vehicles/hussar/hussar16004-5.htm is more info on the ammo....looks really cool and may well be obtaining some of those!
As for the 85 differences, so I believe, the factory 183 kit has the turret with one piece cupola hatch and turret traverse motor bulge. Apparently it also comes with both types of fenders, (the squared off versions are appropriate for this version). The other kit has the earlier turret , two piece commanders hatch and no turret traverse motor bulge.
Jason, does the 85 come with all the radio gear in the turret, or have Trumpeter left a lot of it out?
Carl
colo_artist
Colorado, United States
Joined: August 27, 2004
KitMaker: 139 posts
Armorama: 0 posts
Joined: August 27, 2004
KitMaker: 139 posts
Armorama: 0 posts
Posted: Friday, August 27, 2004 - 06:16 AM UTC
Hi majorproblem,
Maybe I can answer your questions about the /85 models...mine arrived about an hour ago. It's the early #174 (vs. the late #183).
The early #174 does have the split hatch and no motor bulge (which is one reason I went for the early version...I like the look of the smoother side). Also, this version does come with both the round and squared off fenders.
I'm not sure what all should be in there for radio gear, but there is a piece for the "wireless unit."
I have a couple of pictures...one of the turret and one of page 16 showing what's inside of the turret. I don't know yet how to link to them, so just use the "my photos" button.
When deciding which model to go with, I used this page to help sort out what might be the differences between the early and late /85...
http://www.missing-lynx.com/articles/russia/rpt34/rpt34.htm
Studying the box art, I believed, at least the artwork, depicted what is shown as the ''Angle-Jointed Style'', Summer '44?? Production Turret." It's near the bottom of the page. Now that I have the kit, I can confirm the model closely matches this drawing. The model has the angular weld, grooved mantlet, and no fairing around the pistol port. FYI...it does have the tie downs on the back of the turret.
I'm thinking the T-34/85 later #183 will look like the drawing titled "Flattened Style" Turret, Summer '44 Production" but that drawing indicates it has the two-piece hatch. It's be interesting to find out whether it has a the two-piece or a one-piece hatch.
Take care.
Karl
colo_artist
Colorado, United States
Joined: August 27, 2004
KitMaker: 139 posts
Armorama: 0 posts
Joined: August 27, 2004
KitMaker: 139 posts
Armorama: 0 posts
Posted: Saturday, August 28, 2004 - 12:00 AM UTC
Looks like I found the answer as to whether the T-34/85 has a single or double hatch cover. Here's a picture...
http://gallery43349.fotopic.net/p2714896.html
If you follow the link up, there are lots of photos of what I take to be the T-34/85 Late #183 "stock" model although the box art shown with it is for the /76 1942 model.
It looks like the photos are from the Nurnberg Spielwarenmesse 2004 Toy Fair.
Take care.
sgirty
Ohio, United States
Joined: February 12, 2003
KitMaker: 1,315 posts
Armorama: 0 posts
Joined: February 12, 2003
KitMaker: 1,315 posts
Armorama: 0 posts
Posted: Saturday, August 28, 2004 - 12:52 AM UTC
Hi, Thanks for that information there colo_artist. Man, there sure doesn't seem to be a whole lot of difference there between them. I would think that Trumpeter would have made some more changes to each kit in order to sell more of them both. Hardly worth the price of buying two of them is there?
But one good thing about either one of these /85 kits is that there seems to be quite a few changes, to be made in going from the /43, /42 kits to one of the /85s. So that's good news. I really like the /42 and /43, but there is just something about that big turret and bigger gun on the /85 that makes it look more rugged and dangerous.
I will most likely go for the #183 kit, (providing the boss approves that is, as according to her I have two of the same model already which is kind of stretching it in her opinion), as I like that extra little bulge on the turret's side. I guess either one of these machines could have seen action in Berlin, which is how I'm planning to do one, with the 'bed springs' on the side, blown off road wheel, and such. Also think I'm going to add a lot more weathering to it was well. Lots of bricks and brick dust, timber and such, just like it's chashed somebody through a building, which they were known to have done on occasion.
Thanks and take care, Sgirty
colo_artist
Colorado, United States
Joined: August 27, 2004
KitMaker: 139 posts
Armorama: 0 posts
Joined: August 27, 2004
KitMaker: 139 posts
Armorama: 0 posts
Posted: Saturday, August 28, 2004 - 08:33 AM UTC
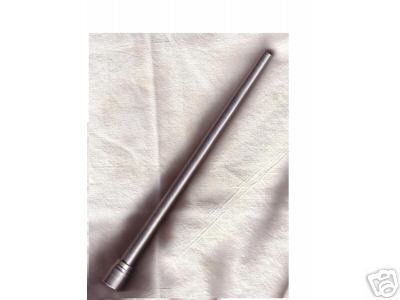
I wanted a metal barrel for my T-34/85. Cfbush2000 listed a link for a brass barrel for the /76 at:
http://brassbarrels.com/
They didn't show one for the /85, but I did find one which looks to be from them on eBay. I suspect Mike of Mikes Crafts is the same Mike at brassbarrels. Here's what the barrel looks like...
And here is the accompaning description:
"Replacement barrel for the NEW Trumpeter 1/16th scale tank model kit. Made from aluminum for less weight this barrel directly replaces the unusable plastic kit barrel. It is drilled through to compliment the kit's full interior. Made with pride in the U.S.A."
The "buy it now" price was $27.99.
Others have mentioned the replacement barrel from Finemolds for the /76...here's a link if you haven't bookmarked it...
http://www.perthmilitarymodelling.com/reviews/vehicles/finemolds/sp09.htm
I went to the Finemolds site and found they have one for the /85...
http://www.sala.or.jp/%7Efm/sp10/85.htm
...(the page also has a nice shot showing the bulge and flat spot on the /85 late #183's turret)
Although the Finemolds barrel looks sweet, I ended up going with brassbarrels because they are available now...the Finemolds /85 isn't even listed yet on Rainbow Ten's site...
http://www.rainbowten.co.jp/english/index.html
Someone mentioned some replacement ammo reviewed at...
http://pmms.webace.com.au/reviews/vehicles/hussar/hussar16004-5.htm
They are only $10 from AirConnection (in Canada), so I figured what the heck and ordered them. Here's the site...
http://www.airconnection.on.ca/
One last thing...model pricing. Hisham mentioned a great price $74 at...
http://www.luckymodel.com/
The thing is, they are in Hong Kong, so shipping is $28 for surface shipping (1-2 months) or $42 for Air (7-11 days). However, they only list the two /76 models.
The best price I found in the states was $98.99 at Tower Hobbies for the /85 early model...
http://www2.towerhobbies.com/cgi-bin/wti0001p?&I=LXHEH4&P=W
Tower also has the /85 late version, but wants $125 for it. Weird.
Having said that, I went with Sprue Brothers. I've done business with them before and they had the /85 early model for $129 (they currently have all 4 models in stock). Shipping to me was only $7.50. Here's their site...
http://www.spruebrothers.com
Take care.
sgirty
Ohio, United States
Joined: February 12, 2003
KitMaker: 1,315 posts
Armorama: 0 posts
Joined: February 12, 2003
KitMaker: 1,315 posts
Armorama: 0 posts
Posted: Saturday, August 28, 2004 - 07:13 PM UTC
HI, Thanks for all that fine information there color_artist. Lots of stuff there to check out. I usually stick to the kit barrels if I can get them sanded down good and about the only time I go for the aftermarket brass, aluminum, or such barrels is if they have a muzzle brake on them. So far I've had good luck.
Have checked into the PMMS site on that ammo from Hussar and it looks really good. But haven't quite made up my mind on that as of yet. I also see that Archer is releasing a couple sets of decals for the big T-34 too, and I may get a set for this /42 as time goes on, as the ones in the kit, at least for it, really suck in my opinion.
That $98.99 is a really good price there from Tower. I paid $125 for my kits here locally.
I've pre-ordered the book Mystic T-34 from Air Connection and I hope that it will be in sometime in the near future and plan to go through that with a fine tooth comb before starting on an /85. And I hope that it will be in before I get too far along on the /42 as well. But won't hold my breath. I figure if I see it by the first of the year I'll be lucky.
Take care and good luck, Sgirty
sgirty
Ohio, United States
Joined: February 12, 2003
KitMaker: 1,315 posts
Armorama: 0 posts
Joined: February 12, 2003
KitMaker: 1,315 posts
Armorama: 0 posts
Posted: Saturday, August 28, 2004 - 10:45 PM UTC
HI, Been cleaning out my gallery a little and added a couple pictures of my /42 at the moment. One is the engine that I added some extra wiring to. and the other is the interior of the /42 turret so far. No weathering in there, so it's kind of bright.
Take care, Sgirty
Take care, Sgirty
colo_artist
Colorado, United States
Joined: August 27, 2004
KitMaker: 139 posts
Armorama: 0 posts
Joined: August 27, 2004
KitMaker: 139 posts
Armorama: 0 posts
Posted: Saturday, August 28, 2004 - 11:18 PM UTC
Sgirty,
Did you redo the fuel injection lines (on the top of the engine)? They look different than the July 3 photo. They look better now, more angular, which resembles tubing (which they are) than cables. What did you use? Wire?Great stuff by the way...
It looks like the Archer transfers for the T-34/76 1942 and 1943 will be available in a couple of days...
http://www.archertransfers.com/SovietAFVcatalog.html
I dropped them a note asking if/when some for the /85's would be ready.
This forum, with its excellent and talented members, is what finally swayed me to getting the "amazing T-34 model." The photos have given me some insight as to what is possible. Amazing model and amazing work.
Take care all...