Alan: Excellent work on reworking that base into a more natural organic form!
You'll have plenty of time for the Rolls Royce, so rest easy while you finish up that Churchill
Steven: That looks like it will be a nice warmup while you wait to tackle that tiny sub kit.
For anyone interested in field artillery, Darren Baker was kind enough to put together this feature walk around of a WWI British 18pdr Mk I highlighting a healthy amount of detailed close ups per his usual standards.
Campaigns
Where Armorama group builds can be discussed, organized, and updates posted.
Hosted by Darren Baker, Richard S.
The Great War 11-11-11 (official thread)
vonHengest
Texas, United States
Joined: June 29, 2010
KitMaker: 5,854 posts
Armorama: 4,817 posts
Joined: June 29, 2010
KitMaker: 5,854 posts
Armorama: 4,817 posts
Posted: Monday, December 05, 2011 - 01:47 PM UTC
Posted: Tuesday, December 06, 2011 - 02:03 AM UTC
Hi Jeremy,
Many thanks, the build was a lot of fun.
Cheers
Al
Many thanks, the build was a lot of fun.
Cheers
Al
trooper82
Scotland, United Kingdom
Joined: September 11, 2005
KitMaker: 109 posts
Armorama: 98 posts
Joined: September 11, 2005
KitMaker: 109 posts
Armorama: 98 posts
Posted: Tuesday, December 06, 2011 - 06:17 AM UTC
the link for the 18pdr walkaround is failing to connect !!
Paul
Paul
vonHengest
Texas, United States
Joined: June 29, 2010
KitMaker: 5,854 posts
Armorama: 4,817 posts
Joined: June 29, 2010
KitMaker: 5,854 posts
Armorama: 4,817 posts
Posted: Tuesday, December 06, 2011 - 10:05 AM UTC
Quoted Text
the link for the 18pdr walkaround is failing to connect !!
Paul
Thanks for letting me know, give it a try now
Barbarossa
United Kingdom
Joined: August 25, 2005
KitMaker: 216 posts
Armorama: 215 posts
Joined: August 25, 2005
KitMaker: 216 posts
Armorama: 215 posts
Posted: Tuesday, December 06, 2011 - 09:40 PM UTC
Hi everyone,
Here's my contribution to the Great War Campaign........
I got the inspiration from a photo of a similar dio I'd seen on a website afew years ago , but then dispite searching since couldn't find it again..., but the idea was hatched..!!
Basically it's a book on the British Tommy, pages glued down individually & set on a base deep enough to allow for the depths of the trenches. Using images from wartime photo's, ideas from films & specialist books, I tried to recreate the allied & german trenches, and show the differences between the structures of the 2.
Once the shapes were cut out with a sharp knife, I lined the trench walls with plaster bandage to neaten it all up. Not really neccesary as it proved, but fun using all the same..
The german trench is now completely built, awaiting the first coat of paint. I firstly raised the ground to the right level, then built the trench sides with plastic card & matchsticks. The duck boards were added with a gap in the middle to show a drainage ditch, then the firing step. I allowed a space on the right side to be used as a storge area, with a hole futher along for a dugout. Milliput sandbags were placed around the top, with holes allowed as firing positions. Plaster & sand brought it all together, along with bits of debris & a skeleton from Verlinden. The barbed wire is from Eduard, the intention was to have 2 rows of wire fencing, but I didn't want to spread out too much futher across the page, I wanted to keep a reasonable distance between the 2 lines.
Ideally I would have liked to have had an extra 1cm in each trench to allow for abit more room, but having seen the cramped conditions in some first world war trenches, they're ok.
Wasn't sure initally how to approach the painting of this, weather to paint everything in sub assemblies first before building the trench piece by piece, or to airbrush it all once built, then begin to pick out the individual detail from there. Decided on the latter, as I thought it would more naturally come together. The pagesof the book will be 'carefully' covered in low tac masking tape.
Just started now the british trench, which will look more ramshackled & 'put together' than the neat & tidy germans.
Cheers for now,
SIMON.
Here's my contribution to the Great War Campaign........
I got the inspiration from a photo of a similar dio I'd seen on a website afew years ago , but then dispite searching since couldn't find it again..., but the idea was hatched..!!
Basically it's a book on the British Tommy, pages glued down individually & set on a base deep enough to allow for the depths of the trenches. Using images from wartime photo's, ideas from films & specialist books, I tried to recreate the allied & german trenches, and show the differences between the structures of the 2.
Once the shapes were cut out with a sharp knife, I lined the trench walls with plaster bandage to neaten it all up. Not really neccesary as it proved, but fun using all the same..
The german trench is now completely built, awaiting the first coat of paint. I firstly raised the ground to the right level, then built the trench sides with plastic card & matchsticks. The duck boards were added with a gap in the middle to show a drainage ditch, then the firing step. I allowed a space on the right side to be used as a storge area, with a hole futher along for a dugout. Milliput sandbags were placed around the top, with holes allowed as firing positions. Plaster & sand brought it all together, along with bits of debris & a skeleton from Verlinden. The barbed wire is from Eduard, the intention was to have 2 rows of wire fencing, but I didn't want to spread out too much futher across the page, I wanted to keep a reasonable distance between the 2 lines.
Ideally I would have liked to have had an extra 1cm in each trench to allow for abit more room, but having seen the cramped conditions in some first world war trenches, they're ok.
Wasn't sure initally how to approach the painting of this, weather to paint everything in sub assemblies first before building the trench piece by piece, or to airbrush it all once built, then begin to pick out the individual detail from there. Decided on the latter, as I thought it would more naturally come together. The pagesof the book will be 'carefully' covered in low tac masking tape.
Just started now the british trench, which will look more ramshackled & 'put together' than the neat & tidy germans.
Cheers for now,
SIMON.
Posted: Tuesday, December 06, 2011 - 09:56 PM UTC
Hi Simon,
This looks to be a grand idea, what scale are you building in?
Nice one.
Al
This looks to be a grand idea, what scale are you building in?
Nice one.
Al
Tailor
Nordrhein-Westfalen, Germany
Joined: May 26, 2008
KitMaker: 1,168 posts
Armorama: 256 posts
Joined: May 26, 2008
KitMaker: 1,168 posts
Armorama: 256 posts
Posted: Tuesday, December 06, 2011 - 11:32 PM UTC
What a spectacular idea!
Bravo Zulu!
Guido
Bravo Zulu!
Guido
95bravo
Kansas, United States
Joined: November 18, 2003
KitMaker: 2,242 posts
Armorama: 504 posts
Joined: November 18, 2003
KitMaker: 2,242 posts
Armorama: 504 posts
Posted: Wednesday, December 07, 2011 - 12:02 AM UTC
Oh man, Simon, I'm seriously loving this idea! I can hardly wait to see it completed!
Barbarossa
United Kingdom
Joined: August 25, 2005
KitMaker: 216 posts
Armorama: 215 posts
Joined: August 25, 2005
KitMaker: 216 posts
Armorama: 215 posts
Posted: Wednesday, December 07, 2011 - 12:49 AM UTC
Hi guys,
Thanks for the positive comments, the scale is 1/35. I plan on using ICM's British Infantry 1917-18, & German Troops 1917-18, using 2-3 guys for each trench. I've also got Plus Models rats, sapper tools & crockery equipment to try & add to the detail.
Cheers!
Thanks for the positive comments, the scale is 1/35. I plan on using ICM's British Infantry 1917-18, & German Troops 1917-18, using 2-3 guys for each trench. I've also got Plus Models rats, sapper tools & crockery equipment to try & add to the detail.
Cheers!
95bravo
Kansas, United States
Joined: November 18, 2003
KitMaker: 2,242 posts
Armorama: 504 posts
Joined: November 18, 2003
KitMaker: 2,242 posts
Armorama: 504 posts
Posted: Wednesday, December 07, 2011 - 04:39 AM UTC
Reference has arrived, so I am making revolutions to get this project underway.
See you boys on the other side.
Steve
See you boys on the other side.
Steve
95bravo
Kansas, United States
Joined: November 18, 2003
KitMaker: 2,242 posts
Armorama: 504 posts
Joined: November 18, 2003
KitMaker: 2,242 posts
Armorama: 504 posts
Posted: Wednesday, December 07, 2011 - 04:50 AM UTC
Quoted Text
Hi guys,
Thanks for the positive comments,
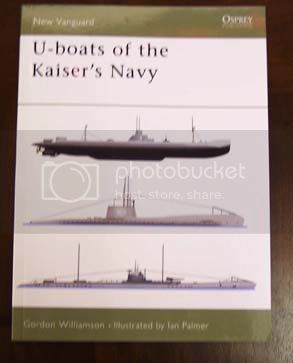
I have frequently had debates ( which degenerated into shouting matches) over the issue of modeling be an art or craft. I would say that this settles the issue...it is, art. My mind has been churning all day over your project. The whole premise that the scene is leaping from the pages of a book is genius. (Try that with a fracking Kindle!) I have thought of a number of books and subjects that would be perfect for using your idea. A u-boat surfacing from the pages? Oh man, the mind boggles!
vonHengest
Texas, United States
Joined: June 29, 2010
KitMaker: 5,854 posts
Armorama: 4,817 posts
Joined: June 29, 2010
KitMaker: 5,854 posts
Armorama: 4,817 posts
Posted: Thursday, December 08, 2011 - 08:24 AM UTC
Simon: That is a seriously excellent idea!
Steven: Excellent! Now get to work!
Regarding modelling as art vs. craft, it is generally ART hands down. It involves sculpting and painting skills on a 3D canvas that require the mastery of several skills to properly execute. The exception to this would be people who put together kits real quick for play or other purposes, ie: snaptite kits etc.
WARDUKWNZ
Auckland, New Zealand
Joined: June 01, 2011
KitMaker: 1,716 posts
Armorama: 1,638 posts
Joined: June 01, 2011
KitMaker: 1,716 posts
Armorama: 1,638 posts
Posted: Thursday, December 08, 2011 - 09:39 AM UTC
Hey guys ,, Just signed up for this campaign .. after the score i just had on some WW1 models this couldnt be better timed .. now to brag about what i got lol
I got these Emhar kits ,, the Whippet .Tadpole. MkIV Male and the female all for $109 NZ .. now thats a deal since here these kits are very very hard to find .the guy i got these off waited 10 yrs to get his hands on the Emhar A7V in 1/35th ..he,s hunting one down for me too .. now which to build ..might have to build two i think
Phill
vonHengest
Texas, United States
Joined: June 29, 2010
KitMaker: 5,854 posts
Armorama: 4,817 posts
Joined: June 29, 2010
KitMaker: 5,854 posts
Armorama: 4,817 posts
Posted: Thursday, December 08, 2011 - 11:19 AM UTC
Phill: I've been hunting those kits myself, but stopped with the Whippet. If you guys are looking for the 1/35 A7V, it only made by a company called Tauro I believe.
jjasmine
Connecticut, United States
Joined: January 16, 2011
KitMaker: 112 posts
Armorama: 33 posts
Joined: January 16, 2011
KitMaker: 112 posts
Armorama: 33 posts
Posted: Saturday, December 10, 2011 - 04:54 PM UTC
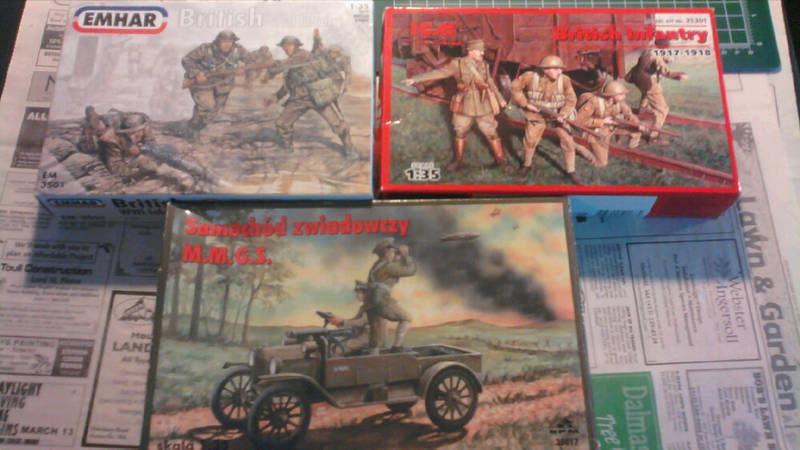
Decided to go from lurking to participating. I have a Model T Scout Car and some British Infantry in 1/35 scale that I've been meaning to use in a diorama. Now I have the impetus to get started. I will pull the kits off the shelf and post some pics tomorrow.
jjasmine
Connecticut, United States
Joined: January 16, 2011
KitMaker: 112 posts
Armorama: 33 posts
Joined: January 16, 2011
KitMaker: 112 posts
Armorama: 33 posts
Posted: Saturday, December 10, 2011 - 04:56 PM UTC
Simon, I love your idea and your progress so far looks excellent. I can't wait to see the finished product.
eoinryan
Cork, Ireland
Joined: April 30, 2010
KitMaker: 232 posts
Armorama: 134 posts
Joined: April 30, 2010
KitMaker: 232 posts
Armorama: 134 posts
Posted: Sunday, December 11, 2011 - 11:59 AM UTC
@SImon,
Just browsing the thread and I saw your trench system. That is such a great idea and so suited to WWI. Hats off and good luck with the rest of the build.
Eoin
Removed by original poster on 12/12/11 - 02:12:50 (GMT).
jjasmine
Connecticut, United States
Joined: January 16, 2011
KitMaker: 112 posts
Armorama: 33 posts
Joined: January 16, 2011
KitMaker: 112 posts
Armorama: 33 posts
Posted: Sunday, December 11, 2011 - 06:46 PM UTC
Here's what I have to start with. The figures are mostly in combat action poses and don't fit well with the idea I have for the diorama. I will start with the vehicle first and keep my eye out for some figures that will be better suited for my needs. If anyone here has a good source for WWI era figures in 1/35, I'd love to hear from you.
RedDuster
England - South East, United Kingdom
Joined: March 01, 2010
KitMaker: 7,078 posts
Armorama: 248 posts
Joined: March 01, 2010
KitMaker: 7,078 posts
Armorama: 248 posts
Posted: Monday, December 12, 2011 - 12:11 AM UTC
Nice work Simon, great concept, and being well executed.
HMS Kent under way (just). The wast resin removed from the hull, fortunatley a simple clean up as it was deeply grooved, and some deck tan shot at the deck.
next job more painting, at this time from the available photographs, Kent, it appears, was overall light grey at the time of the Battle of the Falkland Istands. Also, She had returned from the China station in 1913, and was placed in reserve, re-activated on the outbreak of war, and then sent shortly after that to the Falklands, so I doupt she would have been repainted from the light grey used on the China station.
More soon
Si
Tailor
Nordrhein-Westfalen, Germany
Joined: May 26, 2008
KitMaker: 1,168 posts
Armorama: 256 posts
Joined: May 26, 2008
KitMaker: 1,168 posts
Armorama: 256 posts
Posted: Monday, December 12, 2011 - 03:59 AM UTC
I'll chekc my Burt tonight, Si, but I guess that would be a sound way to base you colour.
Cheers,
Guido
PS.: I still haven't made up my mind, whether to build a boat or a gun, oer even a tank (Female, Tadpole, A7V. All choices seem equally appealing.
Cheers,
Guido
PS.: I still haven't made up my mind, whether to build a boat or a gun, oer even a tank (Female, Tadpole, A7V. All choices seem equally appealing.
Posted: Monday, December 12, 2011 - 04:07 AM UTC
Excellent, glad to see more folks joining the ranks.
Al
Al
Buckeye198
Ohio, United States
Joined: May 02, 2010
KitMaker: 596 posts
Armorama: 265 posts
Joined: May 02, 2010
KitMaker: 596 posts
Armorama: 265 posts
Posted: Monday, December 12, 2011 - 01:56 PM UTC
About time I throw my hat in the ring with Eddie Rickenbacker's Nieuport 28c1 in 1/48 scale by Roden. Now for the pictures:
The kit itself is pretty spartan in terms of the number of pieces, though what is included looks very well molded. Lots of surface detail, very thin wings, and what looks like it should be a very straightforward build.
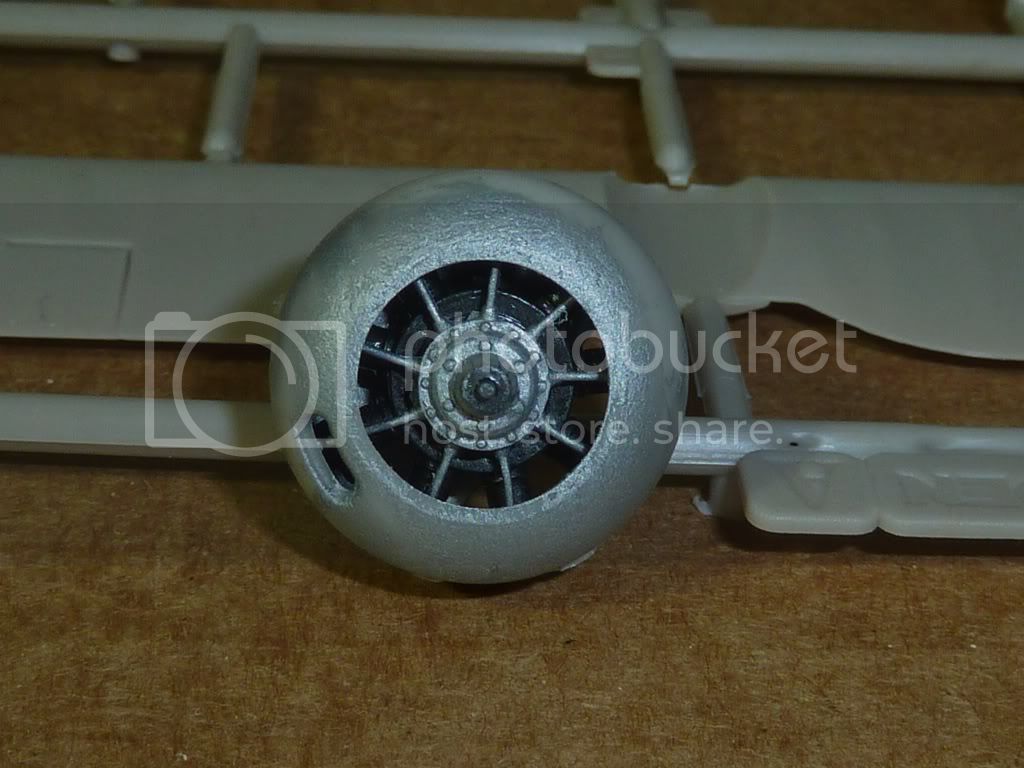
The engine went together easily and fit into the deep cowl with minimal fussing.
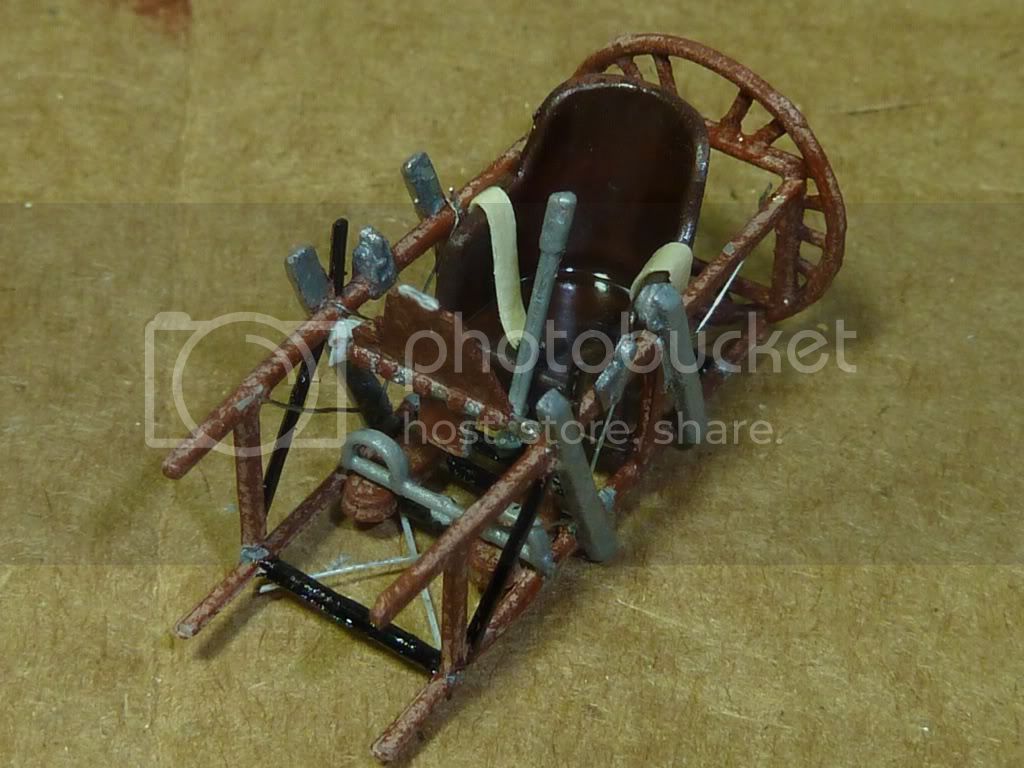
The cockpit was somewhat lacking in detail, but for a guy like me, since so little of it will be seen anyway, I didn't mind. It also allowed me to practice using wire, since I will be needing plenty of it for the rigging. I'm not sure how thick the wire is since I just cut open an old cable that I'm not sure what it goes to...
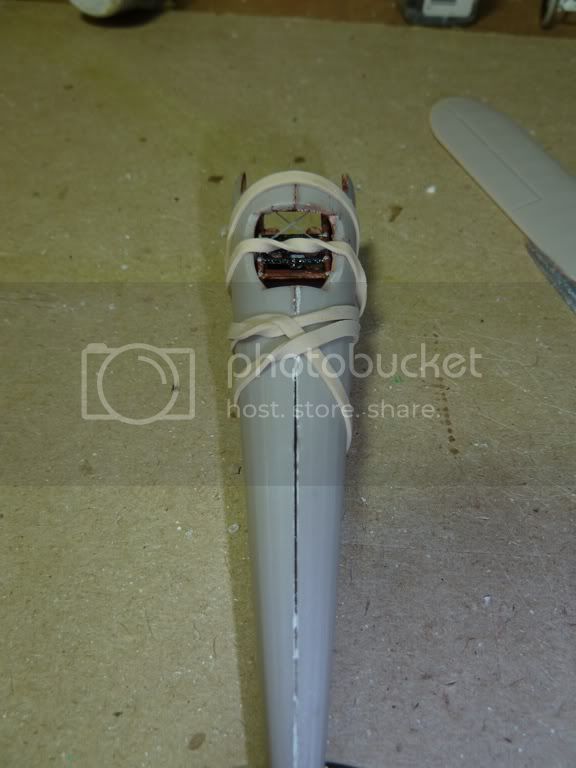
The instructions had me gluing the fuselage halves together then sliding in the cockpit. No way in hell was that going to work for me. I don't know if that was sloppy building on my part or poor planning on theirs, but I had to crack open the halves. When all was said and done, there were some significant gaps that needed putty badly.
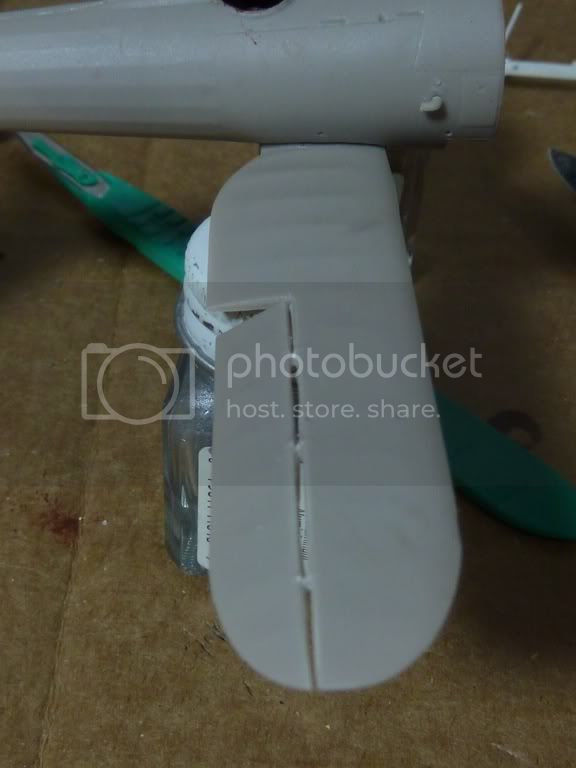
I decided to drop all the flaps. I just feel like they add a bit more life to model as opposed to everything being straight and stiff. The elevators came off neat and clean, but the ailerons needed a bit more coercion to separate.
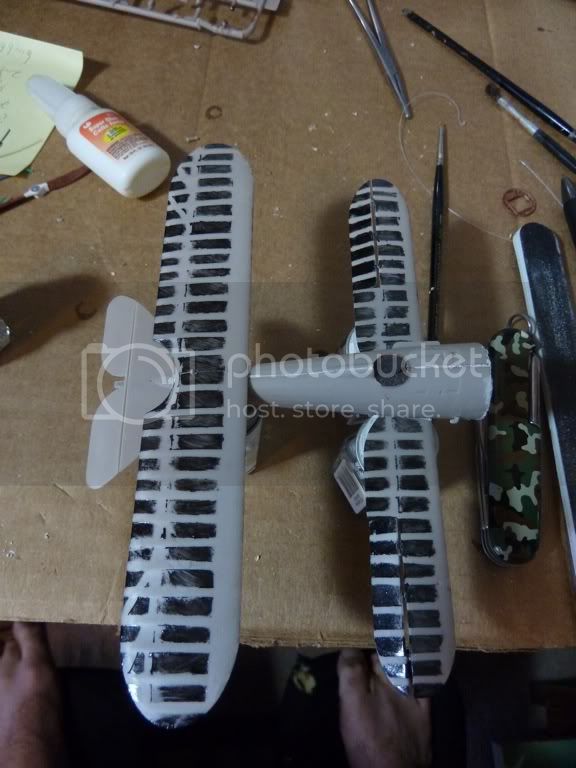
I tried a preshading technique of laying down masking tape along the framework of the wing (Thank you Terri for showing this technique here), but I'm not sure how well it'll turn out. My airbrush and paints are pretty uncooperative. Maybe I can find a way to make it all work. Or I'll screw up, dunk the model in thinner, and try again. Yeah, that sounds like what I'll end up doing...
Either way, updates soon. Glad that this campaign took off nicely!
Buckeye198
Ohio, United States
Joined: May 02, 2010
KitMaker: 596 posts
Armorama: 265 posts
Joined: May 02, 2010
KitMaker: 596 posts
Armorama: 265 posts
Posted: Monday, December 12, 2011 - 04:40 PM UTC
Just as I had planned, my model is SO f-ed up right now I'm considering dropping the kit. The enamel preshade was too thick, so there are essentially raised panel lines instead of the light-colored "stripes" in the preshading areas. The acrylic paint for the base coat didn't adhere at all when I used the airbrush. (This seems to be a common theme for me, acrylics, and airbrushing. I can just never get the ratio right to make paint that will flow through the AB yet stick to the plastic.) So then I tried to hand-paint the base coat, still using the acrylic. When I ran the brush over the wings, the preshade ridges caused bubbles to entirely coat the surface. I painted slowly and carefully, but I swear, it was like the paint was carbonated there were so many ****ing bubbles! I've only had to abandon 2 models due to extreme screwups, but this may be my third. I have never been so infuriated by a model before, and in my opinion, if you're not enjoying your build, just stop. I know that this is almost certainly my fault, but I'm losing interest in this build, and fast. One thing is for sure, I have learned so many things NOT to do when painting, and I'm fairly sure I'll be abandoning acrylics shortly. Give me a week or so...I'll have calmed down by then. That or maybe the entire thing will become target practice
JackG
Ontario, Canada
Joined: May 28, 2006
KitMaker: 172 posts
Armorama: 122 posts
Joined: May 28, 2006
KitMaker: 172 posts
Armorama: 122 posts
Posted: Monday, December 12, 2011 - 06:59 PM UTC
Since your pre-shading was enamel, your following base coat has to be the same. Particularly if the acrylic you put on top is flat base, that will certainly cause problems. You could of tried adding some future to the acrylic for better adhesion and more compatible with the enamel.
It is when doing the wash technique you want to utilize two different paint types.
regards,
Jack
It is when doing the wash technique you want to utilize two different paint types.
regards,
Jack