Campaigns
Where Armorama group builds can be discussed, organized, and updates posted.
The Great War 11-11-11 (official thread)
vonHengest
Visit this Community
Texas, United States
Joined: June 29, 2010
KitMaker: 5,854 posts
Armorama: 4,817 posts
Posted: Monday, December 12, 2011 - 07:07 PM UTC
Jeffrey: Welcome aboard! As far as WWI figures go, Masterclub seems to be the best out there overall. What type of figures are you looking for specifically?

Si: I have to say that class of ship certainly has a beautiful shape. I think I'm really starting to like the early steel ships.

Guido: You can't go wrong as far as subject matter goes, that's part of the idea behind this campaign. I know you enjoy building ships, and you are certainly well skilled in building aircraft, so you may want to choose a gun or tank. The Emhar and Tauro kits need quite a bit of work and would present a nice challenge if you're up for it

Alan: Me too, the more the merrier

Robby: Automotive brake fluid has been used by many to clean botched paint jobs off of model kits, it will warp the plastic if left in too long though. Some people use an oven cleaner product as well, but it is very caustic and smells pretty bad. They both do the job nicely.
It looks like you hand brushed the preshading on the wings? IIf so, you may want to consider airbrushing during this step after you remove the old paint. It will eliminate the raised texture.
Regarding the rest of the painting, what brands of paints are you using? And I am guessing you are applying the paint directly to the bare plastic?
jjasmine
Visit this Community
Connecticut, United States
Joined: January 16, 2011
KitMaker: 112 posts
Armorama: 33 posts
Posted: Monday, December 12, 2011 - 08:27 PM UTC
Jeremy,

Thanks for the link, I just bookmarked it. It was exactly what I was looking for, figures from all armies of the Great War. I was only finding a very limited menu to work from and this gives me a great many more choices. I will be looking for things to incorporate into my build.
RedDuster
Visit this Community
England - South East, United Kingdom
Joined: March 01, 2010
KitMaker: 7,078 posts
Armorama: 248 posts
Posted: Monday, December 12, 2011 - 09:37 PM UTC
Thanks Guido,

My first instinct was to go for a darker grey as used in home waters as HMS Kent had be re-activated from the reserve fleet, but studying the photographs of her in Port Stanley she does appear to be light grey, looking at the contrast between deck and bulkhead colours. (risky I know trying to interpret very old b&w pics), but in 1913 would they have bothered with re-painting her prior to putting her in reserve, with the priorities of the day I doubt it. I am certain she would not have got a repaint coming out of reserve at the outbreak of war, repainting an obselescant armoured cruiser, not I think on the list of things to do.

Si
Tailor
Visit this Community
Nordrhein-Westfalen, Germany
Joined: May 26, 2008
KitMaker: 1,168 posts
Armorama: 256 posts
Posted: Tuesday, December 13, 2011 - 01:20 AM UTC
Si-
I have found no hint in the Burt (Light Cruisers of WWI).
The photos of the era do depend as much on the lighting as the prcessing chemicals, media, etc. It is almost impossible to make a valid colour determination especially as the the photos were most likely brown-white (see my photo on page 1 of this thread) in original and only turned black white when being reproduced for book printing for the first time.
In any way, anyone would be hard pressed to prove your interpretation to be wrong.
Cheers,
Guido
AlanL
Visit this Community
England - East Anglia, United Kingdom
Joined: August 12, 2005
KitMaker: 14,499 posts
Armorama: 11,675 posts
Posted: Tuesday, December 13, 2011 - 06:40 AM UTC
Hi Jeremy,

Thanks for the link. Looks like there might be a few Brits coming along.

Cheers

Al
Buckeye198
Visit this Community
Ohio, United States
Joined: May 02, 2010
KitMaker: 596 posts
Armorama: 265 posts
Posted: Tuesday, December 13, 2011 - 11:02 AM UTC

Quoted Text

Robby: Automotive brake fluid has been used by many to clean botched paint jobs off of model kits, it will warp the plastic if left in too long though. Some people use an oven cleaner product as well, but it is very caustic and smells pretty bad. They both do the job nicely.
It looks like you hand brushed the preshading on the wings? IIf so, you may want to consider airbrushing during this step after you remove the old paint. It will eliminate the raised texture.
Regarding the rest of the painting, what brands of paints are you using? And I am guessing you are applying the paint directly to the bare plastic?


It seems that isoprop took off all the acrylic, but also the enamel underneath after a bit of rubbing with an old rag . Neat surprise there. The enamels are standard Testors and the acrylics are Vallejo. After doing more research it seems like Tamiya and some MM acrylics don't need a primer for acceptable results, but Vallejo are impossible to hold on bare plastic. Lucky me, eh? Well I'll just try to finish this up already, ignoring the preshade and forcing my way to the rigging...I only have another week or two at my workbench and I'm not the kind of guy to finish a model in a weekend.
By the way, Jeremy, you always seem to be watching my "best works," don't you?
vonHengest
Visit this Community
Texas, United States
Joined: June 29, 2010
KitMaker: 5,854 posts
Armorama: 4,817 posts
Posted: Tuesday, December 13, 2011 - 11:41 AM UTC
Si: Your thoughts seem sound and that would be my guess as well. As Guido accurately stated, someone will be VERY hard pressed to prove you wrong either way.

Alan: My pleasure, I think you'll like them.

Robby: Vallejos absolutely need a primer regardless of what they are being applied to modelwise, the Tamiya acrylics are more forgiving in that sense. And don't worry, I'll have some.. err, interesting things to show I'm sure once I get a chance to try out my own resin "water" submarine displays
RedDuster
Visit this Community
England - South East, United Kingdom
Joined: March 01, 2010
KitMaker: 7,078 posts
Armorama: 248 posts
Posted: Tuesday, December 13, 2011 - 10:53 PM UTC
Guido

Thanks for the assist, I will go along with the light grey.

Si
VLADPANZER
Visit this Community
Lebanon
Joined: December 20, 2010
KitMaker: 568 posts
Armorama: 549 posts
Posted: Wednesday, December 14, 2011 - 07:04 AM UTC
@Simon: That is an ingenious idea, just wonderful!!!! I am looking forward to it with great enthusiasm!!!!

Regards,
95bravo
Visit this Community
Kansas, United States
Joined: November 18, 2003
KitMaker: 2,242 posts
Armorama: 504 posts
Posted: Wednesday, December 14, 2011 - 10:21 AM UTC
Robby,

Just for information, Formula 409 works well as paint remover. It's not as caustic as oven cleaner or brake fluid. Fill a tub full of it, toss in the model, wait a few days and you can wipe off the paint or, it will have fallen off in sheets. I've used it on models that had been painted for over ten years and it even pulled up the paint on those.

Try it some time.

Steve
Buckeye198
Visit this Community
Ohio, United States
Joined: May 02, 2010
KitMaker: 596 posts
Armorama: 265 posts
Posted: Wednesday, December 14, 2011 - 11:40 AM UTC
Ten years?? And we are talking about taking off enamel paints? Wow...I guess I did okay with the isoprop, but there was a lot of scrubbing involved. I will definitely keep 409 in mind!
95bravo
Visit this Community
Kansas, United States
Joined: November 18, 2003
KitMaker: 2,242 posts
Armorama: 504 posts
Posted: Wednesday, December 14, 2011 - 01:59 PM UTC

Quoted Text

Ten years?? And we are talking about taking off enamel paints? Wow...I guess I did okay with the isoprop, but there was a lot of scrubbing involved. I will definitely keep 409 in mind!


Yep, ten years and it was enamels. I used a tooth brush, but it was a minimal amount of scrubbing action.
vonHengest
Visit this Community
Texas, United States
Joined: June 29, 2010
KitMaker: 5,854 posts
Armorama: 4,817 posts
Posted: Wednesday, December 14, 2011 - 02:16 PM UTC
Great tip Steven, thanks for sharing!
grayghost666
#021
Joined: August 02, 2007
KitMaker: 2,458 posts
Armorama: 656 posts
Posted: Wednesday, December 14, 2011 - 07:11 PM UTC
Hello All,
I am sorry it took so long to make a reply to all of you about my reference books and other papers I have on the Great War, I had to hire another 2 librarians to help sort out and read the microfilm.
I have microfilm of most of the major newspapers from Germany, France, Great Britain, Russia, Italy, USA and the Austro-Hungarian Empire and I had to find librarians that could read Russian, Italian and Hungarian. They are translating them for me so if any of you need any info I think I can get it for you if it was in the newspaper.

I also hired a few students from the local collage to go over the books in my storage units and get out of them anything that is on WW1. They are searching all 100 climate controlled units and I think it will take them about 2 months to do all of them as they are also doing an inventory at the same time.
So far they have sent to my library about 40 books, and about 200 lbs of papers that I am looking over.

@Simon,
The HMS Kent paint was what was called "Gray, Light, Naval Ship Paint # 179"
I hope this helps you out. I have a dockyard booklet that has a number of different paints that where used before and during the war on Naval Ships. I did check with the British War Museum to make sure I did read it right, The print is badly faded.

If anyone needs any help, Please let me know,
Cheers,
Bruce
vonHengest
Visit this Community
Texas, United States
Joined: June 29, 2010
KitMaker: 5,854 posts
Armorama: 4,817 posts
Posted: Wednesday, December 14, 2011 - 07:22 PM UTC
Bruce that takes a lot of work and I personally appreciate your help as well as those who you have working for you to get this information


I greatly encourage anyone in this campaign to take advantage of this resource while you have the opportunity

Cheers and Happy Modelling
Jeremy
Buckeye198
Visit this Community
Ohio, United States
Joined: May 02, 2010
KitMaker: 596 posts
Armorama: 265 posts
Posted: Wednesday, December 14, 2011 - 07:34 PM UTC
D: Damn, son...you have picked up some SERIOUS resources over the years! Anything on the rigging of a Nieuport 28c1? And while I'm at it, I know it's Interwar material, but anything on the USS Los Angeles airship (ZR-3)? Never hurts to ask!
Tailor
Visit this Community
Nordrhein-Westfalen, Germany
Joined: May 26, 2008
KitMaker: 1,168 posts
Armorama: 256 posts
Posted: Wednesday, December 14, 2011 - 08:03 PM UTC
Facts of WWI:

To move a single combat-ready German army corps from depot to deployment took up as much space as 280 trains comprising a total of 12,000+ wagons:
170 passenger carriages for officers
965 freight wagons for troops
2960 wagons fitted for horse transport
1950 flat cars /freight wagons for artillery and impedimenta
6000 freight wagons for food, fodder, ammo and supplies.

The German army amassed 42 active and reserve army corps for frontline deployment within 15 days in 11,000 train movements with total capacity of 460,000 wagons. The above figures do not take account of Landwehr, replacement and naval personnel movements.

Source: The 1914 Campaign - August - October 1914, Daniel David, Spellmount 1987, ISBN 0-946771-62-6
grayghost666
#021
Joined: August 02, 2007
KitMaker: 2,458 posts
Armorama: 656 posts
Posted: Thursday, December 15, 2011 - 01:48 PM UTC

Quoted Text

D: Damn, son...you have picked up some SERIOUS resources over the years! Anything on the rigging of a Nieuport 28c1? And while I'm at it, I know it's Interwar material, but anything on the USS Los Angeles airship (ZR-3)? Never hurts to ask!


Hello Robby,
I will ask the Librarians if they have come across any aircraft items yet and I will check my Aviation Section of the library if I have any books on WW1 Aircraft.
I will also look into the Airship for you. I do have a few books on the history of the Airships used by the US Military. I will dig them out tomorrow.
Cheers,
Bruce
Barbarossa
Visit this Community
United Kingdom
Joined: August 25, 2005
KitMaker: 216 posts
Armorama: 215 posts
Posted: Friday, December 16, 2011 - 08:50 AM UTC
Hi everyone....
Firstly thanks again for all the great comments, still feel I can't take the crredit for the 'idea' though since I'd seen it on a similar dio elsewhere on a website afew years ago....... As Eoin mentioned earlier though, the subject of WW1 and the layout of opposing trenches suits the opposite pages of a book.

Anyway, I've just completed building the 'British side' of the page now, with it's corrugated iron, firing steps & sandbags.


The trench was put together pretty much the same way as the German side, with alittle less plastic card, but more corrugated cardboard, plaster & twigs. Hidden in the bank at the front are holes for the infantry to fire through from the firing steps. The plank of wood on the left will be embedded into the groundwork later once all the detail in the trench has been painted.


Airbrushing the whole lot is next, before picking out all the detail & adding the figures.
Thanks for reading, it's interesting to read & follow all the builds going on in this campaign, especially the subjects that I'd not normally look into.
Keep up the good work guys.....

SIMON.
Railmen2000
Visit this Community
California, United States
Joined: February 17, 2007
KitMaker: 87 posts
Armorama: 65 posts
Posted: Saturday, December 17, 2011 - 06:59 PM UTC
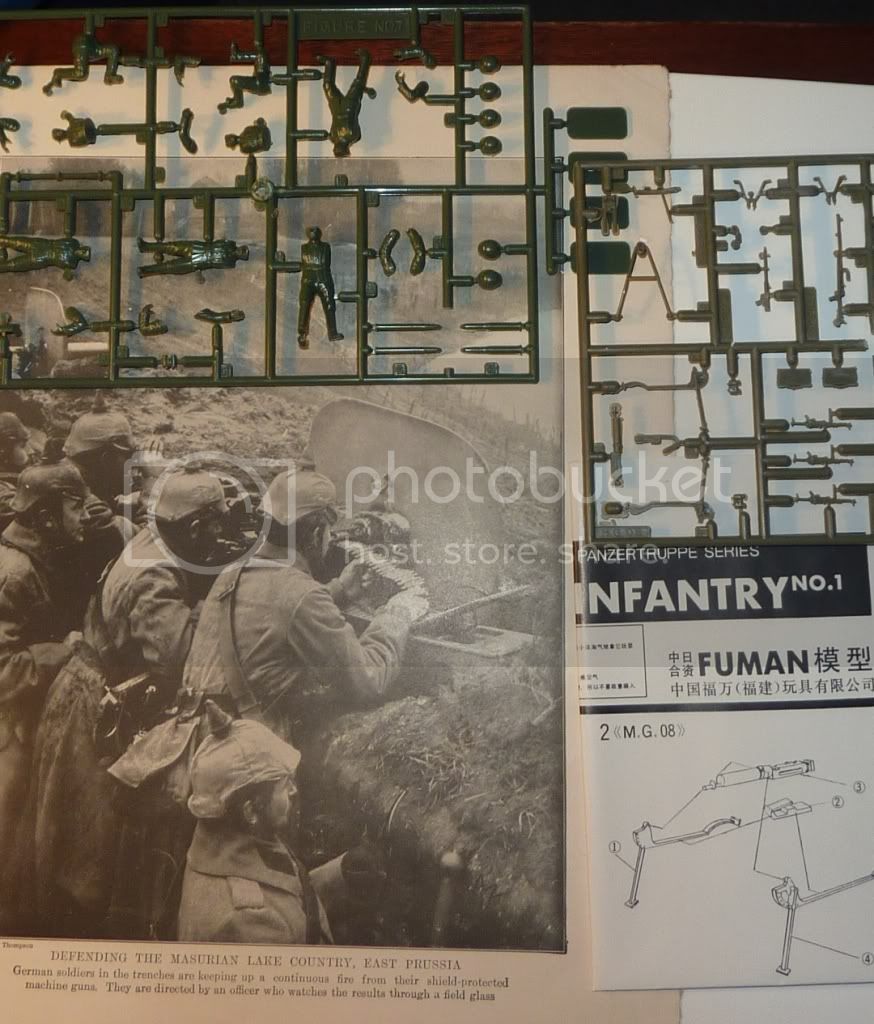
Hi All: I have been looking forward to this campaign for a while. While I have several subjects to choose from, I always wanted to somehow use the 1/48 Bandai kit of the MG 08 with back dated figures for a WWI scene. So here are the base parts I will be using and a period picture for inspiration:


I don't think I will add the shield on the gun. I do plan on making an early war team wearing pickelhaubes standing in a trench.

Jim
vonHengest
Visit this Community
Texas, United States
Joined: June 29, 2010
KitMaker: 5,854 posts
Armorama: 4,817 posts
Posted: Sunday, December 18, 2011 - 04:52 PM UTC
Simon: We're all really excited about your build mate, keep crackin!

Jim: I believe the shield was to protect them from sniper fire, so you may want to install it.
RedDuster
Visit this Community
England - South East, United Kingdom
Joined: March 01, 2010
KitMaker: 7,078 posts
Armorama: 248 posts
Posted: Sunday, December 18, 2011 - 11:32 PM UTC
Nice work guys, some great builds comming on.

A bit more progress on the Kent, The hull has been painted, doesn't show in the picture, but it is a rough hand brushed finished, on the hull sides. All the pictures of the ship at the time of the battle of the Falklands islands show here to be looking rather tatty.


More soon

Si
jjasmine
Visit this Community
Connecticut, United States
Joined: January 16, 2011
KitMaker: 112 posts
Armorama: 33 posts
Posted: Monday, December 19, 2011 - 01:44 PM UTC
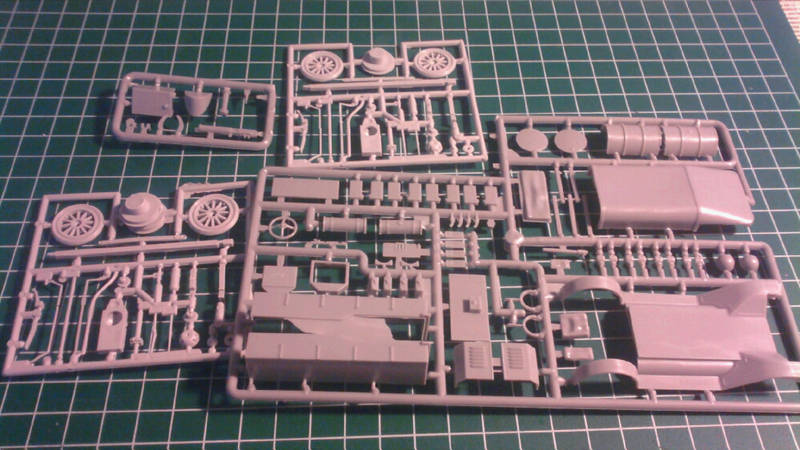
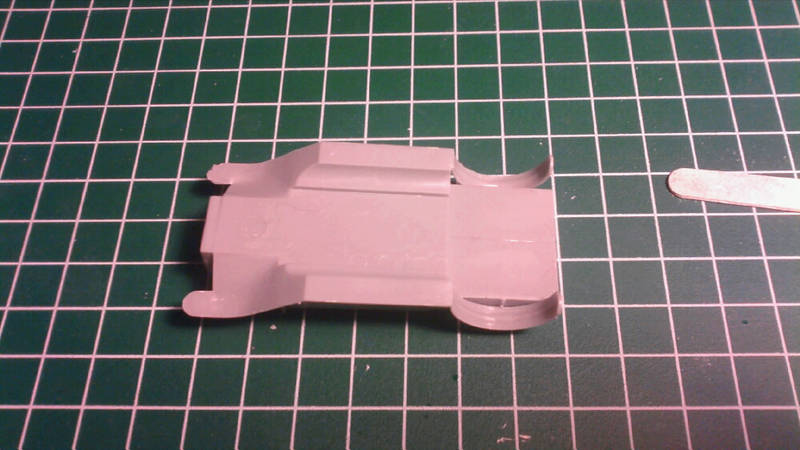
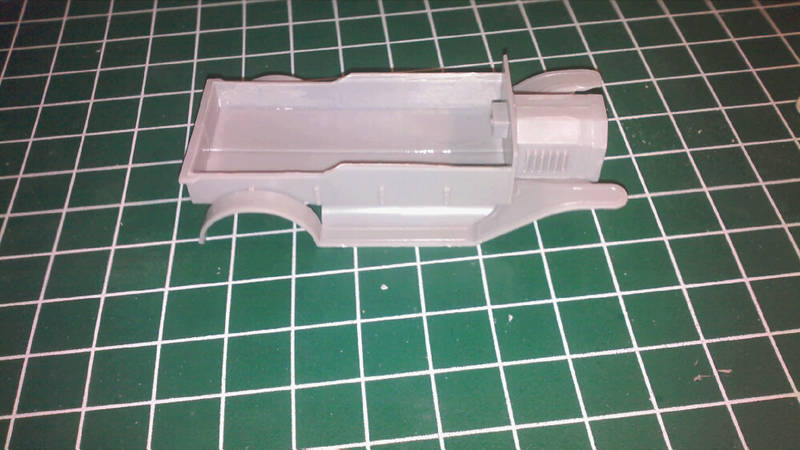
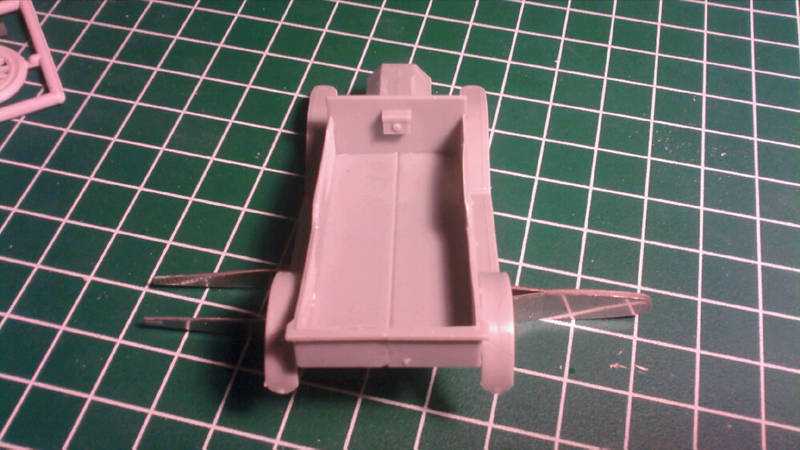
Diving in to my Model-T Scout car. Need to find some reference photos on the internet as the kit comes with no color suggestions.

grayghost666
#021
Joined: August 02, 2007
KitMaker: 2,458 posts
Armorama: 656 posts
Posted: Tuesday, December 20, 2011 - 12:05 AM UTC
Hello Jeffrey,
From the few color/colorized photo's I have, they seem to be a either brown, green or gray. It depends on which country and service that vehicle was used by.
If you can tell me what country and service you will be building your model for, I think I can get a color for you.
Cheers,
Bruce
jjasmine
Visit this Community
Connecticut, United States
Joined: January 16, 2011
KitMaker: 112 posts
Armorama: 33 posts
Posted: Thursday, December 22, 2011 - 05:39 PM UTC
Some more progress on my Model T scout car.