

That's reaaly well done Karl,I like a lot the drybrush and the light chipping. I'd like to do something similar on mine
cheers
Яusso-Soviэt Forum
Russian or Soviet vehicles/armor modeling forum.
Russian or Soviet vehicles/armor modeling forum.
Hosted by Darren Baker, Jacques Duquette
REVIEW
Zvezda Russian T-90 MBT
Spiderfrommars

Joined: July 13, 2010
KitMaker: 3,845 posts
Armorama: 3,543 posts
Posted: Tuesday, February 14, 2012 - 06:29 AM UTC

BBD468

Joined: March 08, 2010
KitMaker: 2,465 posts
Armorama: 2,383 posts

Posted: Tuesday, February 14, 2012 - 06:35 AM UTC
Hi Karl,
great paint job on a great build. i must get this kit for the stash!
Gary
great paint job on a great build.
i must get this kit for the stash! Gary


dlesko
Joined: January 08, 2003
KitMaker: 124 posts
Armorama: 106 posts
Posted: Tuesday, February 14, 2012 - 07:23 AM UTC
I love to see that someone still drybrushes. Looks great. Can't wait to get this kit.
sauceman

Joined: September 28, 2006
KitMaker: 2,672 posts
Armorama: 2,475 posts

Posted: Tuesday, February 14, 2012 - 03:33 PM UTC
Quoted Text
I love to see that someone still drybrushes.
Every model I build
Looks great Karl!
cheers


Karl187

#284

Joined: October 04, 2006
KitMaker: 3,094 posts
Armorama: 2,942 posts

Posted: Wednesday, February 15, 2012 - 01:29 AM UTC
Mauro, Gary, Dave, Richard- thanks so much guys, its good to have you all along for this build!
As for drybrushing I find this is such a versatile technique it can be used for so many effects- I find it particularly useful to impart wear and tear on modern AFV surfaces but I also use it if I want to bring out some small details or apply it slightly heavier than usual to add some interest on chipped edges, there's so many things it can be used for.
As for drybrushing I find this is such a versatile technique it can be used for so many effects- I find it particularly useful to impart wear and tear on modern AFV surfaces but I also use it if I want to bring out some small details or apply it slightly heavier than usual to add some interest on chipped edges, there's so many things it can be used for.

Karl187
#284
Joined: October 04, 2006
KitMaker: 3,094 posts
Armorama: 2,942 posts
Posted: Thursday, February 16, 2012 - 04:49 AM UTC
Latest progress on the tank was simply giving it a coat of Future to seal the paint and to provide a nice sheen to aid decaling and weathering. Decals went on and were then sealed with a quick blast of Future once they had dried properly:


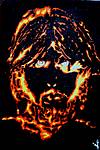
I thought I would also show you the figures I'm adding to the scene. They are both from TANK, the standing figure is a stand-alone item, a Russian Officer and the guy in the Gunner's position is from a 3-crew set. I would have included a driver but, strangely, the driver hatch was too small and the figure looked way too big sitting in it and it was going to interfere with the mantlet underside so in the end it is two figures.


The Gunner figure comes with full boots, I cut the bottom parts off so he fitted into the turret better. Both needed some work. They are decent mouldings but not amazing, face detail is kind of weak. I replaced the Officer's head with a Hornet item as his tanker's cap came as a separate item. The Gunner's head was better than the other two figures in the kit, I might have replaced it but I didn't have any Hornet heads with tanker caps or any tanker caps so I drilled the eyes out to nail down the detail a bit more.
The jumper on the Officer that comes out under his clothes was attached to the stock head and was sawed off, attached to the Hornet item and then the gaps were sculpted in with Magic-Sculp and I also gave him some hair at the back. Both arm joins also needed some work and the Gunner needed just a bit for filling a gap in one of the arm joins.
So here is the layout of the scene:


The base is just a plain wooden item and the groundwork base is DAS clay. The power line pole is Verlinden and I will have dis-used wires hanging down from it. The small grey pole is cut sprue and will be a warning sign but from these pictures it doesn't appear tall enough so I'll have to make a bigger one.
The area in the corner with the pole and sign will be a grass and stones, while the majority of the base will be a road of some description- haven't decided whether it will be dirt/gravel or tarmac yet.
I plan to give the figure's a couple of mugs, sitting on the tank beside each of them, as well as each man's AKS-74U.
Thanks for reading.
-Karl187-
I thought I would also show you the figures I'm adding to the scene. They are both from TANK, the standing figure is a stand-alone item, a Russian Officer and the guy in the Gunner's position is from a 3-crew set. I would have included a driver but, strangely, the driver hatch was too small and the figure looked way too big sitting in it and it was going to interfere with the mantlet underside so in the end it is two figures.
The Gunner figure comes with full boots, I cut the bottom parts off so he fitted into the turret better. Both needed some work. They are decent mouldings but not amazing, face detail is kind of weak. I replaced the Officer's head with a Hornet item as his tanker's cap came as a separate item. The Gunner's head was better than the other two figures in the kit, I might have replaced it but I didn't have any Hornet heads with tanker caps or any tanker caps so I drilled the eyes out to nail down the detail a bit more.
The jumper on the Officer that comes out under his clothes was attached to the stock head and was sawed off, attached to the Hornet item and then the gaps were sculpted in with Magic-Sculp and I also gave him some hair at the back. Both arm joins also needed some work and the Gunner needed just a bit for filling a gap in one of the arm joins.
So here is the layout of the scene:
The base is just a plain wooden item and the groundwork base is DAS clay. The power line pole is Verlinden and I will have dis-used wires hanging down from it. The small grey pole is cut sprue and will be a warning sign but from these pictures it doesn't appear tall enough so I'll have to make a bigger one.
The area in the corner with the pole and sign will be a grass and stones, while the majority of the base will be a road of some description- haven't decided whether it will be dirt/gravel or tarmac yet.
I plan to give the figure's a couple of mugs, sitting on the tank beside each of them, as well as each man's AKS-74U.
Thanks for reading.
-Karl187-

dylans
Joined: March 05, 2009
KitMaker: 394 posts
Armorama: 380 posts
Posted: Friday, February 17, 2012 - 07:16 PM UTC
I'm loving the way that looks Karl.
Spiderfrommars
Joined: July 13, 2010
KitMaker: 3,845 posts
Armorama: 3,543 posts
Posted: Friday, February 17, 2012 - 07:36 PM UTC
I'm sure it'll be an outstanding job Karl!
Regarding the figure painting you're a master indeed
Regarding the figure painting you're a master indeed

meaty_hellhound
Joined: July 23, 2010
KitMaker: 786 posts
Armorama: 753 posts

Posted: Saturday, February 18, 2012 - 05:40 AM UTC
nice work indeed. i too enjoyed working with Tank Figures (sometimes spelled Tahk) but found them very large compared to other 1/35th figures especially when placed near Dragon figures who are a bit on the small side to begin with.
i also found that the faces on Tank figures were sometimes well done and some figures were plainly sculpted (just not a lot of dimension and detail). they do offer a great selection in a niche that is under represented.
cheers, bd.
i also found that the faces on Tank figures were sometimes well done and some figures were plainly sculpted (just not a lot of dimension and detail). they do offer a great selection in a niche that is under represented.
cheers, bd.

Karl187
#284
Joined: October 04, 2006
KitMaker: 3,094 posts
Armorama: 2,942 posts
Posted: Saturday, February 18, 2012 - 05:48 AM UTC
Dylan- thanks for the kind words mate!
Mauro- too kind my friend, thanks> !
!
Bruce- thanks for stopping by and taking the time to look and comment. Your dios are always something special! As for TANK figures I reckon you hit the nail on the head- they fill a big nice gap, especially in terms of modern tank crewmen. Plus they also do a whole host of extra parts- extensive range of AK's and small arms plus things like tanker's helmets and ammunution boxes etc. Some of the faces are pretty good and some just aren't- but there's always aftermarket parts for that.
Mauro- too kind my friend, thanks>
!Bruce- thanks for stopping by and taking the time to look and comment. Your dios are always something special! As for TANK figures I reckon you hit the nail on the head- they fill a big nice gap, especially in terms of modern tank crewmen. Plus they also do a whole host of extra parts- extensive range of AK's and small arms plus things like tanker's helmets and ammunution boxes etc. Some of the faces are pretty good and some just aren't- but there's always aftermarket parts for that.
Karl187
#284
Joined: October 04, 2006
KitMaker: 3,094 posts
Armorama: 2,942 posts
Posted: Wednesday, February 22, 2012 - 04:03 AM UTC
So, more progress.
On to the weathering stage now. The build process will slow down here mainly due to the extended drying times of non-acrylic mediums like enamels and oils.
The first step is a Mig Productions Dark Wash- I apply this fairly liberally, concentrating on areas of detail and areas were dirt were naturally accumulate. I then leave it overnight before removing any excess I don't want.


Once that is done I try and leave the model for a full 24 hours or thereabouts to let the wash dry fully. The reason for this is that the next stage will use thinners which can have an effect on an enamel wash if it hasn't had a decent time to dry.
While waiting for it to dry I got on with a few other bits and bobs for the scene:

I wired up the broken power lines and then made a road-sign. This was done with a piece of sprue, part of it sanded to accept a flat piece of plastic-card cut to the desired size. These signs are often secured to the poles using thin alumunium retainers on the rear, this was made using Tamiya masking tape of quadruple thickness (i.e. four bits of tape on top of each other and cut to size).
As you know I built up the groundwork using DAS clay but ran into a snag here- if I'm modelling a paved road I always use sandpaper as a base to level things off prior to applying Tamiya texure paint over the top- this gives a nice, durable finish that will accept weathering better than a thin piece of sandpaper. However the clay base was too uneven and became a nightmare to sand, so instead of spending ages trying to get a smooth finish I broke out some wall filler and covered the base with that. I always use a decent quality ready-mixed variety which is very smooth and goes on fairly evenly. This stuff is very easy to sand and within no time I had a nice smooth surface to which I glued the sandpaper.

Next up was Oil Filters/Oil Dot Fading. I love this stage of weathering as it really brings some interesting effects to the table. You can use pretty much whatever colors you like (probably best not to use neon green or pink though ). I usually stick to earthy, drab tones that will compliment the paint job:

A nice bright, vibrant color like grass green or faded yellow is good to add to the pallette too as they can produce different effects.
To illustrate what this technique adds to a model here is a picture of the front mudguard with just the dark wash:
And here is the same mudguard after oil dot filtering:

Notice the changed hue and the running streaks- this is achieved on all non-horiztonal surfaces by dragging the oil dots downward with a flat brush. On horizontal/flat areas the oil dots are swirled with a round brush.


I also finished the machine gun but I haven't attached it yet (Mr. Metal Color Brass was used to pick out the bullets) :


As always guys- thanks for reading and taking the time to have a look.
-KARL187-
On to the weathering stage now. The build process will slow down here mainly due to the extended drying times of non-acrylic mediums like enamels and oils.
The first step is a Mig Productions Dark Wash- I apply this fairly liberally, concentrating on areas of detail and areas were dirt were naturally accumulate. I then leave it overnight before removing any excess I don't want.
Once that is done I try and leave the model for a full 24 hours or thereabouts to let the wash dry fully. The reason for this is that the next stage will use thinners which can have an effect on an enamel wash if it hasn't had a decent time to dry.
While waiting for it to dry I got on with a few other bits and bobs for the scene:
I wired up the broken power lines and then made a road-sign. This was done with a piece of sprue, part of it sanded to accept a flat piece of plastic-card cut to the desired size. These signs are often secured to the poles using thin alumunium retainers on the rear, this was made using Tamiya masking tape of quadruple thickness (i.e. four bits of tape on top of each other and cut to size).
As you know I built up the groundwork using DAS clay but ran into a snag here- if I'm modelling a paved road I always use sandpaper as a base to level things off prior to applying Tamiya texure paint over the top- this gives a nice, durable finish that will accept weathering better than a thin piece of sandpaper. However the clay base was too uneven and became a nightmare to sand, so instead of spending ages trying to get a smooth finish I broke out some wall filler and covered the base with that. I always use a decent quality ready-mixed variety which is very smooth and goes on fairly evenly. This stuff is very easy to sand and within no time I had a nice smooth surface to which I glued the sandpaper.
Next up was Oil Filters/Oil Dot Fading. I love this stage of weathering as it really brings some interesting effects to the table. You can use pretty much whatever colors you like (probably best not to use neon green or pink though
). I usually stick to earthy, drab tones that will compliment the paint job:A nice bright, vibrant color like grass green or faded yellow is good to add to the pallette too as they can produce different effects.
To illustrate what this technique adds to a model here is a picture of the front mudguard with just the dark wash:
And here is the same mudguard after oil dot filtering:
Notice the changed hue and the running streaks- this is achieved on all non-horiztonal surfaces by dragging the oil dots downward with a flat brush. On horizontal/flat areas the oil dots are swirled with a round brush.
I also finished the machine gun but I haven't attached it yet (Mr. Metal Color Brass was used to pick out the bullets) :
As always guys- thanks for reading and taking the time to have a look.
-KARL187-
Karl187
#284
Joined: October 04, 2006
KitMaker: 3,094 posts
Armorama: 2,942 posts
Posted: Wednesday, February 22, 2012 - 04:13 AM UTC
Ok so Photobucket have just f****** my b***** f****** account, dozy b*******, stupid **** ***** they should **** with their ******* along with a carrot and then ***** up their *****.

So...anyone know how to fix this problem?
So...anyone know how to fix this problem?
BBD468
Joined: March 08, 2010
KitMaker: 2,465 posts
Armorama: 2,383 posts
Posted: Wednesday, February 22, 2012 - 04:24 AM UTC
Quoted Text
Ok so Photobucket have just f****** my b***** f****** account, dozy b*******, stupid **** ***** they should **** with their ******* along with a carrot and then ***** up their *****.
So...anyone know how to fix this problem?
Hey Karl,
you lost everything? id like to know what happend aswell. i have alot of stuff there myself and dont want to lose it.
sorry man. that sucks.

Gary
Karl187
#284
Joined: October 04, 2006
KitMaker: 3,094 posts
Armorama: 2,942 posts
Posted: Wednesday, February 22, 2012 - 04:37 AM UTC
Thats the funny thing Gary, I haven't lost the stuff, it is all still there in my Photobucket account but for some reason they won't let it be shown here.
Of course I go to try and find out why and I'm met with this curt sentence:
Now that is some triple A rated, gold plated customer service right there.
I uploaded the latest progress via imageshack so they should be visible for now.
I think this Photobucket nonsense happend to Christian on his T-90 thread- if you are reading Christian- how did you sort it out?
Of course I go to try and find out why and I'm met with this curt sentence:
Quoted Text
This answer is no longer avaliable.
Now that is some triple A rated, gold plated customer service right there.
I uploaded the latest progress via imageshack so they should be visible for now.
I think this Photobucket nonsense happend to Christian on his T-90 thread- if you are reading Christian- how did you sort it out?
BBD468
Joined: March 08, 2010
KitMaker: 2,465 posts
Armorama: 2,383 posts
Posted: Wednesday, February 22, 2012 - 04:53 AM UTC
Hey Karl,
glad your pics are back in place. T-90 looks great! i must add that kit to my wish list.
Is imageshack better than photobucket? photobucket is real glitchy when i try and upload images there. it freezes up on me when uploading 50% of the time. is basic imageshack free like photobucket?
Thanks
Gary
glad your pics are back in place. T-90 looks great! i must add that kit to my wish list.
Is imageshack better than photobucket? photobucket is real glitchy when i try and upload images there. it freezes up on me when uploading 50% of the time. is basic imageshack free like photobucket?
Thanks
Gary
Karl187
#284
Joined: October 04, 2006
KitMaker: 3,094 posts
Armorama: 2,942 posts
Posted: Wednesday, February 22, 2012 - 04:58 AM UTC
Thanks for the compliments Gary!
Imageshack is like a budget Photobucket in my opinion. Uploads are slower and the interface for posting pictures isn't very good in my opinion anyway.
As for the Photobucket problem it seems to be that the amount of views the pictures are getting has exceeded the limit for my free account and it will re-set next month (I think) so it looks like the older pics will be off-line until then. My apologies to anyone wanting to see pictures of the earlier stages. I'll let you guys know when the account decides to fix itself. For pictures of progress on the build from now on until the account fixes I'll be using imageshack.
Thanks Photobucket !
Imageshack is like a budget Photobucket in my opinion. Uploads are slower and the interface for posting pictures isn't very good in my opinion anyway.
As for the Photobucket problem it seems to be that the amount of views the pictures are getting has exceeded the limit for my free account and it will re-set next month (I think) so it looks like the older pics will be off-line until then. My apologies to anyone wanting to see pictures of the earlier stages. I'll let you guys know when the account decides to fix itself. For pictures of progress on the build from now on until the account fixes I'll be using imageshack.
Thanks Photobucket
!BBD468
Joined: March 08, 2010
KitMaker: 2,465 posts
Armorama: 2,383 posts
Posted: Wednesday, February 22, 2012 - 05:16 AM UTC
Thanks Karl. Hmmm...strange its called customer "SERVICE".
Seems a bit sketchy to me.
Gary
Seems a bit sketchy to me.
Gary

Kelley
Joined: November 21, 2002
KitMaker: 1,966 posts
Armorama: 1,635 posts
Posted: Wednesday, February 22, 2012 - 05:53 AM UTC
Quoted Text
As for the Photobucket problem it seems to be that the amount of views the pictures are getting has exceeded the limit for my free account and it will re-set next month
That's it exactly Karl, too many people have been checking out your pics (not a bad thing!), and you have exceeded the allowable monthly bandwidth for your free account. It will reset March 1.
I haven't posted any comments earlier, but I have been watching your progress. Very nice work, I picked up the kit this past Saturday at a show, and I have bookmarked this thread for when I start on it.
Cheers,
Mike

UGBEAR
Joined: December 01, 2011
KitMaker: 248 posts
Armorama: 247 posts
Posted: Wednesday, February 22, 2012 - 07:08 AM UTC
Great job!!!!
Waiting for this baby open her cold-blooded red eyes
Waiting for this baby open her cold-blooded red eyes
lukiftian
Joined: March 12, 2010
KitMaker: 791 posts
Armorama: 592 posts

Posted: Wednesday, February 22, 2012 - 08:05 AM UTC
Quoted Text
Ok so Photobucket have just f****** my b***** f****** account, dozy b*******, stupid **** ***** they should **** with their ******* along with a carrot and then ***** up their *****.
So...anyone know how to fix this problem?
Yes, if you exceed your bandwidth they want you to pay for more. There are other photo hosts, use Picasa instead.
Brobru

Joined: October 10, 2011
KitMaker: 95 posts
Armorama: 86 posts

Posted: Wednesday, February 22, 2012 - 08:59 AM UTC
Very nice!
I like very much how oil dots filters turned out!
I like very much how oil dots filters turned out!
Spiderfrommars
Joined: July 13, 2010
KitMaker: 3,845 posts
Armorama: 3,543 posts
Posted: Wednesday, February 22, 2012 - 10:55 AM UTC
Handsome!
Spiderfrommars
Joined: July 13, 2010
KitMaker: 3,845 posts
Armorama: 3,543 posts
Posted: Wednesday, February 22, 2012 - 11:05 AM UTC
Quoted Text
Ok so Photobucket have just f****** my b***** f****** account, dozy b*******, stupid **** ***** they should **** with their ******* along with a carrot and then ***** up their *****.
So...anyone know how to fix this problem?
the solution is...iscribing to Flickr 
Free accounts on Flickr have just a MONTHLY limit of 300 MB...which is a far more than enough
Karl187
#284
Joined: October 04, 2006
KitMaker: 3,094 posts
Armorama: 2,942 posts
Posted: Wednesday, February 22, 2012 - 11:50 PM UTC
Gary- Thanks mate!
Mike- thanks for checking in, glad to hear your enjoying the thread. Its a fantastic kit, you'll have a blast building it!
Dave- Thanks for the compliment. I'm looking forward to taking the masking off the Shtora devices too!!
Jaroslaw- Much appreciated, I'm glad you liked the way they turned out.
Mauro- She is a handsome beast isn't she? !
Mike- thanks for checking in, glad to hear your enjoying the thread. Its a fantastic kit, you'll have a blast building it!
Dave- Thanks for the compliment. I'm looking forward to taking the masking off the Shtora devices too!!
Jaroslaw- Much appreciated, I'm glad you liked the way they turned out.
Mauro- She is a handsome beast isn't she?
! 
markchis

Joined: February 09, 2009
KitMaker: 467 posts
Armorama: 392 posts

Posted: Thursday, February 23, 2012 - 06:08 AM UTC
awesome work Karl ! I love the hard edge camo ! makes me wish I hadnt freehanded mine ! It really is coming along very nicely.
cheers
Mark
cheers
Mark
 |

WEB HOSTING BY


Copyright ©2021 Armorama and Kitmaker Network, a subsidiary of Silver Star Enterprises
All Rights Reserved. Please read our Conditions of Use and Privacy Policy.
All Rights Reserved. Please read our Conditions of Use and Privacy Policy.