Auckland, New Zealand
Joined: June 01, 2011
KitMaker: 1,716 posts
Armorama: 1,638 posts
Posted: Thursday, October 09, 2014 - 08:47 PM UTC
Lovely work Colin .. the dash looks excellent mate ..the entire build ...sweet

I just read that your is the Dragon 3 n 1 kit ..so is mine but as you can see ..not a lot of it used ..more goodies for the spares box
:)
Phill
I know the voices ain't real but they do come up with some great ideas
Never trust a man who left alone with a tea cozy and doesn't try it on ( Billy Connolly )
Overkill is often very understated
Removed by original poster on 10/12/14 - 21:29:28 (GMT).
Removed by original poster on 10/12/14 - 21:41:16 (GMT).
Wojewodztwo Slaskie, Poland
Joined: October 21, 2003
KitMaker: 529 posts
Armorama: 500 posts
Posted: Sunday, October 12, 2014 - 09:45 AM UTC
ColinEdm
 Associate Editor
Alberta, Canada
Joined: October 15, 2013
KitMaker: 1,355 posts
Armorama: 1,229 posts
Posted: Sunday, October 12, 2014 - 12:58 PM UTC
Quoted Text
Lovely work Colin .. the dash looks excellent mate ..the entire build ...sweet
I just read that your is the Dragon 3 n 1 kit ..so is mine but as you can see ..not a lot of it used ..more goodies for the spares box
:)
Phill
Thanks Phill! Yes, lots of bonus pieces, looking forward to some more pics of yours.
Pawel, very nice work, nice weathering.
The voices are back.....excellent....
Namabiiru
Associate Editor 
#399
Rhode Island, United States
Joined: March 05, 2014
KitMaker: 2,888 posts
Armorama: 1,920 posts
Posted: Wednesday, October 15, 2014 - 08:03 PM UTC
As always, a first-rate piece of work, Pawel! Nicely done, with just the right amount of weathering.

Wojewodztwo Slaskie, Poland
Joined: October 21, 2003
KitMaker: 529 posts
Armorama: 500 posts
Posted: Thursday, October 16, 2014 - 09:35 AM UTC
Thanks for the comments guys. I'm glad to you like it.

Paweł
New York, United States
Joined: March 08, 2010
KitMaker: 3,662 posts
Armorama: 3,078 posts
Posted: Monday, October 20, 2014 - 01:56 PM UTC
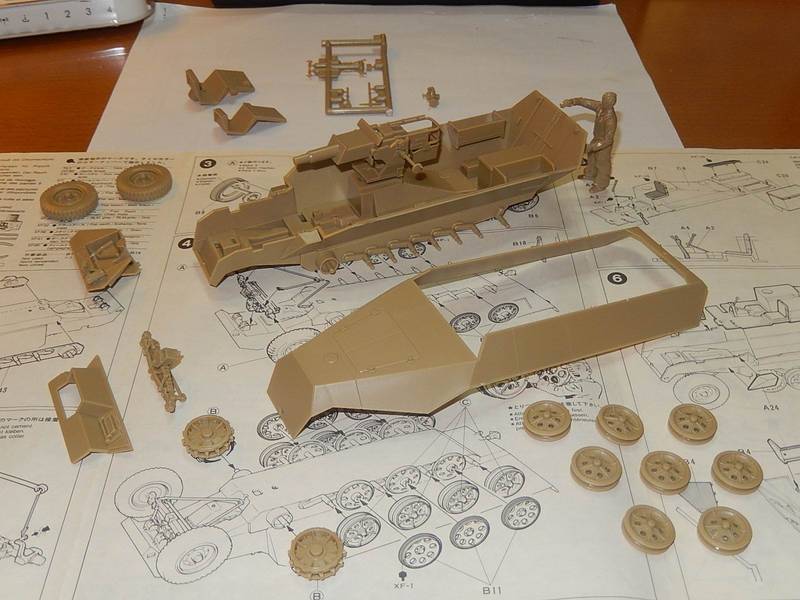
Ok I'm coming in real late here and i hope that I can get this done on time so here is my start photo taken last Thursday

and my progress up to today

sorry about the blurry photo hopefully I can get some more done tomorrow

Active Campaigns on the bench:
Operation Fall Gelb - Pz.Kpfw. IV Ausf. C
Engineering the Future - M-26 Recovery Vehicle
115 Campaigns completed
Auckland, New Zealand
Joined: June 01, 2011
KitMaker: 1,716 posts
Armorama: 1,638 posts
Posted: Monday, October 20, 2014 - 02:19 PM UTC
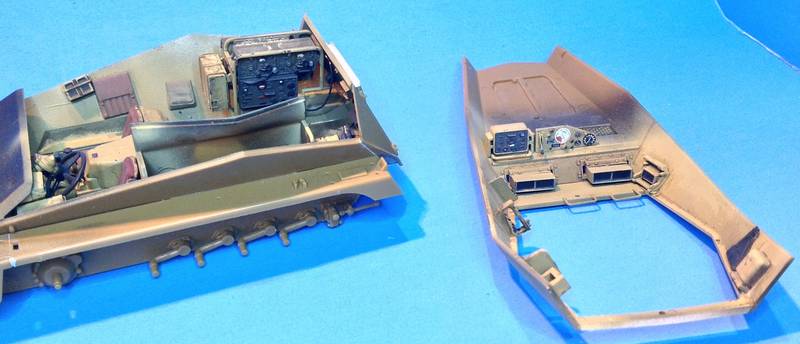
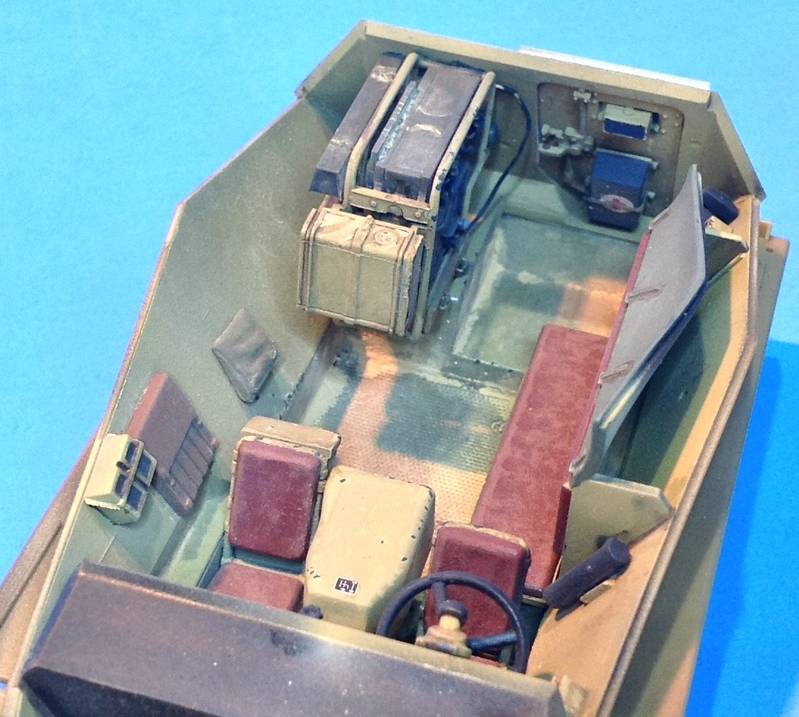
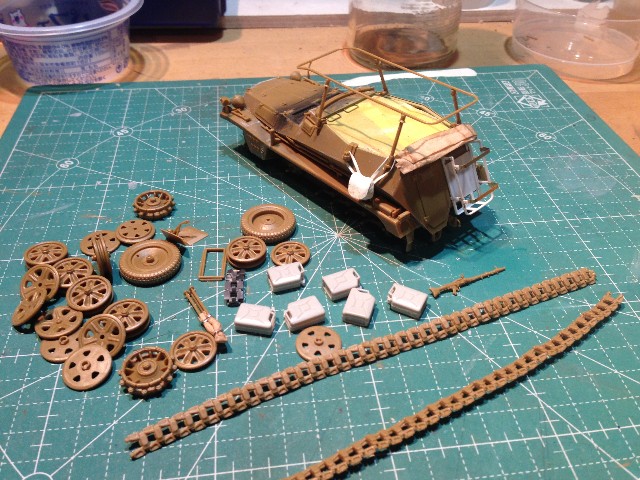
Hey ya guys .. been a little while that i aint done any work on the 251 but yesterday that changed ,,so here's what it looks like now .


Today this has changed even more ,,yet to take any pics but that wont matter cause the next time its seen in here it will be finished ...at the moment the guns,roadwheels and tools are painted ..i have decided to use AFV Club tracks on this as i am not happy with the Dragon ones and the AFV Club tracks for the late model type which works with this as it was the very last version .
Paweł .. Very very nice build mate .. that is one fine looking 251 ,, well done

Sal ,, bout time you got going bud lol ,,hope you cant knock this one out in time .
Phill
I know the voices ain't real but they do come up with some great ideas
Never trust a man who left alone with a tea cozy and doesn't try it on ( Billy Connolly )
Overkill is often very understated
Namabiiru
Associate Editor #399
Rhode Island, United States
Joined: March 05, 2014
KitMaker: 2,888 posts
Armorama: 1,920 posts
Posted: Monday, October 20, 2014 - 05:11 PM UTC
BT BT. So as I near completion on the interior of Rommel's GREIF 250, my mind keeps coming back to the problem of how I am going to sort out the decals. The GREIF decals are filled with red on both sides; whereas on the original, one side was red-filled and the other was simply a white outline.

The solution that seems to be the most viable is to carefully cut out the red fill on one side before applying the decals, but I'm really concerned about it winding up too fragile to use (especially in light of the age of the kit). I've also considered painting over the red after the decals are applied, but that is going to require a perfect finish with zero room for errors, and hand-painting is not my forte.
Anyone got any ideas on how to overcome this challenge?
Namabiiru
Associate Editor #399
Rhode Island, United States
Joined: March 05, 2014
KitMaker: 2,888 posts
Armorama: 1,920 posts
Posted: Thursday, October 23, 2014 - 11:51 AM UTC
So I feel like I have fully recovered from the Dragon OOB campaign, and am finally starting to get my modeling mojo back.
The interior of my little Greif 250 is finished and ready to be buttoned up.
Of course, it's not up to the same standards as Colin, Pawel, Robert, Alex, &tc., but I'm fairly pleased.
It's clear that when Gunze-Sangyo decided to retool one of their other 250 kits as the Greif, they didn't really think through how the interior of a command vehicle would be different from any other troop carrier. Perfect case in point is the pistol holder, which, if placed according to the instructions, winds up behind the radio where nobody could ever reach it. I didn't really pick up on this until I tried to dry fit the top to the hull at which point much of this became obvious. In the case of the pistol holder I was able to pry it off and move it to the opposite side of the hull where it makes more sense, but some bits I just had to leave as-is, and fill in some of the blank spots with on the wall with stuff out fo the spares box. Fortunately, I don't think there are many photos of the interior of GREIF so who's to say I got it wrong?
New York, United States
Joined: March 08, 2010
KitMaker: 3,662 posts
Armorama: 3,078 posts
Posted: Friday, October 24, 2014 - 09:14 AM UTC
Im making some steady progress almost ready for primer

top of hull is just dry fit for the photo op
Active Campaigns on the bench:
Operation Fall Gelb - Pz.Kpfw. IV Ausf. C
Engineering the Future - M-26 Recovery Vehicle
115 Campaigns completed
New York, United States
Joined: March 08, 2010
KitMaker: 3,662 posts
Armorama: 3,078 posts
Posted: Saturday, October 25, 2014 - 05:45 AM UTC
Active Campaigns on the bench:
Operation Fall Gelb - Pz.Kpfw. IV Ausf. C
Engineering the Future - M-26 Recovery Vehicle
115 Campaigns completed
Auckland, New Zealand
Joined: June 01, 2011
KitMaker: 1,716 posts
Armorama: 1,638 posts
Posted: Saturday, October 25, 2014 - 09:49 AM UTC
Sal ,,if its like the normal amount then its 55 on one side and 56 on the other..what i normally do is make up a nice long length then wrap it around the drive sprocket and see how many i will need to complete it cause i keep forgetting just how many i need lol .
Phill
I know the voices ain't real but they do come up with some great ideas
Never trust a man who left alone with a tea cozy and doesn't try it on ( Billy Connolly )
Overkill is often very understated
New York, United States
Joined: March 08, 2010
KitMaker: 3,662 posts
Armorama: 3,078 posts
Posted: Sunday, October 26, 2014 - 04:19 AM UTC
Quoted Text
Sal ,,if its like the normal amount then its 55 on one side and 56 on the other..what i normally do is make up a nice long length then wrap it around the drive sprocket and see how many i will need to complete it cause i keep forgetting just how many i need lol .
Phill
Thanks Phill


Active Campaigns on the bench:
Operation Fall Gelb - Pz.Kpfw. IV Ausf. C
Engineering the Future - M-26 Recovery Vehicle
115 Campaigns completed
Napoli, Italy
Joined: April 17, 2014
KitMaker: 652 posts
Armorama: 600 posts
Posted: Thursday, October 30, 2014 - 04:03 PM UTC
Hi friends,
I have enlisted long time ago, but just this week I can start my project: a nice classic kit, 1:35 Tamiya Sd.Kfz.251/9 Stummel
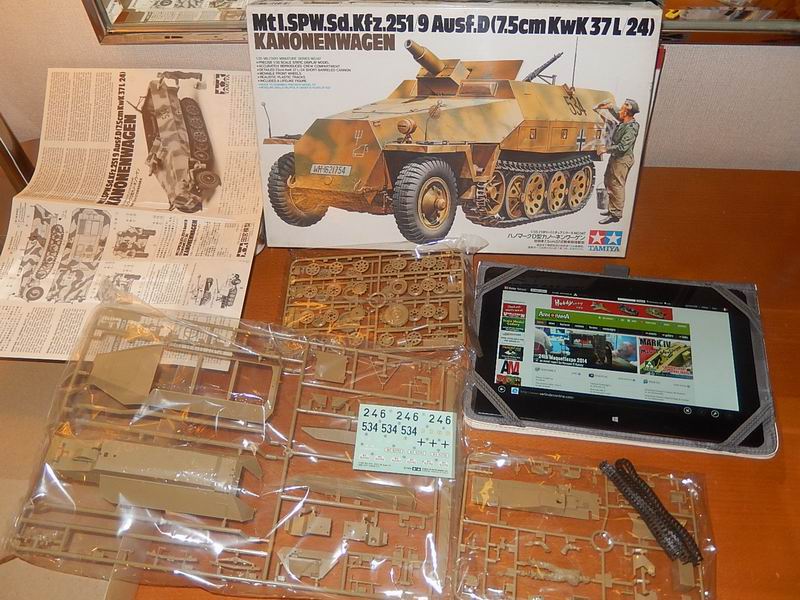
I'll run to finish in time...

Napoli, Italy
Joined: April 17, 2014
KitMaker: 652 posts
Armorama: 600 posts
Posted: Thursday, October 30, 2014 - 04:10 PM UTC
Hi Pawel,
I like as you finished and weathered your 251. I don't know if I'll reach this standard... Really great job
Wojewodztwo Slaskie, Poland
Joined: October 21, 2003
KitMaker: 529 posts
Armorama: 500 posts
Posted: Friday, October 31, 2014 - 01:03 PM UTC
Many thanks Giovanni
rule number one - practice makes perfect.
Good luck.

Paweł
Napoli, Italy
Joined: April 17, 2014
KitMaker: 652 posts
Armorama: 600 posts
Posted: Friday, October 31, 2014 - 03:19 PM UTC
Quoted Text
Many thanks Giovanni
rule number one - practice makes perfect.
Pawel, you're right: practice and good example.
Regards
Giovanni
Napoli, Italy
Joined: April 17, 2014
KitMaker: 652 posts
Armorama: 600 posts
Posted: Friday, October 31, 2014 - 03:23 PM UTC
...and this is my 251/9 Stummel after almost ten working hours, splitted in few nights:
Now needs to shift to painting workshop. I hope to have time during next week.
See you soon
Giovanni
Bayern, Germany
Joined: October 22, 2013
KitMaker: 380 posts
Armorama: 376 posts
Posted: Saturday, November 01, 2014 - 12:17 PM UTC
Well... good thing: cammo is on, bad thing: lot´s of other work still to do...
not really pleased with the result, but this kit was already crused in the beginning...

Impossible only means that you haven't found the solution yet.
Namabiiru
Associate Editor #399
Rhode Island, United States
Joined: March 05, 2014
KitMaker: 2,888 posts
Armorama: 1,920 posts
Posted: Saturday, November 01, 2014 - 08:22 PM UTC
Camo looks good to me, Fabian. Going to look great with some washes, filters, and weathering.
Here's my progress: assembly all done and ready for priming.
Napoli, Italy
Joined: April 17, 2014
KitMaker: 652 posts
Armorama: 600 posts
Posted: Saturday, November 01, 2014 - 11:26 PM UTC
Hi Fabian, very good job with the camo ! I like it
New York, United States
Joined: March 08, 2010
KitMaker: 3,662 posts
Armorama: 3,078 posts
Posted: Sunday, November 02, 2014 - 02:49 PM UTC
Fabian Camo looks fine to me
Made some progress on my build as well


Had some fit problems with the front and had to use some putty

gave the outside a 2nd coat of dunkelgelb this afternoon

Active Campaigns on the bench:
Operation Fall Gelb - Pz.Kpfw. IV Ausf. C
Engineering the Future - M-26 Recovery Vehicle
115 Campaigns completed
ColinEdm
Associate Editor Alberta, Canada
Joined: October 15, 2013
KitMaker: 1,355 posts
Armorama: 1,229 posts
Posted: Sunday, November 02, 2014 - 05:31 PM UTC
Quoted Text
Had some fit problems with the front and had to use some putty gave the outside a 2nd coat of dunkelgelb this afternoon
I feel your pain Sal! I ran into some fit problems on my exact same kit as well.
The voices are back.....excellent....