Campaigns: Completed Campaigns
Campaigns that are completed should be grouped here.
Hosted by Richard S.
The 251 Campaign
WARDUKWNZ
Visit this Community
Auckland, New Zealand
Joined: June 01, 2011
KitMaker: 1,716 posts
Armorama: 1,638 posts
Posted: Sunday, November 02, 2014 - 08:14 PM UTC
That seems to be a issue on all the early Dragon 251's ...mine was no different and just as annoying ..still guys we live with it and deal with it ..and the end results ..very cool

Phill
yeahwiggie
Visit this Community
Dalarnas, Sweden
Joined: March 24, 2006
KitMaker: 2,093 posts
Armorama: 1,359 posts
Posted: Sunday, November 02, 2014 - 08:59 PM UTC

Quoted Text

BT BT. So as I near completion on the interior of Rommel's GREIF 250, my mind keeps coming back to the problem of how I am going to sort out the decals. The GREIF decals are filled with red on both sides; whereas on the original, one side was red-filled and the other was simply a white outline.

The solution that seems to be the most viable is to carefully cut out the red fill on one side before applying the decals, but I'm really concerned about it winding up too fragile to use (especially in light of the age of the kit). I've also considered painting over the red after the decals are applied, but that is going to require a perfect finish with zero room for errors, and hand-painting is not my forte.

Anyone got any ideas on how to overcome this challenge?


Not only that, but if you study pictures of the Greif you'll notice it is multicoloured!
Don't know if it is yellow over darkgrey or the DAK camouflagepattern, both cacked with a thick layer of dust.
That's why my Greif is sidetracked for the moment, while I try to figure these issues.
Namabiiru
Staff MemberAssociate Editor
MODEL SHIPWRIGHTS
#399
Visit this Community
Rhode Island, United States
Joined: March 05, 2014
KitMaker: 2,888 posts
Armorama: 1,920 posts
Posted: Monday, November 03, 2014 - 10:10 AM UTC

Quoted Text


Quoted Text

BT BT. So as I near completion on the interior of Rommel's GREIF 250, my mind keeps coming back to the problem of how I am going to sort out the decals. The GREIF decals are filled with red on both sides; whereas on the original, one side was red-filled and the other was simply a white outline.

The solution that seems to be the most viable is to carefully cut out the red fill on one side before applying the decals, but I'm really concerned about it winding up too fragile to use (especially in light of the age of the kit). I've also considered painting over the red after the decals are applied, but that is going to require a perfect finish with zero room for errors, and hand-painting is not my forte.

Anyone got any ideas on how to overcome this challenge?


Not only that, but if you study pictures of the Greif you'll notice it is multicoloured!
Don't know if it is yellow over darkgrey or the DAK camouflagepattern, both cacked with a thick layer of dust.
That's why my Greif is sidetracked for the moment, while I try to figure these issues.


Quite right, Ron. The only "color" photos of GREIF are simply colorized B/W photos. Makes it tough to tell. That said, I'm going to take a gamble with using the yellow and darkgrey. Getting the caked-on dust to look right is going to be a challenge, but the good news is I can probably use that to help hide any goofs I make in the decal surgery.

Namabiiru
Staff MemberAssociate Editor
MODEL SHIPWRIGHTS
#399
Visit this Community
Rhode Island, United States
Joined: March 05, 2014
KitMaker: 2,888 posts
Armorama: 1,920 posts
Posted: Thursday, November 06, 2014 - 11:09 AM UTC
Got all parts primed and base coat/camo on the hull. Contrast of the colors is a bit stark, but the filter and pigments should fix that up.


A couple of coats of Future and I'll be at the point I've been dreading all along: the decals. This kit is pretty old, and I'm concerned the decals are going to completely crumble. When I tried to do surgery on the left-hand GREIF it became clear the decals are quite brittle. Hopefully they'll survive enough for me to get something halfway decent because I have not found a source anywhere for replacement GREIF decals.

yeahwiggie
Visit this Community
Dalarnas, Sweden
Joined: March 24, 2006
KitMaker: 2,093 posts
Armorama: 1,359 posts
Posted: Thursday, November 06, 2014 - 07:22 PM UTC
I messed up my decals trying to get them to fit properly...
Try pastelchalks for the dust. Rub them on sandpaper and apply them with on old brush. Maybe use minute amounts of water to make it cake like the real thing.
ltb073
Visit this Community
New York, United States
Joined: March 08, 2010
KitMaker: 3,662 posts
Armorama: 3,078 posts
Posted: Sunday, November 09, 2014 - 08:29 PM UTC
Ok build is complete and ready for markings and weathering
 photo P1090162.jpg
 photo P1090163.jpg
 photo P1090164.jpg
 photo P1090165.jpg
not to happy with the camo on the hood so I may have to cover it with a flag
SGTJKJ
#041
Visit this Community
Kobenhavn, Denmark
Joined: July 20, 2006
KitMaker: 10,069 posts
Armorama: 4,677 posts
Posted: Monday, November 10, 2014 - 07:41 PM UTC
Sal, nice looking camo. I agree it slipped a bit on the hood, but that could have happened to the guy painting it 70+ years ago anyway.

One trick is to ensure the airbrush always sprays at a rough 90 degree angle to the model. Then you avoid the extra broad lines on the side of the hood.

looking forward to see more.
Namabiiru
Staff MemberAssociate Editor
MODEL SHIPWRIGHTS
#399
Visit this Community
Rhode Island, United States
Joined: March 05, 2014
KitMaker: 2,888 posts
Armorama: 1,920 posts
Posted: Tuesday, November 11, 2014 - 05:04 AM UTC
Sal,
Another option would be to go back and touch it up with your base coat. I do that quite a bit when things don't go quite right the first time.

ColinEdm
Staff MemberAssociate Editor
ARMORAMA
Visit this Community
Alberta, Canada
Joined: October 15, 2013
KitMaker: 1,355 posts
Armorama: 1,229 posts
Posted: Tuesday, November 11, 2014 - 05:51 AM UTC

Quoted Text

Sal,
Another option would be to go back and touch it up with your base coat. I do that quite a bit when things don't go quite right the first time.


Second this, go back with some base coat to touch it up. Other than the hood it's looking good!
eMan
#298
Visit this Community
Hong Kong S.A.R. / 繁體
Joined: August 08, 2002
KitMaker: 1,182 posts
Armorama: 665 posts
Posted: Tuesday, November 11, 2014 - 11:53 AM UTC
Progress update, Dragon Sd.kfz.250/1.


Namabiiru
Staff MemberAssociate Editor
MODEL SHIPWRIGHTS
#399
Visit this Community
Rhode Island, United States
Joined: March 05, 2014
KitMaker: 2,888 posts
Armorama: 1,920 posts
Posted: Tuesday, November 11, 2014 - 01:55 PM UTC
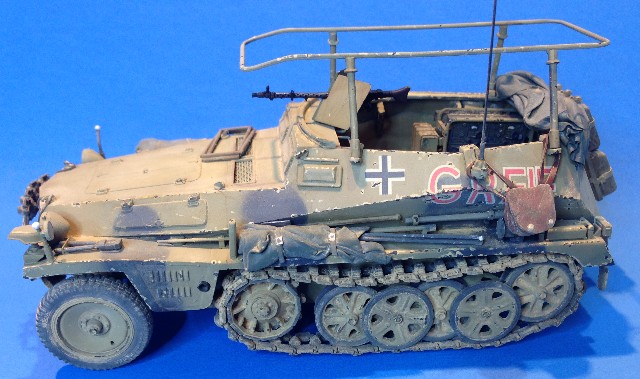
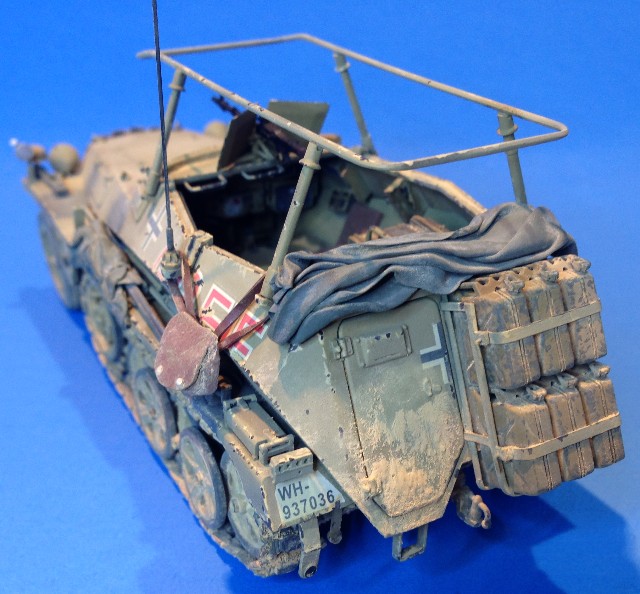
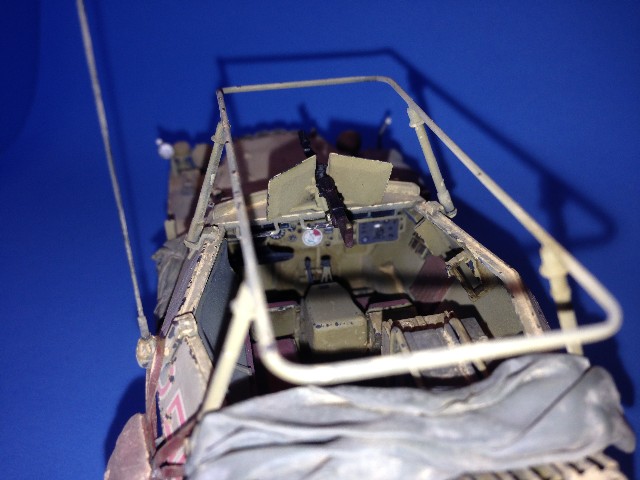
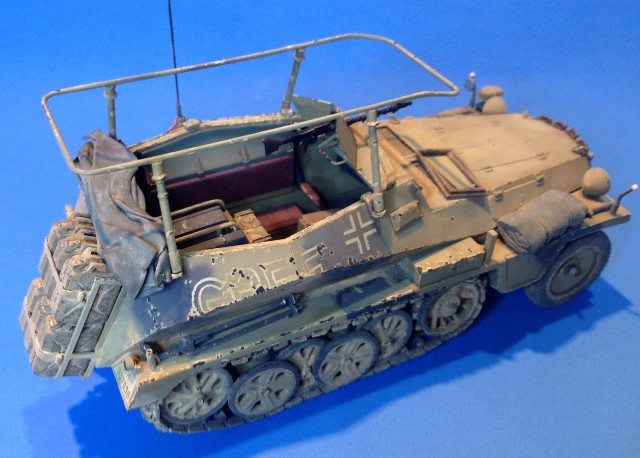
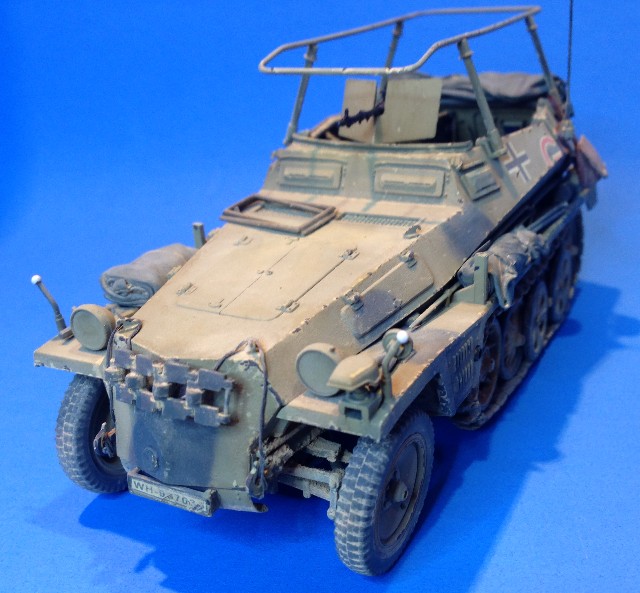
Well, I managed to make it a pretty productive extended weekend in spite of everything else going on, and I can say I am done with this build!

I tried to produce a really dry, sun-baked, and sandstorm- beaten appearance, and I think it came out pretty close to what I wanted. The paint chipping is a bit more aggressive than I think is really appropriate, but it was necessary in order to overcome the decals, which proved to be every bit as brittle as I had feared, particularly on the right side where I had to remove the red fill from the lettering.


Most of the stowage--the tarps, satchel, etc.--are homemade to match the ubiquitous pieces seen in the photos, but where not included in the Gunze Sangyo kit for some reason. First time using epoxy putty for tarps, but I think they look okay.

Lastly, I have to give a great big shout-out to Ellis (a.k.a Milvehfan) for graciously sending me the spare track links gracing the hood! Cheers for that, Mate!

Rommel has long been one of my heroes, and I wanted to do him justice with this build. Hope you like it.

nng-nng
Visit this Community
Bayern, Germany
Joined: October 22, 2013
KitMaker: 380 posts
Armorama: 376 posts
Posted: Tuesday, November 11, 2014 - 02:06 PM UTC
Terriffic build Mark, just as seen on the pictures.
Namabiiru
Staff MemberAssociate Editor
MODEL SHIPWRIGHTS
#399
Visit this Community
Rhode Island, United States
Joined: March 05, 2014
KitMaker: 2,888 posts
Armorama: 1,920 posts
Posted: Tuesday, November 11, 2014 - 02:56 PM UTC
Thanks for the kind words, Fabian. The photos you sent were very helpful!

Oh, and if you noticed in the pictures, I ended up installing the rifle rack but leaving the rifles out, which is just as well because once the radio is in place it turns out nobody can get at the rifles!

Giovanni1508
Visit this Community
Napoli, Italy
Joined: April 17, 2014
KitMaker: 652 posts
Armorama: 600 posts
Posted: Wednesday, November 12, 2014 - 07:32 PM UTC

Hi guys,

Some small progress with the (slow) building of my 251/9. Unfortunately not so much time during this week:

Just finishing the assembly of the interiors, then primer and base coat:


Then, finishing and painting of driver dashboard:


I've realized that, when installed this piece in position and fitted the upper hull, you will not see NOTHING anymore...

Then, assembled and painted the cannon and the radio:


Hoping to have some time during next weekend...

Regards

Giovanni

yeahwiggie
Visit this Community
Dalarnas, Sweden
Joined: March 24, 2006
KitMaker: 2,093 posts
Armorama: 1,359 posts
Posted: Thursday, November 13, 2014 - 09:43 PM UTC
Nice one, Marc!
That really makes me want to take up mine again. You should read "the Rommel papers", a book composed of many of his diary-entries, along with other bits of information. I did read it for my Rommel-research and I loved it!
Namabiiru
Staff MemberAssociate Editor
MODEL SHIPWRIGHTS
#399
Visit this Community
Rhode Island, United States
Joined: March 05, 2014
KitMaker: 2,888 posts
Armorama: 1,920 posts
Posted: Friday, November 14, 2014 - 03:38 PM UTC

Quoted Text

Nice one, Marc!
That really makes me want to take up mine again. You should read "the Rommel papers", a book composed of many of his diary-entries, along with other bits of information. I did read it for my Rommel-research and I loved it!


Thanks, Ron. I will definitely look for that!

ltb073
Visit this Community
New York, United States
Joined: March 08, 2010
KitMaker: 3,662 posts
Armorama: 3,078 posts
Posted: Wednesday, November 19, 2014 - 07:07 AM UTC
Nice work Mark really like the weathering
Ok a was ready to call my build finished but the camera show were some touch ups need to be on the track mud
 photo P1090167.jpg
 photo P1090166.jpg
 photo P1090170.jpg
 photo P1090171.jpg
 photo P1090172.jpg
Is the flag to bright Anything else im not seeing
Namabiiru
Staff MemberAssociate Editor
MODEL SHIPWRIGHTS
#399
Visit this Community
Rhode Island, United States
Joined: March 05, 2014
KitMaker: 2,888 posts
Armorama: 1,920 posts
Posted: Wednesday, November 19, 2014 - 08:43 AM UTC
Sal,
Looks fantastic, but you are right about the suspension needing some touch up on the mud where you missed a couple of spots. Since you asked I will venture the opinion that the flag could stand a light spray of off-white or light grey to fade it abit, followed by a couple of washes to dirty it up. It's certainly plausible the crew just acquired a new flag to put on the hood, but I think it's too strong a contrast with such a battle-weary vehicle. You might also want to try wrinkling it up a little bit--looks a bit like it's freshly ironed.

Great build!

justsendit
Visit this Community
Colorado, United States
Joined: February 24, 2014
KitMaker: 3,033 posts
Armorama: 2,492 posts
Posted: Wednesday, November 19, 2014 - 09:11 AM UTC
Hi Sal,

I agree with Mark with regards to beating up the flag. It could use wrinkles and/or fold marks; tie-downs too. It could also be smaller and moved farther forward as well Example — maybe??? What material is the flag made of? I might have a solution.

All said, the build looks great!

—mike
ltb073
Visit this Community
New York, United States
Joined: March 08, 2010
KitMaker: 3,662 posts
Armorama: 3,078 posts
Posted: Wednesday, November 19, 2014 - 03:31 PM UTC
Thanks for the opinions and complement guys yes forgot all about the tie downs too. The flag is plain printer paper printed it out on a computer and went over the red with some acrylic craft store paint
justsendit
Visit this Community
Colorado, United States
Joined: February 24, 2014
KitMaker: 3,033 posts
Armorama: 2,492 posts
Posted: Wednesday, November 19, 2014 - 11:04 PM UTC
Sal,

First off ... nice job painting the flag! Here are some suggestions.

No. 1: The circle edge is a little rough but I think it can be fixed. Then, add wrinkles, weathering and seriously consider where to tie it down on the vehicle. Imagine yourself as the guy walking around the 251 assigned with ID Flag duty!

No. 2: Ditch this flag altogether and make a smaller one and move it forward on the hood as explained in my prior comment.

No. 3: 'The Scenic Factory' makes these out of cotton fabric (pre-faded) and you get a variety of sizes. You can wet them with highly diluted white glue; ball them up to form folds/wrinkles; add washes/oil stains as needed. Don't forget to include raised bumps where the flag covers the hatch hinges.

Includes 4 flag set in 3 sizes
- 1 approximately 40"x27" scale inches
- 1 approximately 45"x30" scale inches
- 2 approximately 50"x34" scale inches

One of these should easily do the trick! HTH.

—mike
eMan
#298
Visit this Community
Hong Kong S.A.R. / 繁體
Joined: August 08, 2002
KitMaker: 1,182 posts
Armorama: 665 posts
Posted: Sunday, November 23, 2014 - 05:56 AM UTC
update progress.


Removed by original poster on 11/24/14 - 03:08:43 (GMT).
corsair924
Visit this Community
New Hampshire, United States
Joined: August 11, 2008
KitMaker: 403 posts
Armorama: 322 posts
Posted: Sunday, November 23, 2014 - 08:09 AM UTC
Well, with one week to go, even I don't know if I'll finish.
Got the wind knocked out of my sails when I screwed up the alinement of the rear hull.

I've got the major assembly completed, just waiting for a bit of warm weather and time to paint the exterior.

Everyone else seems to be making great projects.
Personally working on bring my own level of work up to the next level.

Namabiiru
Staff MemberAssociate Editor
MODEL SHIPWRIGHTS
#399
Visit this Community
Rhode Island, United States
Joined: March 05, 2014
KitMaker: 2,888 posts
Armorama: 1,920 posts
Posted: Sunday, November 23, 2014 - 08:28 AM UTC
Warm weather? In late November? In New Hampshire? Sounds like time to break out the acrylics!

Good luck, Corsair! Looks great, so far!