Looks promising, Nick.
Looking forward to see more when you take more photos.
Hosted by Richard S.
Campaign :: Improve your figures!
Posted: Tuesday, June 30, 2015 - 04:12 PM UTC
All_You_Can_Kit

Joined: August 22, 2012
KitMaker: 599 posts
Armorama: 527 posts

Posted: Wednesday, July 01, 2015 - 06:49 AM UTC
Hello fellas, actually I start my project for this campaign on January 2015, but suspended for a few months due to office hactic work! 
 Thanks for the extension, I able to resume my work, and these are several in progress pictures of my entries used for this campaign:
Dragon figure set "PzGrenadier 'Nordland'":
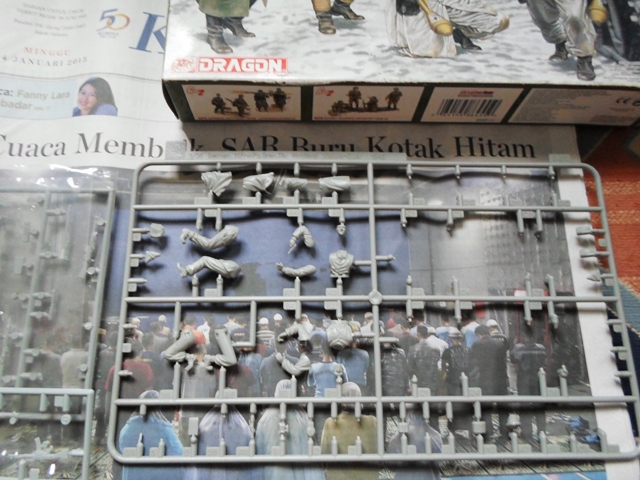
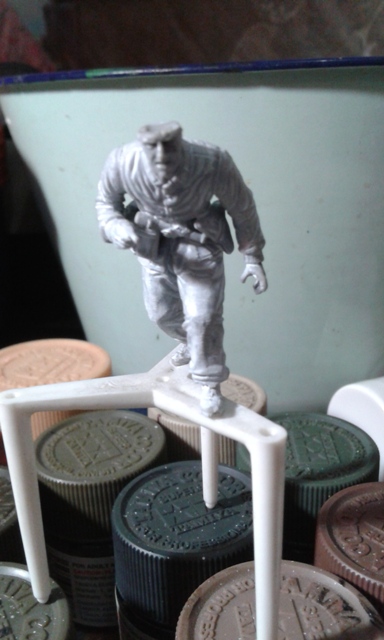
Dragon figure set "Ambush! Eastern Front 1944'":
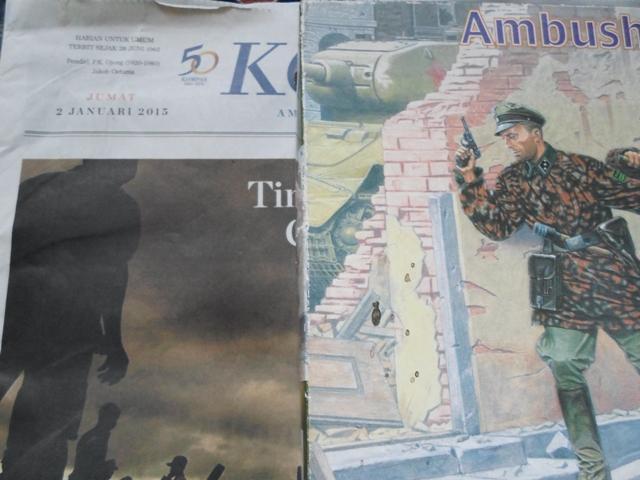
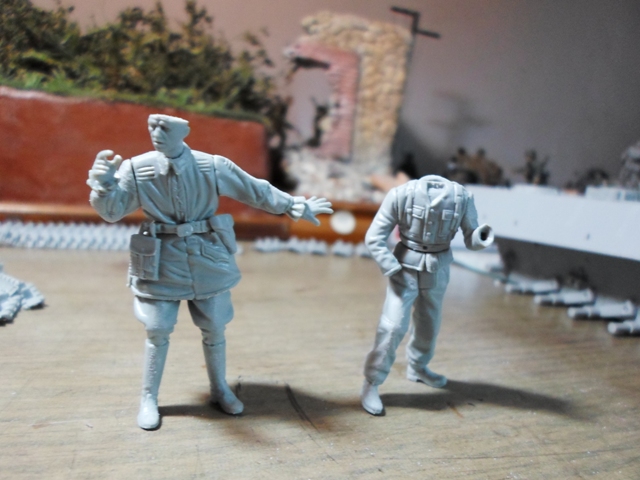
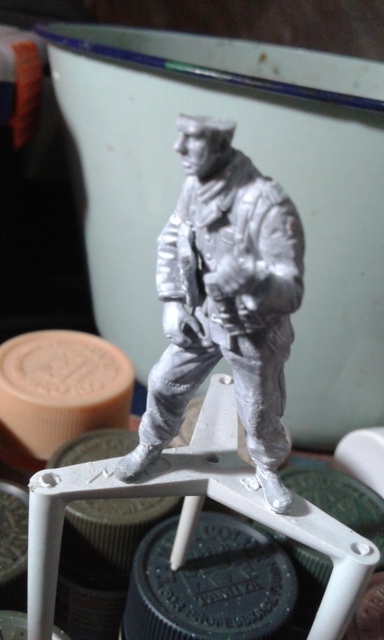
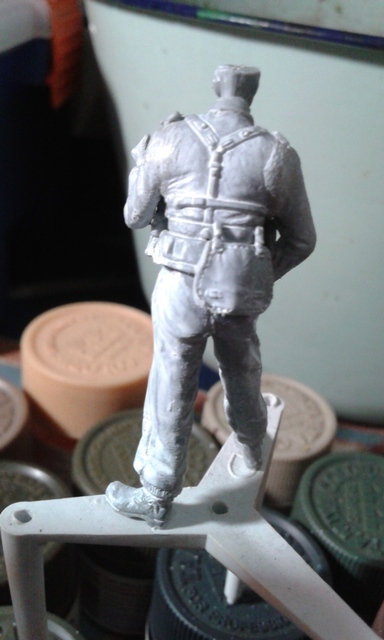
A complete presentation of these 2 projects can be reviewed here:
German Infantry Set: PzGrenadier 'Nordland' and German Infantry Set: Ambush! Eastern Front
Many thanks!

Cheers,
Garry

 Thanks for the extension, I able to resume my work, and these are several in progress pictures of my entries used for this campaign:
Dragon figure set "PzGrenadier 'Nordland'":


Dragon figure set "Ambush! Eastern Front 1944'":


A complete presentation of these 2 projects can be reviewed here:
German Infantry Set: PzGrenadier 'Nordland' and German Infantry Set: Ambush! Eastern Front
Many thanks!


Cheers,
Garry
BravoTwoZero

Joined: June 11, 2009
KitMaker: 461 posts
Armorama: 370 posts

Posted: Wednesday, July 01, 2015 - 10:56 PM UTC
I have completed painting my figures. Here they are:
1/16 MiniArt French Knight


1/16 Tamiya Elite German Soldier


Here are the sets and some of the products I used:
Vallejo Black Primer
Vallejo Face Painting Set
Vallejo Black & White Paint Set
AK Interactive Old & Weathered Wood Vol. 1
AK Interactive True Metal
Andrea Silver Paint Set
Andrea Gold Paint Set
Andrea Blue Paint Set
Andrea Red Paint Set
Andrea Yellow Paint Set
Andrea White Paint Set
Andrea Black Paint Set
Andrea Inks Set
AK Interactive M-44 Camouflage Uniform
AK 3019 Dark Brown Glaze
Uschi van der Rosten Metallic Polishing Powder - Iron
Plus some individual Vallejo paints that I can't recall anymore.
I still need practice on the weathering, especially the German soldier. I am planning to put dust and mud effects on the uniform, particularly the boots. Plus some chipping on the gas mask. But, this will do for now.
After seeing the reviews on the AK Interactive True Metal paint series, I immediately bought several tubes. I was excited to try them out on the knight. Although they apply very well as advertised, I was disappointed that the paint do not dry completely. Even after a couple of months after I appied them, I still get paint residue on my fingers when I handle the knight. Consequently, some of the metallic color got applied on the blue tunic. I had to re-apply the blue color. What saved me was Andrea's Silver paint. I would recommend this set. It was so easy to use and the shading for the metal color is included.
With the exception of the AK Interactive True Metal paint, I highly recommend all the other products. I was very impressed with the AK Interactive M-44 set plus the Dark Brown Glaze.
Quick shout out to Dave Youngquist of Last Cavalry for his Youtube videos. The episodes on painting leather and gear were very helpful!
I truly enjoyed this campaign. Thank you very much!
1/16 MiniArt French Knight


1/16 Tamiya Elite German Soldier


Here are the sets and some of the products I used:
Vallejo Black Primer
Vallejo Face Painting Set
Vallejo Black & White Paint Set
AK Interactive Old & Weathered Wood Vol. 1
AK Interactive True Metal
Andrea Silver Paint Set
Andrea Gold Paint Set
Andrea Blue Paint Set
Andrea Red Paint Set
Andrea Yellow Paint Set
Andrea White Paint Set
Andrea Black Paint Set
Andrea Inks Set
AK Interactive M-44 Camouflage Uniform
AK 3019 Dark Brown Glaze
Uschi van der Rosten Metallic Polishing Powder - Iron
Plus some individual Vallejo paints that I can't recall anymore.
I still need practice on the weathering, especially the German soldier. I am planning to put dust and mud effects on the uniform, particularly the boots. Plus some chipping on the gas mask. But, this will do for now.
After seeing the reviews on the AK Interactive True Metal paint series, I immediately bought several tubes. I was excited to try them out on the knight. Although they apply very well as advertised, I was disappointed that the paint do not dry completely. Even after a couple of months after I appied them, I still get paint residue on my fingers when I handle the knight. Consequently, some of the metallic color got applied on the blue tunic. I had to re-apply the blue color. What saved me was Andrea's Silver paint. I would recommend this set. It was so easy to use and the shading for the metal color is included.
With the exception of the AK Interactive True Metal paint, I highly recommend all the other products. I was very impressed with the AK Interactive M-44 set plus the Dark Brown Glaze.
Quick shout out to Dave Youngquist of Last Cavalry for his Youtube videos. The episodes on painting leather and gear were very helpful!
I truly enjoyed this campaign. Thank you very much!
Scouteyes

Joined: November 07, 2010
KitMaker: 247 posts
Armorama: 208 posts

Posted: Thursday, July 02, 2015 - 04:36 AM UTC
Nice work Joseph,and thanks for the heads-up on the Silver paint. That Pea pattern uniform on the German soldier is no easy feat. They both look great.

justsendit

Joined: February 24, 2014
KitMaker: 3,033 posts
Armorama: 2,492 posts

Posted: Thursday, July 02, 2015 - 07:16 AM UTC
Really exciting to see all of the nice works filling these pages! Keep at it!
Cheers!🍺
ómike
Cheers!🍺
ómike
Motives

Joined: October 15, 2013
KitMaker: 444 posts
Armorama: 428 posts

Posted: Thursday, July 02, 2015 - 11:44 AM UTC
I love that pea pattern uniform. Very nice!
JackG

Joined: May 28, 2006
KitMaker: 172 posts
Armorama: 122 posts

Posted: Thursday, July 02, 2015 - 06:59 PM UTC
Joseph, I like both of those large scale figures, but your execution of the pea dot camou is brilliant!
regards,
Jack
regards,
Jack
Posted: Thursday, July 02, 2015 - 08:40 PM UTC
Joseph,
I would have to "ditto" Jack's comment. Great job. The camouflage job is very striking and I'll get inspiration from you when painting my figures for this and the Market Garden campaigns.
Take care,
Don "Lakota"
I would have to "ditto" Jack's comment. Great job. The camouflage job is very striking and I'll get inspiration from you when painting my figures for this and the Market Garden campaigns.
Take care,
Don "Lakota"


justsendit

Joined: February 24, 2014
KitMaker: 3,033 posts
Armorama: 2,492 posts

Posted: Friday, July 03, 2015 - 06:30 AM UTC
íTug of Warí update.
A little more work on the crowd (no shadows/highlights just yet). Not getting a whole lot done here lately with the heat. Paint is drying too quickly ... even with the wet palette ... and sweat is dripping from my Optivisor
 ... maybe I can bottle that stuff and use it for thinner!

All of these characters have had extensive modifications, with exception to the center figure in the tan suite.
Cheers!🍺
ómike
A little more work on the crowd (no shadows/highlights just yet). Not getting a whole lot done here lately with the heat. Paint is drying too quickly ... even with the wet palette ... and sweat is dripping from my Optivisor

 ... maybe I can bottle that stuff and use it for thinner!

All of these characters have had extensive modifications, with exception to the center figure in the tan suite.
Cheers!🍺
ómike
Posted: Friday, July 03, 2015 - 05:44 PM UTC
Hi Joseph and Mike,
Excellent work guys.
Joseph two excellent figures, terrific.
Mike, the civilians are looking good so far I like the poses.
Al
Excellent work guys.
Joseph two excellent figures, terrific.
Mike, the civilians are looking good so far I like the poses.
Al
TankManNick

Joined: February 01, 2010
KitMaker: 551 posts
Armorama: 543 posts

Posted: Saturday, July 04, 2015 - 03:45 AM UTC
All done. Here are the 'good' pictures.


Removed by original poster on 07/04/15 - 22:46:35 (GMT).

justsendit

Joined: February 24, 2014
KitMaker: 3,033 posts
Armorama: 2,492 posts

Posted: Saturday, July 04, 2015 - 04:36 AM UTC
Wow! ... That came out looking really great Nick Ö outstanding work!🍺
ómike
ómike
Posted: Saturday, July 04, 2015 - 03:16 PM UTC
Looks very nice, Nick! Second round of pictures are much better!
Posted: Saturday, July 04, 2015 - 04:18 PM UTC
Hi Nick,
They look very good against the clear blue sky. Good concept for the dispaly.
Some progress on the ICM British Infantry. The detail on the figures and kit is much better than the Tamiya ones. I added some back straps and buckles as I didn't want them with packs on.
Still some lanyards to add to the officers and gunner.
Al


justsendit

Joined: February 24, 2014
KitMaker: 3,033 posts
Armorama: 2,492 posts

Posted: Saturday, July 04, 2015 - 07:43 PM UTC
Hi Alan,
As always, your figures with additional details really look the part.
ómike
As always, your figures with additional details really look the part.
ómike
Posted: Saturday, July 04, 2015 - 08:12 PM UTC

All_You_Can_Kit

Joined: August 22, 2012
KitMaker: 599 posts
Armorama: 527 posts

Posted: Monday, July 06, 2015 - 07:26 AM UTC
Hi all, my recent update can be followed via this link:
German Infantry Set: Ambush! Eastern Front
German Infantry Set: PzGrenadier 'Nordland'
Cheers
Garry
German Infantry Set: Ambush! Eastern Front
German Infantry Set: PzGrenadier 'Nordland'
Cheers

Garry
graymouser17

Joined: March 27, 2010
KitMaker: 36 posts
Armorama: 11 posts

Posted: Monday, July 06, 2015 - 09:51 PM UTC
I am willing but I do have at the moment in mind a diorama compose of the Mini-Art Farmhouse with farm yard and village workshop and also U.S. Military Police Motorcycles and Repair Crew as well with an extra Motorcycle as well .
Mech_Inf

Joined: July 30, 2005
KitMaker: 119 posts
Armorama: 87 posts

Posted: Tuesday, July 07, 2015 - 06:16 PM UTC
Bryan, I don't even paint eyes on 1/35 figures. Nothing detracts from an otherwise perfect figure like 'pop-eyes' do.
TankManNick

Joined: February 01, 2010
KitMaker: 551 posts
Armorama: 543 posts

Posted: Tuesday, July 07, 2015 - 09:49 PM UTC
Quoted Text
Bryan, I don't even paint eyes on 1/35 figures. Nothing detracts from an otherwise perfect figure like 'pop-eyes' do.
So, what DO you do? You must have some technique, not just a bare eye socket. (A picture would help!)

justsendit

Joined: February 24, 2014
KitMaker: 3,033 posts
Armorama: 2,492 posts

Posted: Thursday, July 09, 2015 - 09:51 PM UTC
Quoted Text
Quoted TextBryan, I don't even paint eyes on 1/35 figures. Nothing detracts from an otherwise perfect figure like 'pop-eyes' do.
So, what DO you do? You must have some technique, not just a bare eye socket. (A picture would help!)
Any insight to this would be greatly appreciated. Iím nearing that stage of the build and I'm frustrated to say ... there is just no way that Iíll be able to paint detailed eyes. Iíve tried in the past but my very limited vision just canít seem to handle that particular task.
Thanks in advance,
ómike
Thudius

Joined: October 22, 2012
KitMaker: 1,194 posts
Armorama: 1,077 posts

Posted: Thursday, July 09, 2015 - 10:43 PM UTC
Quoted Text
Any insight to this would be greatly appreciated. Iím nearing that stage of the build and I'm frustrated to say ... there is just no way that Iíll be able to paint detailed eyes. Iíve tried in the past but my very limited vision just canít seem to handle that particular task.
Thanks in advance,
ómike
You can always try a squint with a wash, trying to do eyes in 35th is a indeed a bit tricky. I find if you do them first the rest of the face comes together a little easier with them as reference points, and also you get to redo the eyes as many times as needed without having to worry about ruining the skin tones.
Kimmo
erichvon

Joined: January 17, 2006
KitMaker: 1,694 posts
Armorama: 1,584 posts

Posted: Friday, July 10, 2015 - 04:24 AM UTC
Al they're looking superb. It's a shame that the ICM figures are so close together posewise, you can't even multipose them because they're so similar. They really have let themselves down there. They look to be nice figures as well. The Tamiya ones are really nice by the looks of it. Quite animated and they all look spot on with the Hornet heads. What are you going for? Skirmish at Mons type dio? At least that early in the war there were still buildings and vegetation so plenty of options. I'm really looking forward toseeing your next dio as the last few WW1 dios have been superb. Lots going on all over the scene.
Posted: Friday, July 10, 2015 - 03:09 PM UTC
Hi Karl,
Many thanks. Yes, of all the advancing WW1 sets ICM did the British poses are the most disappointing, all with the right leg forward. That said the detail on the figures is much better than the Tamiya set although the Tamiya set allow for some switching around of posture.
It's nice to have some early infantry - still mulling over a setting for first contact with the Hun (no offence intended).
Al
Many thanks. Yes, of all the advancing WW1 sets ICM did the British poses are the most disappointing, all with the right leg forward. That said the detail on the figures is much better than the Tamiya set although the Tamiya set allow for some switching around of posture.
It's nice to have some early infantry - still mulling over a setting for first contact with the Hun
 (no offence intended).
Al

 |


