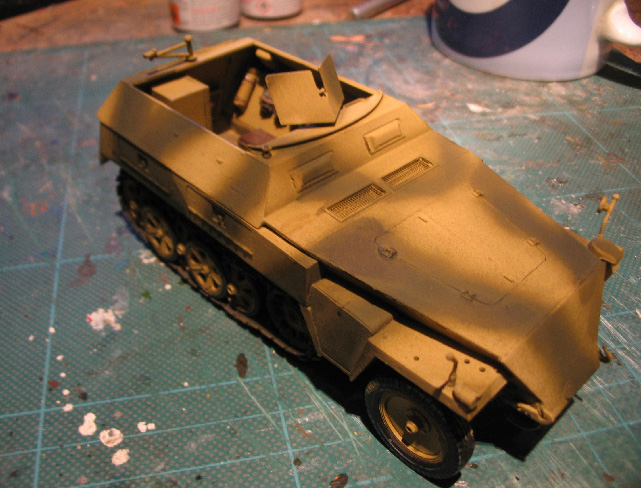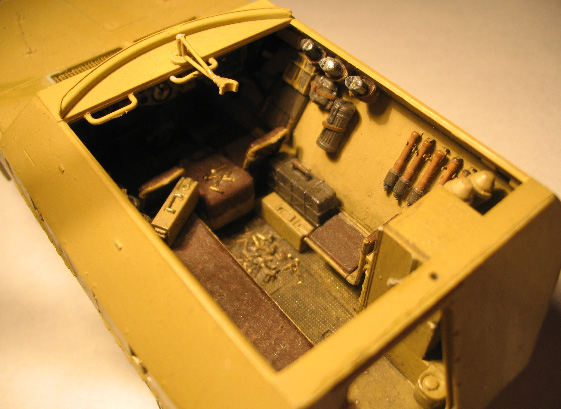
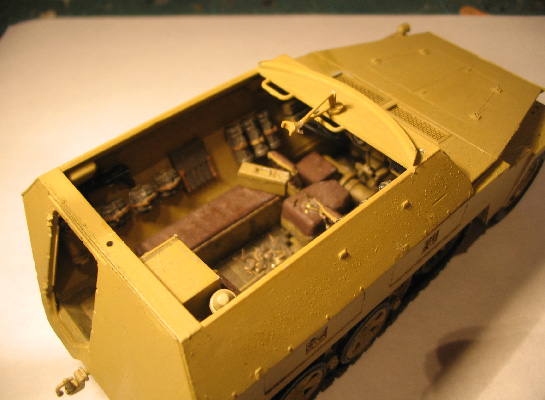
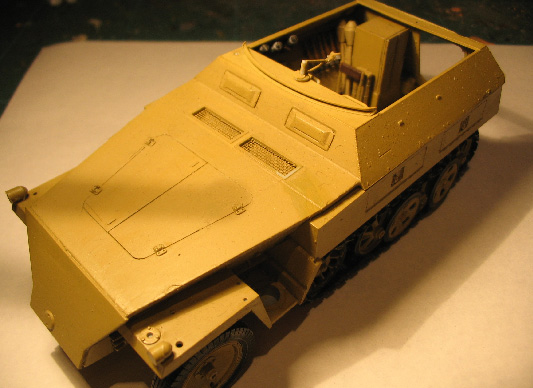
This is the Sdkfz 250 I'm sticking in. I started it a few years ago and lost interest or got distracted by something else hence it never got finished. I've decided to use it in my Arnhem dio over on the Op Market Garden Campaign so I've got a good reason to finish it off now.
It's actually quite a nice kit but the instructions are crap. I'd never built a DML vehicle before this one and to say that the instructions are confusing and vague would be an understatement. Still onwards and upwards...
Hosted by Richard S.
Unfinished Business 2015
erichvon
England - East Midlands, United Kingdom
Joined: January 17, 2006
KitMaker: 1,694 posts
Armorama: 1,584 posts
Joined: January 17, 2006
KitMaker: 1,694 posts
Armorama: 1,584 posts
Posted: Monday, March 30, 2015 - 11:03 AM UTC
35th-scale
Kildare, Ireland
Joined: November 21, 2007
KitMaker: 3,212 posts
Armorama: 2,807 posts
Joined: November 21, 2007
KitMaker: 3,212 posts
Armorama: 2,807 posts
Posted: Monday, March 30, 2015 - 01:08 PM UTC
That's a well travelled Panzer Guy....welcome to the campaign.
Welcome Karl, as DML don't do modern stuff I've never had the pleasure of one of their kits but that don't look bad. I must pop over and see your Arnhem dio at some stage. I actually have a funny story about Arnhem. Back in 1979 my Dad was working in Donegal but the family were living in Ballinasloe about 100miles away. He'd go up on a Monday morning & come back on a Friday evening just for a few months. One day at work he got a call from the local convent in Donegal to see if he could give their Reverend Mother a lift to their sister convent in Ballinasloe the following weekend (those nuns had excellent intelligence gathering) as this would save her a very long indirect train journey. He was happy for the company, said "of course" and went to pick her up at the convent on the Friday afternoon. A stereotypical Reverend Mother arrived out: in her 60s, small, frail looking etc. Anyway, they are driving along chatting about their lives, as you do, and it turns out she had been a nurse who had parachuted into Arnhem with the 1st Airborn and was one of the few to walk back out.
Posted: Monday, March 30, 2015 - 09:10 PM UTC
ejhammer
Michigan, United States
Joined: June 10, 2008
KitMaker: 230 posts
Armorama: 34 posts
Joined: June 10, 2008
KitMaker: 230 posts
Armorama: 34 posts
Posted: Friday, April 03, 2015 - 12:18 AM UTC
Got my taxes done, now back to the bench. Some more stuff came this week for my Little Wood Flattie
Lost my solder equipment so -
solder, flux, heat sink clamps
Some cool looking toothpicks that look like mint hiking sticks, bamboo skewers for tool handles, ex nuts, a free paint mixer, teeny tubing and rod to make rudder hinges for the Little Wood Flattie
EJ
Lost my solder equipment so -
solder, flux, heat sink clamps
Some cool looking toothpicks that look like mint hiking sticks, bamboo skewers for tool handles, ex nuts, a free paint mixer, teeny tubing and rod to make rudder hinges for the Little Wood Flattie
EJ
35th-scale
Kildare, Ireland
Joined: November 21, 2007
KitMaker: 3,212 posts
Armorama: 2,807 posts
Joined: November 21, 2007
KitMaker: 3,212 posts
Armorama: 2,807 posts
Posted: Friday, April 03, 2015 - 03:13 AM UTC
Dont scorch the wood EJ
interesting figures Jasper and welcime to the campaign
ejhammer
Michigan, United States
Joined: June 10, 2008
KitMaker: 230 posts
Armorama: 34 posts
Joined: June 10, 2008
KitMaker: 230 posts
Armorama: 34 posts
Posted: Friday, April 03, 2015 - 10:09 PM UTC
Back on the Flattie -
In the last week I've been looking for "prettier" woods to use for wood boat trim with limited success. Never seem to find exactly what I want and if I do it's usually out of stock. So, out to the workshop. In the "save this" bin, I found blocks of American black walnut, mahogany (not sure what kind), rosewood, clear western red cedar, various types of pine, clear redwood and a few I'm not sure of what they are. Spent about 3 hours building a fixture for the table saw to cut very narrow strips. The pics show what I was able to do. Able to get down to 1/16" X 1/16". pretty nice. I'm working on a fixture for the drill press to use as a thickness sander.
Next - went to work with the new soldering stuff. Making the Pintles and Gudgeons for the rudder. I call em hinges. I tried the lower melting point solder first, 275 degrees, but had two joints fail, so then used the higher temp silver solder, 430 degrees, with great success. The low temp I think might work very well with PE railings and such, but the high temp seems to be better for joints that might get stressed. Anyway, they are done and ready to install.
The materials -
Bent, fitted and soldered,
Cut off, pins fitted and cleaned up, ready for paint.
Next, the crib to set it on.
EJ
dcandal
Buenos Aires, Argentina
Joined: September 07, 2006
KitMaker: 918 posts
Armorama: 212 posts
Joined: September 07, 2006
KitMaker: 918 posts
Armorama: 212 posts
Posted: Saturday, April 04, 2015 - 05:14 PM UTC
ejhammer
Michigan, United States
Joined: June 10, 2008
KitMaker: 230 posts
Armorama: 34 posts
Joined: June 10, 2008
KitMaker: 230 posts
Armorama: 34 posts
Posted: Sunday, April 05, 2015 - 05:36 AM UTC
Posted: Sunday, April 05, 2015 - 06:36 AM UTC
Looking nice, EJ!
jimb
New York, United States
Joined: August 25, 2006
KitMaker: 2,539 posts
Armorama: 238 posts
Joined: August 25, 2006
KitMaker: 2,539 posts
Armorama: 238 posts
Posted: Thursday, April 09, 2015 - 02:51 AM UTC
Greetings from The Shiny Side! Since I pulled this one off the "Shelf of Shame" to try & finish it up it has been a real fight! Seems like every time I glue something on, something falls off! I went to glue the cab on, and the left fuel tank broke off causing the hood to fall off. Ok, so the hood wasn't such a big deal as I was going to take that off anyway, but I would have like to do it a little more gently. Then, trying to get the fuel tank back on, the air tank falls off! So I finally get everything glued back on (except the hood), and I manage to get the mirrors, marker lights, & horns on. I go to glue the air cleaners on, and they don't fit! The piping is too short. Not a total disaster since I can't get them to say on anyway, and in working with the air cleaners & piping, the engine breaks loose. Moving on to the exhaust system, I was trying to line up the exhaust tubing with the stacks and the cab falls off. It almost went across the room at that point.
So, here is where it's at. I really hope it won't be another 3-1/2 years before the next update.
Note air cleaner on the bench & not on the truck!
Well, the mirrors, marker lights, & horns look good.
Jim
So, here is where it's at. I really hope it won't be another 3-1/2 years before the next update.
Note air cleaner on the bench & not on the truck!
Well, the mirrors, marker lights, & horns look good.
Jim
Bonaparte84
Hessen, Germany
Joined: July 17, 2013
KitMaker: 338 posts
Armorama: 331 posts
Joined: July 17, 2013
KitMaker: 338 posts
Armorama: 331 posts
Posted: Thursday, April 09, 2015 - 01:48 PM UTC
COntinued work on my E-100. I have now modified the gun mantlet to present an "intentional shot trap", same as I did on the turret front.
Still needs some clean up and polishing, though.
@ Daniel: SOmething you might want to consider doing as well, since the Maus and my E-100 share the same turret. I know both tanks are what ifs, but we also know from history that a very similar design by Porsche, the Panther gun mantlet was redesigned (late panther G type with the chin added)...

I find the thought that one might knock out these huge tanks with any inferior tank just by shooting at the bottom of the turret/ gun mantlet rather painful.
Still needs some clean up and polishing, though.
@ Daniel: SOmething you might want to consider doing as well, since the Maus and my E-100 share the same turret. I know both tanks are what ifs, but we also know from history that a very similar design by Porsche, the Panther gun mantlet was redesigned (late panther G type with the chin added)...
I find the thought that one might knock out these huge tanks with any inferior tank just by shooting at the bottom of the turret/ gun mantlet rather painful.
Neonoodle
Wales, United Kingdom
Joined: September 01, 2005
KitMaker: 41 posts
Armorama: 41 posts
Joined: September 01, 2005
KitMaker: 41 posts
Armorama: 41 posts
Posted: Thursday, April 09, 2015 - 04:35 PM UTC
ejhammer
Michigan, United States
Joined: June 10, 2008
KitMaker: 230 posts
Armorama: 34 posts
Joined: June 10, 2008
KitMaker: 230 posts
Armorama: 34 posts
Posted: Saturday, April 11, 2015 - 04:53 AM UTC
Not much accomplished this week. Installed the brass traveler bar at the rudder. Started to prep parts for the rigging. 8 blocks were supplied (3mm), so I started wrapping them with brass wire for loops, but lost 2 and never found them, broke 4 more wrapping the wire. Tried to make a couple but gave up on that. Ordered a couple packs of them from the LHS and got some smaller brass wire. I'll try annealing it before installation, if not, I have some small soft copper strands from wire clipping in the workshop scrap bucket, from 28 ga to 12 ga. Something's got to work. Also, the eyebolts supplied are actually small brass cotter pins. The eye portion is kinda tear-drop shaped which I didn't like the look of, so, I tried to close the eye and round it off by inserting a round plier tip in the eye and squeezing the shank to round out and "smallerize" the hole. Broke one leg off 4 of those, so picked up a pack of them as well. I think I'll wind up making my own eye bolts from an appropriately gauged brass wire.
The new blocks will be in on Tuesday.
EJ
The new blocks will be in on Tuesday.
EJ
Posted: Saturday, April 11, 2015 - 06:29 AM UTC
Quoted Text
Not much accomplished this week. Installed the brass traveler bar at the rudder. Started to prep parts for the rigging. 8 blocks were supplied (3mm), so I started wrapping them with brass wire for loops, but lost 2 and never found them, broke 4 more wrapping the wire. Tried to make a couple but gave up on that. Ordered a couple packs of them from the LHS and got some smaller brass wire. I'll try annealing it before installation, if not, I have some small soft copper strands from wire clipping in the workshop scrap bucket, from 28 ga to 12 ga. Something's got to work. Also, the eyebolts supplied are actually small brass cotter pins. The eye portion is kinda tear-drop shaped which I didn't like the look of, so, I tried to close the eye and round it off by inserting a round plier tip in the eye and squeezing the shank to round out and "smallerize" the hole. Broke one leg off 4 of those, so picked up a pack of them as well. I think I'll wind up making my own eye bolts from an appropriately gauged brass wire.
The new blocks will be in on Tuesday.
EJ
Arrg, Ye be makin a fine lookin vessel
Posted: Sunday, April 12, 2015 - 12:58 AM UTC
Eugene, really nice progress. The boat is shaping up very nicely. Looking forward to see more.
James, cool bling bling entry! Nice to see something out of the ordinary.
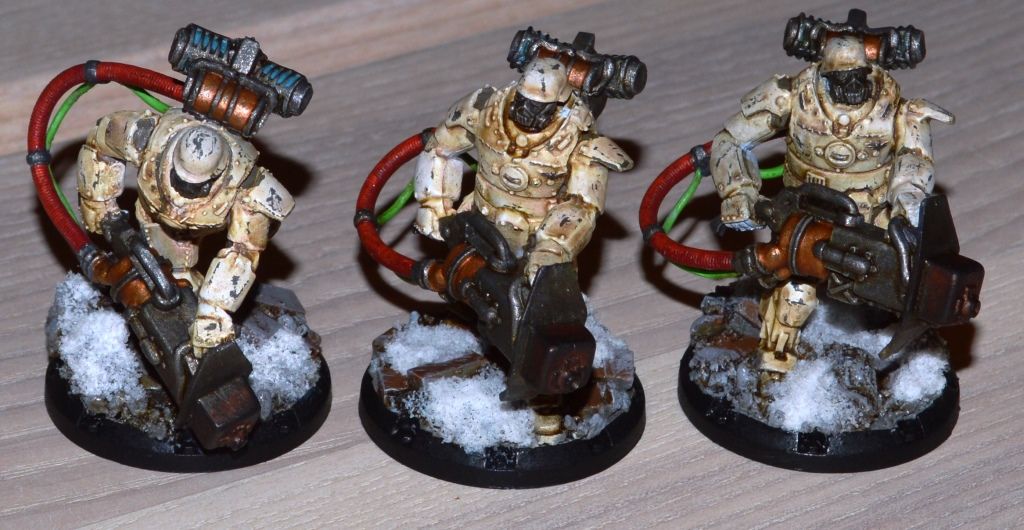
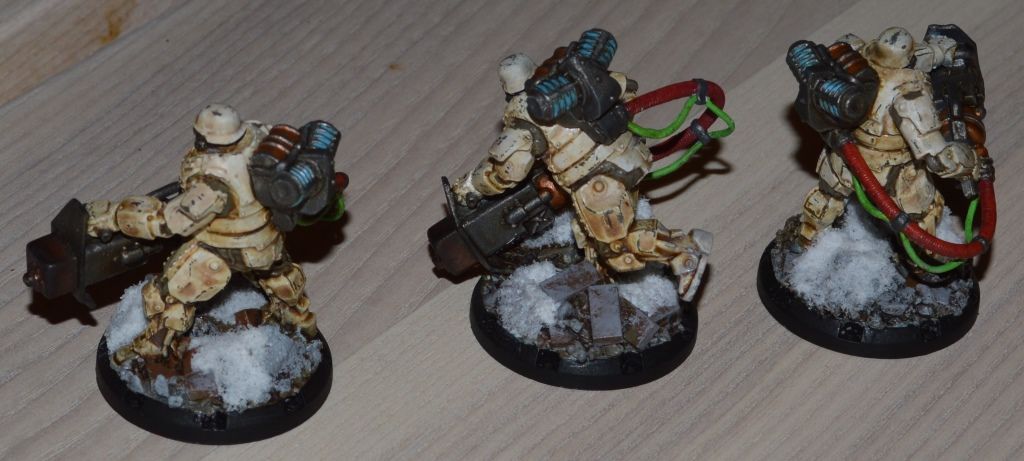
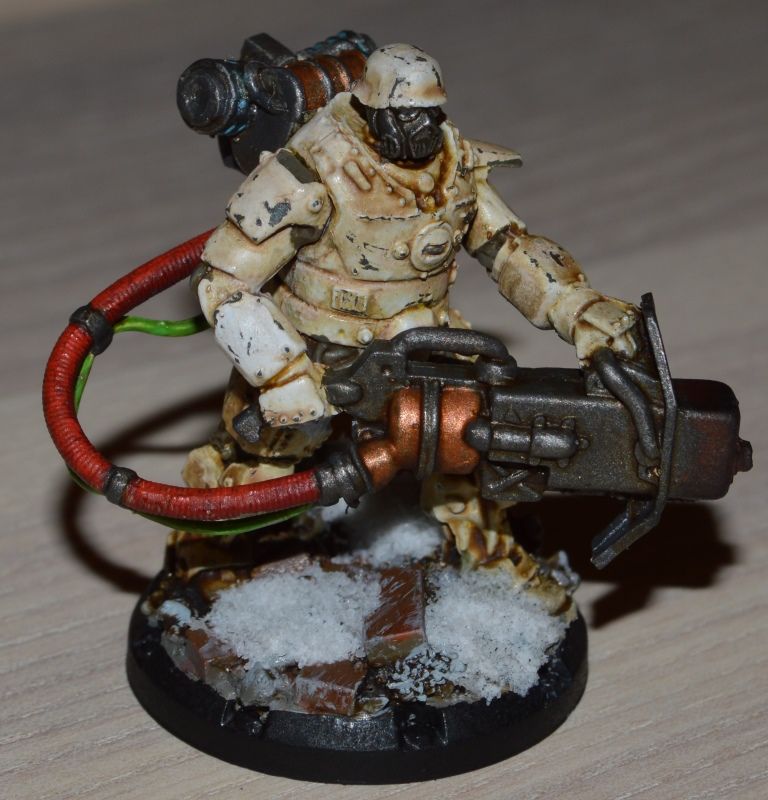
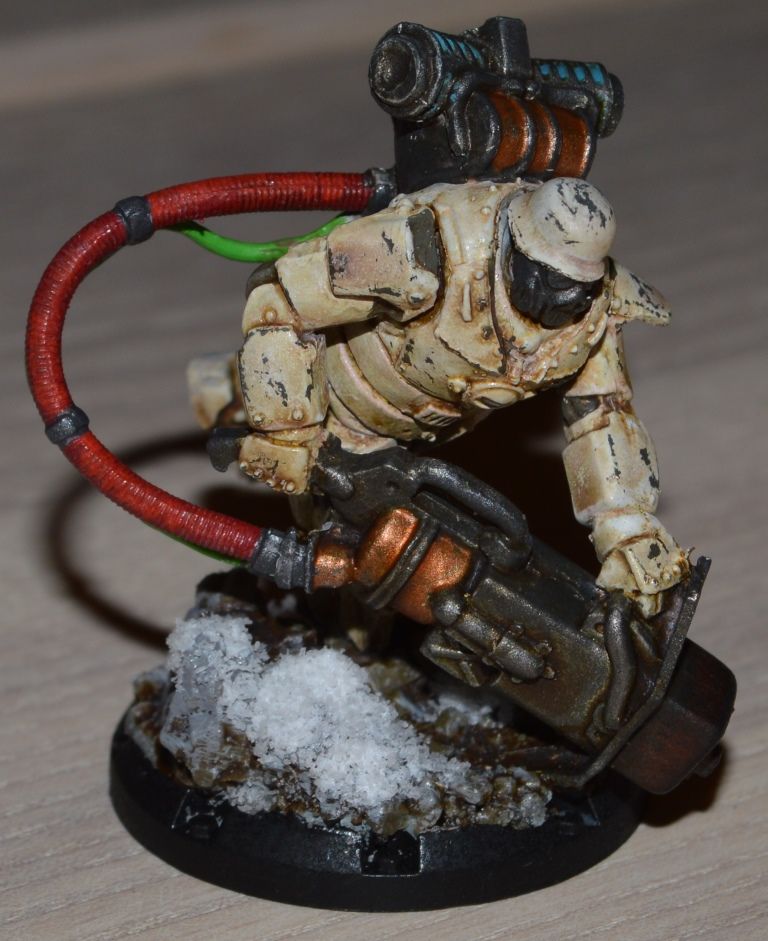
I took three straight hours at the painting table with my Axis heavy laser grenadiers yesterday evening and finished them today with a dull coat.
Nice to have them of the semi finished work pile.
James, cool bling bling entry! Nice to see something out of the ordinary.
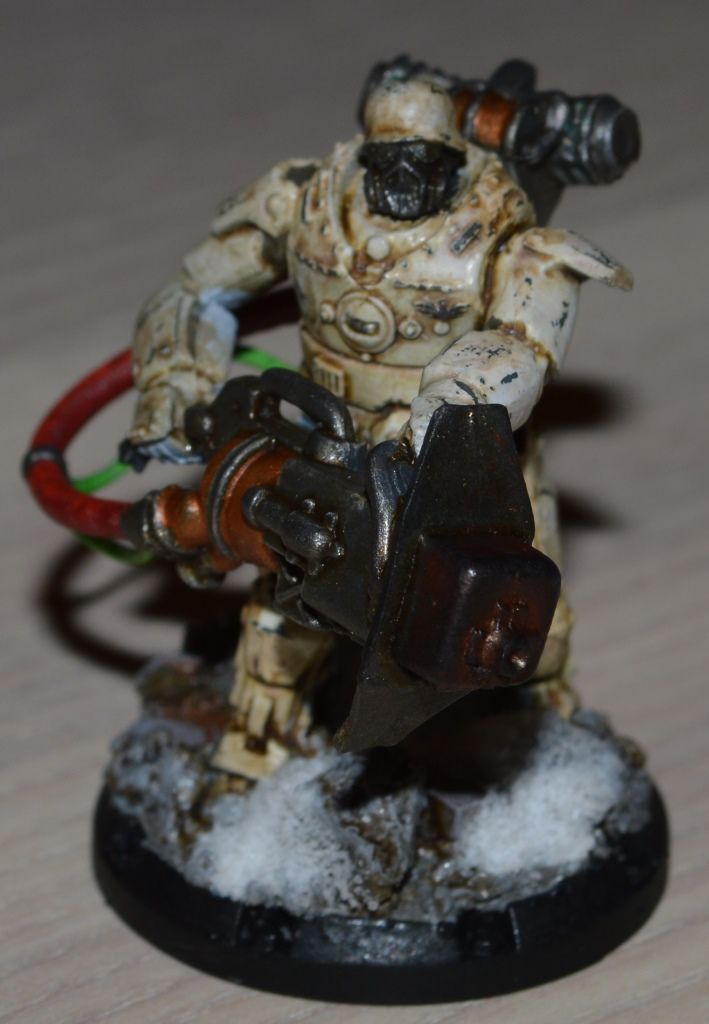
I took three straight hours at the painting table with my Axis heavy laser grenadiers yesterday evening and finished them today with a dull coat.
Nice to have them of the semi finished work pile.
dcandal
Buenos Aires, Argentina
Joined: September 07, 2006
KitMaker: 918 posts
Armorama: 212 posts
Joined: September 07, 2006
KitMaker: 918 posts
Armorama: 212 posts
Posted: Sunday, April 12, 2015 - 03:42 AM UTC
ejhammer
Michigan, United States
Joined: June 10, 2008
KitMaker: 230 posts
Armorama: 34 posts
Joined: June 10, 2008
KitMaker: 230 posts
Armorama: 34 posts
Posted: Monday, April 13, 2015 - 05:32 AM UTC
Nice figures Jesper.
While waiting for my 3mm blocks to arrive, I went shopping at Michal's and Hobby Lobby looking for wire. There is an amazing amount of wire in the beading department.
Sizing wire - well it makes my 73 year old head spin. I still think in inches. Wire and rod are designated in fractional inches, decimal inches (my machinist's thinking), wire gauge and millimeters depending on the product and the manufacturer. I made a spreadsheet for wire from 12 g (gauge) to 32 g so I can get a mental feel for the sizes.
I found some 28 g, (.37mm), 24g (.49mm), 20g (.80mm) and 18g (1.01mm) copper wire in the workshop, most of it I stripped from stranded type building wire scraps or electronic wiring. Also, some 26 g (.40mm) in black, copper and antique brass, and 24g ((.50mm) in antique brass that was in the model room junk that I picked up somewhere. Not sure what they are made of but seem soft enough. I also have some brass rods, 1.57mm, 1.2mm, .81mm, .51mm. The rod is more of a hard brass than soft.
You'd think that would do me right? Guess I must be fussy, cause I really decided on 22 g wire size for what I wanted and had none.
Well, I found some stuff called Parawire. A soft copper wire with a "permanently colored non-tarnish" coating. Comes in several gauges from 16g to 28g and different colors, so I got a roll of "Natural Brass", a kinda antiqued brass color. Wanted truly brass color too but they were out of that. Really nice stuff and works great for wrapping. I'll still use stiffer brass rod to make the rings and eyes from, as that holds it's shape better.
They had ready made rings, but only down to 4mm. 3mm rings were only in silver color so I passed on that.
Meantime, I'm practicing ring making from some .81mm brass rod.
Gosh, I'm thinking in mm now!
EJ
erichvon
England - East Midlands, United Kingdom
Joined: January 17, 2006
KitMaker: 1,694 posts
Armorama: 1,584 posts
Joined: January 17, 2006
KitMaker: 1,694 posts
Armorama: 1,584 posts
Posted: Monday, April 13, 2015 - 02:55 PM UTC
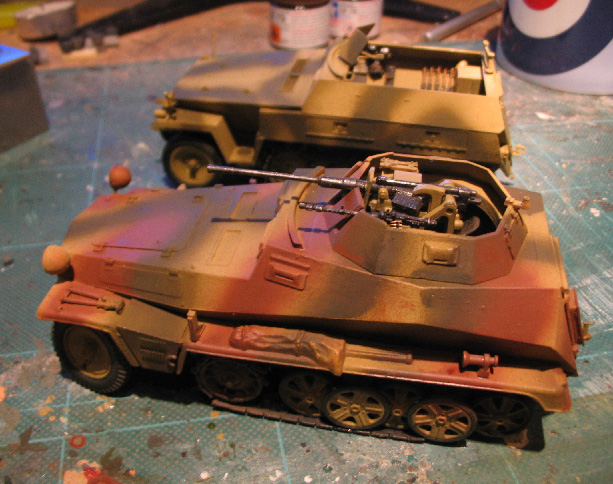
Did a bit of work on the half track this weekend and had a go on my airbrush which I've not used since I don't know when. I'd hoped to get the green bands a bit thinner but I'm still trying to work it out balancing pressure and paint flow.
I still can't decide whether to add red brown to the cam. I was redoing an Sdkfz 250/9 I'd built years ago and decided the piantwork was crap so resprayed it as that's going in the Arnhem dio as well. Here's the two together.
I don't know whether to leave them as they are as Hohenstaufen was re-equipping after the battering they took in Normandy so there is quite a bit of variation in paint jobs in combat pics from Arnhem.
Posted: Monday, April 13, 2015 - 07:04 PM UTC
Eugene, thanks for the comment.
Karl, I would leave them different. Since they are going in the same diorama it will add a little contrast and interest to have them different.
Oblivion
Dodecanese, Greece / Ελλάδα
Joined: April 04, 2015
KitMaker: 195 posts
Armorama: 191 posts
Joined: April 04, 2015
KitMaker: 195 posts
Armorama: 191 posts
Posted: Monday, April 13, 2015 - 08:16 PM UTC
I am also in with two kits
Italeri GMC 2.5 Ton Truck
I built it some years ago, so decided to give it a reset and finish it without the MG mount and include a tarp.
Italeri M110A2
Another of my older builds, repainted in rust and sitting on the bench to be completed as a scrapped vehicle
I think they fall under the unfinished business, don't they?
Posted: Tuesday, April 14, 2015 - 02:48 AM UTC
Not sure if this counts but just finished these that have been sitting in the todo pile since xmas. Assembled like a model. Cut and punch out the parts from the wooden sheet. Sand and glue then sand some more. Assemble parts and finish with a little furniture oil (no weathering). Tada...
Cheers
Cheers
Oblivion
Dodecanese, Greece / Ελλάδα
Joined: April 04, 2015
KitMaker: 195 posts
Armorama: 191 posts
Joined: April 04, 2015
KitMaker: 195 posts
Armorama: 191 posts
Posted: Tuesday, April 14, 2015 - 10:40 PM UTC
After a couple days of work, that's where I stand:
Let me know what you think
Oblivion
Dodecanese, Greece / Ελλάδα
Joined: April 04, 2015
KitMaker: 195 posts
Armorama: 191 posts
Joined: April 04, 2015
KitMaker: 195 posts
Armorama: 191 posts
Posted: Thursday, April 16, 2015 - 09:43 PM UTC
More progress on my M110A2
This looks like it's going to end up in some sort of post-apocalyptic scene
Also done some work on the CCKW
I don't like the camo net, it is most likely getting the boot!
Thank you, happy modelling!
Christos
This looks like it's going to end up in some sort of post-apocalyptic scene
Also done some work on the CCKW
I don't like the camo net, it is most likely getting the boot!
Thank you, happy modelling!
Christos
dcandal
Buenos Aires, Argentina
Joined: September 07, 2006
KitMaker: 918 posts
Armorama: 212 posts
Joined: September 07, 2006
KitMaker: 918 posts
Armorama: 212 posts
Posted: Sunday, April 19, 2015 - 03:53 AM UTC
Stoker
Nova Scotia, Canada
Joined: February 07, 2015
KitMaker: 58 posts
Armorama: 27 posts
Joined: February 07, 2015
KitMaker: 58 posts
Armorama: 27 posts
Posted: Monday, April 20, 2015 - 12:14 AM UTC
Hi everybody,
I've almost got my Sherman done, The tracks are on finally. Each set took me at least 10 hours each! They weren't difficult to put together but there were over 400 pieces to each track and of course I made many mistakes with them. In the pictures you can see the right side track, I think I got the tension right with it, just needs some touch ups. The left track, which I did first, is another story. Used too much glue on the parts so they won't bend properly, broke many pieces trying to put the track on, etc....
First time using rust colour on tracks, think I may have over did it.
Ron