Louisiana, United States
Joined: May 19, 2007
KitMaker: 459 posts
Armorama: 421 posts
Posted: Thursday, May 14, 2015 - 02:05 AM UTC
Louisiana, United States
Joined: May 19, 2007
KitMaker: 459 posts
Armorama: 421 posts
Posted: Thursday, May 14, 2015 - 02:09 AM UTC
Louisiana, United States
Joined: May 19, 2007
KitMaker: 459 posts
Armorama: 421 posts
Posted: Thursday, May 14, 2015 - 02:10 AM UTC
Louisiana, United States
Joined: May 19, 2007
KitMaker: 459 posts
Armorama: 421 posts
Posted: Thursday, May 14, 2015 - 04:31 PM UTC
Frankentanken with friend, a Pz IV Ausf C from June 1944 in Normandy.

Louisiana, United States
Joined: May 19, 2007
KitMaker: 459 posts
Armorama: 421 posts
Posted: Thursday, May 14, 2015 - 04:35 PM UTC
Buenos Aires, Argentina
Joined: September 07, 2006
KitMaker: 918 posts
Armorama: 212 posts
Posted: Thursday, May 14, 2015 - 07:34 PM UTC
South Carolina, United States
Joined: December 03, 2009
KitMaker: 2,160 posts
Armorama: 1,906 posts
Posted: Thursday, May 14, 2015 - 08:56 PM UTC
Irvin,
Lovely piece of work. It's almost a shame to cover it with paint.
Daniel,
Nice Maus.
England - East Midlands, United Kingdom
Joined: January 17, 2006
KitMaker: 1,694 posts
Armorama: 1,584 posts
Posted: Saturday, May 16, 2015 - 02:25 AM UTC
Daniel- Really nice Maus.
Irvin- There's not much of the original kit left there under all that PE...lol. That would have driven me mad. Really looking forward to seeing that completed as it's looking good already.
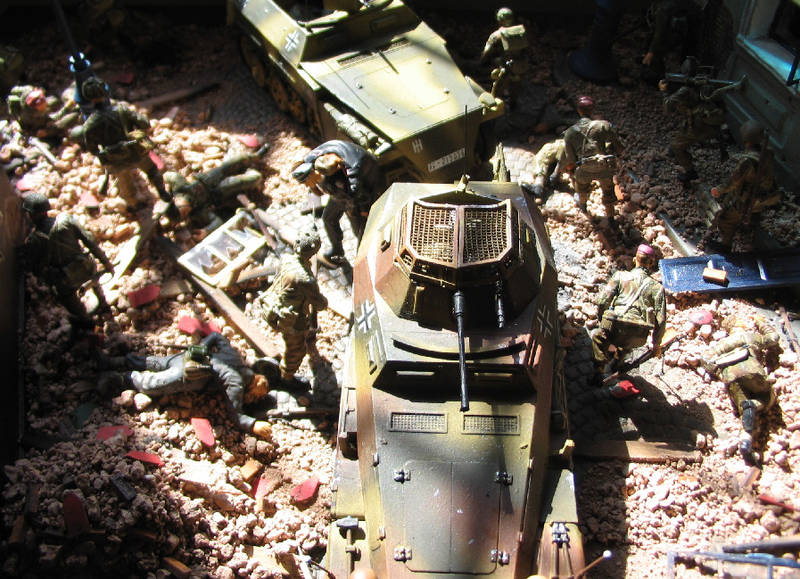
Well now I've finished my Arnhem dio (using my two Sdkfz 250's that I completed here) I think I'll finish off an LRDG chevvy I started about 2 years ago. I didn't get much further than the cargo bed so I'll dig that out tomorrow and crack on with that. It's quite a nice kit, I've already built two for a dio that never happened so maybe this will motivate me into starting the dio...lol. Here's the two Sdkfz 250's in the Arnhem dio.
Nothing is so exhilarating in life as to be shot at with no result.
- Winston Churchill
New Jersey, United States
Joined: July 25, 2006
KitMaker: 1,139 posts
Armorama: 946 posts
Posted: Saturday, May 16, 2015 - 04:14 AM UTC
My PanzerIIIL with cammo its moving along.


Tom
"ALLONS" 11TH ACR BLACKHORSE
"Death Before Dismount"
19K40/ Dino Rider 19F10
Dodecanese, Greece / Ελλάδα
Joined: April 04, 2015
KitMaker: 195 posts
Armorama: 191 posts
Posted: Tuesday, May 19, 2015 - 11:31 PM UTC
Sun is shinning
CA Armour Models on FB
Michigan, United States
Joined: June 10, 2008
KitMaker: 230 posts
Armorama: 34 posts
Posted: Wednesday, May 20, 2015 - 05:33 AM UTC
Got sidetracked for a while building bridges with the kids as a mentor/helper at school for the bridgebuilding competition for Science Olyimpiad. Had 5 teams of two. We built about 50 bridges. Entered three competitions and finally went to the State competition at Michichigan State. One of "my kids" took 12th place at state out of 64 entries. Our school is a smaller charter school. I'm really proud of them.
Back on the little wood flattie now.
Did the blackening on the rudder hinges and it came out fine.

Had problems doing the blocks for the rigging. Those things are hard to hang on to. My neighbor, a fisherman suggested a fly tying vise. His had jaws that worked kinda like a pin vice and wouldn't open up far enough. Went to the sport shop and found this one. They let me take it home to test and I love it. It opens up wider and with parallel jaws.


These were the first blocks I did. I didn't like the look and broke several blocks and cotter pin eyebolts.

These I did with the new vise. I used 26 guage black coated copper wire, .032 brass rod for the eyebolts. Stained the blocks first with maple stain.

This block and ring was fitted to the traveler.

Moving along now with installing the masts and spars and the rigging hardware.
EJ
Fair Winds and Following Seas
EJ
Dodecanese, Greece / Ελλάδα
Joined: April 04, 2015
KitMaker: 195 posts
Armorama: 191 posts
Posted: Wednesday, May 20, 2015 - 11:17 PM UTC
Sun is shinning
CA Armour Models on FB
Florida, United States
Joined: May 14, 2012
KitMaker: 730 posts
Armorama: 624 posts
Posted: Thursday, May 21, 2015 - 10:33 PM UTC
Ok I'm in. After reviewing some of these beautiful builds Im moved towards completing a certain T34 I started probably back in 2013. It was to be for a Battle of Berlin Diorama I had planned.
Dave

"No beast so fierce but knows some touch of pity.
But I know none, and therefore am no beast."
Ontario, Canada
Joined: August 05, 2003
KitMaker: 1,698 posts
Armorama: 1,563 posts
Posted: Thursday, May 28, 2015 - 05:05 PM UTC
I think this is its 3rd repaint now. Going for a heavily faded Canadian 3-tone scheme:

Why plan when you can react?

#417
Ontario, Canada
Joined: March 01, 2004
KitMaker: 3,123 posts
Armorama: 2,539 posts
Posted: Sunday, June 14, 2015 - 09:05 PM UTC
Graeme, what did you use to mask the colour boundaries? They look super crisp.
Paul
Paul Roberts
Past Editor, Boresight
Armor Modeling and Preservation Society

#417
Ontario, Canada
Joined: March 01, 2004
KitMaker: 3,123 posts
Armorama: 2,539 posts
Posted: Sunday, June 14, 2015 - 09:16 PM UTC
OK, so I have also just joined and this is my project:

I made the master for Fantastic Plastic a couple years ago:

I got a copy of the kit as part of the deal and started assembly, but haven't finished it yet. I'll post photos tomorrow of where it is at the moment, but most of the basic assembly and clean-up are complete but it needs painting and then final assembly.
This is the scheme I'm going for:

Once the orange drop tanks are gone you would see the markings. Think I'm going for US AF Military Airlift Command in a mid 60s tactical scheme of that semi-gloss olive green seen on Caribous and Hercs. MAC band somewhere on the glide wings and big high vis '60s era stars and bars.
Think it's gonna look kickin' when finished!
Paul
Paul Roberts
Past Editor, Boresight
Armor Modeling and Preservation Society
Ontario, Canada
Joined: August 05, 2003
KitMaker: 1,698 posts
Armorama: 1,563 posts
Posted: Tuesday, June 16, 2015 - 12:13 AM UTC
Quoted Text
Graeme, what did you use to mask the colour boundaries? They look super crisp.
Paul
Physical Therapy Putty (aka Theraputty) Yellow. Same idea as silly putty.
Why plan when you can react?

#417
Ontario, Canada
Joined: March 01, 2004
KitMaker: 3,123 posts
Armorama: 2,539 posts
Posted: Tuesday, June 16, 2015 - 05:12 PM UTC
Paul Roberts
Past Editor, Boresight
Armor Modeling and Preservation Society
Vietnam
Joined: May 07, 2006
KitMaker: 416 posts
Armorama: 312 posts
Posted: Tuesday, June 16, 2015 - 05:24 PM UTC
@ Eugene J Schmidt,
Your working area is clean and orderly. I like.
Michigan, United States
Joined: June 10, 2008
KitMaker: 230 posts
Armorama: 34 posts
Posted: Tuesday, June 16, 2015 - 06:07 PM UTC
Quoted Text
@ Eugene J Schmidt,
Your working area is clean and orderly. I like.
Not always like that. I usually straiten up a bit for photo's or use a less cluttered area to the right of where I do most of the work.
Thanks though.
EJ
Fair Winds and Following Seas
EJ
Vietnam
Joined: May 07, 2006
KitMaker: 416 posts
Armorama: 312 posts
Posted: Thursday, July 02, 2015 - 07:20 PM UTC
Hi all,
I try to assemble this Italeri's LAV-25. It was unfinished some years ago. This campaign is my good chance.

Regards,
K.

#123
New Mexico, United States
Joined: November 17, 2008
KitMaker: 1,202 posts
Armorama: 635 posts
Posted: Friday, July 03, 2015 - 01:02 AM UTC
Howdy Y'all

I've figured out what kit I'll be finishing. I started this 1/700 Fujimi Ise battleship for the Battleship Campaign on Model Shipwrights. Here's how she looked a couple of weeks ago:

And I just started painting the deck today.

Hopefully I'll do a lot more this 3-day weekend.
Take care,
Don "Lakota"
Working on Campaigns:
1/72 Hasegawa Ki-84 Frank
1/144 Dragon Armor

#123
New Mexico, United States
Joined: November 17, 2008
KitMaker: 1,202 posts
Armorama: 635 posts
Posted: Saturday, July 04, 2015 - 03:08 AM UTC
Howdy Y'all

I put in a few hours on the IJN Ise for a couple of days. It doesn't look like I got far and I realize there's even more work I want to do on her. The deck isn't looking to even but maybe a dark wash will accent it a little better. I also want to streak some oil paint down the hull for weathering. Next step-I want to paint a light gray shade on top of the turrents for modulation. Then it will be airbrushing a coat of Pledge over the entire model to prepare for oil pin washes.

The black background was a trick I just learned today. It helped expose the touch-ups still needed on the float planes. Next step for the float planes-painting the yellow
strips on the front of the wings. Any suggestions?
Take care,
Don "Lakota"
Working on Campaigns:
1/72 Hasegawa Ki-84 Frank
1/144 Dragon Armor
Jakarta Raya, Indonesia
Joined: August 22, 2012
KitMaker: 599 posts
Armorama: 527 posts
Posted: Friday, July 31, 2015 - 01:53 PM UTC
Hello all, just a simple question, even the campaign is already start since February 1st, 2015, am I still allowed to join? If so, my unfinished figures on "Improve Your Figures!" campaign that recently closed at August 1, 2015 will be my choice. Thank you all

Warm regards
Garry
From A Dream Becomes A Vision
From A Vision Becomes A Reality
(Hiram Maxim)
England - South West, United Kingdom
Joined: March 13, 2015
KitMaker: 418 posts
Armorama: 235 posts
Posted: Friday, August 07, 2015 - 02:08 AM UTC
this is one of the most breathtaking models I've seen.


