England - North West, United Kingdom
Joined: March 27, 2007
KitMaker: 803 posts
Armorama: 793 posts
Posted: Monday, September 28, 2015 - 02:21 PM UTC
More detailing of the rear engine deck, not sure if these are grab handle or some extra guards for the rear grills.


More later folks
Dan
Germany
Joined: September 12, 2008
KitMaker: 307 posts
Armorama: 304 posts
Posted: Monday, September 28, 2015 - 03:32 PM UTC
Hi Dan,
I do follow your beautiful build for a while now and admire your great work on the Challenger after every posting you add. I mainly build OOB or conversions and I would never have the patiance to do no much detail work on a model kit. However, I would suggest that you might replace the Chieftain small bin and the Chieftain hull rear bin on the side of the turret of your Challenger. I have seen many exercises with Challenger taking part here in Germany, but I never have seen a combination like this realized on a real vehicle. Not that I would say that it never happened or is impossible(maybe you do have a picture that shows it), but more commonly the Chieftain long bin was used at this place, or a hand crafted long welded diamond mesh basket that came out of the unit´s REME workshop, every one looking different from another. But, this only a suggestion and the most important thing is that you like the result of your build yourself! Keep on with your beautiful work and I am curious to see how it goes on!
Andreas
England - North West, United Kingdom
Joined: March 27, 2007
KitMaker: 803 posts
Armorama: 793 posts
Posted: Monday, September 28, 2015 - 04:17 PM UTC
Thanks Andreas,
A good friend of mine crewed the Challenger 1 for 9 years so I have used his stowage layout as a guide, in fact my build will be wearing his reg number. From what I have been told the Challenger was very tight on space for personal kit and the crews would scavinge what they could hence Chieftain items being the most common. Several others who have served on the Challenger have also said that it is a valid layout but as you said not common.
Kind Regards
Dan
England - North West, United Kingdom
Joined: March 27, 2007
KitMaker: 803 posts
Armorama: 793 posts
Posted: Monday, September 28, 2015 - 05:01 PM UTC
So more done, amended the chain that holds
the recovery/tow bar on back, checked my ref material
and Eduard got it wrong.


And made a start in the ratchet straps for the rear fuel drums, I took these from the Eduard PE set for the Challenger 2....Oops
One made and 3 more to go, straps will be made from lead foil.


Cheers
Dan
England - North West, United Kingdom
Joined: March 27, 2007
KitMaker: 803 posts
Armorama: 793 posts
Posted: Monday, September 28, 2015 - 07:31 PM UTC
First Set of Fuel can straps done, one more to do.


Cheers
Dan
England - North West, United Kingdom
Joined: March 27, 2007
KitMaker: 803 posts
Armorama: 793 posts
Posted: Monday, September 28, 2015 - 08:36 PM UTC
Turret Callsign board added.
I'll need to make up one from plastic card for the left hand side of the turret soon, I can almost smell primer !


Cheers folks and thanks for looking
Dan
Germany
Joined: September 12, 2008
KitMaker: 307 posts
Armorama: 304 posts
Posted: Monday, September 28, 2015 - 09:54 PM UTC
Hi Dan,
thanks for enlighten me in that case. As long as you have reference (and people who crewed Challenger are indeed good reference) everything is fine!!! Very nice idea to take your friends vehicle for reference. Go on, have fun with the build, as we here are looking forward to any update!
Andreas
England - North West, United Kingdom
Joined: March 27, 2007
KitMaker: 803 posts
Armorama: 793 posts
Posted: Tuesday, September 29, 2015 - 01:52 PM UTC
Quoted Text
Hi Dan,
thanks for enlighten me in that case. As long as you have reference (and people who crewed Challenger are indeed good reference) everything is fine!!! Very nice idea to take your friends vehicle for reference. Go on, have fun with the build, as we here are looking forward to any update!
Andreas
Thanks Andreas, glad you are enjoying the build

getting close now and already thinking about the next project.
But for now work continues on this one, So I removed the undersized bolts from the track tension idlers and replaced them with the Meng offering, a bit closer to the correct size.


And fitted


More later folks
Dan
England - North West, United Kingdom
Joined: March 27, 2007
KitMaker: 803 posts
Armorama: 793 posts
Posted: Tuesday, September 29, 2015 - 04:43 PM UTC
Whilst I was working in the area I added some more
of the missing detail to the idler housing.


Cheers
Folks
Dan
England - North West, United Kingdom
Joined: March 27, 2007
KitMaker: 803 posts
Armorama: 793 posts
Posted: Tuesday, September 29, 2015 - 06:42 PM UTC
Back to the grease gun, some detailing going on.


One more handle to make and add the hose from lead wire.
Dan
Shah Alam, Malaysia
Joined: September 17, 2015
KitMaker: 2 posts
Armorama: 2 posts
Posted: Wednesday, September 30, 2015 - 05:57 AM UTC
With so much detail being put to this build, I have to ask. Is this for your personal collection on the mantle, or has someone commissioned you to do it? I'd buy it
Exceptional work and coming from me, who mainly prefers WWII armor.

#450
California, United States
Joined: July 19, 2015
KitMaker: 672 posts
Armorama: 668 posts
Posted: Wednesday, September 30, 2015 - 10:25 AM UTC
Dan, this build log is exactly why I love this medium. To do a log this detailed in print would take an entire magazine. You have mad scratch-building skills. I am currently working on my first kit in over ten years, a 101AD M1043 from Mosul, Iraq, circa 2003. There are a few things that make their trucks unique. I will post some photos soon along with a few questions. This is an inspiring and educational build. Thank you for taking the time to post your work.
"Pray for peace but prepare for violence"
- Me
"The only thing necessary for the triumph of evil is for good men to do nothing"
- Edmund Burke
England - North West, United Kingdom
Joined: March 27, 2007
KitMaker: 803 posts
Armorama: 793 posts
Posted: Wednesday, September 30, 2015 - 02:09 PM UTC
Thanks for the great feedback guys, all appreciated
So the build is mine, I'd find it difficult to build something for others even if I was paid to do it, it would also take me a very long time !
I'm just getting the most out of the kit in terms of adding detail, I really wouldn't say that my scratch building are amazing. You would be amazed at what you can do if you put your mind too it is all I say, just having a good punch and die set really opens up the world of adding detail.
I served in Germany during the cold war in an Armoured Division and I used to see these bits of kit very regular on the training areas so I set out to build one and add as much to it as I could. I've been lucky to have a few friends who crewed these monsters and they were nice enough to send over photo's from personal albums to enable me to detail up the base kit. I hope I've done it justice !
So back to the build, The grease gun is now done, just requires the strap to hold it in place.


This will get some careful painting.
Enjoy
Dan
England - North West, United Kingdom
Joined: March 27, 2007
KitMaker: 803 posts
Armorama: 793 posts
Posted: Wednesday, September 30, 2015 - 03:22 PM UTC
More detailing going into the TOGs inner door.
Not glued yet as I have to scratch the actuator arm.


Enjoy
Dan
England - East Anglia, United Kingdom
Joined: April 14, 2015
KitMaker: 188 posts
Armorama: 173 posts
Posted: Wednesday, September 30, 2015 - 03:29 PM UTC
England - North West, United Kingdom
Joined: March 27, 2007
KitMaker: 803 posts
Armorama: 793 posts
Posted: Wednesday, September 30, 2015 - 03:52 PM UTC
Cheers Paul.
Just mocking up the TOGS door actuator arm, I don't have any ref pictures to go on for this so its a bit of guesswork.


Thanks for looking guys
Dan
England - North West, United Kingdom
Joined: March 27, 2007
KitMaker: 803 posts
Armorama: 793 posts
Posted: Wednesday, September 30, 2015 - 07:15 PM UTC
Second stowage bin cover made, the dust is just talcum powder
from rolling out the epoxy putty, it will get cleaned up before paint. Just have to wait for it to cure before adding the rest of the details.


Enjoy
Dan
England - North West, United Kingdom
Joined: March 27, 2007
KitMaker: 803 posts
Armorama: 793 posts
Posted: Thursday, October 01, 2015 - 01:49 PM UTC
More work on the turret.
Jerry can holder has had the bottom put in, made from scrap PE, this is missing from the kit.


And with the water can in place


Cheers for looking
Dan
England - East Anglia, United Kingdom
Joined: April 14, 2015
KitMaker: 188 posts
Armorama: 173 posts
Posted: Thursday, October 01, 2015 - 02:45 PM UTC
Get some bloody paint on it!!!

England - North West, United Kingdom
Joined: March 27, 2007
KitMaker: 803 posts
Armorama: 793 posts
Posted: Thursday, October 01, 2015 - 03:17 PM UTC
All in good time Paul...
Loaders hatch detailing, used the handles from the Eduard PE set for the Chieftain as these are correct for the Challenger as well. Some missing bolts added to the inner cushions at the same time.


More later folks
Dan
England - North West, United Kingdom
Joined: March 27, 2007
KitMaker: 803 posts
Armorama: 793 posts
Posted: Thursday, October 01, 2015 - 03:26 PM UTC
England - North West, United Kingdom
Joined: March 27, 2007
KitMaker: 803 posts
Armorama: 793 posts
Posted: Friday, October 02, 2015 - 02:23 AM UTC
Latest update, pushing to get paint now but without compromising the detail.
Clansman BAE's done with carbon antenna 2m whips (VHF)


Drivers tool bin gets new clamps


RHS turret bin is now secure with straps


So all that is really left is the pioneer tools, fuel tank breather tubes, recovery ropes and side skirts.
Then Paint time
Dan
England - North West, United Kingdom
Joined: March 27, 2007
KitMaker: 803 posts
Armorama: 793 posts
Posted: Friday, October 02, 2015 - 03:02 AM UTC
Last update for the night folks, won't keep you long.
Wasn't happy with the padlock on the bin so I ripped it off and did it properly.


Much better I think
Dan
England - North West, United Kingdom
Joined: March 27, 2007
KitMaker: 803 posts
Armorama: 793 posts
Posted: Friday, October 02, 2015 - 03:43 PM UTC
England - North West, United Kingdom
Joined: March 27, 2007
KitMaker: 803 posts
Armorama: 793 posts
Posted: Saturday, October 03, 2015 - 04:23 PM UTC
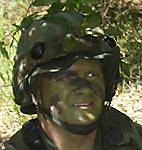
Moving onto the crew. Driver has a new home.


And the loader and commander, CPU will get removed from one of the guys(Loader)


More later folks
Dan