Ray
Many thanks for this. Looking through the ASLAV decal sheet from Echelon I saw that for the most part the markings were for 25's. A lot of the various small markings are usable still but it is nice to know that Courage is for an APC.
Upon close examination I see that Recon Redneck has it's propeller guards, smoke grenade cluster brush guards removed and the rear ramp has slat armour still attached. The slat hanger bars are still in place on the top of the "box" near the air guard hatches. The trim vane hardware has also been removed, obviously this vehicle was once fitted with slat armour, is that a correct assumption? The Arabic text on your decal sheet, is that what I see to the right of the red roo on Recon Redneck?
Regards
Bill
Hosted by Darren Baker
Australian LAV (ASLAV) (Renamed Topic)

Boggie

Joined: December 08, 2005
KitMaker: 1,370 posts
Armorama: 1,331 posts

Posted: Friday, December 05, 2008 - 12:34 AM UTC
RomeoKilo

Joined: December 03, 2007
KitMaker: 160 posts
Armorama: 155 posts

Posted: Friday, December 05, 2008 - 05:06 AM UTC
Quoted Text
....it is nice to know that Courage is for an APC.
Sorry mate, thats incorrect. Some CO's have used an ASLAV-25. The markings on the Echelon Sheet are for a specific vehicle, and its a 25 not a PC. I should of added, not all CO's have had their vehicle named after their regiments motto, if they have named them at all.
(photo of Courage here tomorrow)
Quoted Text
....The Arabic text on your decal sheet, is that what I see to the right of the red roo on Recon Redneck?
That is correct. I found it very difficult to print the yellow though, as its appears almost invisible when applied on a dark surface. I was planning on using the decal as a guide and hand painting the yellow over the top of it.
And you are correct that all the brush guards have been remove due to Bar armour being fitted. Only problem you would have in changing yours to that set up is you would have to remove the exhaust cover as well, which is no small task.
From what ive seen of yours, you are leaning toward either an Australian or an Afghanistan deployed vehicle. (No Bar armour, no lights/sirens, brush guards in place, trim vane extension in place). I think you could probably just use the Echelon Sheet with a bit of modification. When you have a reference pic of the vehicle you have decided on, just cut it up to mix and match a suitable ARN and callsign. Thats what i intend to do. But what i intend to do changes every day....

Boggie

Joined: December 08, 2005
KitMaker: 1,370 posts
Armorama: 1,331 posts

Posted: Friday, December 05, 2008 - 05:22 AM UTC
Ray
Thanks for the clarification. Ideally I'd like to have my vehicle deployed in Afghanistan and as you've noticed, rigged the way you outlined. I intend to cover the lights with tan cloth (painted parafilm) as I have seen in one series of photos. I guess what I need to do know is find a vehicle and commit to it's decals. I know nothing about the ID of ASLAV's so if you have any suggestions I'd be interested in hearing them.
Thanks again for your help.
Regards
Bill
RomeoKilo

Joined: December 03, 2007
KitMaker: 160 posts
Armorama: 155 posts

Posted: Friday, December 05, 2008 - 05:38 AM UTC
Easy mate. The ARN is painted on the left front and on the upper centre of the ramp. It a five digit number starting with 16XXX. The callsign is the Letter and Number combination on either side of the triangle painted on either side and on the ramp as well. Vehicle callsigns can change but the ARN stays with the vehicle forever, this is why in some photo's you will see the Callsigns have been patched over with different colored paint. Look through the pics in this thread and in your collection and you'll see what i mean.

Boggie

Joined: December 08, 2005
KitMaker: 1,370 posts
Armorama: 1,331 posts

Posted: Friday, December 05, 2008 - 05:49 AM UTC
Ray
Important information, I will check through my pics to look for examples. Is there a time frame when the ASLAV's started sporting the "stay back or you will be shot" signage?
In a post I put up lately I said that I had just noticed the metal boxes on the front of the 25's and the PC's. I was mistaken as you posted pictures in this thread near the beginning that clearly shows them in use. Actually it was the first page when you were explaining the various phases, in particular the one with the digital compass antenna circled.
I'll post some number combo's to see if you appove ;o)
Thanks again
Bill

Boggie

Joined: December 08, 2005
KitMaker: 1,370 posts
Armorama: 1,331 posts

Posted: Friday, December 05, 2008 - 07:01 AM UTC
Ray
I see what you mean. You said front left but it is front right. Here is the vehicle that keeps coming to my mind.
It has 31 E on the front left upper hull just below the driver hatch.This is the number that can often change correct? Unfortunately I can't find a rear number nor can I see the name (if any).
What are the white numbers on the grills for the engine cover for. Occasionally I see them and sometimes they are repainted over another more faded number? Like this.


Here is an example of the constant number up over the door 16401, what are the numbers on the welded over vision ports on either side of the main number, V23D left and right, is this the call sign then? There is a D over the right hand black roo too?
I like this vehicle as it has the tow bar which I want to include and the Blue Force Tracker, any way to find out it's squadron number and name number?

Here is another from the same photo shoot and it has the skull on the side (but it is not the same vehicle as the gas cans are painted differently. Could this first vehicle (under the swords) be a part of the skulls squadron (CSQN 2CAV)? Sorry for image quality I had to blow it out to see the markings.
Lots of question, sorry about that, all new to me. This is very interesting something I didn't even consider before, that;s the joy of modelling you learn new stuff every day.
Thanks for your help Ray.
Bill
PS
anyone know if an AM company makes this sign?

Thanks
I see what you mean. You said front left but it is front right. Here is the vehicle that keeps coming to my mind.

It has 31 E on the front left upper hull just below the driver hatch.This is the number that can often change correct? Unfortunately I can't find a rear number nor can I see the name (if any).
What are the white numbers on the grills for the engine cover for. Occasionally I see them and sometimes they are repainted over another more faded number? Like this.


Here is an example of the constant number up over the door 16401, what are the numbers on the welded over vision ports on either side of the main number, V23D left and right, is this the call sign then? There is a D over the right hand black roo too?
I like this vehicle as it has the tow bar which I want to include and the Blue Force Tracker, any way to find out it's squadron number and name number?

Here is another from the same photo shoot and it has the skull on the side (but it is not the same vehicle as the gas cans are painted differently. Could this first vehicle (under the swords) be a part of the skulls squadron (CSQN 2CAV)? Sorry for image quality I had to blow it out to see the markings.
Lots of question, sorry about that, all new to me. This is very interesting something I didn't even consider before, that;s the joy of modelling you learn new stuff every day.
Thanks for your help Ray.
Bill
PS
anyone know if an AM company makes this sign?

Thanks
WayneB

Joined: July 22, 2008
KitMaker: 141 posts
Armorama: 130 posts

Posted: Friday, December 05, 2008 - 09:52 AM UTC
William,
I think Ray, Jason or one of the other fellas may have noted they you have decked out your vehicle with antennas and comms gears that is specific to a Command vehicle (SHQ perhaps?). Ray or Jason may be able to provide more guidance here but I think this may limit the available callsigns. 2A, 2B, 1A, 1B…… You should probably avoid using any D or E callsigns as these denote a saber troop vehicle if I understand 2 Cav and 2nd/14th callsign nomenclature.
Ray Jason comments?
seb43

Joined: August 30, 2005
KitMaker: 2,315 posts
Armorama: 2,158 posts

Posted: Friday, December 05, 2008 - 11:10 AM UTC
Bill
Concerning the sign, I do believe that Real Model have such sign
Cheers
Seb
Concerning the sign, I do believe that Real Model have such sign
Cheers
Seb

Boggie

Joined: December 08, 2005
KitMaker: 1,370 posts
Armorama: 1,331 posts

Posted: Friday, December 05, 2008 - 12:21 PM UTC
Wayne
Thanks Wayne it was Ray that determined that it looked more like a Command car. Does SHQ stand for Squadron Head Quarters? The Sabre Troop, are they more like the name implies, tip of the sword? Does this hierarchy exist in Afghanistan as well as in Iraq? Don't the Sabre troops have a Command vehicle associated with their deployments? I must say I like the sounds of a Sabre Troop vehicle but as long as I can sort out the proper markings I'll be very happy. Any designations that you think might be appropriate?
Seb
You are correct. I hunted through my Lav III and Maple Leaf Models signs and they are all different from these so thanks very much. Any movement on the Bushie plans?
Thanks to you both for helping out.
Bill
PS Any body know what kind of MRE's and (brands) water boxes the ALSAV's would be stowed with?
Command Car

Quoted Text
I think Ray, Jason or one of the other fellas may have noted they you have decked out your vehicle with antennas and comms gears that is specific to a Command vehicle (SHQ perhaps?). Ray or Jason may be able to provide more guidance here but I think this may limit the available callsigns. 2A, 2B, 1A, 1B…… You should probably avoid using any D or E callsigns as these denote a saber troop vehicle if I understand 2 Cav and 2nd/14th callsign nomenclature.
Thanks Wayne it was Ray that determined that it looked more like a Command car. Does SHQ stand for Squadron Head Quarters? The Sabre Troop, are they more like the name implies, tip of the sword? Does this hierarchy exist in Afghanistan as well as in Iraq? Don't the Sabre troops have a Command vehicle associated with their deployments? I must say I like the sounds of a Sabre Troop vehicle but as long as I can sort out the proper markings I'll be very happy. Any designations that you think might be appropriate?
Seb
You are correct. I hunted through my Lav III and Maple Leaf Models signs and they are all different from these so thanks very much. Any movement on the Bushie plans?
Thanks to you both for helping out.
Bill
PS Any body know what kind of MRE's and (brands) water boxes the ALSAV's would be stowed with?
Command Car


Boggie

Joined: December 08, 2005
KitMaker: 1,370 posts
Armorama: 1,331 posts

Posted: Monday, December 08, 2008 - 07:58 AM UTC
I went through 20 images of ASLAV APC type vehicles and jotted down the vehicle number ad call signs.Six vehicles looked like candidates and a couple looked very good with multiple views and call signs vehicle numbers clearly visible, unfortunately none of these were Command cars. I edited and posted a nice Command Car above, note the rear bar armour on the ramp.
I'm thinking that these three cars might be the same, any thoughts?
Top Vehicle ARN 16458, no call sign
Lower two vehicles call sign 31/E. no ARN


Edit
Top vehicle has a black X on the top front body and what appears to be letters on the right front box where the black paint meets the roof line, this is a different vehicle.
I'm thinking that these three cars might be the same, any thoughts?
Top Vehicle ARN 16458, no call sign
Lower two vehicles call sign 31/E. no ARN


Edit
Top vehicle has a black X on the top front body and what appears to be letters on the right front box where the black paint meets the roof line, this is a different vehicle.

Boggie

Joined: December 08, 2005
KitMaker: 1,370 posts
Armorama: 1,331 posts

Posted: Thursday, December 18, 2008 - 03:17 AM UTC
First off thanks Ray for answering my questions. Here are two images of where I'm at today. From here on in you'll never recognize it as the same model,it will be covered in mud and dust. I have wrapped the lights as in the reference and applied the decals. One BIG problem I have is with the Mouse House red kangaroo decals, they have a white halo around them which really spoils them. I used most of the Echelon decals which were beautiful but I only wish they would have included one more big roo for the left side of my model, the sheet has two looking right only.
I have changed the green from the previous post. I used Tamiya Olive Green with Tamiya Lemon Yellow and a bit of Flesh.
Note,the gear details are not glued on yet until weathering is done.
Bill


I have changed the green from the previous post. I used Tamiya Olive Green with Tamiya Lemon Yellow and a bit of Flesh.
Note,the gear details are not glued on yet until weathering is done.
Bill


RomeoKilo

Joined: December 03, 2007
KitMaker: 160 posts
Armorama: 155 posts

Posted: Thursday, December 18, 2008 - 08:15 AM UTC
Sex on wheels!!!
Im on my phone so i can only see the first photo (barely) but it looks fantastic.
What color did you use to paint the water jerrys?
It looks like you replaced the rear water jerrys with POL jerrys? Did you scratch new brackets to fit them?
A couple of things. The red kangaroo is facing the wrong way. They always face to the front of the vehicle. Also, I know you have not attached it yet, but the generator is in the wrong position. It has a specific mounting position on the same base that the storage box is on.
I love it!!!

Boggie

Joined: December 08, 2005
KitMaker: 1,370 posts
Armorama: 1,331 posts

Posted: Thursday, December 18, 2008 - 09:38 AM UTC
Ray
I'm happy you approve. I hope you still like it covered in mud.
OOPs. The only PC I saw with the red roo on the side had mud smeared all over it (picture attached) so it looks like mine will also have the red roo muddied over as well.
I did replace and rebuild the rear brackets and put in AA cans, very nice I may add. I will check on the water can colours but I think they are Vallejo khaki lightened with some white.
HMMM I do believe I saw the station for the generator in one of your photos and it even had the name "generator" marked on the station. Thanks for the heads up on all these things they really help.

Regards
Bill
I'm happy you approve. I hope you still like it covered in mud.
OOPs. The only PC I saw with the red roo on the side had mud smeared all over it (picture attached) so it looks like mine will also have the red roo muddied over as well.
I did replace and rebuild the rear brackets and put in AA cans, very nice I may add. I will check on the water can colours but I think they are Vallejo khaki lightened with some white.
HMMM I do believe I saw the station for the generator in one of your photos and it even had the name "generator" marked on the station. Thanks for the heads up on all these things they really help.

Regards
Bill
shaun68

Joined: May 10, 2007
KitMaker: 46 posts
Armorama: 45 posts

Posted: Thursday, December 18, 2008 - 10:20 AM UTC
Quoted Text
Wayne
Quoted TextI think Ray, Jason or one of the other fellas may have noted they you have decked out your vehicle with antennas and comms gears that is specific to a Command vehicle (SHQ perhaps?). Ray or Jason may be able to provide more guidance here but I think this may limit the available callsigns. 2A, 2B, 1A, 1B…… You should probably avoid using any D or E callsigns as these denote a saber troop vehicle if I understand 2 Cav and 2nd/14th callsign nomenclature.
Thanks Wayne it was Ray that determined that it looked more like a Command car. Does SHQ stand for Squadron Head Quarters? The Sabre Troop, are they more like the name implies, tip of the sword? Does this hierarchy exist in Afghanistan as well as in Iraq? Don't the Sabre troops have a Command vehicle associated with their deployments? I must say I like the sounds of a Sabre Troop vehicle but as long as I can sort out the proper markings I'll be very happy. Any designations that you think might be appropriate?
Seb
You are correct. I hunted through my Lav III and Maple Leaf Models signs and they are all different from these so thanks very much. Any movement on the Bushie plans?
Thanks to you both for helping out.
Bill
PS Any body know what kind of MRE's and (brands) water boxes the ALSAV's would be stowed with?
Command Car
Mouse House carry current issue rat packs & Aussie styled water jerry's
shaun68

Joined: May 10, 2007
KitMaker: 46 posts
Armorama: 45 posts

Posted: Thursday, December 18, 2008 - 10:28 AM UTC
Quoted Text
G'day Guys !!
However I've got a question regarding the vision blocks on the ASLAV. I've seen several painted with clear red and also some with different shades of that color.
Some defence dept pics also show them in red - is this the angle ?
What do you experts think is the go (on this Aussie machine) ? Should colors be varied from block to block ?
I was thinking of using this great technique:
https://armorama.kitmaker.net/forums/100045
Any thoughts ?
Cheers
Paul
Paul, you could do the confetti thing, though I generally copy the way HeavyArty suggests to do IR sights - paint the vision block gloss black then paint several coats of clear red over that. He recommends you paint them all the same rather than playing around with other clear colours in the mix.

ppawlak1

Joined: March 14, 2006
KitMaker: 1,973 posts
Armorama: 1,843 posts

Posted: Thursday, December 18, 2008 - 03:29 PM UTC
Quoted Text
Quoted TextG'day Guys !!
However I've got a question regarding the vision blocks on the ASLAV. I've seen several painted with clear red and also some with different shades of that color.
Some defence dept pics also show them in red - is this the angle ?
What do you experts think is the go (on this Aussie machine) ? Should colors be varied from block to block ?
I was thinking of using this great technique:
https://armorama.kitmaker.net/forums/100045
Any thoughts ?
Cheers
Paul
Paul, you could do the confetti thing, though I generally copy the way HeavyArty suggests to do IR sights - paint the vision block gloss black then paint several coats of clear red over that. He recommends you paint them all the same rather than playing around with other clear colours in the mix.
Thanks Shaun,
I've sussed the vision blocks out as per "Tankriders " examples in the following thread:
https://armorama.kitmaker.net/forums/128392&page=1
The results are brilliant !!
Bill the colors on your PC are great, well done. You finally got there !!
Can I ask what the recipes you ended up with for each color please ? ie: What %'s of each color in each final mix did you use ?
I'm still waiting on MH Ph 3 Conversion bits for my '25'.
Cheers
Paul

Boggie

Joined: December 08, 2005
KitMaker: 1,370 posts
Armorama: 1,331 posts

Posted: Friday, December 19, 2008 - 04:55 AM UTC
I have removed the right hand side red roo from the ASLAV. I gently sanded away the Matt Varnish and the Future then soaked the exposed decal in Micro Solve. I used a sharp chisel and removed the decal no problem. Now I must apologize for complaining about Echelon for not having enough red roo's. If had applied the roo's the way they were supposed to be done I'd have had enough to do my model without having to use the inferior Mouse House decals. So that was my fault, my bad, so sorry Echelon. The new red roo facing the correct direction will be Echelon's as well.
Paul
The Black was Nato Black
The Tan was Flesh 75 parts, Flat earth 20 parts, white 5 parts
Green was Olive Green 75 parts, Lemon Yellow 20 parts and Flesh 5 parts.
On the top sides I diluted the colour with an extra 5 parts of white except for the Black, the sides were the above mixture. I also made jars of extra colour so I could do touch ups and be ready for the ASLAV 25 heading my way in the mail.
Again Ray thanks for your critiques.
Bill

ppawlak1

Joined: March 14, 2006
KitMaker: 1,973 posts
Armorama: 1,843 posts

Posted: Friday, December 19, 2008 - 09:09 PM UTC
Thanks Bill, that's great !
I'm surprised you made the Tan with so much "Flesh".
I'll use the same mixes I think
Cheers
Paul
I'm surprised you made the Tan with so much "Flesh".
I'll use the same mixes I think
Cheers
Paul
WayneB

Joined: July 22, 2008
KitMaker: 141 posts
Armorama: 130 posts

Posted: Saturday, December 20, 2008 - 03:14 AM UTC
Quoted Text
Does SHQ stand for Squadron Head Quarters?
Bill,
Your PC looks great. Colours look very authentic. It would be a huge shame to hide them beneath too much mud.
Sorry to be so long in responding. Yes SHQ does = Squadron Head Quarters.
Good work on the POL jerry cans as well. I like how you have the fill ports faced inwards on both sides (to stop dust accumulation on the spout). Very authentic.
Sadly my ASLAV project has stalled over the last few months. Moving house and all. You’ve inspired me to finish it off.
W

Boggie

Joined: December 08, 2005
KitMaker: 1,370 posts
Armorama: 1,331 posts

Posted: Saturday, December 20, 2008 - 03:54 AM UTC
Wayne
Nice to hear from you. It has been a long haul, piecing things together bit by bit. It is thanks to you guys like you that work or have worked on and in these machines that shaped this build. Without your constant guidance it would have been built from photographs on the net. The process that evolved here in this thread will hopefully be a resource for anyone else building Aussie Modern Armour.
At first I had the MH water cans in the back but when I ordered the gas cans from Accurate Armour I just had to change them out. The belt buckles that tighten the straps that hold the cans aren't accurate but I couldn't find PE ones. I didn't know the reason the spouts faced inwards just that every picture had them that way so that's the way I installed them, it is good to know why now.
I'll go easy on the mud and dust but the machines I've seen in the field pick up a lot of it.
I'd like to build another one now that this is almost finished, I know now how to tackle it. Perhaps Mouse House will come out with an ASLAV F or and R and that would satisfy me ;o) I have a 25 conversion coming my way so that will be next.
I look forward to your ASLAV project, thanks again for all your help.
Paul, I just rechecked the colour formula and it is like this
Tan XF15 75 parts, XF52 15 parts and XF 2 10 parts
Green XF 58 75 parts XF 8 20 parts and XF 15 5 parts
Nato Black
Hope this helps
Regards
Bill

Frenchy

Joined: December 02, 2002
KitMaker: 12,719 posts
Armorama: 12,507 posts

Posted: Saturday, December 20, 2008 - 04:17 AM UTC
Quoted Text
The belt buckles that tighten the straps that hold the cans aren't accurate but I couldn't find PE ones.
Bill
Eduard has released at least 2 "Zoom"sets that could maybe do the job :
TP513 "German Tie Downs and Straps" :

TP515 "US Tie Downs and Straps" :

HTH
Frenchy

Boggie

Joined: December 08, 2005
KitMaker: 1,370 posts
Armorama: 1,331 posts

Posted: Saturday, December 20, 2008 - 04:22 AM UTC
Frenchie
Thanks for that, you're like a genie in a bottle!
I'll order some ASAP.
Bill
Thanks for that, you're like a genie in a bottle!
I'll order some ASAP.
Bill

ppawlak1

Joined: March 14, 2006
KitMaker: 1,973 posts
Armorama: 1,843 posts

Posted: Saturday, December 20, 2008 - 11:21 AM UTC
Quoted Text
Paul, I just rechecked the colour formula and it is like this
Tan XF15 75 parts, XF52 15 parts and XF 2 10 parts
Green XF 58 75 parts XF 8 20 parts and XF 15 5 parts
Nato Black
Hope this helps
Regards
Bill
Thanks Bill.
That Tan recipe makes more sense............
Cheers
Paul
jasmils

Joined: December 23, 2003
KitMaker: 1,016 posts
Armorama: 745 posts

Posted: Saturday, December 20, 2008 - 11:46 PM UTC
G'day all,
Sorry but all of my ASLAV photo's have removed untill further notice. Including the kit ones.
But don't panic, they will be back.
Cheers Jason
Sorry but all of my ASLAV photo's have removed untill further notice. Including the kit ones.
But don't panic, they will be back.
Cheers Jason
jasmils

Joined: December 23, 2003
KitMaker: 1,016 posts
Armorama: 745 posts

Posted: Tuesday, January 06, 2009 - 11:57 PM UTC
Well its HERE!!!!!!!!!!
And about bloody time, if I do say so myself.
MA125 ASLAV-25 Phase III
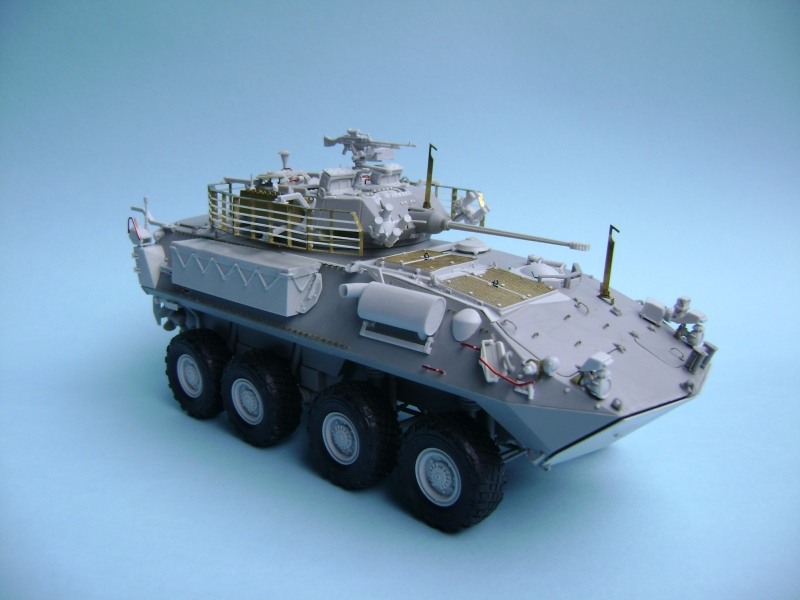
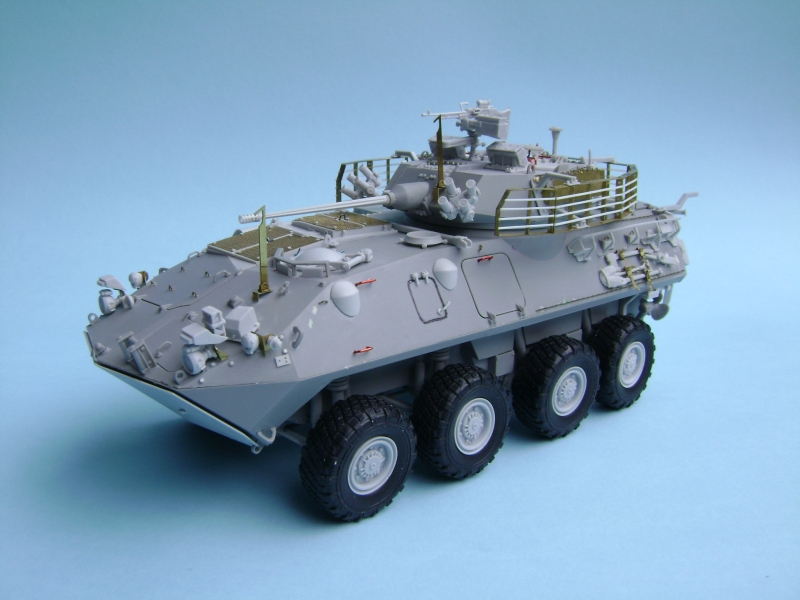
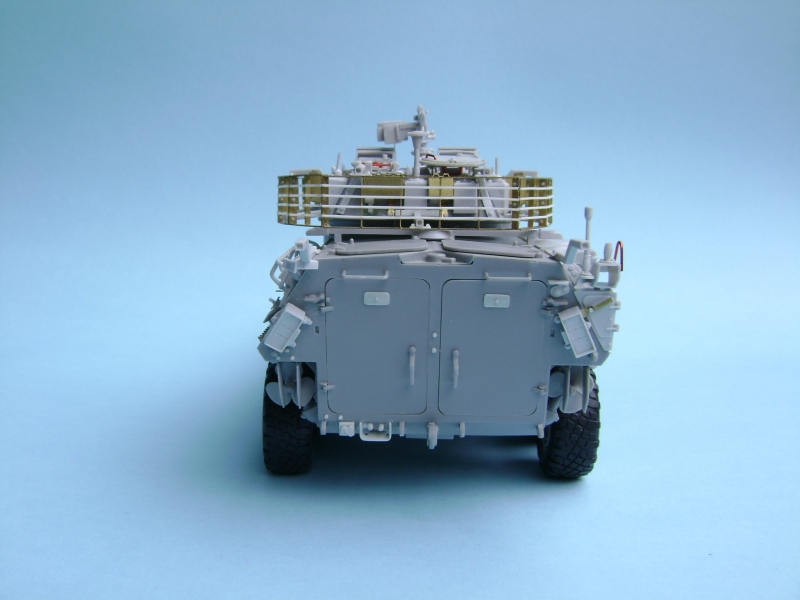
MA125 With MA322
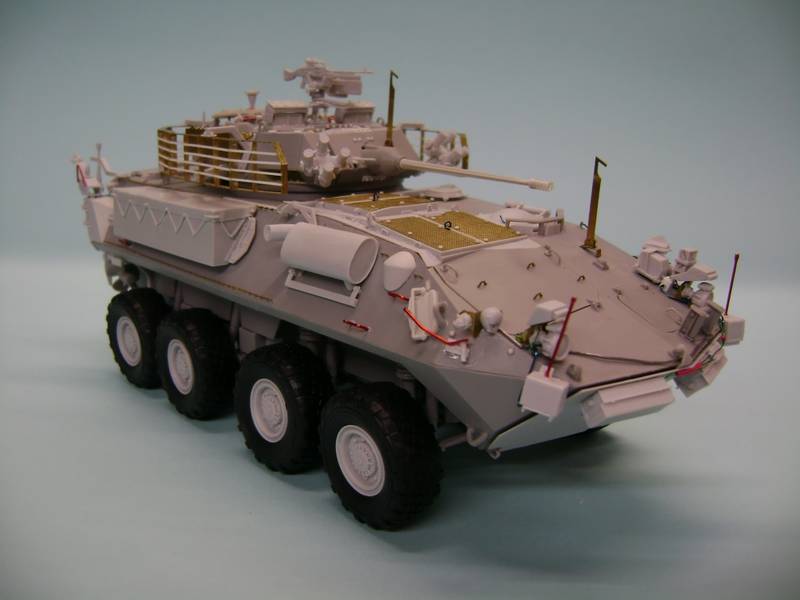
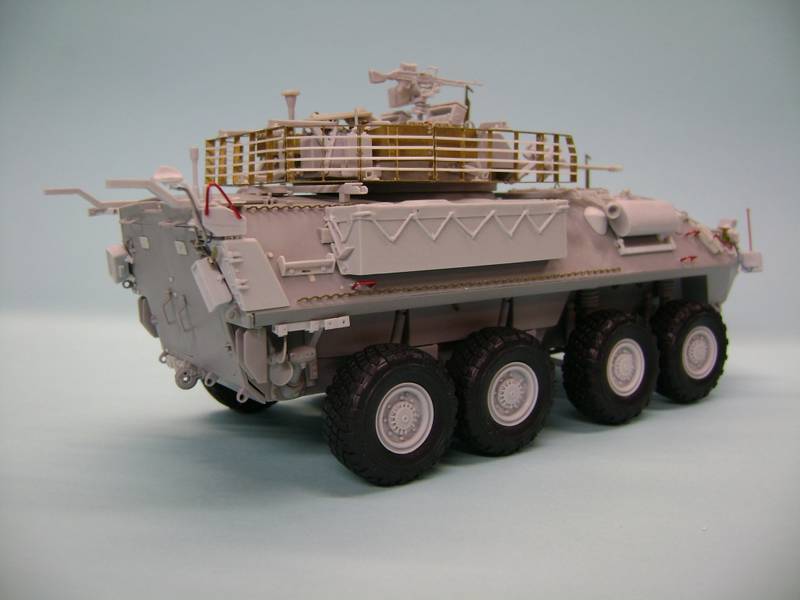
And something I have been working on for myself.
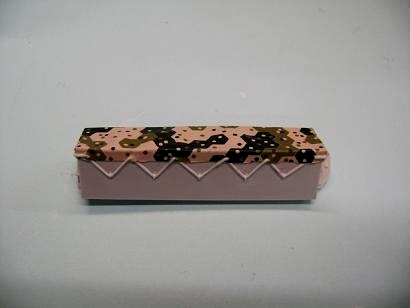
And about bloody time, if I do say so myself.
MA125 ASLAV-25 Phase III


MA125 With MA322


And something I have been working on for myself.

 |


