Armor/AFV: Modern Armor
Modern armor in general.
Hosted by Darren Baker
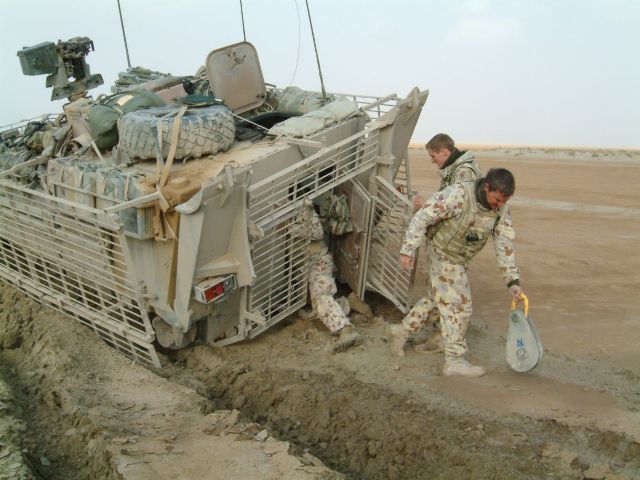
Australian LAV (ASLAV) (Renamed Topic)
Adamskii
Visit this Community
South Australia, Australia
Joined: November 06, 2010
KitMaker: 537 posts
Armorama: 474 posts
Posted: Friday, February 11, 2011 - 01:43 AM UTC
last batch for tonight - there must be a 32pic limit to armorama/kitmaker upload photos.


theres alot of pics where the wheel are not dusty .....


will post some more tomorrow if the limit is reset overnight. or I am doing something really wrong..

Anyways enjoy,

Adamskii
4WDNROX
Visit this Community
Victoria, Australia
Joined: December 15, 2010
KitMaker: 13 posts
Armorama: 11 posts
Posted: Tuesday, February 22, 2011 - 08:17 PM UTC
Hey great pictures you have there Adamskii.. Keeping on the topic of ASLAV did you receive an email from John at Mouse House? they are releasing a set of Australian cam paints
Adamskii
Visit this Community
South Australia, Australia
Joined: November 06, 2010
KitMaker: 537 posts
Armorama: 474 posts
Posted: Sunday, March 06, 2011 - 12:43 AM UTC

Quoted Text

Hey great pictures you have there Adamskii.. Keeping on the topic of ASLAV did you receive an email from John at Mouse House? they are releasing a set of Australian cam paints


I have recieved the set and will be doing a 'quick look' review with 24 hours. I just did the review and after previewing hit i hit the back button on my browser as suggested and the page it went back to was blank. So the work from the last 2 - 3 hours was all lost. Will re write it again tomorrow...

Its a good set by the way


Also the pics above are fantastic I think, Would love to hear what othere think about them. ASLAV chapter gone real quiet for a bit ...

Adamskii
4WDNROX
Visit this Community
Victoria, Australia
Joined: December 15, 2010
KitMaker: 13 posts
Armorama: 11 posts
Posted: Tuesday, March 08, 2011 - 09:28 PM UTC
Adamskii

I have received my set as well (ordered the night the email came out) I plan to check them against the rebuild line (ASLAV, AS4) paints that I have and see how close they are. I am prepared for them to be slightly different as I understand that paints still need to be "scaled"

I'll let you know how they compare
Adamskii
Visit this Community
South Australia, Australia
Joined: November 06, 2010
KitMaker: 537 posts
Armorama: 474 posts
Posted: Saturday, March 12, 2011 - 12:01 PM UTC
Hey folks,

Just done an Auscam paint set review. I was really impressed by these, and I think the review reflects that somewhat!.

https://armorama.kitmaker.net/review/6096

My first review so let me know if it was helpful or not!

Adam
4WDNROX
Visit this Community
Victoria, Australia
Joined: December 15, 2010
KitMaker: 13 posts
Armorama: 11 posts
Posted: Sunday, March 13, 2011 - 09:14 PM UTC
Great review Adam,

Once I unpack my spray gun and get some practice in again I'll definately be giving them a go.

On a seperate note, I picked up a Revell 1/35 scale Unimog today. I now have an idea for a diarama for my ASLAV- F and ASLAV-R (once its released) which will be an A1 echelon deployed in the field. Again this will be in an Australian setting as I will be leaving the ASLAV in stock form.
Adamskii
Visit this Community
South Australia, Australia
Joined: November 06, 2010
KitMaker: 537 posts
Armorama: 474 posts
Posted: Sunday, March 13, 2011 - 10:11 PM UTC
Thanks for the kudos! my first review I guess, and although just a first look, I enjoyed doing it very muchly. Will do more detailed review when painting the vehicles.

Unimog. I dont see many completed unimog kits and I dont know why. I certainly dont recal having ever seen a single one completed in Australian markings. A echelon type dio sounds fantasic - great opportunity to get some "hutchies" up somewhere , I immeadiately have details come to mind like pissaphone; ration packs; those stores chests I can never remember the name of (jackie boxes?); fs table with some 1:50 thou topo maps; jaffle irons; gas cylinders; webbing sets; toilet roll on a shovel handle; 77 sets/524 sets; generator (theres apparently one in the m113 acv kit); and the ultimate scratchbuild challenge - chairs millionairs!

serious opportunity to do an unpacked dio of any camp hq on biv. Of course I shoot for the stars and if I hit the moon I'm happy so I know my ideas are always bigger than they should be. There is a heap of good accesories from ACM and Mouse house. Even a Unimog with the tarp down and a CRAPLOAD of jerries in the back (aussie pattern of course) with couple of the new plastic boxes would look great as load, just driving past some uniquely Australian feature ( cattle grid and barb wire fence aka Cultana or mt Bundy etc) with several dead foxes hanging on the fence... some dumb ass cadet doing sentry duty with a 77 set lol.. hang n i'm getting carried away again. see what people do to me when they mention a solid Aussie diorama idea!! So many tiny details that could be put in that any ex dig looking at it would know he's privvy to the in joke, details others might miss. Web set with one water bottle lid painted white maybe ? lol... If theres anything you need help with in the painting or scratchbuilding area let me know and I do my best to help out.

What would look freaking awesome is a 110 FFR. Now I havent much clue how the landrover defender wolf differs from the 110 but Bronco I think is bringing out a high spec LR wolf kit that I wonder how easy would be to mod to Aussie standards - wheel look the same, front guards look the same, battery box is right spot etc etc the front grill and maybe bonnet ? and maybe the rollcage but nothing impossible - especially if the chassis and panelwork on the sides is accurate.

Unimog echelon vehicle, Aslav Hq assigned vehicle, FFR in the mix, almost enough for a small defensive layout?? Sounds like a fun build. Ideas always develop between inception and fruition. but I like the inception so far.

I wouldnt mind doing a fun build with a 113 going through the Pt Augusa McDonalds. It happened. I saw it. I saw the guy get his butt kick for doing it, but funny as at the time. I think 3 buckets lined up in the drive through perfectly describes a choko weekend getaway... lmao, either that or the REME guys fixing fences..

Adamskii
4WDNROX
Visit this Community
Victoria, Australia
Joined: December 15, 2010
KitMaker: 13 posts
Armorama: 11 posts
Posted: Monday, March 14, 2011 - 02:51 PM UTC
G'day Adam,

And here I was thinking I'll just have the ASLAV R, F and unimog in a Y shaped hide with a couple of guys under cam nets, and on watch. You have just blown my thoughts right out the window with all your other suggestions. I have since thought I could use an M113 engine and scratch build it into an ASLAV engine with the F doing a pack lift with the unimog as the parts truck. Anyway I'll keep thinking of which way to go and how I can incorporate some of your ideas.

Cheers

Tony
jasmils
Visit this Community
Queensland, Australia
Joined: December 23, 2003
KitMaker: 1,016 posts
Armorama: 745 posts
Posted: Monday, March 14, 2011 - 04:01 PM UTC
Good luck with the cam net Tony.
Here are a couple of images I found on the net. No idea who owns them, but I hope they don't mind.

Jason


4WDNROX
Visit this Community
Victoria, Australia
Joined: December 15, 2010
KitMaker: 13 posts
Armorama: 11 posts
Posted: Monday, March 14, 2011 - 06:13 PM UTC
Thanks Jason,

I hadn't seen those pics before, but I can name everyone in the picture (I have worked with them all over the years) where they're all sitting around having a break. As for the cam net I have some 1/35 Modern Camuflage netting, which I think came from mouse house, which from the instructions looks tough enough that if I'm careful I might be able to hang it from some cam poles. If that fails I'll hang it as scrim over the vehicles.

Thanks again

Tony
jasmils
Visit this Community
Queensland, Australia
Joined: December 23, 2003
KitMaker: 1,016 posts
Armorama: 745 posts
Posted: Monday, March 14, 2011 - 06:39 PM UTC
A couple of the boys look familiar, but I have been out for 10 years now.
This is one dio of an admin hide I very much intend to do.
It's from Southern Iraq 2008.
2 gun cars, F, R and 2 PC's.

Cheers Jason
PS photo credit to ADF.
jasmils
Visit this Community
Queensland, Australia
Joined: December 23, 2003
KitMaker: 1,016 posts
Armorama: 745 posts
Posted: Monday, March 14, 2011 - 06:48 PM UTC
Or this one.
C/S V11B and C/S V11C. SWBTA 2007

SPRWITTMANN
Visit this Community
Victoria, Australia
Joined: August 12, 2007
KitMaker: 111 posts
Armorama: 108 posts
Posted: Tuesday, March 13, 2012 - 04:17 PM UTC
For the Aslav PC fans out there I got word from my Trumpeter supplier for Australia that the PC kit will be expected in the next resup for the distributer, approx 3 months from now.
jasmils
Visit this Community
Queensland, Australia
Joined: December 23, 2003
KitMaker: 1,016 posts
Armorama: 745 posts
Posted: Monday, December 10, 2012 - 03:41 PM UTC


The ASLAV finishes its tour of duty in Afghanistan

Ultra_aussie
Visit this Community
New South Wales, Australia
Joined: May 20, 2014
KitMaker: 197 posts
Armorama: 145 posts
Posted: Thursday, February 26, 2015 - 05:24 PM UTC
What a cool thread to read through from start to finish
Maybe it can re kick off given the new kits and updates out there, or coming.
Removed by original poster on 02/27/15 - 12:31:12 (GMT).
KrankenPz
Visit this Community
Victoria, Australia
Joined: April 23, 2016
KitMaker: 3 posts
Armorama: 3 posts
Posted: Saturday, April 23, 2016 - 05:59 AM UTC
Black dog resin do a set
KrankenPz
Visit this Community
Victoria, Australia
Joined: April 23, 2016
KitMaker: 3 posts
Armorama: 3 posts
Posted: Saturday, April 23, 2016 - 06:40 AM UTC
I believe that the base colour of most things is tan

The Pilbara Brown I believe replaces the Black (can't really find many pics of it in use) and there is mention of a 'light tan' (which looks very much like CARC sand) which I believe is the base colour used on refurbished LRPVs and the new Nary SOVs, with a disruptive pattern of the Camo Tan over it
Austmouse
Visit this Community
Australian Capital Territory, Australia
Joined: February 11, 2008
KitMaker: 104 posts
Armorama: 98 posts
Posted: Monday, April 25, 2016 - 12:36 PM UTC
Pilbara brown was to be the colour that replaced the standard brown FS30219 but the difference is minimal.

Paint the ASLAV overall FS30219 and then add black and olive drab lustreless (ODL). by the time you scal;e clour the paints and add dust and mud in 1/35 you would not be able to tell the difference.

When armoured units were based in the south of the country the initial overall colour was ODL and brown and blck painted on top.

JM
whatgluewasthat
Visit this Community
United States
Joined: December 09, 2016
KitMaker: 35 posts
Armorama: 23 posts
Posted: Wednesday, December 14, 2016 - 12:44 PM UTC
OK I got my Trumpeter ASLAV -25 Phase 3 today.

It came in the mail, not crushed, is all there.

A few spots of what looks like brown shoo goo or resin and a few scrapes that are either a for detail or b result of fingers and rings, I perfer B but nothing to worry about.

I had a quick look at instructions, snag from word go, drill holes here and here x 6. Yes OK but what drill size and if all the way through or not would have been handy info.

MY budget does not allow for an airbrush or branded paints, but to be honest, even in the day,I could never afford the paint so Im not fussed for this first go of a model like this, so I will be painting it on the cheap.

At same time I am building old Hogans heroes Jeep, as practice.

I painted one sprue to test paint, forgot to wash it, was a bit heavy handed with grey undercoat, so lesson one learned already. Its funny, first deja vue kinda flashback memory today, I expect there will be more when I looked at chrome engine of Jeep. Very quick image of a long time ago, maybe a Hot Rod type Munsers car? and that smell came back even though when I sniffed the parts, it was not same.

I plan to wash all sprues of ASLAV, cut and bag, this works best for me, as I lose things of late.

I also bought a PBY-5 and plan to do a Black Cat.

So I think with three on the go over xmas, I can see if I like this again or not.

My ASLAV is kinda maybe heading from Iraq to Afghaninistan and maybe now NORFORCE as those guys get overlooked and I have a Diorama in mind and the Yawuru boys are easier to paint.

Its all anout your imagination from memory, what you see and think when you build it. And I tel you, when its done, onto the bed it will gop to climb a few blanket (now doona) mountains for old times sake. I should have been an A4 Skyhawk pilot, I could fly those things so heavy and so low over blanket moutains it was a thing to behold.

whatgluewasthat
Visit this Community
United States
Joined: December 09, 2016
KitMaker: 35 posts
Armorama: 23 posts
Posted: Sunday, January 08, 2017 - 04:06 PM UTC
Progress of sorts has been made.

The lower hull is assembled, albeit a bit rough. I broke two pieces of that thin suspension steering stuff, one I didnt even notice I broke, it must have snapped when I cut something else. Also lost a couple of ball joints, but the wheels wil hide them.

I put the props on backwards Broke off a couple of those tiny eyelets that are on some kind of poles, , yes youve got the idea, we are breaking a few things.

The upshot is the wheels are a bit wobbly because IMHO, you should bnuild the suspenders first and cement the front big suspension arms last. There was one section that just did not line up despite trying all parts that could fit, so that kinda threw the others off. No it couldnt be the builder!

The tyres are very loose on the rims, either too big or rims too small. but once on doesnt matter. Oh that reminds me, I took a chunk out of one of the rims whan I was cutting and couldnt find it to stick it back on, it went throught the decing as well, never to be seen again, although I did find a packet of yellow squash seeds under there.

I(m leaving the prop guards and rudders off until last.

So so far, so good. I reAlly need to set up a proper work bench inside, but I want to build outsside, so I need to go to op shop for sheets I think.

I painted a lot of the small parts sonthe sprues just for fun with cheap paint and a brush, lets say the U bolts look good, the rest needs work.

Im very confused with the turret options, so will leave that until last. I dropped part of the support for the 50 cal or is if 30 or a SLR between the decking, down I went, and actually found it, its 1cm x .3 so a fluke. I wont be doing it again.

What I find frustrating, is not being able to do it al in one go, despite the advances in glue technology. So I might start on the PBY also. When I feel like workingon them, I want to go for a few hours, so need more kits I huess when budhet allows, so I can have a few on the go.

Already I want to build another one so I can correct my mistakes.

Looking forward to the uppper hull.

One thing, is the annoying flash in the strangest places. some tiny parts are perfect, others a class or two below, very odd. Like an old and a new mold kinda thing.

Im using 3x mafnification glasses, I might have to go the head visor as it has a lot more mag choices.

I have always been in awe of people who can build good models and paint them well, I think I will be in awe for some time to come.

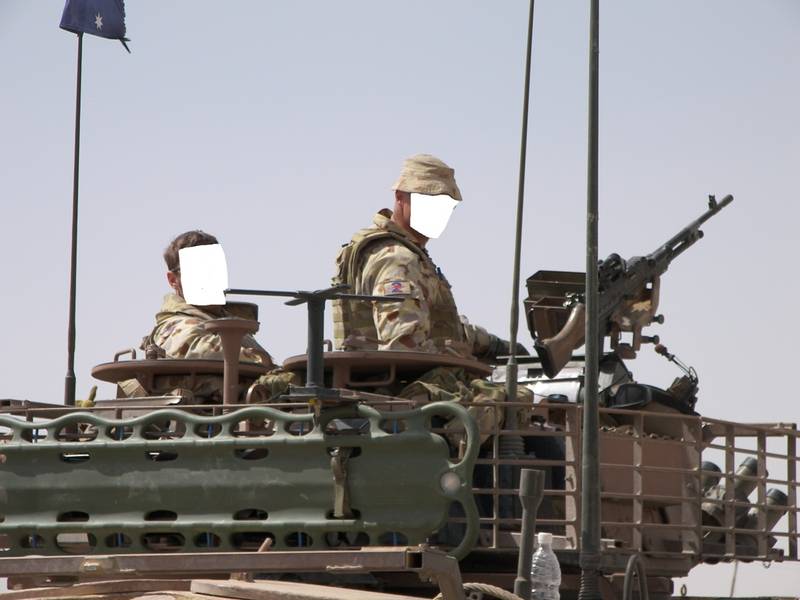
Piccies tomorrow.
whatgluewasthat
Visit this Community
United States
Joined: December 09, 2016
KitMaker: 35 posts
Armorama: 23 posts
Posted: Monday, January 23, 2017 - 12:29 PM UTC
After building the suspension etc, I decided to modify the instructions. Ive glued the hull and top and rear end on and doors and hatches.

Everyting fits perfectly. The two halves, I just used sone tamiya extra thin and what small gaps there were melded together and the small ooze fits with the welds. Wouldmt pass a microscope, but Im happy.

Rear end lined up perfect and Ive glued everything shut as this is my first go.

I seen a video of one that had gaps all over the joint, so it must have been a dud one I reckon, maybe it warped in the heat of a rear parcel shelf? can cook an egg there in summer. Anyway, for me to get it to line up, it must be idiot proof unlike the undercarriage.

Ive ordered more paints and glues and fillers and airbrush to make life easier.

Next I will stick on all big bits boxes etc, and then all the small bits working bottom up, I think this is best for me.

Turret is another job, I leave it until last.

So far so good, it is more fun having a few on the go, I still am working onthe jeep and started on a catalina.

Im on the lok out for old unbuilt kits, I seen plenty for cheap, but none I was interested in.

IM thinking M113A1 for next build.
Adamskii
Visit this Community
South Australia, Australia
Joined: November 06, 2010
KitMaker: 537 posts
Armorama: 474 posts
Posted: Monday, January 23, 2017 - 04:09 PM UTC
keep up the good work. Looks like yoiur taking the time these kits need. There are some fantastic good ASLAV build logs on this website, search for them. Sam Dwyer is highly reccomended.

Adam
whatgluewasthat
Visit this Community
United States
Joined: December 09, 2016
KitMaker: 35 posts
Armorama: 23 posts
Posted: Tuesday, January 24, 2017 - 11:07 AM UTC
Thanks for the encouragement, I can see light at end of tunnel

I have seen some amazing work here and all over the place. Just when you think you have seen the most realistic model ever made, along comes another.

So much history is black and white, so poetic license comes into play but sometimes people get it spot on. Just amazing to see.

This is where I am up to, so far so good, its pretty rough but good for me.

Been making some assemblys, added a few small parts, put turrett together and gun which despite the box touting it as some new process, it is very lame.

I broke one of the cage wires, but worked out how to glue it back together, like joining fishing line with glue I reckon, but I worked out that if I pinned them down with tweezers, then glued it was easy to do. I was so proud of not breaking them off the sprue, then the air broke one.

The turret has a hatch comms I think, I stuck the panel in the wrong way, and the tab was in the wrong place antway so it would not have fit, but it gets covered with a panel hatch, so no dramas there.

I managed to cut and apply my fitst ever photo etch part with no dramas, a tiny srip of bolt heads that goes above the gun.

I need better tweezers too.

It is interesting though not good to see how the stresses in the plastic transfer when cutting, even at a distance. tiny parts are worst. I am alreasy complainfg like a seasoned modeller.

Also I noticed the difference in quality in each of the sprues. It is as though differnt people designed differnt parts. Some of the connections, especially on joins not at right angles, the placement is shocking and could I reckon have been placed elsewhere easily. There are other little dog legs to avoid vital connections but not for hatches for example.

Aim is to complete it over the weekend and wait for black paint to arrive.


Adamskii
Visit this Community
South Australia, Australia
Joined: November 06, 2010
KitMaker: 537 posts
Armorama: 474 posts
Posted: Tuesday, January 24, 2017 - 04:07 PM UTC
there is two parts to building an ASLAV, in my opinion - the physical build - which if you try to accurize or get too specific on timeline can really do your head in - so many little details that need "fixing" or modding and so on. I envy the Out of the box builder.

the other part of the build, is the paint. An ASLAV can built rough as guts as innaccurate as heck, and next to no one would notice as long as the paint is good. You could have the most accurate well researched and modded build, ruined because the tan base coat was the wrong tone. Take the time to look at the colour scheme for Australian Vehicles - the sand is not "sand" its almost pink. strange colour. Get that right, and your build will be a win !