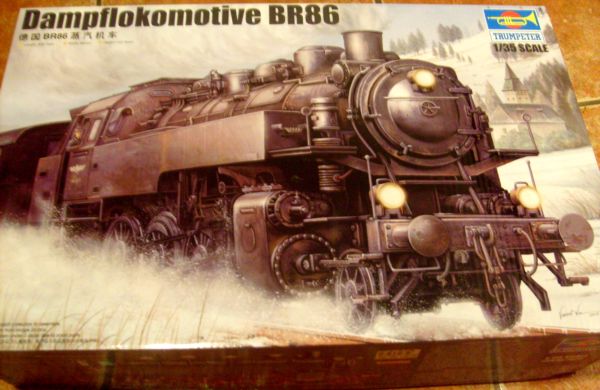
I am a bit short of time with finishing my dio for SL&L campaign, so I want to use Trumpeter styrene kit for my train, because that will go together much faster than CMK resin. But I will build both kits anyway (Trumpeter for early and CMK for late model) to find out the differences between them (if any), everything will be mentioned during my work. A few words to be said.This loco is exact copy of CMK kit, now in styrene. Unfortunately the same like BR 52 some time ago, exact copy with all the mistakes made by CMK on the kit before. Even the same numbers 86 245 and 86 271. I´d really like to know, what reference Trumpeter used for their kit, if any? A bit of history:
The work on 86 245 started at very end of 1935, and the finished loco (serial number 3291) left the Schichau-Werke factory 10.3.1936. So I´d say that 86 245 in red and black painting scheme from 1935 year mentioned in CMK instructions is ??? I would doubt the red wheels anyway. The loco went in Schwerin and Rostock direction to start its duty. After the end of the WWII, BR 86 245 was taken by Soviet block within the scope of the war compensations, and it held its duty in Eastern Germany DDR in Rostock and Dresden area. 19.2.1980 the BR 86 245 was sold to Wustermark as a heating loco. Probably in 1985 it finished its life at loco cemetery in Berlin.
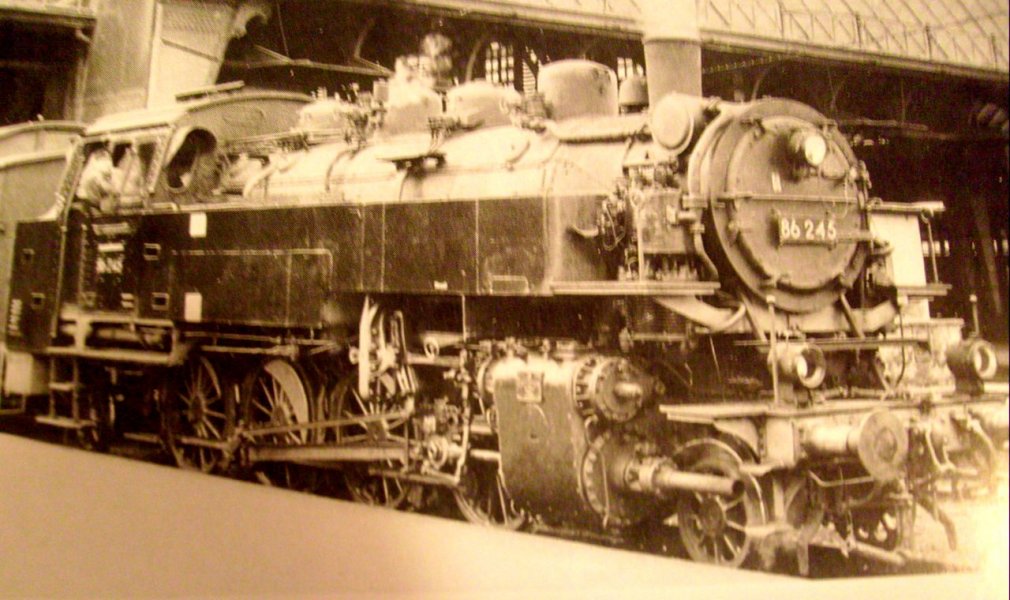
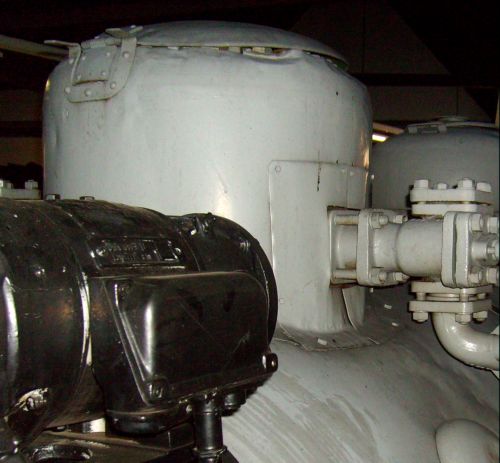
Trumpeter´s kit is very, very simplified the same way like the CMK´s one was, many parts just missing or even wrong. Since 1934 most manufacturers started with double body compressors for BR 86 serie, the chassis were improved and that changed the length of the main connecting rods. Also new steam injector came out, free axles were changed and many more, but this is mostly about parts missing in the kit anyway. There is improved steam cylinder used on the kit, but still old single compressor. BR 86 245 had double one mounted on from manufacturer. Also with second number 271 Trumpeter follows CMK and I am currently checking, if grey painting scheme for this loco number was right. Br 86 271 was manufactured also in Schichau-Werke factory, serial number 3306. Loco left the factory 9th of January 1937, in Frankfurt and Altenkirchen direction, after WWII used to service around Nuremberg and finaly the loco finished its life 11th of December 1968. That means its construction was also very different from the kit, which seems to be closer to some BR 86 loco manufactured before 1931, but then probably with wrong later cylinder. I will bring exact informations, when my research is completed. A picture of real BR86 245 to compare.
I´ll be back with first update soon.
Cheers
Libor
Constructive Feedback
For in-progress or completed build photos. Give and get contructive feedback!
Hosted by Darren Baker, Dave O'Meara
1/35 Trumpeter BR 86 Dampflokomotive
grave_digger
Clare, Ireland
Joined: December 30, 2008
KitMaker: 952 posts
Armorama: 834 posts
Joined: December 30, 2008
KitMaker: 952 posts
Armorama: 834 posts
Posted: Monday, October 05, 2009 - 01:05 PM UTC
Firecaptain
Virginia, United States
Joined: November 03, 2006
KitMaker: 165 posts
Armorama: 118 posts
Joined: November 03, 2006
KitMaker: 165 posts
Armorama: 118 posts
Posted: Monday, October 05, 2009 - 03:03 PM UTC
Mine's on the way.......crack that box and show us some plastic......I'll be following along
with your WIP.......
Gorizont
Sachsen, Germany
Joined: November 28, 2007
KitMaker: 1,462 posts
Armorama: 1,289 posts
Joined: November 28, 2007
KitMaker: 1,462 posts
Armorama: 1,289 posts
Posted: Monday, October 05, 2009 - 07:14 PM UTC
Last weekend I also had this huge kitbox in my hands, but didn´t bought it.
I´m looking forward to see what you make with this kit.
Also the differences to the CMK-kit and Trumpeter´s details would be interesting.
greetings...
Soeren
I´m looking forward to see what you make with this kit.
Also the differences to the CMK-kit and Trumpeter´s details would be interesting.
greetings...
Soeren
Posted: Tuesday, October 06, 2009 - 12:03 AM UTC
Really looking forward to this build Libor. I have the BR52, but this looks so much cooler.
grave_digger
Clare, Ireland
Joined: December 30, 2008
KitMaker: 952 posts
Armorama: 834 posts
Joined: December 30, 2008
KitMaker: 952 posts
Armorama: 834 posts
Posted: Tuesday, October 13, 2009 - 01:19 PM UTC
Thank you all, guys, for your kind words. I have returned from my holidays today, I had good time, visited three rail museums in Germany, and got thousands reference pictures for my next work. More than 800 shots taken just for my BR 86 build. I will follow BR 86 283, what can be seen in steam loco museum in Neuenmarkt, Germany, and I will also keep its grey painting, used by Orenstein and Koppel, manufacturer from Berlin. They also used improved, but single body compressor for their 4 locos (282-285) built between 25.10.1937 and 2.1. 1938. The cylinders were new construction, different from very first BR 86´s. BR 86 283 left the factory 3.11.1937 in grey color, but I am not sure yet about the others. The truth is that some BR 86 locos were painted in grey (water base paints used) mostly for propaganda and photographing purpose, and very soon they were repainted in regular black or black and red colors. Just very few of them were left in their unusual grey color for longer time, and two or three locos had painting in combination grey and black. I´ll start my building tomorrow and first update will be here in no time.
Cheers
Libor
Cheers
Libor
grave_digger
Clare, Ireland
Joined: December 30, 2008
KitMaker: 952 posts
Armorama: 834 posts
Joined: December 30, 2008
KitMaker: 952 posts
Armorama: 834 posts
Posted: Saturday, October 17, 2009 - 10:59 PM UTC
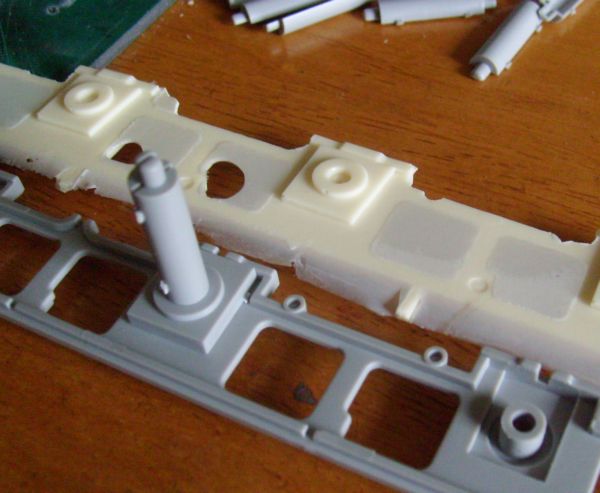
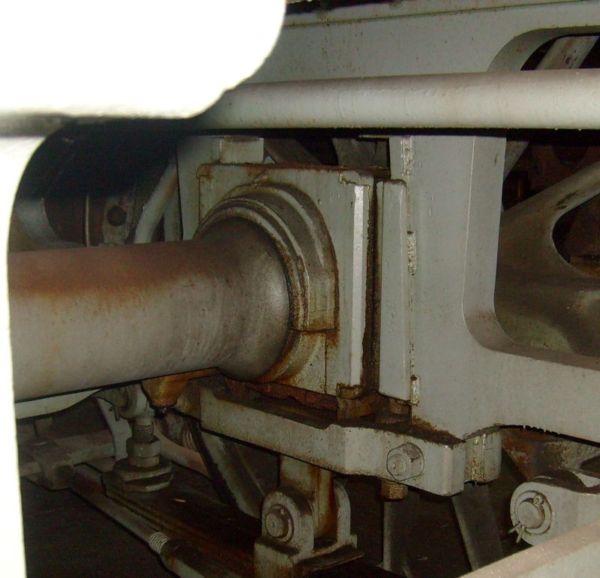
I have done some checking here, but I am not sure where to start. First I have to say I was a bit wrong, when I said that Trumpeter made exact copy of CMK kit. Well, they did anyway, but at least they have fixed wrong length of the frame (CMK kit is over 5mm shorter than it suppose to be). Here the length is fixed, but that means all the proportions in cabin area are wrong now....
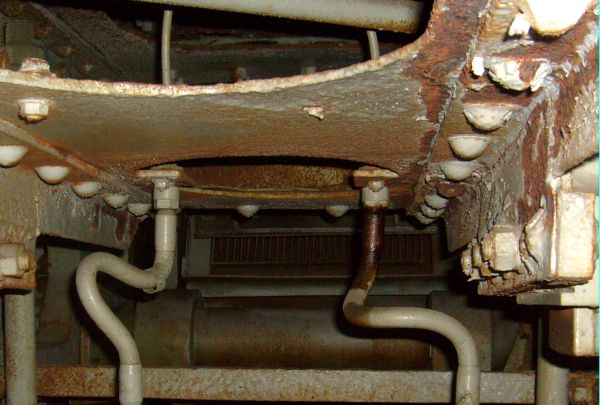
CMK frame parts have right thickness, but not Trumpeter. Their frame is very funny looking and too far from reality, here are pictures to compare Trumpeter, CMK and real thing.
For me that means to leave it, because it is in hiden area anyway, or to scratch build whole frame.
Cheers
Libor
CMK frame parts have right thickness, but not Trumpeter. Their frame is very funny looking and too far from reality, here are pictures to compare Trumpeter, CMK and real thing.
For me that means to leave it, because it is in hiden area anyway, or to scratch build whole frame.
Cheers
Libor
Trutek
Croatia Hrvatska
Joined: November 17, 2007
KitMaker: 46 posts
Armorama: 39 posts
Joined: November 17, 2007
KitMaker: 46 posts
Armorama: 39 posts
Posted: Sunday, October 18, 2009 - 12:04 AM UTC
Quoted Text
For me that means to leave it, because it is in hiden area anyway, or to scratch build whole frame.
Cheers
Libor
Knowing you I supose you will try to scratch...
Anyway whatever you decide I belive it will come good....
P.S. Sorry on bad english....
Gorizont
Sachsen, Germany
Joined: November 28, 2007
KitMaker: 1,462 posts
Armorama: 1,289 posts
Joined: November 28, 2007
KitMaker: 1,462 posts
Armorama: 1,289 posts
Posted: Sunday, October 18, 2009 - 03:36 AM UTC
Knowing you I supose you will try to scratch...
I also think, he will scratch it.
greetings...
Soeren
I also think, he will scratch it.
greetings...
Soeren
grave_digger
Clare, Ireland
Joined: December 30, 2008
KitMaker: 952 posts
Armorama: 834 posts
Joined: December 30, 2008
KitMaker: 952 posts
Armorama: 834 posts
Posted: Sunday, October 18, 2009 - 03:41 AM UTC
grave_digger
Clare, Ireland
Joined: December 30, 2008
KitMaker: 952 posts
Armorama: 834 posts
Joined: December 30, 2008
KitMaker: 952 posts
Armorama: 834 posts
Posted: Monday, October 19, 2009 - 02:11 AM UTC
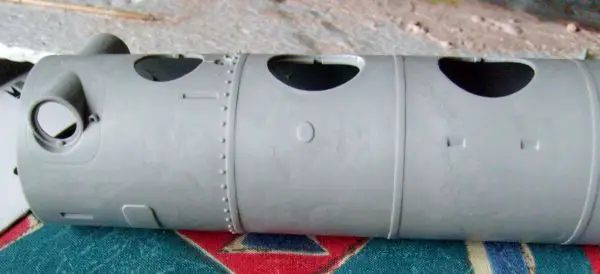
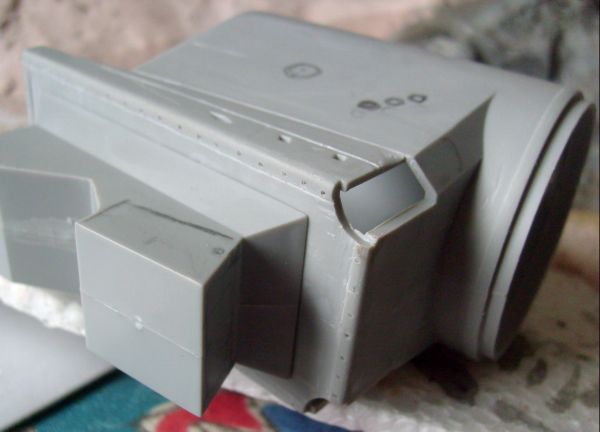
Finally I started building. First the boiler halves glued together, and I tried to do small curving here and there, what should be looking more naturally, when polished and painted. The rings around the boiler were sanded to their right thickness and pipe on the right side was sanded off.
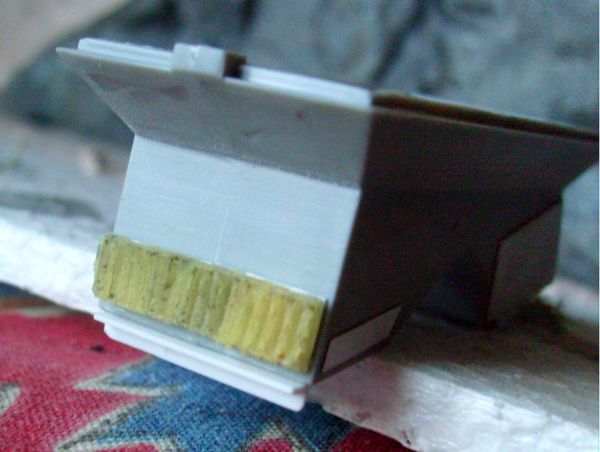
Then I worked on ash box. I made appearance of riveted metal panels and also indicated their lines. Both upper part´s edges with wash holes are wrong in the kit, they are suppose to be rounded. I will make it right now, and then I will add missing wash holes ond the sides and also doors etc. on the lower part of the ash box.
Thanks for looking
Libor
ianclasper
Washington, United States
Joined: September 02, 2009
KitMaker: 227 posts
Armorama: 141 posts
Joined: September 02, 2009
KitMaker: 227 posts
Armorama: 141 posts
Posted: Monday, October 19, 2009 - 05:20 AM UTC
Quoted Text
The work on 86 245 started at very end of 1935, and the finished loco (serial number 3291) left the Schichau-Werke factory 10.3.1936. So I´d say that 86 245 in red and black painting scheme from 1935 year mentioned in CMK instructions is ??? I would doubt the red wheels anyway. The loco went in Schwerin and Rostock direction to start its duty. After the end of the WWII, BR 86 245 was taken by Soviet block within the scope of the war compensations, and it held its duty in Eastern Germany DDR in Augsburg area. 19.2.1980 the BR 86 245 was sold to Wustermark as a heating loco. Probably in 1985 it finished its life at loco cemetery in Berlin.
The standard colour scheme for both Pre and Post war German Railway locomotives was Black Boiler / Cab / Water Tanks / Cylinders and Red Frame and Wheels. It is probable that this continued through the war period. A steam loco can be spotted from several miles away due to its smoke plume, so repainting the frame from red as camouflage is rather mute.
The Grey scheme mentioned is refereed to as "Shop Grey" in the UK, the equipment being painted in shades of grey to best illustrate its details when photographed. The equipment being repainted to its proper livery prior to delivery.
Your photo of 86 245 was taken in Dresden in the early 1950s, so may feature changes made post war as well as some adhoc repairs (there appears to be some odd marks on the tanks)
Regards
Ian
grave_digger
Clare, Ireland
Joined: December 30, 2008
KitMaker: 952 posts
Armorama: 834 posts
Joined: December 30, 2008
KitMaker: 952 posts
Armorama: 834 posts
Posted: Monday, October 19, 2009 - 06:48 AM UTC
Thank you, Ian, for you comment. That corresponds well to my words above. About CMK painting scheme, the point was that they refered to the loco, which had not built yet in 1935.
About the grey, according to my references, there were some BR 86´s left in this color for their service during WWII. Also there were many locos painted just in black overall. The BR 86 245 picture is from 1965 year, and maybe some changes were made there, but the double body compressor is original from Schichau-Werke factory. Compressor in the kit is Nielebock-Knorr one, and this is slightly different from later Tolkien-Knorr sigle body compressor, which was in use by some manufacturers besides double body Knorr after 1934. I have searched very hard in this case and I dont think I am wrong
Now, back to work. I have rounded both corners with miliput and tomorrow I will make the wash out holes. Master for their lids is finished, but I will make a mould, when more masters is ready.
Cheers
Libor
grave_digger
Clare, Ireland
Joined: December 30, 2008
KitMaker: 952 posts
Armorama: 834 posts
Joined: December 30, 2008
KitMaker: 952 posts
Armorama: 834 posts
Posted: Monday, October 19, 2009 - 10:03 AM UTC
And last one for today, ash door and some plates added on the lower part of the ash box, for opposite side I have made quick resin casting.
Thanks for looking
Libor
Thanks for looking
Libor
grave_digger
Clare, Ireland
Joined: December 30, 2008
KitMaker: 952 posts
Armorama: 834 posts
Joined: December 30, 2008
KitMaker: 952 posts
Armorama: 834 posts
Posted: Monday, October 19, 2009 - 09:02 PM UTC
The ash box is finished and ready for surfacer
Cheers
Libor
Cheers
Libor
grave_digger
Clare, Ireland
Joined: December 30, 2008
KitMaker: 952 posts
Armorama: 834 posts
Joined: December 30, 2008
KitMaker: 952 posts
Armorama: 834 posts
Posted: Tuesday, October 20, 2009 - 12:40 AM UTC
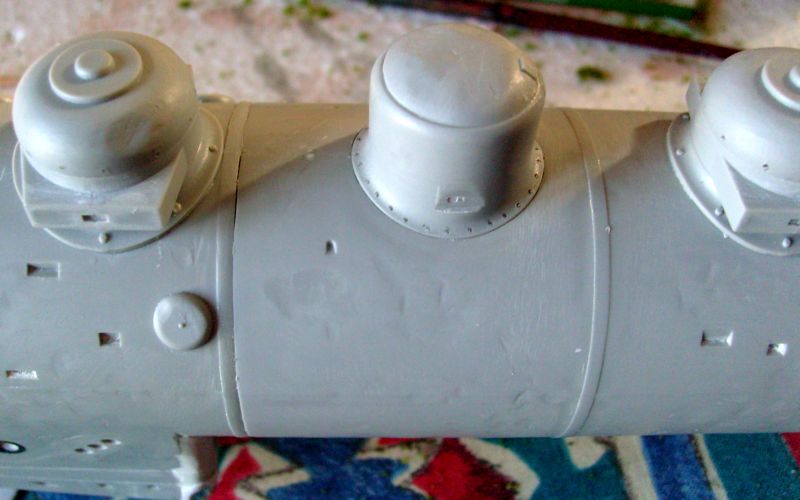
Continued with upper part, I have shaped both wash holes areas, thin plastic sheet used for riveted welt, and everything put together, just the lid castings are to be added later. Whole thing is glued together, and other wash holes drilled on the sides. Here I have used Eduard PE´s for riveted welts.
Cheers
Libor
Cheers
Libor
grave_digger
Clare, Ireland
Joined: December 30, 2008
KitMaker: 952 posts
Armorama: 834 posts
Joined: December 30, 2008
KitMaker: 952 posts
Armorama: 834 posts
Posted: Tuesday, October 20, 2009 - 11:36 PM UTC
I added rivets on the sandboxes and steam domes, I will make their lids from thin metal sheet, which I will use also for making the extra metal panels. For details I want to find spare PE´s.
Cheers
Libor
Cheers
Libor
MrMox
Aarhus, Denmark
Joined: July 18, 2003
KitMaker: 3,377 posts
Armorama: 1,088 posts
Joined: July 18, 2003
KitMaker: 3,377 posts
Armorama: 1,088 posts
Posted: Wednesday, October 21, 2009 - 01:31 AM UTC
Nice work on correcte the faults and omissions - I have bee tempted to get this kit, but due to other projects I have delayed shopping - but your build do tempt me to go and spend some money
Cheers/Jan
Cheers/Jan
grave_digger
Clare, Ireland
Joined: December 30, 2008
KitMaker: 952 posts
Armorama: 834 posts
Joined: December 30, 2008
KitMaker: 952 posts
Armorama: 834 posts
Posted: Thursday, October 22, 2009 - 04:22 AM UTC
Thank you, Jan, you can always get nice and unusual model with this kit, if you dont mind some inaccuracies. Any loco fan would be tempted, thats for sure.
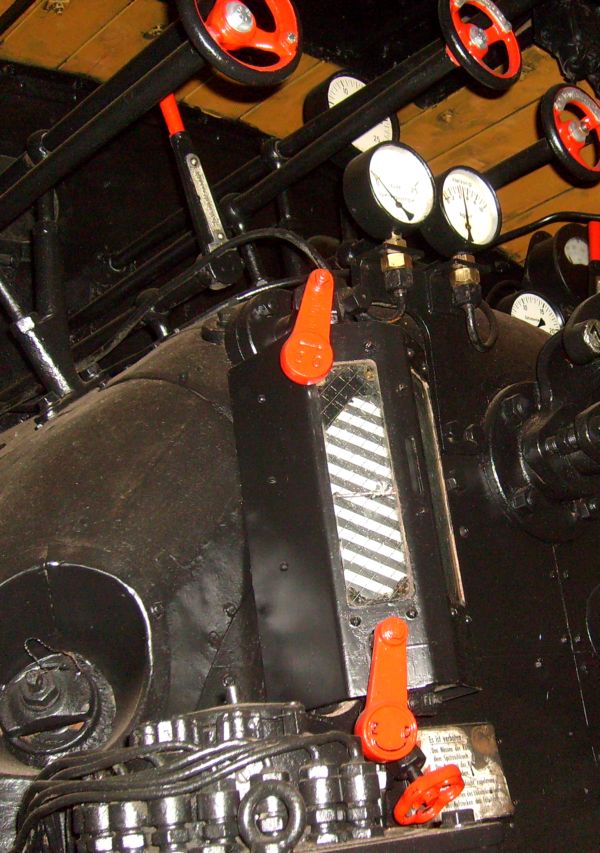
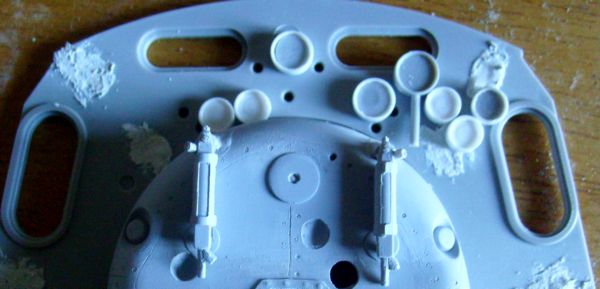
Bases for the level indicators made and mounted on, the wash holes moved into their right position. There is a kind of sci-fi bunch of five funny sized readers in the kit instead of eight ones inside the real loco. I have kept just one of them, which can be used, the rest is scratch built already and dry-fitted. Now I will continue with them.
Cheers
Libor
grave_digger
Clare, Ireland
Joined: December 30, 2008
KitMaker: 952 posts
Armorama: 834 posts
Joined: December 30, 2008
KitMaker: 952 posts
Armorama: 834 posts
Posted: Thursday, October 22, 2009 - 09:06 AM UTC
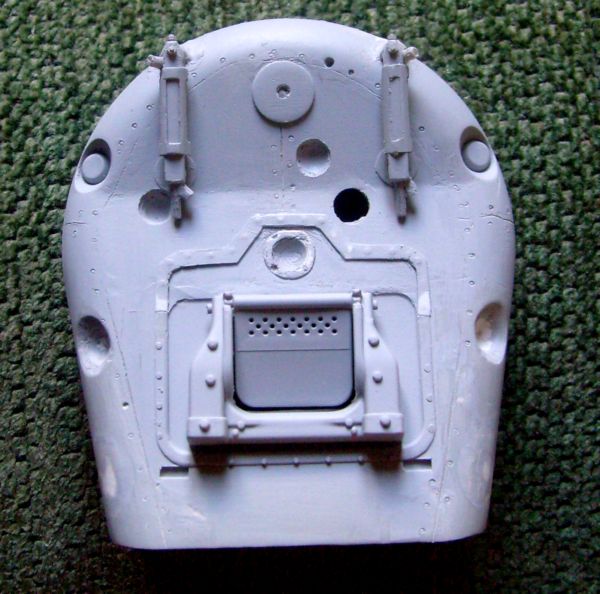
The front part of the cabin glued on, fitting was very bad and a lot of putty was needed. The same problem will happen again with the firewall, which is 2mm wider than boiler. Base for group of readers finished and all completed together.
Thanks for looking
Libor
Thanks for looking
Libor
firstcircle
England - South East, United Kingdom
Joined: November 19, 2008
KitMaker: 2,249 posts
Armorama: 2,007 posts
Joined: November 19, 2008
KitMaker: 2,249 posts
Armorama: 2,007 posts
Posted: Thursday, October 22, 2009 - 09:35 AM UTC
This is interesting, and looks like a big kit. I have noticed it as I really like the bleak Trumpeter art work on the box top. I was wondering if Trump somehow think this could be linked up with their Karl mortar. Any photo I remember seeing of Karl never seems to include the loco. Is this a candidate, do you think?
grave_digger
Clare, Ireland
Joined: December 30, 2008
KitMaker: 952 posts
Armorama: 834 posts
Joined: December 30, 2008
KitMaker: 952 posts
Armorama: 834 posts
Posted: Sunday, October 25, 2009 - 07:44 AM UTC
Hi Matthew, I should have some pictures with Karl or some heavy guns linked together with other cars and so, I will check them to see exactly, what it is about. I think there was BR52 coupled somewhere. These heavy locos (BR50 and BR52) were often in military use, heading with heavy loaded trains to the East. I´ll find some pictures soon.
Cheers
Libor
Cheers
Libor
grave_digger
Clare, Ireland
Joined: December 30, 2008
KitMaker: 952 posts
Armorama: 834 posts
Joined: December 30, 2008
KitMaker: 952 posts
Armorama: 834 posts
Posted: Monday, October 26, 2009 - 08:25 PM UTC
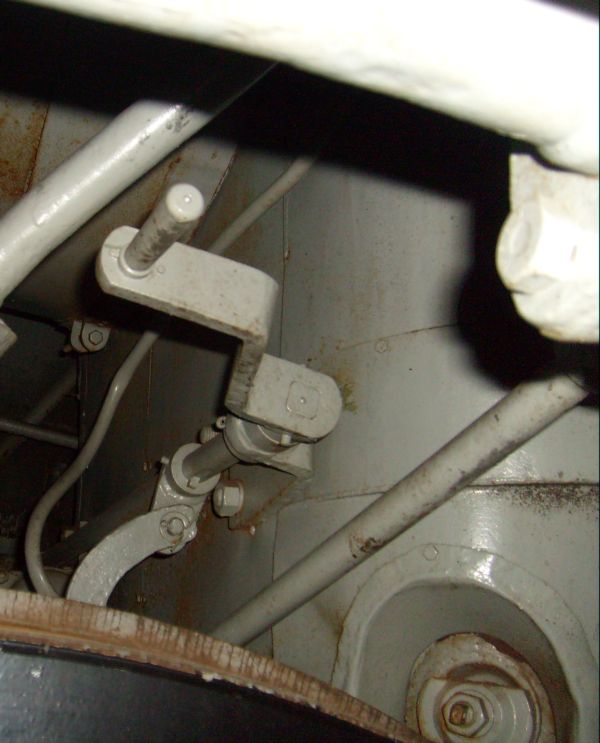
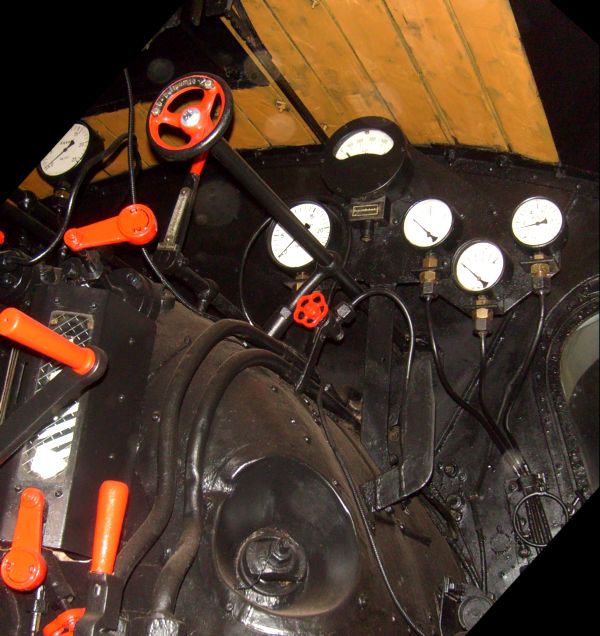
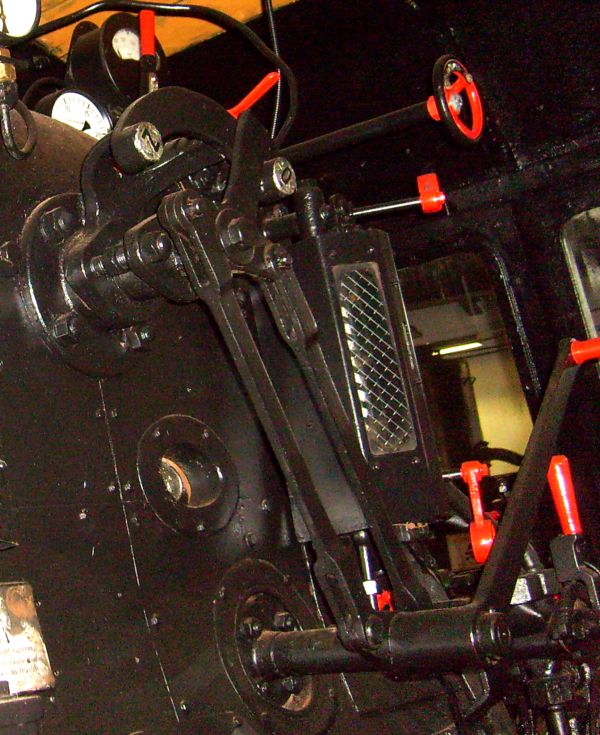
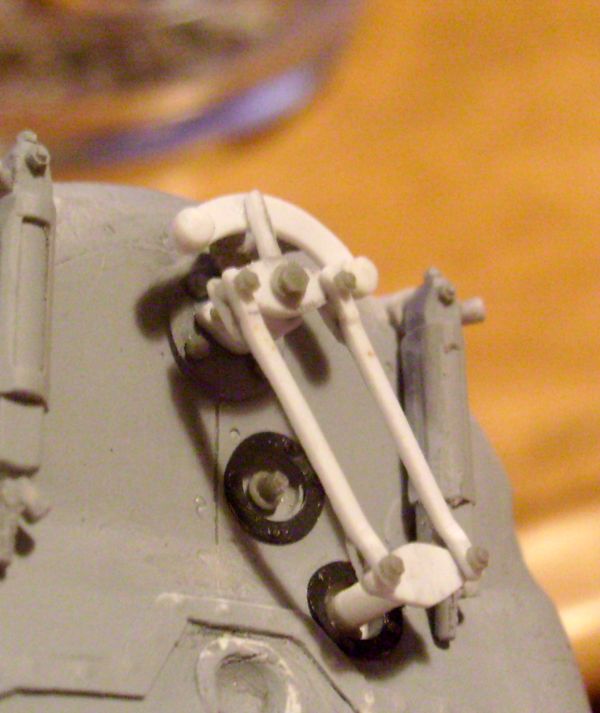
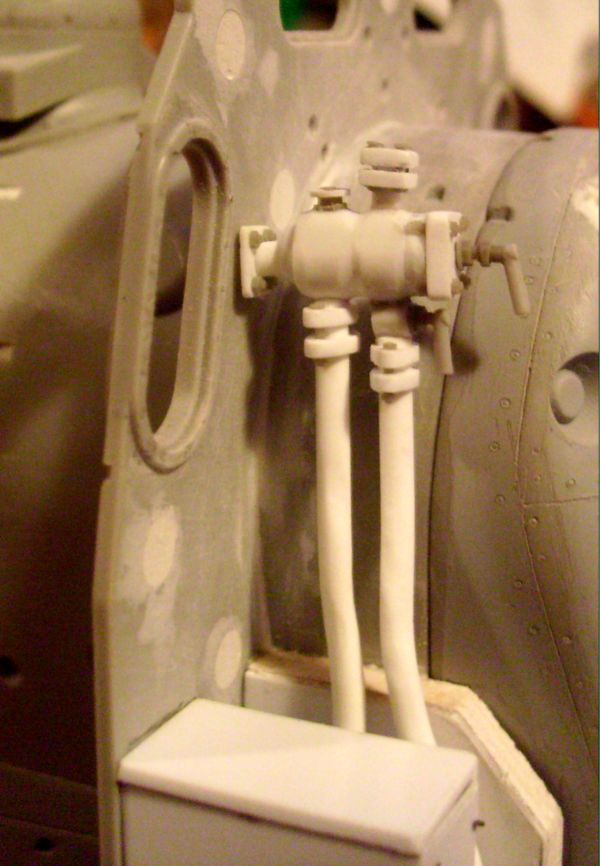
Continued with interior, I have scratch built some pipes and steam valve, also most on the crowbar regulator done.
Cheers
Libor
Cheers
Libor
grave_digger
Clare, Ireland
Joined: December 30, 2008
KitMaker: 952 posts
Armorama: 834 posts
Joined: December 30, 2008
KitMaker: 952 posts
Armorama: 834 posts
Posted: Tuesday, October 27, 2009 - 03:48 AM UTC
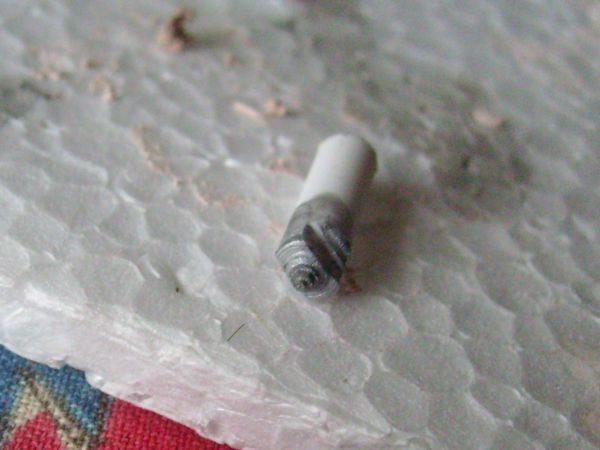
I have finished the steam valve now, but not pictures taken yet. My next task is three way valve with some single ones and all the pipes around, and then an oil pump beside, another nut to crack
Thanks for looking
Libor
Thanks for looking
Libor
grave_digger
Clare, Ireland
Joined: December 30, 2008
KitMaker: 952 posts
Armorama: 834 posts
Joined: December 30, 2008
KitMaker: 952 posts
Armorama: 834 posts
Posted: Wednesday, October 28, 2009 - 07:07 AM UTC
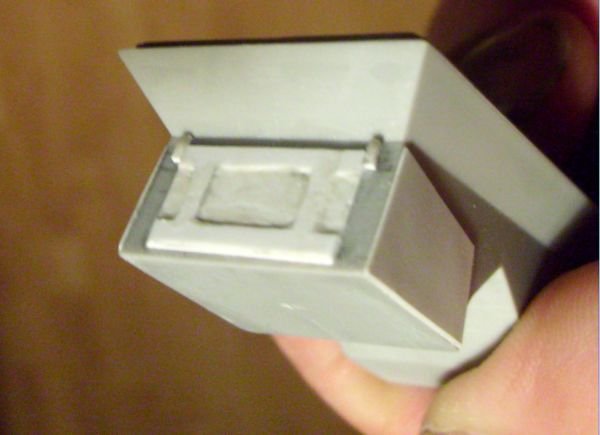
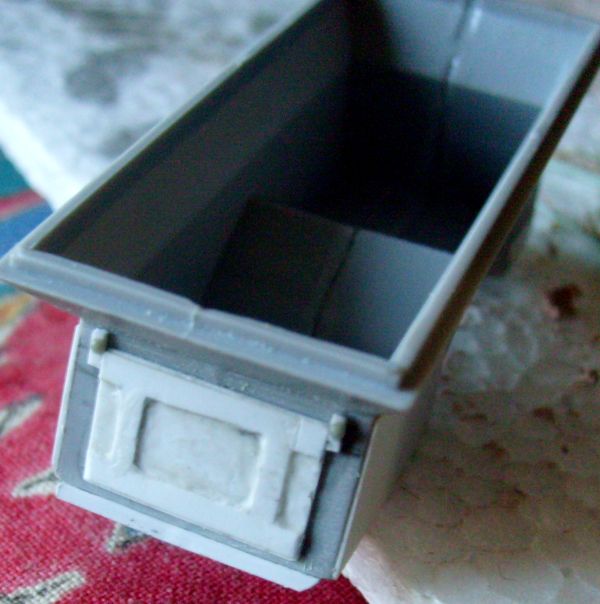
Steam valve completed and dry fitted, I have also built a tool box.
Cheers
Libor
Cheers
Libor
KoOkiE
West-Vlaaderen, Belgium
Joined: April 11, 2007
KitMaker: 2,625 posts
Armorama: 154 posts
Joined: April 11, 2007
KitMaker: 2,625 posts
Armorama: 154 posts
Posted: Thursday, October 29, 2009 - 01:44 AM UTC
I always look in awe at train locomotive projects. there's huge amounts of details to be added, parts to be scratch built etc.. really nice project, thanks for sharing