1/35 Trumpeter BR 86 Dampflokomotive
Clare, Ireland
Joined: December 30, 2008
KitMaker: 952 posts
Armorama: 834 posts
Posted: Saturday, April 10, 2010 - 03:51 AM UTC
Moulds for the wheels are finished and first castings should be ready soon.

Cheers
Libor
www.mymodelplace.eu
www.LZmodels.com
Clare, Ireland
Joined: December 30, 2008
KitMaker: 952 posts
Armorama: 834 posts
Posted: Monday, April 12, 2010 - 02:45 AM UTC
Yesterday I started with the interior and immediatelly I found out there were some pieces still missing, forgoten somehow. So I got them ready, cabin light, another electric box and couple of valves. Two smaller ones to go, tachometer and finally two other electric boxes for lights have to be built.

Cheers
Libor
www.mymodelplace.eu
www.LZmodels.com
Clare, Ireland
Joined: December 30, 2008
KitMaker: 952 posts
Armorama: 834 posts
Posted: Tuesday, April 13, 2010 - 12:54 AM UTC
Master for an electric box made in combination of plastic and PE, that should bring very nice castings, as there are many of these boxes on the loco. Also valve is done and just the tachometer left for today. Then I will assembly the interior and get it painted.


Cheers
Libor
www.mymodelplace.eu
www.LZmodels.com
Clare, Ireland
Joined: December 30, 2008
KitMaker: 952 posts
Armorama: 834 posts
Posted: Tuesday, April 13, 2010 - 07:13 AM UTC
Tachometer finished and everything ready for surfacer coat, polish and to make a mould. Now I can start my work on interior


Cheers
Libor
www.mymodelplace.eu
www.LZmodels.com
Sachsen, Germany
Joined: November 28, 2007
KitMaker: 1,462 posts
Armorama: 1,289 posts
Posted: Tuesday, April 13, 2010 - 08:07 AM UTC
Very nice comparison with the Licht (light) -box and the ruler.
Your parts are (as always) great!
I also added some small parts to my model, but these are (until now) very simple.
But perhaps I also will build more complex parts.
greetings...


Soeren
progress:
- Venera-14-lander on Venus
- Dragon s.10cm K18 at the Atlantic-wall
completed:
- Venera-10 lander on Venus
Clare, Ireland
Joined: December 30, 2008
KitMaker: 952 posts
Armorama: 834 posts
Posted: Wednesday, April 14, 2010 - 12:23 AM UTC
Thank you Soeren, some PEs are sometime neccesary to get nice detail, however I try avoid them as much as I can. They always cause me a trouble, I just cannot find the right glue to work with them in combination with plastic or resin (how many brands of glue I have tried, 15 maybe)
Back in building, I got ready my parts started earlier, and glued a few PE strips with rivet heads on inner roof. The opposite strips mounted on front and rear walls, and they should look like flange angle, once the roof is fixed on its place. Now I will complete adds for the cab and get some of them painted before assembly.


Cheers
Libor
www.mymodelplace.eu
www.LZmodels.com
Clare, Ireland
Joined: December 30, 2008
KitMaker: 952 posts
Armorama: 834 posts
Posted: Wednesday, April 14, 2010 - 12:44 PM UTC
Some parts in surfacer coat and cleaned up, ready for paint. Also last castings for the interior obtained from the mould, I finished this morning.


Cheers
Libor
www.mymodelplace.eu
www.LZmodels.com
Clare, Ireland
Joined: December 30, 2008
KitMaker: 952 posts
Armorama: 834 posts
Posted: Wednesday, April 14, 2010 - 09:29 PM UTC
Painting started


Cheers
Libor
www.mymodelplace.eu
www.LZmodels.com
Clare, Ireland
Joined: December 30, 2008
KitMaker: 952 posts
Armorama: 834 posts
Posted: Thursday, April 15, 2010 - 07:25 AM UTC
Metal parts of the inner roof painted and dark wash applied on the raw wood. This way brings some additional work on it, but the appearance of wood should be then very good. Later I will sand and polish woods and light varnish coat will be added, and finally electric box, light and some wiring will follow. I also cut first mould, way used might seem to be tricky and difficult, but developed by my friend modeller Ondrej it is very handy, because I wont get any mould joint which always brings lots of cleaning and sanding. There might be some tiny membranes at back unvisible area, but they can be cleaned easily.


Cheers
Libor
www.mymodelplace.eu
www.LZmodels.com
Sachsen, Germany
Joined: November 28, 2007
KitMaker: 1,462 posts
Armorama: 1,289 posts
Posted: Thursday, April 15, 2010 - 07:51 AM UTC
Looking good so far!
But I can not see much of the images, because my computer-monitor is defect and now I use a very old one, which also is defect. (very dark)
I hope to get a new (replaced) one in some days.

greetings...
Soeren
progress:
- Venera-14-lander on Venus
- Dragon s.10cm K18 at the Atlantic-wall
completed:
- Venera-10 lander on Venus
Clare, Ireland
Joined: December 30, 2008
KitMaker: 952 posts
Armorama: 834 posts
Posted: Thursday, April 15, 2010 - 12:08 PM UTC
Thank you Soeren, you are very kind. You dont miss much here at the moment, the most images come in resin color or boring surfacer grey. Hopefuly I will get on some proper painting soon, but I have to complete cabin equipment first. More tomorrow

Cheers
Libor
www.mymodelplace.eu
www.LZmodels.com
Clare, Ireland
Joined: December 30, 2008
KitMaker: 952 posts
Armorama: 834 posts
Posted: Friday, April 16, 2010 - 06:58 AM UTC
A couple of things painted for interior and some other added on the firewall.


Cheers
Libor
www.mymodelplace.eu
www.LZmodels.com
Shanghai, China / 简体
Joined: December 02, 2003
KitMaker: 18 posts
Armorama: 16 posts
Posted: Friday, April 16, 2010 - 12:37 PM UTC
Hello, Libor
Great BR86, It's great to watch your new update.
I was working on a BR86 too, I have less detail pics of this big one, and lots of pics which I searched from internet are not original BR86.
And I have no detail pics of this aero:

And this is TRU's part.

Thanks a lot if you can help.
regard
Solo(
[email protected])
poor english,so nothing to say
Clare, Ireland
Joined: December 30, 2008
KitMaker: 952 posts
Armorama: 834 posts
Posted: Friday, April 16, 2010 - 08:29 PM UTC
Hi Solo,
these water tanks slightly changed in time. I did not check the Trumpy ones yet, can you let me know what exactly you are looking for? The pictures?
Cheers
Libor
www.mymodelplace.eu
www.LZmodels.com
Clare, Ireland
Joined: December 30, 2008
KitMaker: 952 posts
Armorama: 834 posts
Posted: Saturday, April 17, 2010 - 04:44 AM UTC
An electric pipe dry-fitted on the inner roof, after assembly and painting this part of my build will be ready for weathering. Also first wheel castings came along, not much cleaning will be required, so even resin kits can be made without hard cleaning and sanding.


Cheers
Libor
www.mymodelplace.eu
www.LZmodels.com
Clare, Ireland
Joined: December 30, 2008
KitMaker: 952 posts
Armorama: 834 posts
Posted: Saturday, April 17, 2010 - 08:21 PM UTC
Continued with the cab details, a valve, brake valves holder and speedmeter assembled on the wall, adjustment device body and some other details added on the firewall. More later


Cheers
Libor
www.mymodelplace.eu
www.LZmodels.com
Shanghai, China / 简体
Joined: December 02, 2003
KitMaker: 18 posts
Armorama: 16 posts
Posted: Sunday, April 18, 2010 - 05:13 PM UTC
Quoted Text
Hi Solo,
these water tanks slightly changed in time. I did not check the Trumpy ones yet, can you let me know what exactly you are looking for? The pictures?
Cheers
Libor
Hello Libor ,
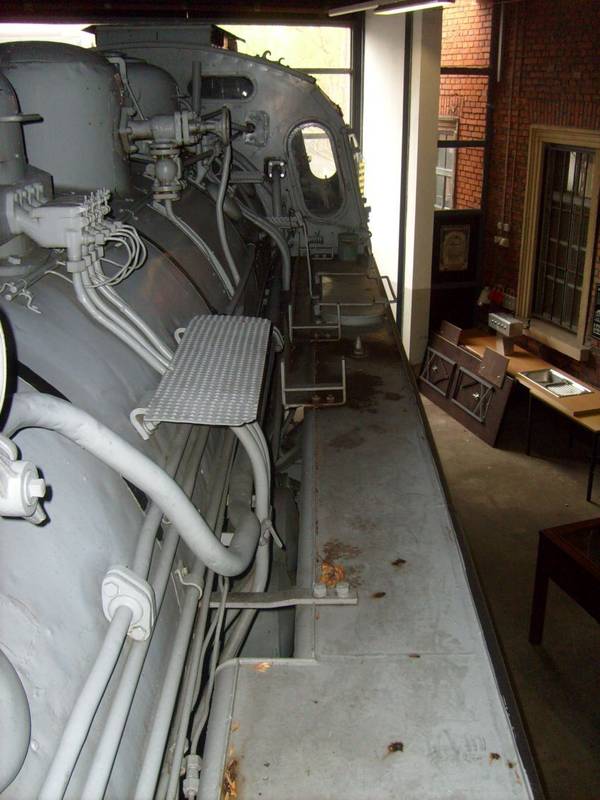
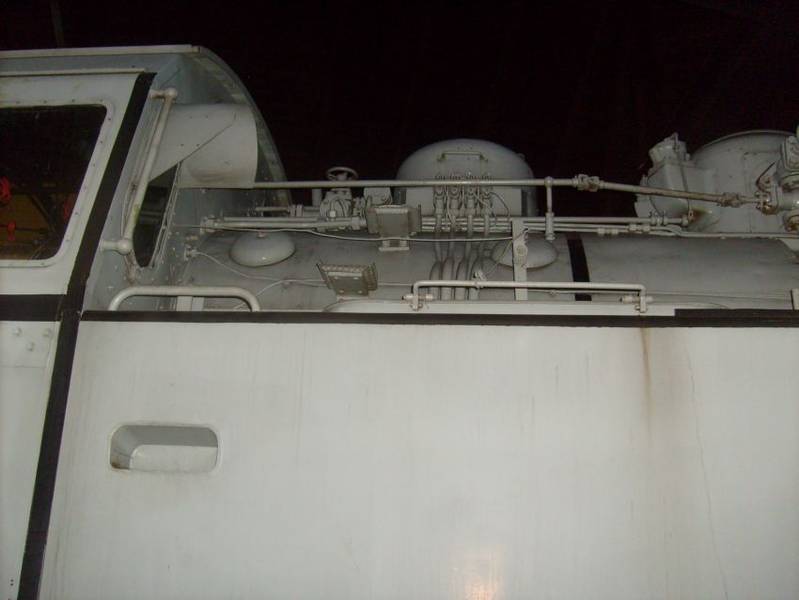
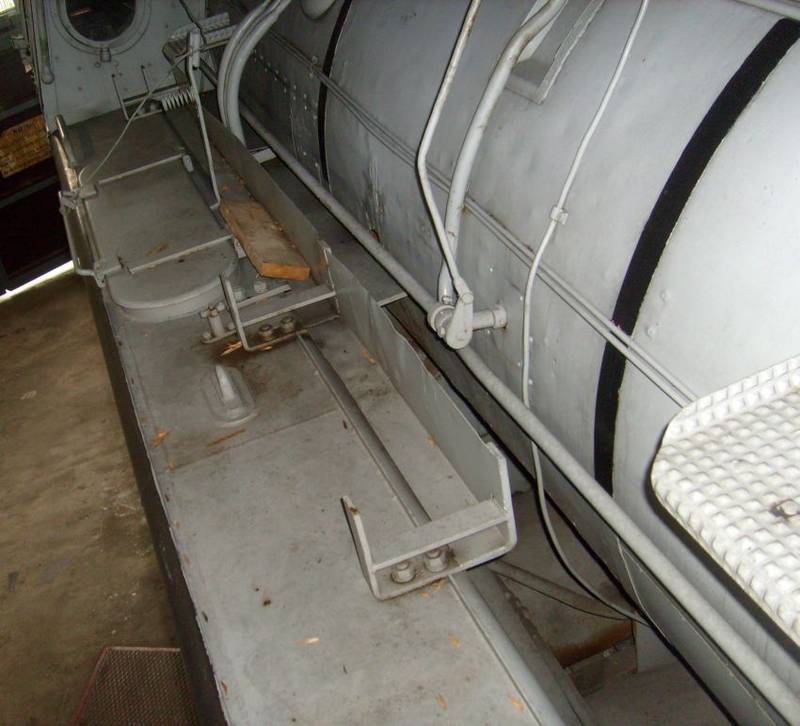
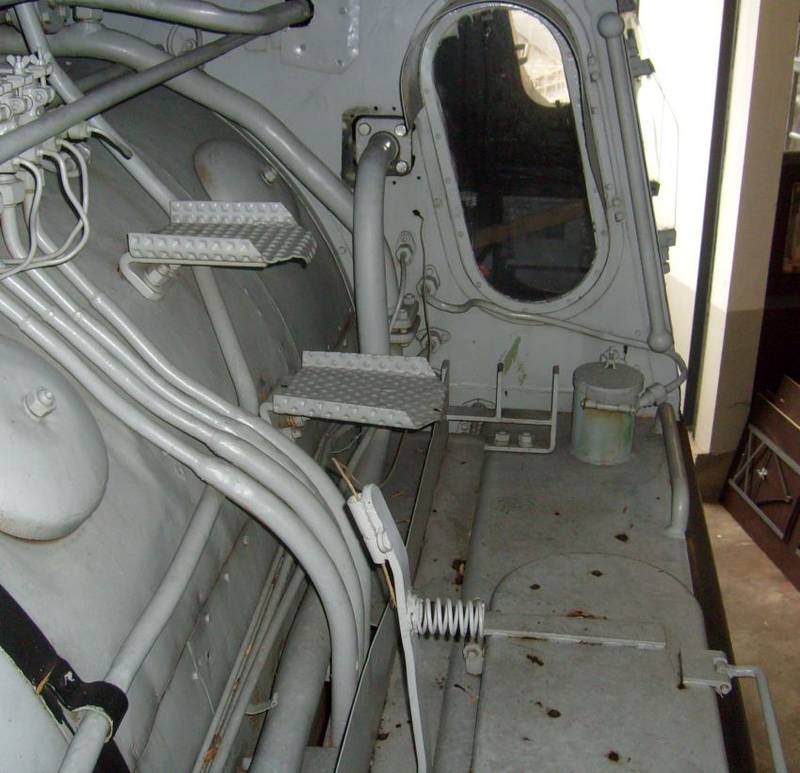
Thanks of help, and I need some pictures which can show the details on top of the water-tank, Thanks again : )
Best Wishes
Solo

poor english,so nothing to say
Clare, Ireland
Joined: December 30, 2008
KitMaker: 952 posts
Armorama: 834 posts
Posted: Monday, April 19, 2010 - 07:28 AM UTC
Hi Solo,
there are some, I hope that can help


Cheers
Libor
www.mymodelplace.eu
www.LZmodels.com
Shanghai, China / 简体
Joined: December 02, 2003
KitMaker: 18 posts
Armorama: 16 posts
Posted: Monday, April 19, 2010 - 01:29 PM UTC
Quoted Text
Hi Solo,
there are some, I hope that can help
Cheers
Libor
Hi Libor,
These pics help a lot !!!! Thanks.
BTW, Did you parking the BR86 in your garage? ? LOL
Best wishes
Solo
poor english,so nothing to say
Clare, Ireland
Joined: December 30, 2008
KitMaker: 952 posts
Armorama: 834 posts
Posted: Tuesday, April 20, 2010 - 04:55 AM UTC
Hi Solo, no problem at all. You got it buddy, thats my personal loco

More parts added, mostly pipes, wash hole covers etc. Now I am working on the top of the firewall and very slowly getting to the left.


Cheers
Libor
www.mymodelplace.eu
www.LZmodels.com
Clare, Ireland
Joined: December 30, 2008
KitMaker: 952 posts
Armorama: 834 posts
Posted: Tuesday, April 20, 2010 - 08:33 PM UTC
Electric boxes added, rods for regulating valves and some others.

Cheers
Libor
www.mymodelplace.eu
www.LZmodels.com
Clare, Ireland
Joined: December 30, 2008
KitMaker: 952 posts
Armorama: 834 posts
Posted: Wednesday, April 21, 2010 - 08:41 PM UTC
Now I had to apply some black base coat, which I need for my following work here. It has also shown some spots, which need to be fixed for final painting (but that is still too far from here) I got ready all the readers, later I will print decals for their dials. Now they need more work and painting. Now there is about 25 % parts in the cab, so 75 % to go.


Cheers
Libor
www.mymodelplace.eu
www.LZmodels.com
Clare, Ireland
Joined: December 30, 2008
KitMaker: 952 posts
Armorama: 834 posts
Posted: Friday, April 23, 2010 - 12:46 PM UTC
Wood used for the floor, after weathering later that should look very good.

Drawings designed to print the decals for dials, which I have printed already. They are 3-5mm in diameter, so not much will be eye-readable. But still... Then I will use my round dies to get perfect circles in diameter required. I will stick them on their spots, and thick clear varnish will be used to make "glass" on the readers.

Another valve added on the left wall and then I started with high pressure oil pump Bosh assembly. 0,3mm plastic rod used for pipes. They will lead together to the front wall, and outside the cab they will separate to their working spots.


Cheers
Libor
www.mymodelplace.eu
www.LZmodels.com
Clare, Ireland
Joined: December 30, 2008
KitMaker: 952 posts
Armorama: 834 posts
Posted: Saturday, April 24, 2010 - 04:26 AM UTC
The oil pump is mounted on the firewall, my next step are other armatures in left front corner of the cab, once I am finished with the pipes. To get everything right I will use excellent German books "Die Dampflokomotive-Technik und Funktion" for references.


Cheers
Libor
www.mymodelplace.eu
www.LZmodels.com
Clare, Ireland
Joined: December 30, 2008
KitMaker: 952 posts
Armorama: 834 posts
Posted: Saturday, April 24, 2010 - 12:33 PM UTC
Oval window frames added, and boiler feeding pump on its place. A couple of smaller parts around it and lots of pipes nearby, that is my next task.


Cheers
Libor
www.mymodelplace.eu
www.LZmodels.com


