


Hosted by Darren Baker
Sunday Service Canceled!
ahandykindaguy

Joined: August 20, 2008
KitMaker: 1,295 posts
Armorama: 1,191 posts

Posted: Thursday, February 20, 2014 - 12:47 PM UTC
I almost forgot. I managed to watch some Olympics too today. Go Canada GO!!! Gold in Women's Curling, and sorry all my American friends, Gold in a wicked Overtime victory for the Women's Hockey Team!!! Woop woop!!
ahandykindaguy
Joined: August 20, 2008
KitMaker: 1,295 posts
Armorama: 1,191 posts
Posted: Thursday, February 20, 2014 - 01:03 PM UTC
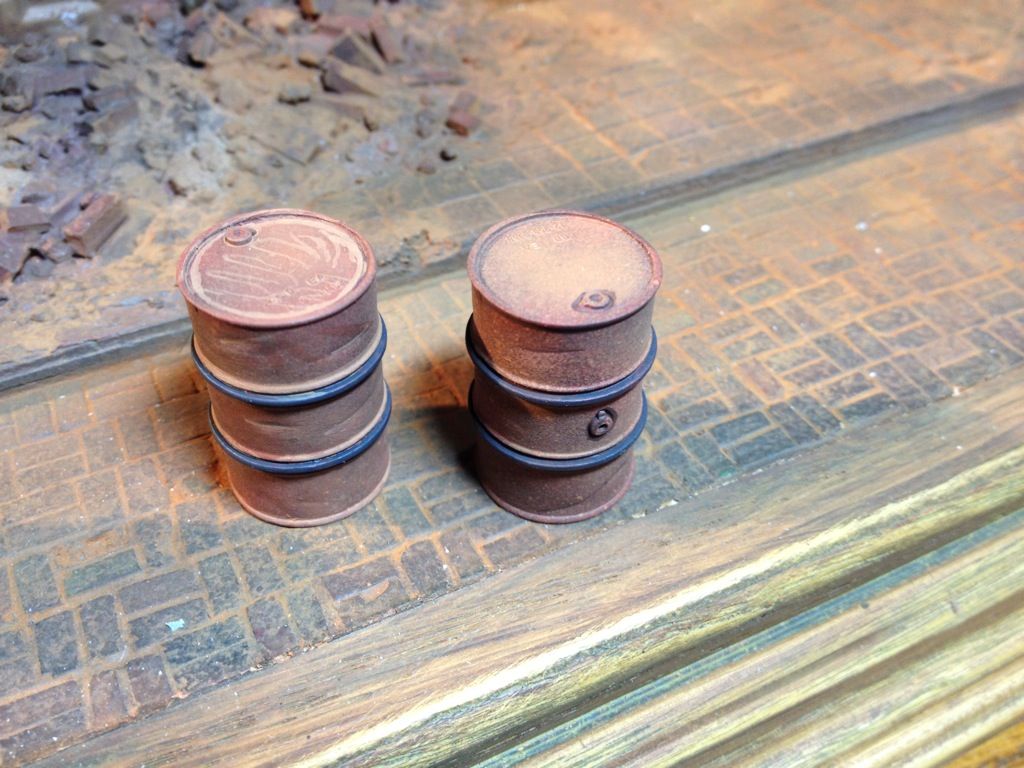
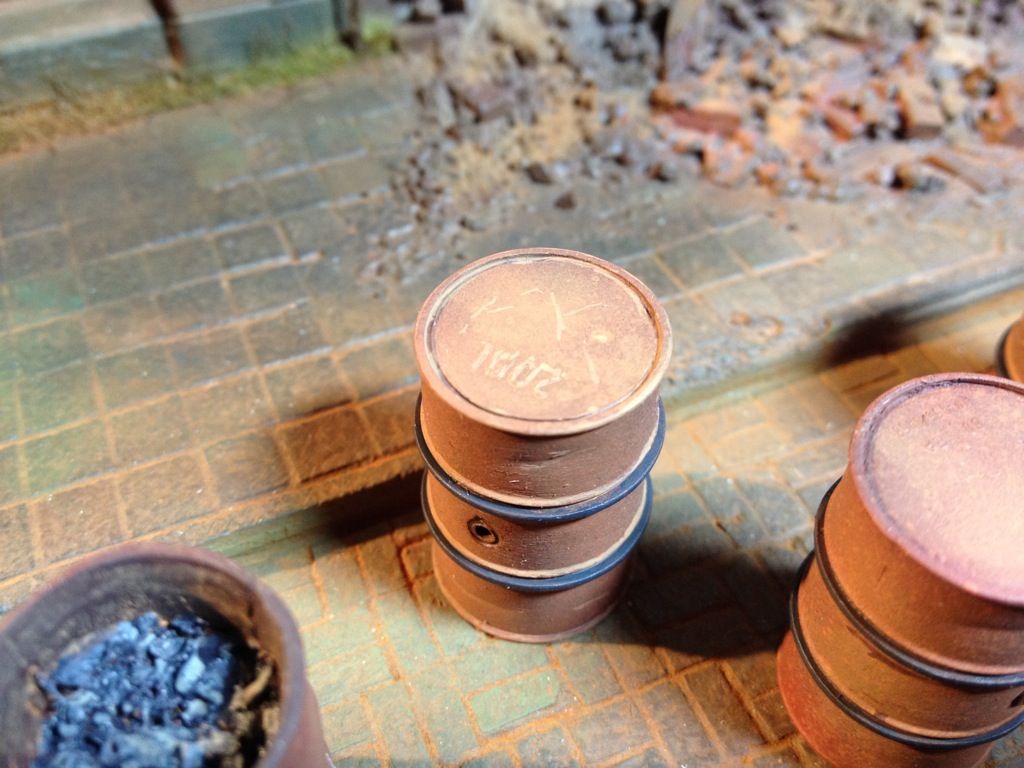
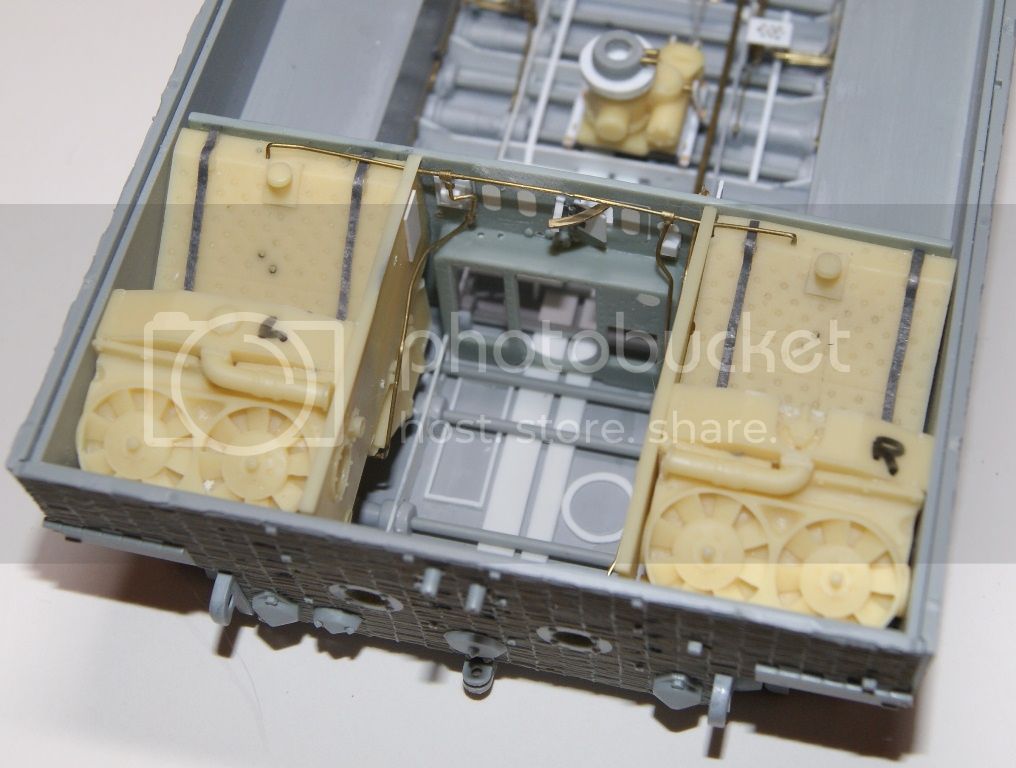
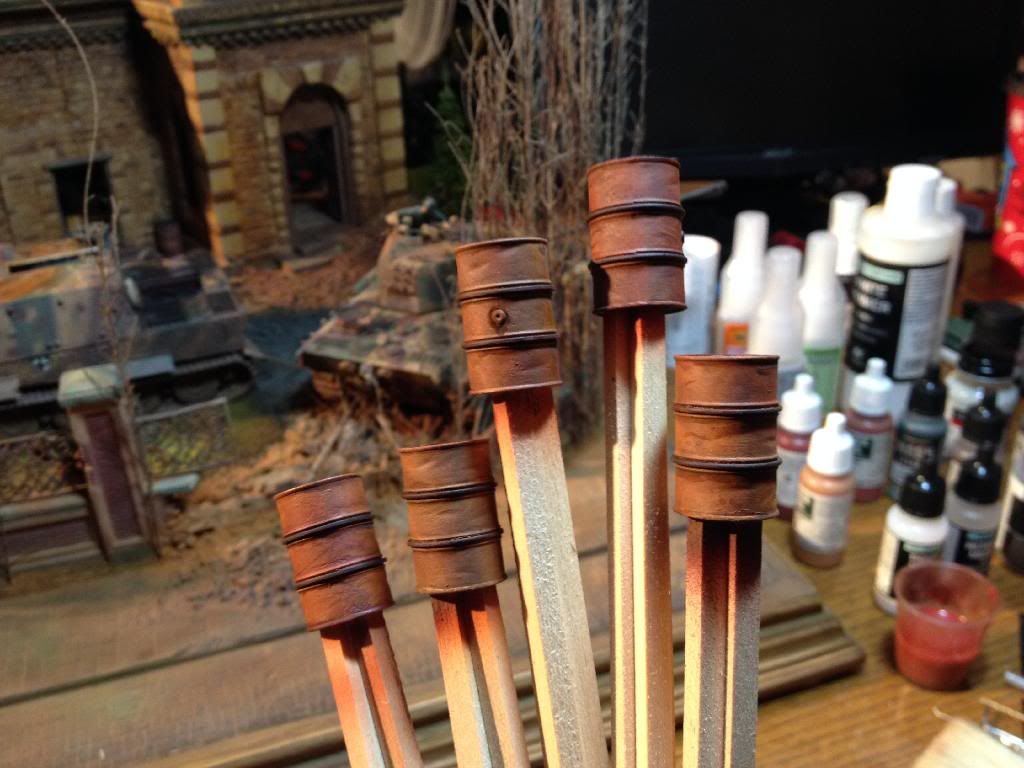
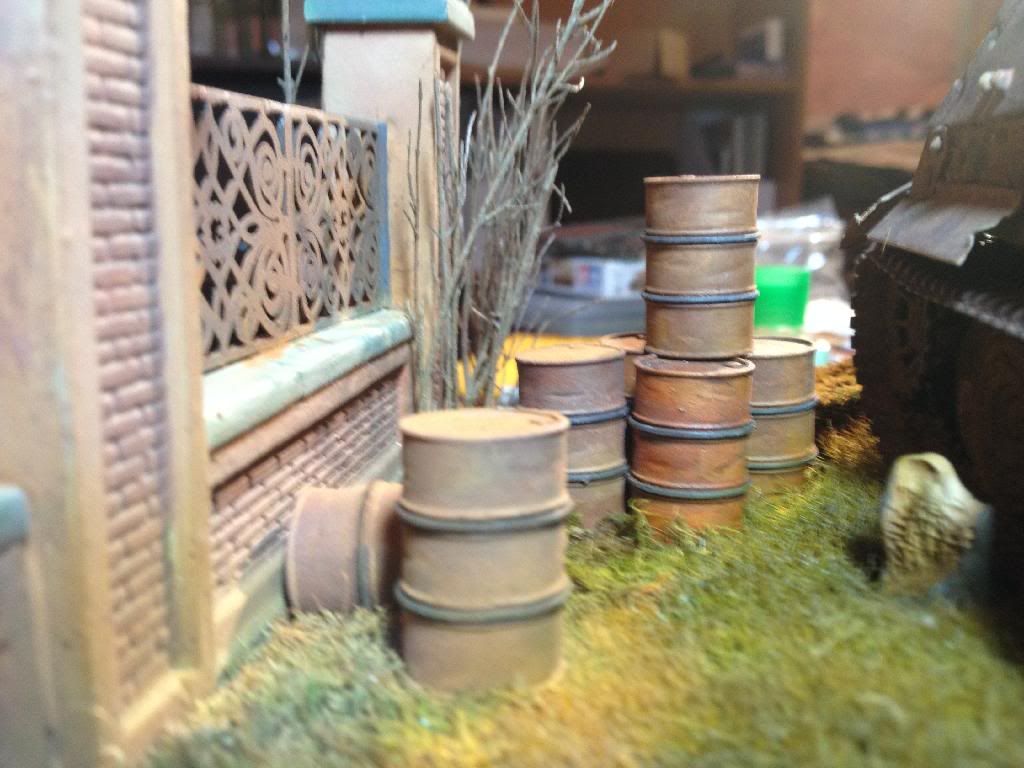
Another mini project I completed between screaming at the TV during the games, while my heart was still beating that is were these Barrels...
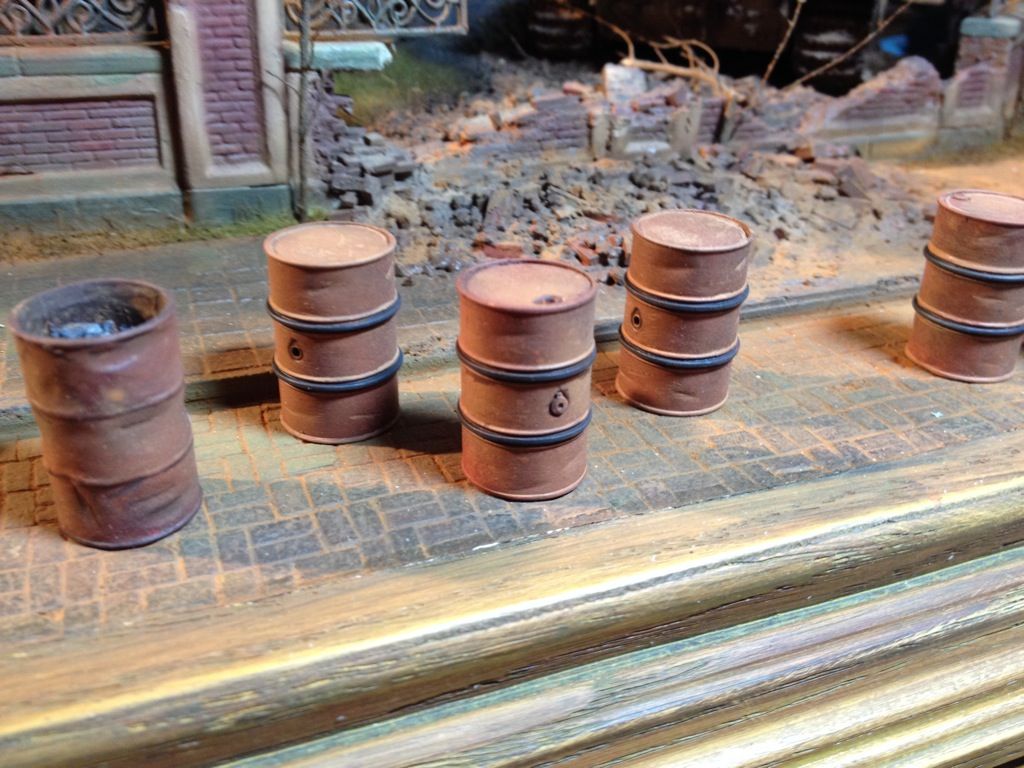
I had them partially assembled a couple years ago, unpainted and stored for the day that would come.
Last night i positioned them roughly where they will reside on the dio, and glued tops and or bottoms on them. i let them harden up overnight. 2 of them i whittled out the inside and removed the big ugly post where the two sides meet so i could use them as opened barrels.
this morning after the curling I primed them with Vallejo's Red Primer using my airbrush.

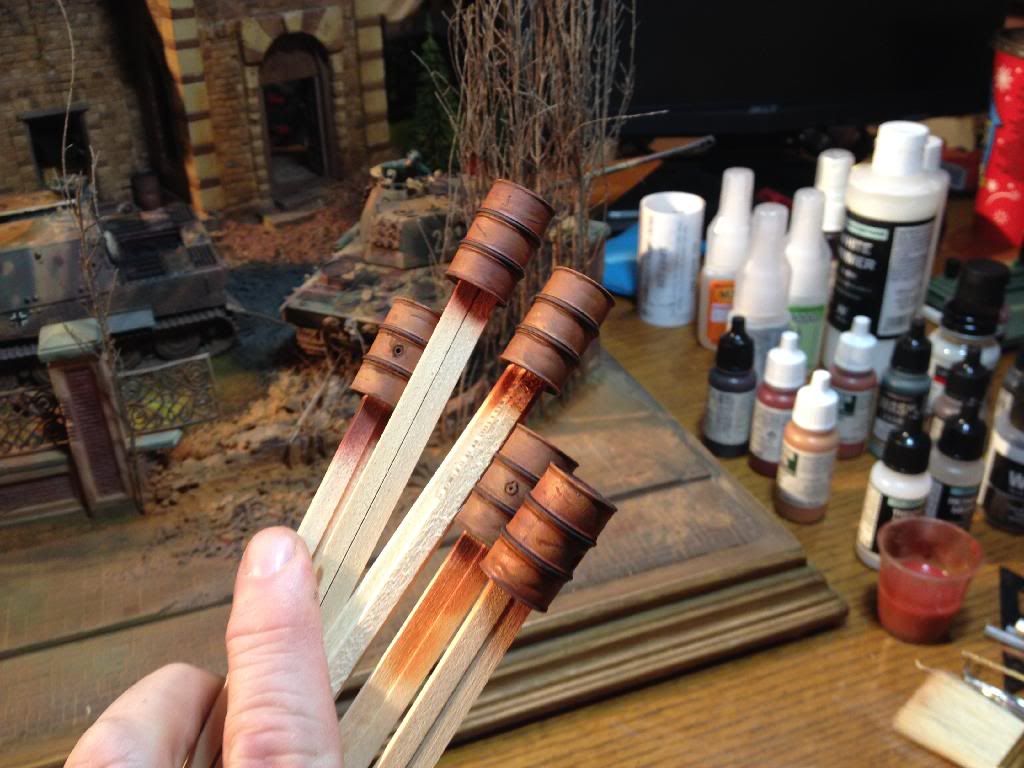
then I noticed a nearly empty rattle can of red primer, and decided to experiment with a rusty finish. So with can in one hand and barrels in the other I spritzed the remainder of the rattle can haphazardly over the barrels as I turned them around in my hand.
Messy but effective.
Then with my airbrush I used some dark rust, followed by light rust, and finally yellowed rust.
I had another mini meltdown when the paint seemed to dry up in the chamber, and sputter and spit all over my barrels. One color after another, after another. I tried everything I could. I cleaned my airbrush completely several times, fully disassembling and reassembling it each time.
To no avail.

I had them partially assembled a couple years ago, unpainted and stored for the day that would come.
Last night i positioned them roughly where they will reside on the dio, and glued tops and or bottoms on them. i let them harden up overnight. 2 of them i whittled out the inside and removed the big ugly post where the two sides meet so i could use them as opened barrels.
this morning after the curling I primed them with Vallejo's Red Primer using my airbrush.

then I noticed a nearly empty rattle can of red primer, and decided to experiment with a rusty finish. So with can in one hand and barrels in the other I spritzed the remainder of the rattle can haphazardly over the barrels as I turned them around in my hand.
Messy but effective.

Then with my airbrush I used some dark rust, followed by light rust, and finally yellowed rust.


I had another mini meltdown when the paint seemed to dry up in the chamber, and sputter and spit all over my barrels. One color after another, after another. I tried everything I could. I cleaned my airbrush completely several times, fully disassembling and reassembling it each time.
To no avail.
ahandykindaguy
Joined: August 20, 2008
KitMaker: 1,295 posts
Armorama: 1,191 posts
Posted: Thursday, February 20, 2014 - 01:21 PM UTC
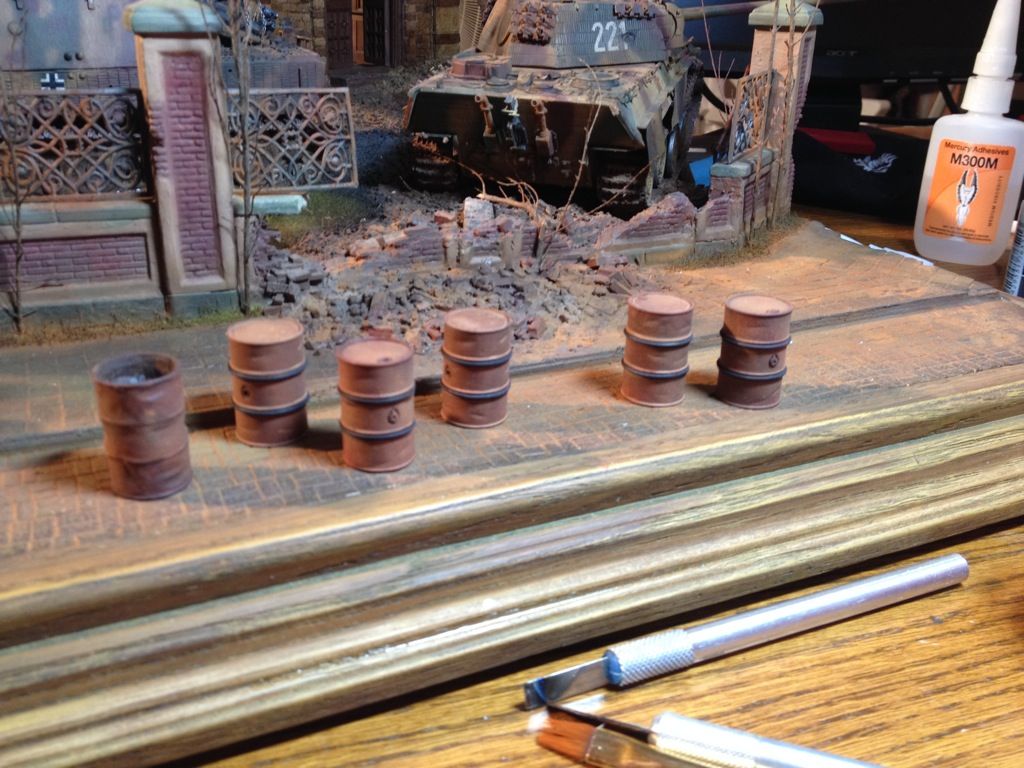
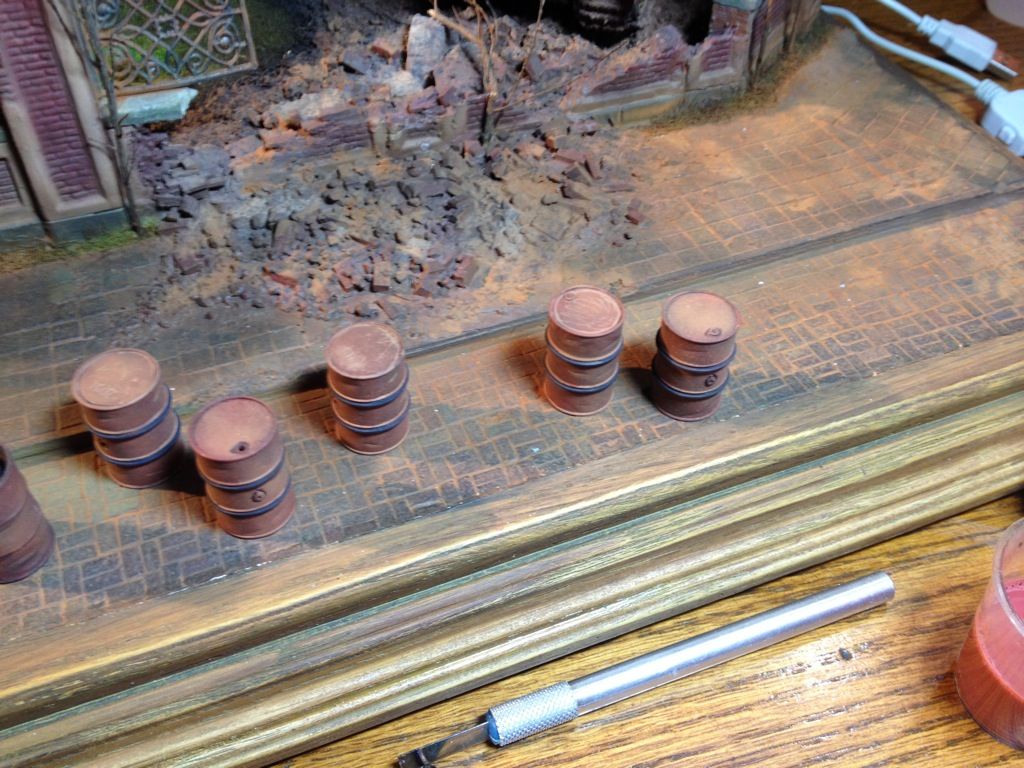
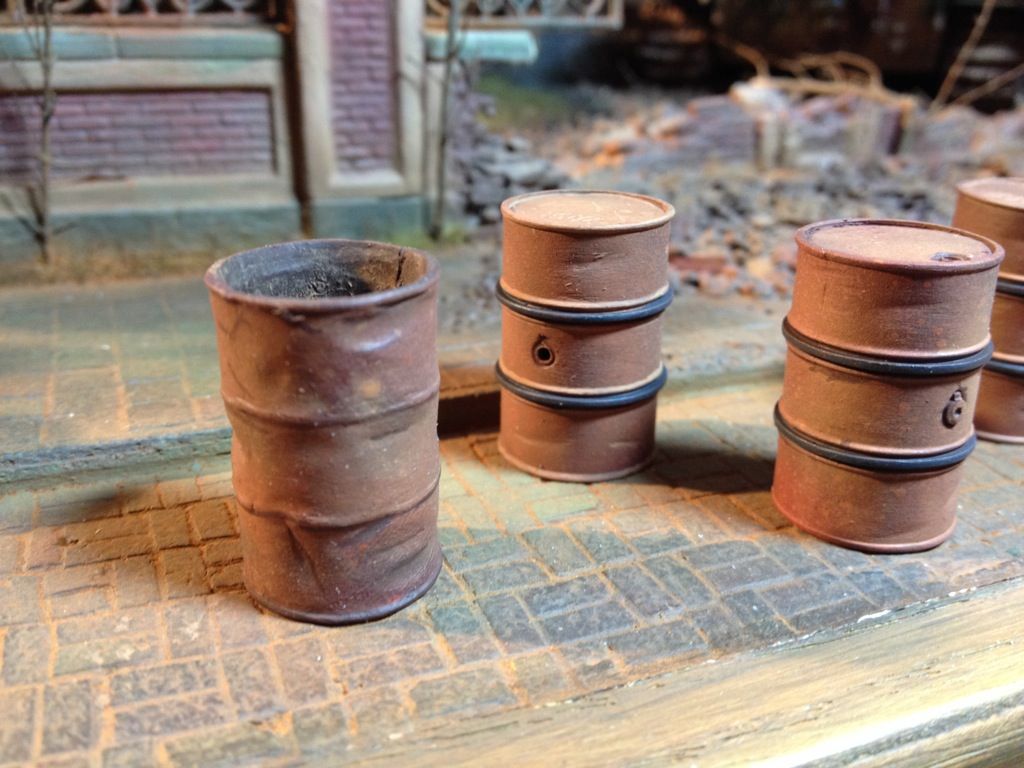
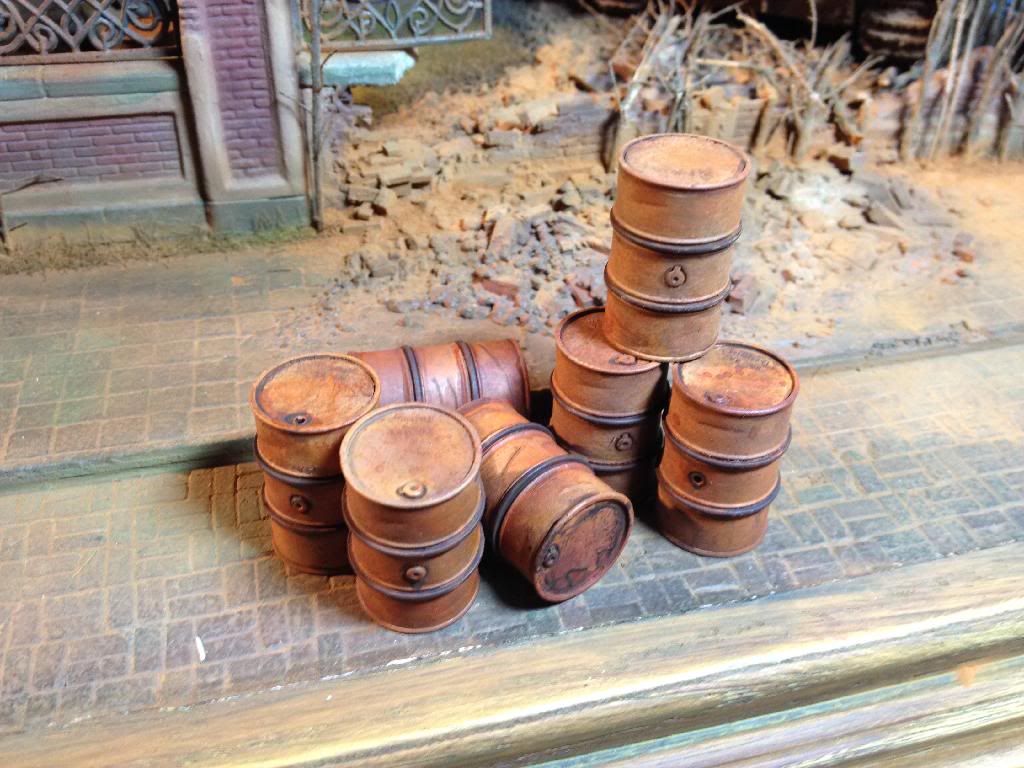
Finally even though thoroughly frustrated at why my airbrush would just up and quit working, then sputter and spit like a madman, i managed to get a relatively decent portrayal of a bunch of rusty barrels.
i used a fine brush and painted the protective rubber rings around the barrels, using Vallejo's Old Rubber color. Go figure hey.
I also highlighted the steel portions of the rings with either light rust or dark rust depending on my whim, and added some fine scratch marks using the two colors to give some shadow definition i guess..
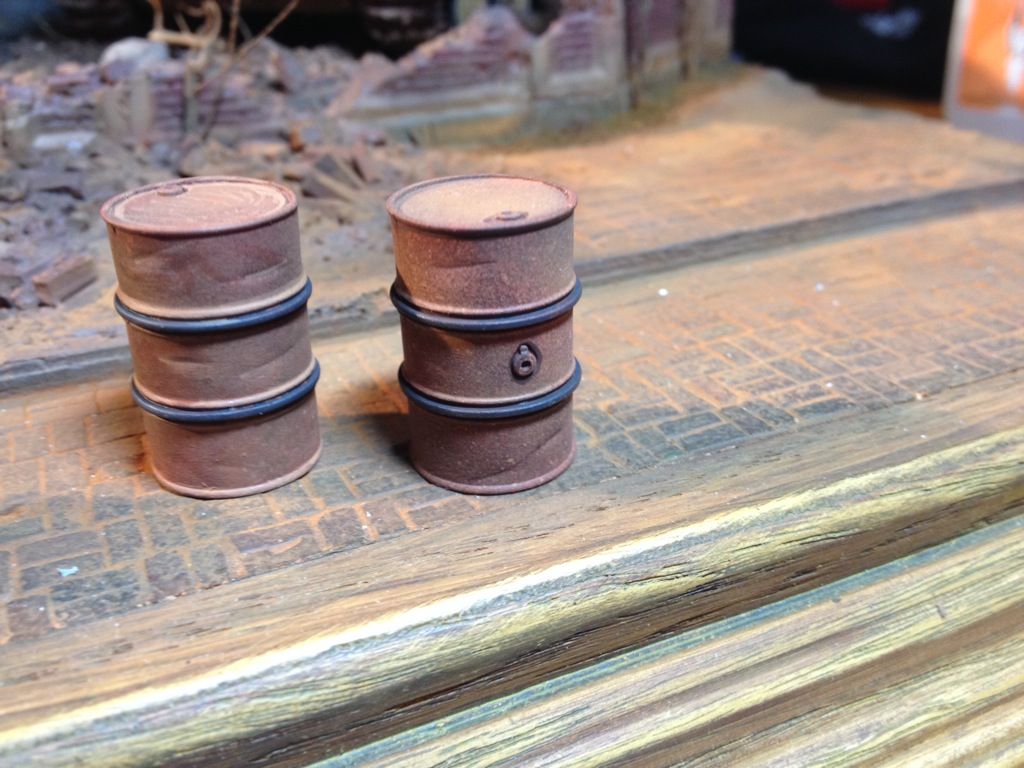
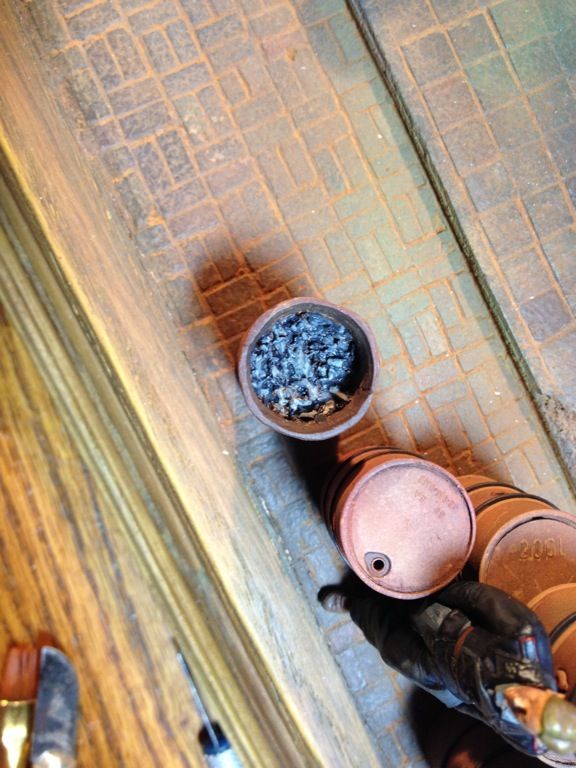
The fire barrel I glued in a bit of foam to add depth and then glued in some actual wood chips which i painted to resemble ashes from previous fires burnt in the barrel. Perhaps to get rid of secret files, or probably to keep warm on a cold fall evening. Either way here is the result...
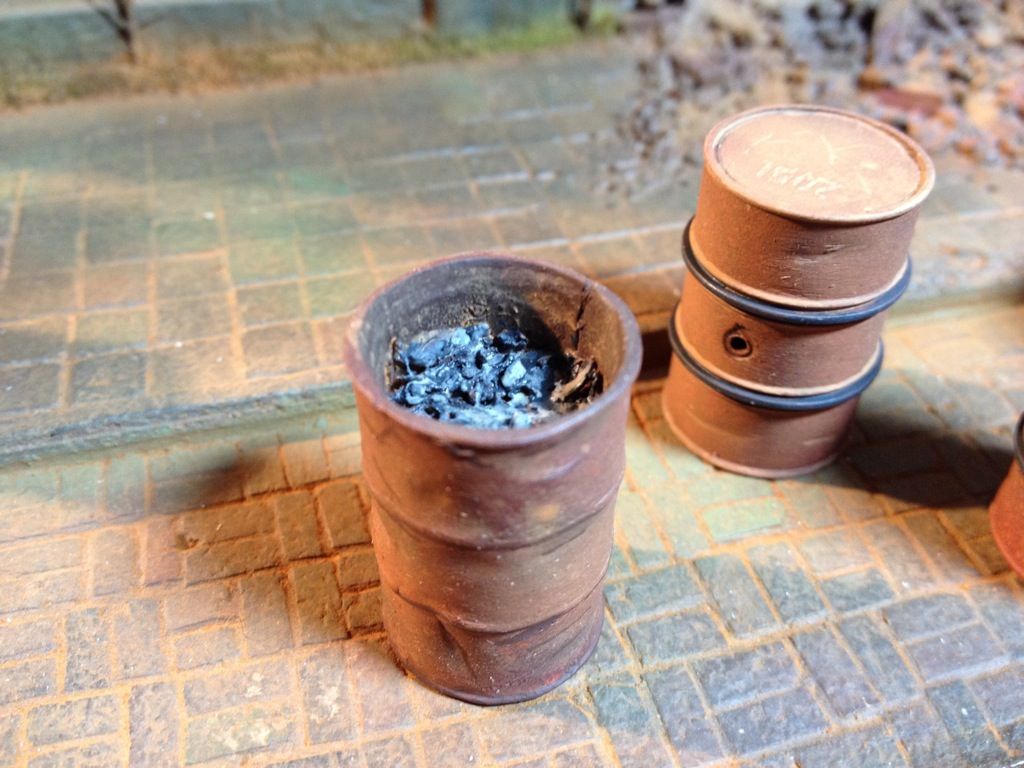
All that remains is to add some rusty colored pigments after the barrels are permanently glued to the base of the diorama. Not a bad days labor if i do say so myself...
If anyone here has a thought or two on why my airbrush not only sputters and spits like the proverbial Scotsman, but also sprays upwards not outwards let me know. I'm stumped. Tried just about everything. Yep... I will touch base again after supper and a recap of all our Gold Medal performances......
i used a fine brush and painted the protective rubber rings around the barrels, using Vallejo's Old Rubber color. Go figure hey.

I also highlighted the steel portions of the rings with either light rust or dark rust depending on my whim, and added some fine scratch marks using the two colors to give some shadow definition i guess..


The fire barrel I glued in a bit of foam to add depth and then glued in some actual wood chips which i painted to resemble ashes from previous fires burnt in the barrel. Perhaps to get rid of secret files, or probably to keep warm on a cold fall evening. Either way here is the result...

All that remains is to add some rusty colored pigments after the barrels are permanently glued to the base of the diorama. Not a bad days labor if i do say so myself...

If anyone here has a thought or two on why my airbrush not only sputters and spits like the proverbial Scotsman, but also sprays upwards not outwards let me know. I'm stumped. Tried just about everything. Yep... I will touch base again after supper and a recap of all our Gold Medal performances......

jrutman

Joined: April 10, 2011
KitMaker: 7,941 posts
Armorama: 7,934 posts
Posted: Friday, February 21, 2014 - 04:37 AM UTC
It may be that you need a water filter thing for the air hose to get rid of excess moisture in the air? Or maybe,the needle is bent? My Paasche needle used to bend if you just looked at it wrong.
J
J
ahandykindaguy
Joined: August 20, 2008
KitMaker: 1,295 posts
Armorama: 1,191 posts
Posted: Friday, February 21, 2014 - 07:09 AM UTC
thanks Jerry for the reply.
I actually have 2 moisture traps, one on the hose just before the airbrush and one built into my compressor. I have checked the needle also and cant see or feel a bend or a burr at the tip so I'm a bit perplexed.
I may go buy another needle just in case as my eyes aren't quite what they used to be, even with magnification.
Any other suggestions?
Dave
jrutman
Joined: April 10, 2011
KitMaker: 7,941 posts
Armorama: 7,934 posts
Posted: Friday, February 21, 2014 - 09:34 AM UTC
It's hard to tell if a needle is bent just by feel. Try a new one and see what happens. Other than that,no idea. I am a novice when it comes to painting anything,specially with an airbrush.
J
J
ahandykindaguy
Joined: August 20, 2008
KitMaker: 1,295 posts
Armorama: 1,191 posts
Posted: Friday, February 21, 2014 - 10:21 AM UTC
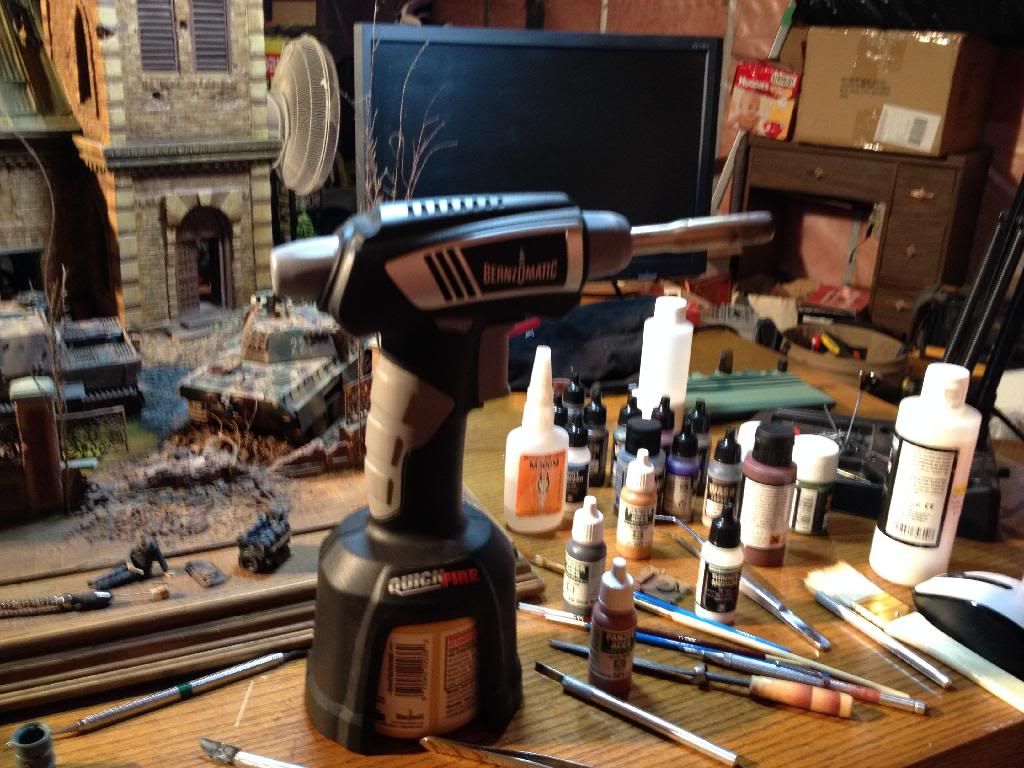
Thanks Jerry. I took the bold step of faith and gently drew the needle across some fine grain sandpaper. Buffed it with a soft cloth and put it back in the AB. crossed my fingers and said a little Prayer to be safe, and loaded up some red oxide primer for a few more barrels. Viola! a working and properly functioning Iwata. Yay!
Almost the same feeling as watching our men outplay those pesky Americans today in Sochi. Complete and total sigh of relief...
sorry.
Dave
Almost the same feeling as watching our men outplay those pesky Americans today in Sochi. Complete and total sigh of relief...
sorry.
Dave
ahandykindaguy
Joined: August 20, 2008
KitMaker: 1,295 posts
Armorama: 1,191 posts
Posted: Saturday, February 22, 2014 - 04:04 AM UTC
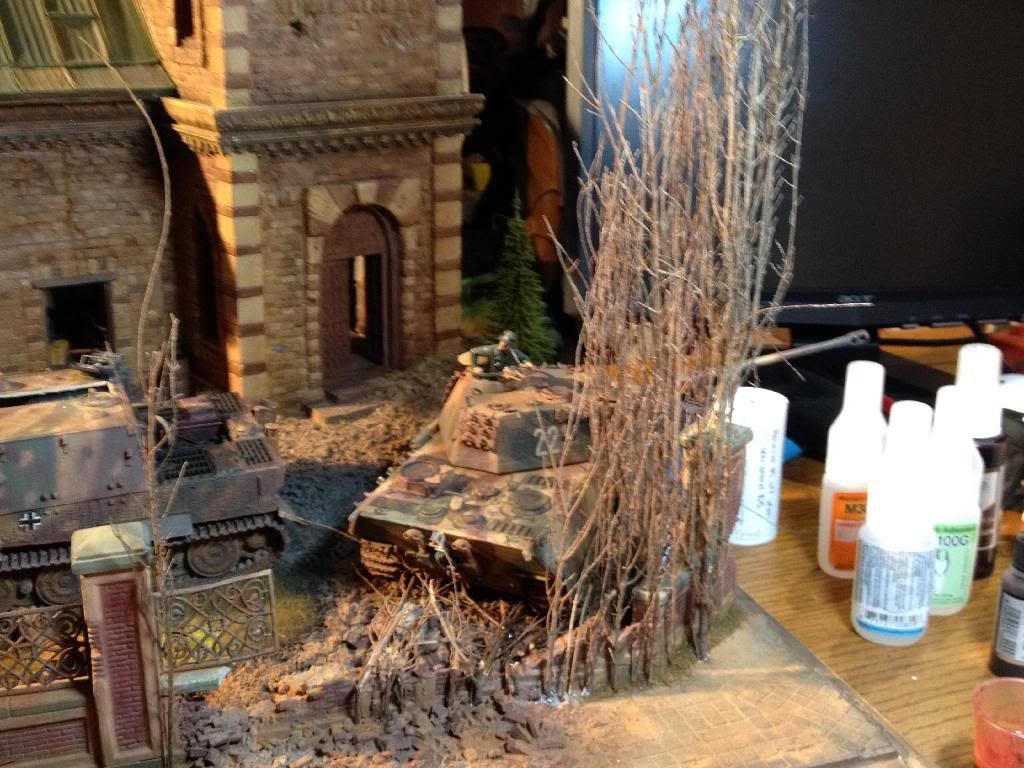
ok another quick update folks...

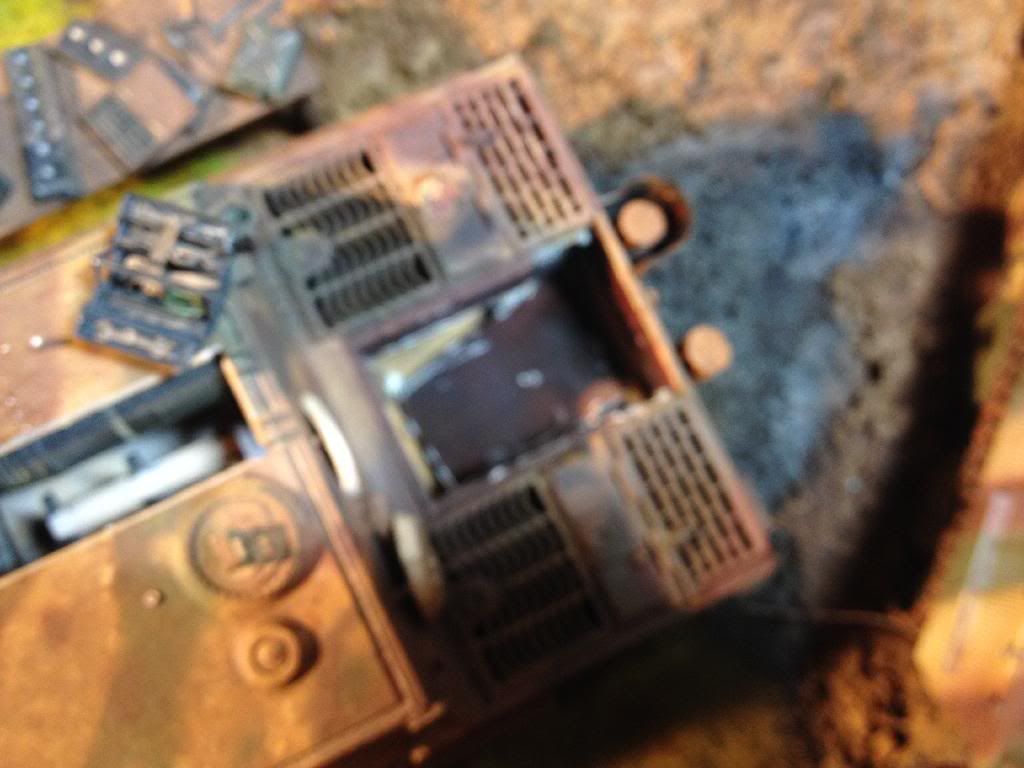
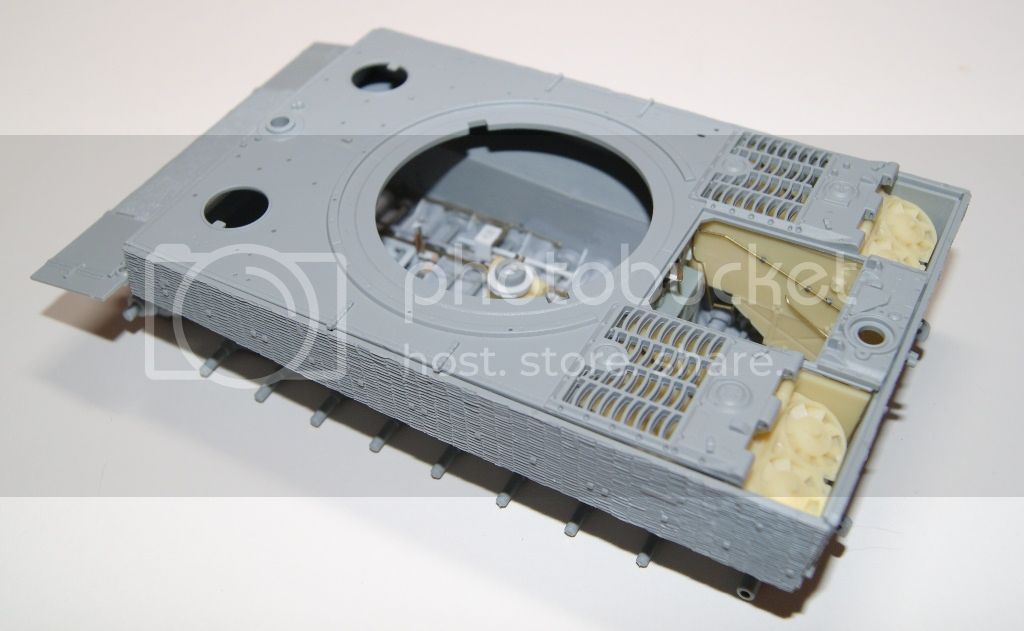
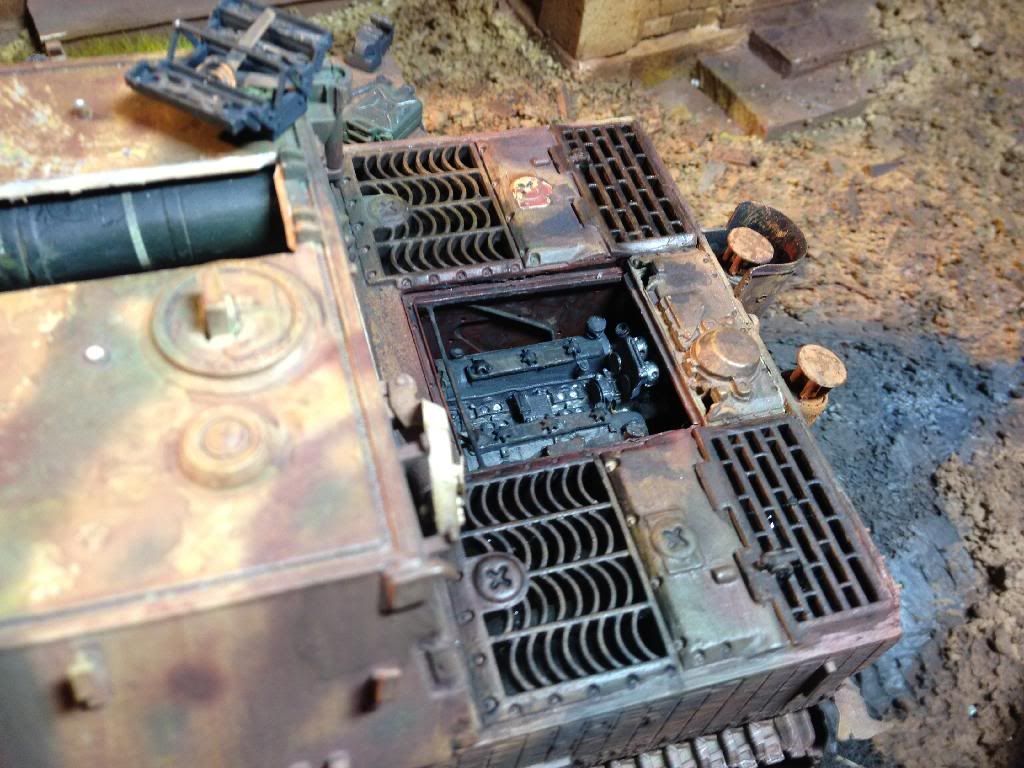
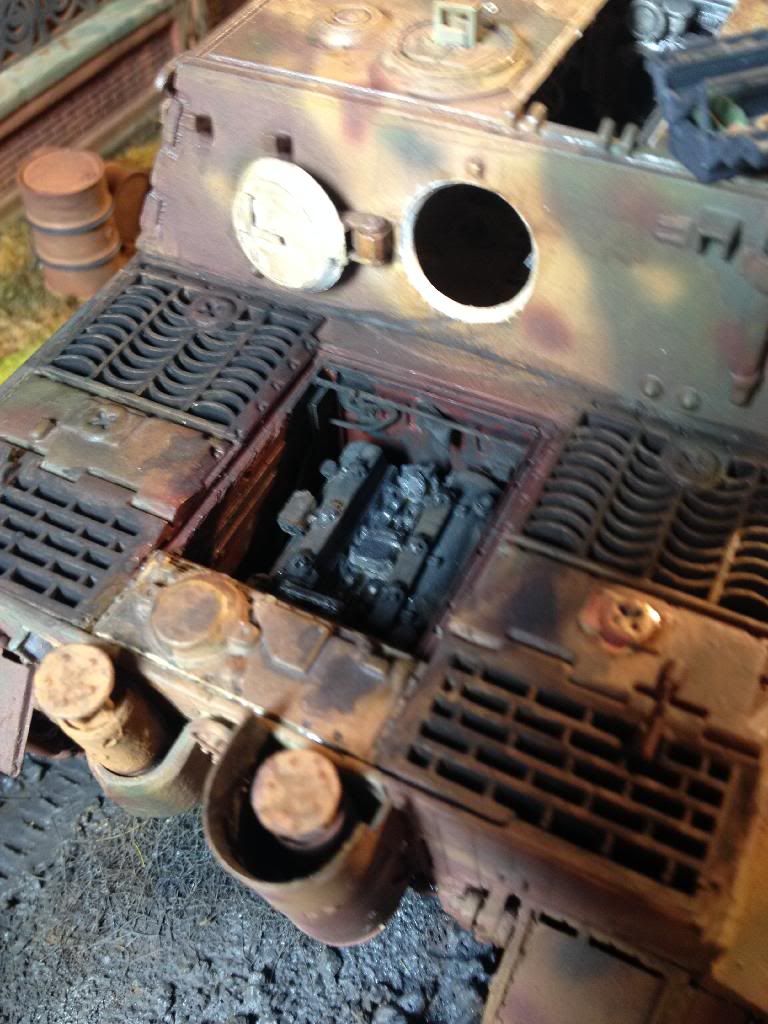
That is what the sturmtiger looked like a couple days ago. I have looked at the hoist mechanism since i built it and thought it was weak, not up to the level of some of the other scratched items.
I was going to consider changing it, but chose to delay that decision for another time.
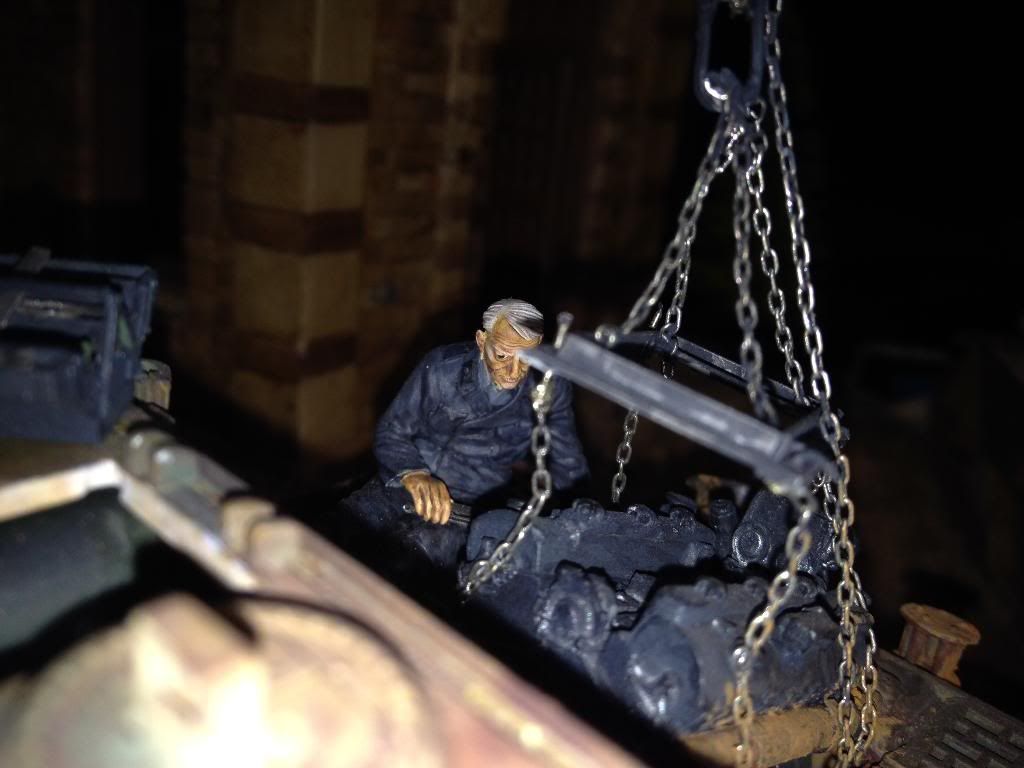
but then I dropped a barrel on the crane assembly as I was trying to glue it down and knocked the engine off the crane, and the mechanic off the back of the tank...
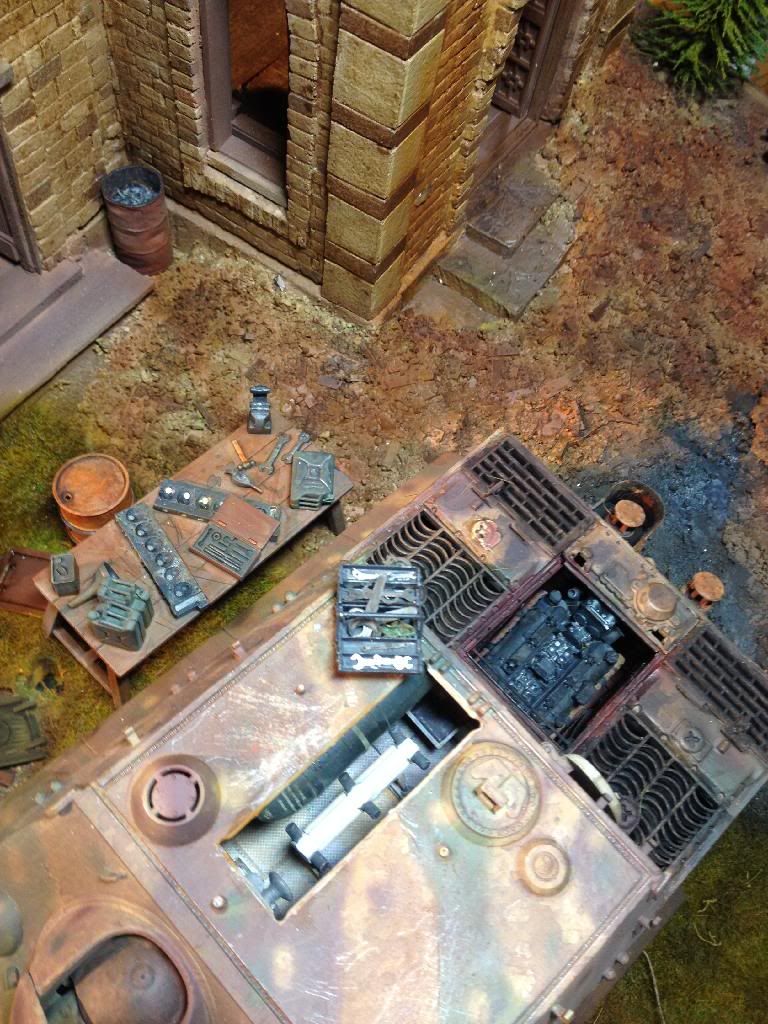
So it seemed like a good idea to revisit the engine compartment and make a change for the better.

That is what the sturmtiger looked like a couple days ago. I have looked at the hoist mechanism since i built it and thought it was weak, not up to the level of some of the other scratched items.
I was going to consider changing it, but chose to delay that decision for another time.

but then I dropped a barrel on the crane assembly as I was trying to glue it down and knocked the engine off the crane, and the mechanic off the back of the tank...


So it seemed like a good idea to revisit the engine compartment and make a change for the better.
ahandykindaguy
Joined: August 20, 2008
KitMaker: 1,295 posts
Armorama: 1,191 posts
Posted: Saturday, February 22, 2014 - 04:20 AM UTC
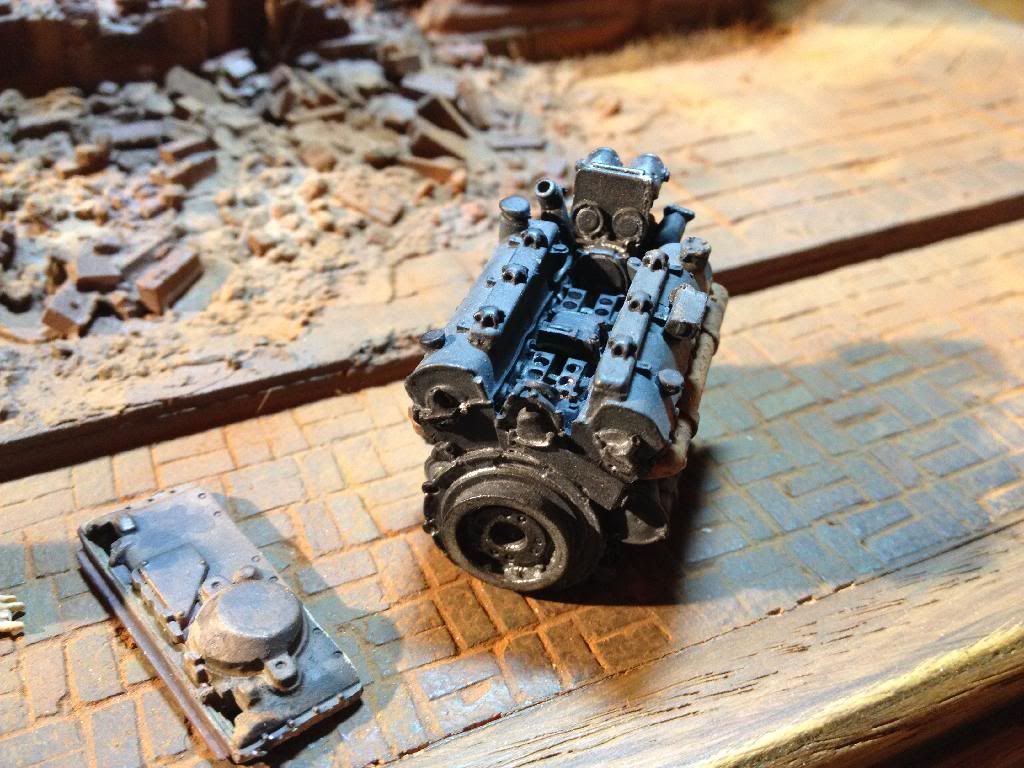
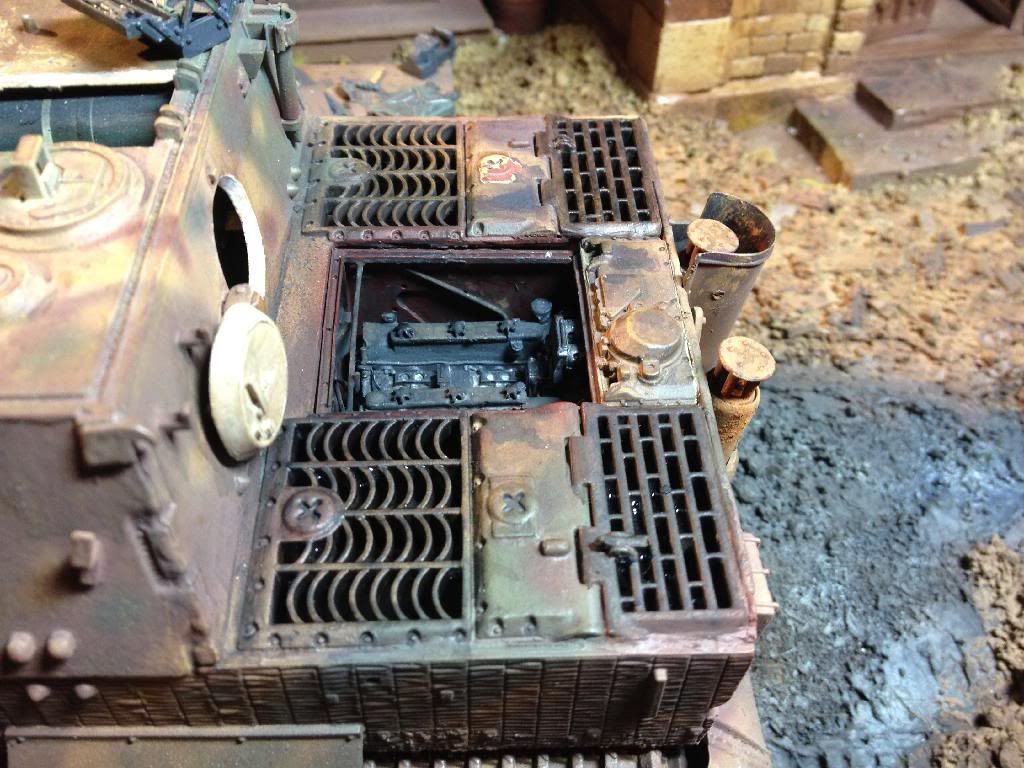
I decided quickly that I didn't want to try to build a new crane apparatus, and so the engine would have to go back in it's bay. when i tried to set it in I found it was too high and would have stuck out above the top of the bay. That wouldn't do.
but how do I lower the engine without taking the Sturmtiger off the base, something i did not want to do.
So out came the big gun!!!!
A little heat on a blade, and Bob's your Uncle...
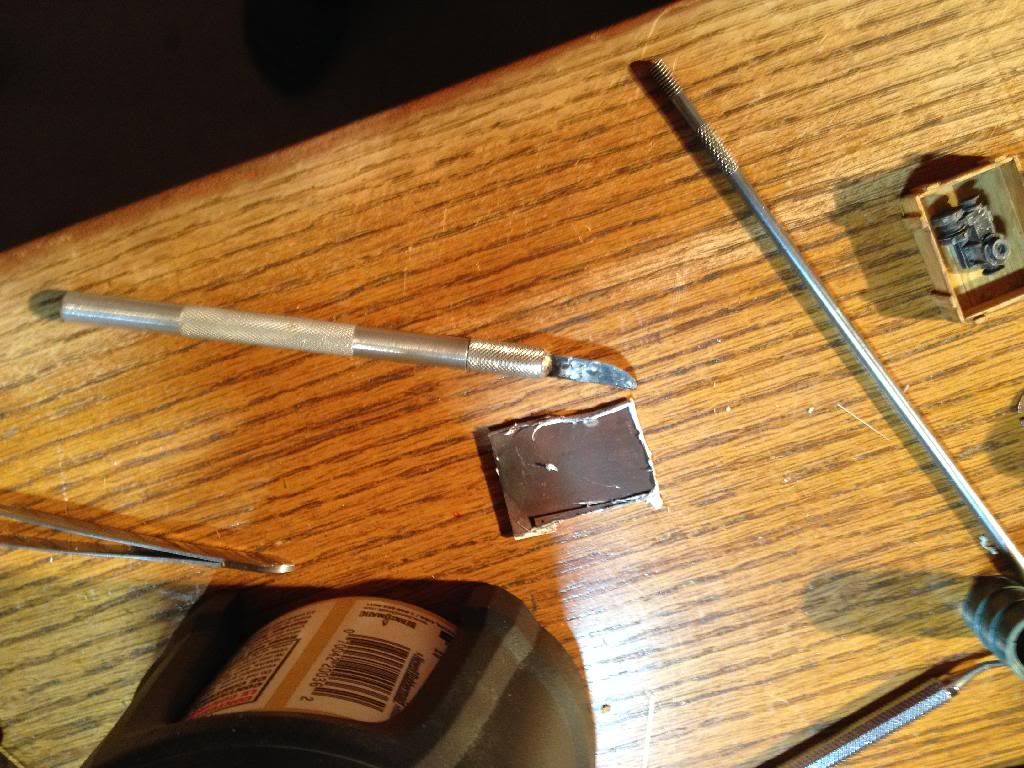
a new coat of rotbraun, and I now had a deeper hole to bury an engine into.
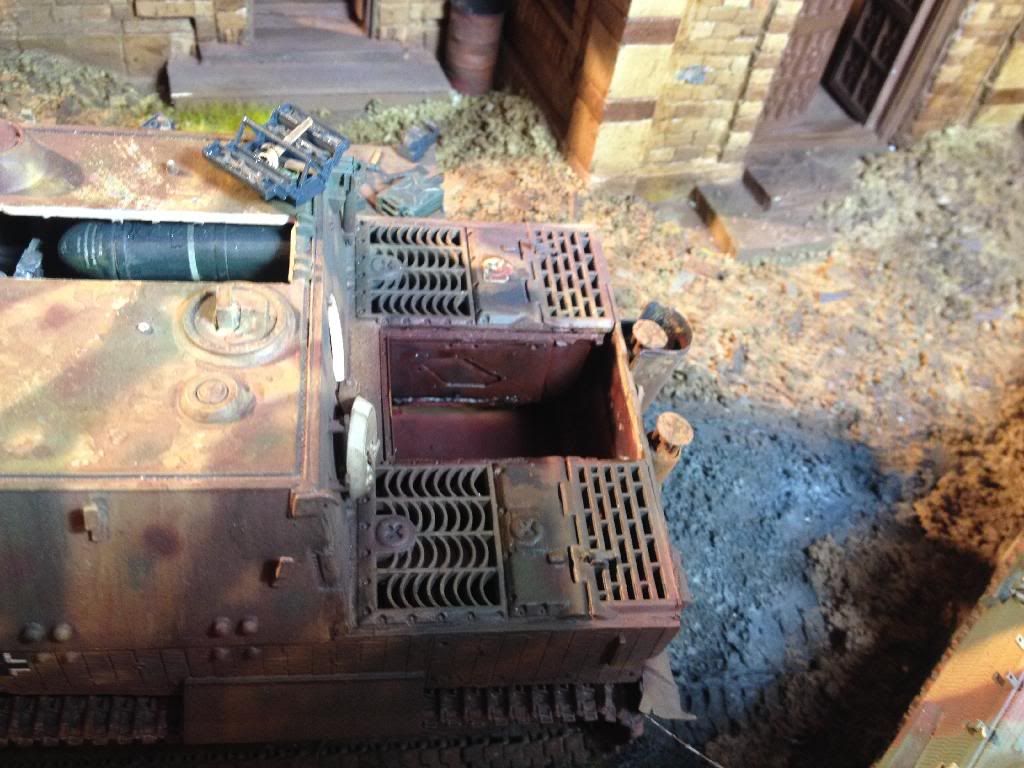
A bare compartment that would need some sprucing up, and a few little hints of what would normally be there when the top is off...
My thanks to Steven and his outstanding Tiger 1 build log for the images of the engine bay to give me an idea of the routing of the gas lines and other things...
but how do I lower the engine without taking the Sturmtiger off the base, something i did not want to do.
So out came the big gun!!!!

A little heat on a blade, and Bob's your Uncle...


a new coat of rotbraun, and I now had a deeper hole to bury an engine into.

A bare compartment that would need some sprucing up, and a few little hints of what would normally be there when the top is off...


My thanks to Steven and his outstanding Tiger 1 build log for the images of the engine bay to give me an idea of the routing of the gas lines and other things...


ahandykindaguy
Joined: August 20, 2008
KitMaker: 1,295 posts
Armorama: 1,191 posts
Posted: Saturday, February 22, 2014 - 04:51 AM UTC
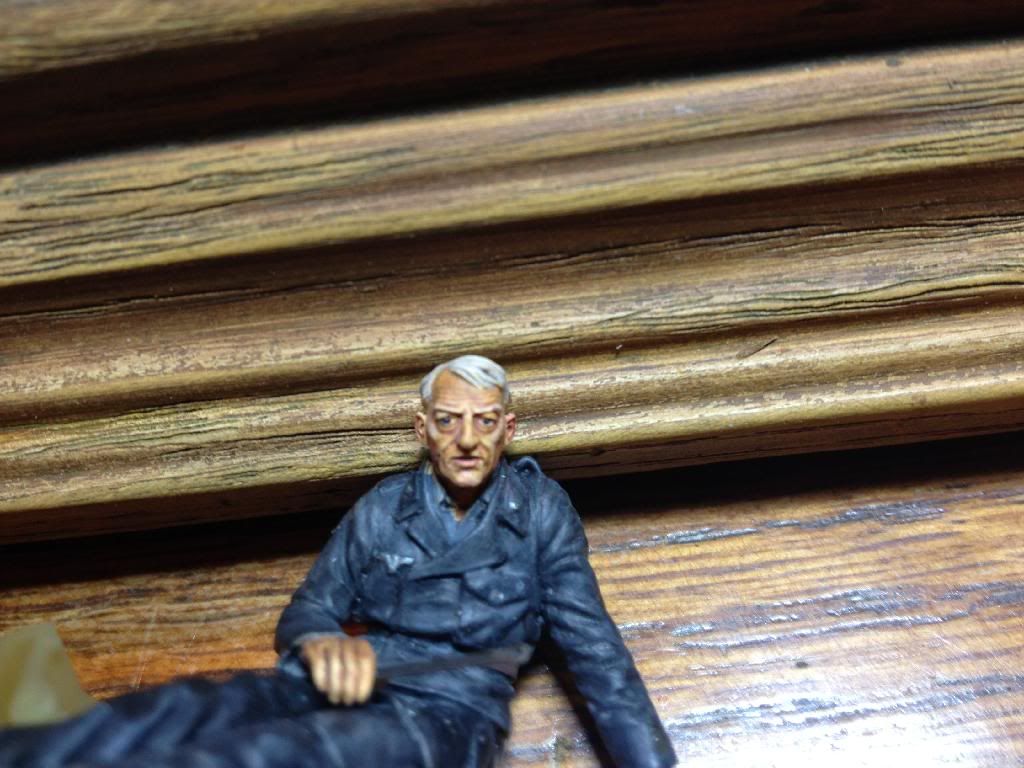
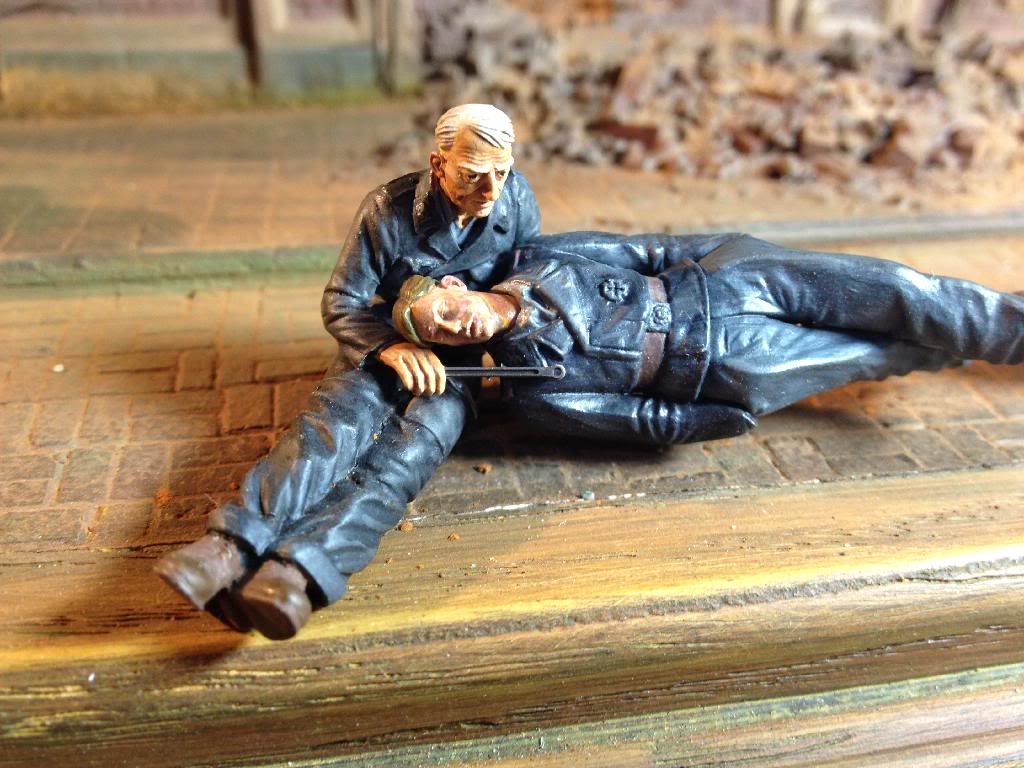
Speaking of the mechanic. When I dropped the barrel on him and the hoist, he got upset. Really upset. So upset he lost his head literally.
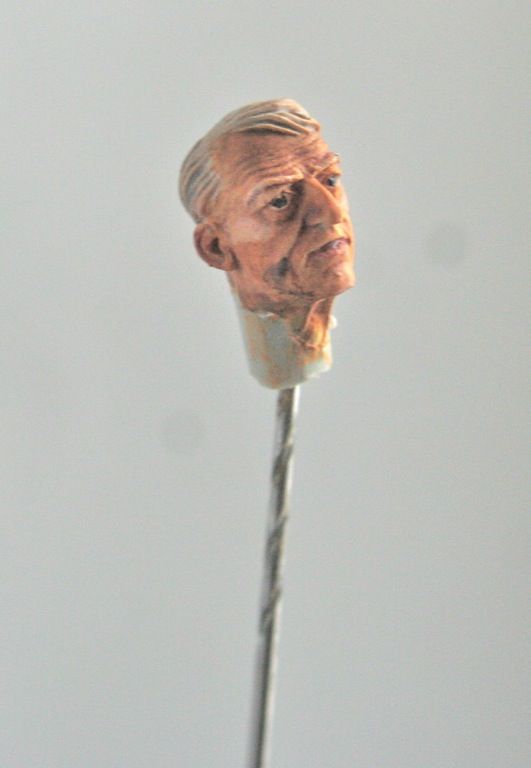
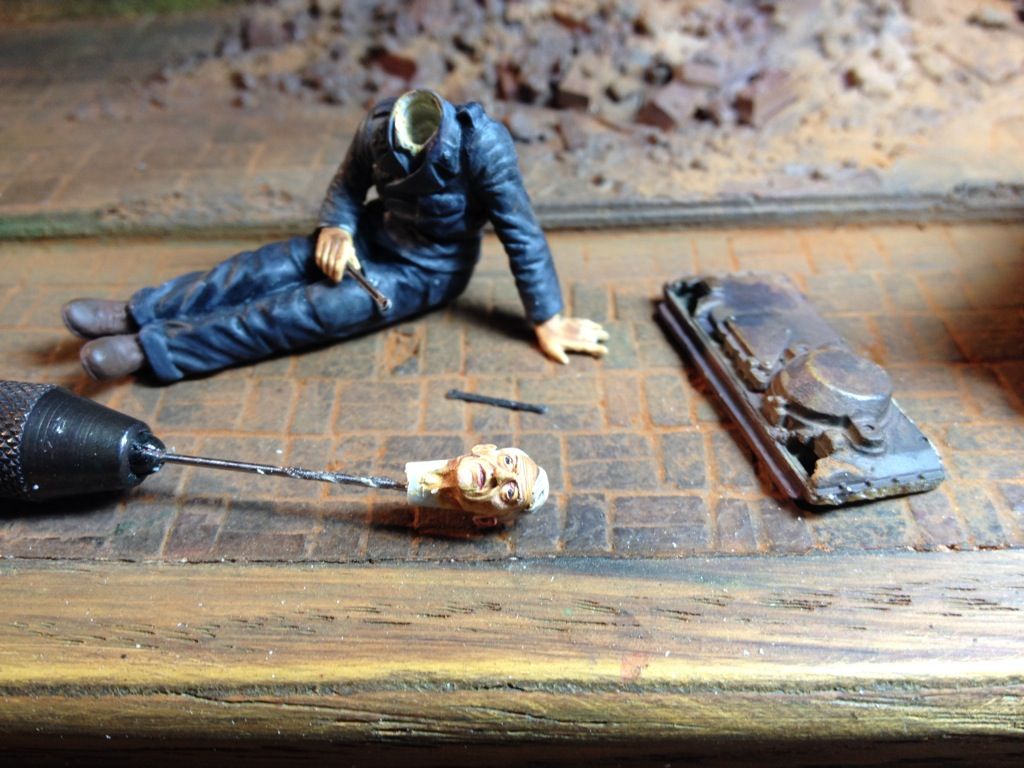
Always something to do, or redo.
I took some close ups of his head while he was in this state, which was kinda nice cause it was hard to get any good ones when everything was glued down solid.


Always something to do, or redo.
I took some close ups of his head while he was in this state, which was kinda nice cause it was hard to get any good ones when everything was glued down solid.
ahandykindaguy
Joined: August 20, 2008
KitMaker: 1,295 posts
Armorama: 1,191 posts
Posted: Saturday, February 22, 2014 - 05:07 AM UTC
Here are a few close ups to show the detail of the mechers head.
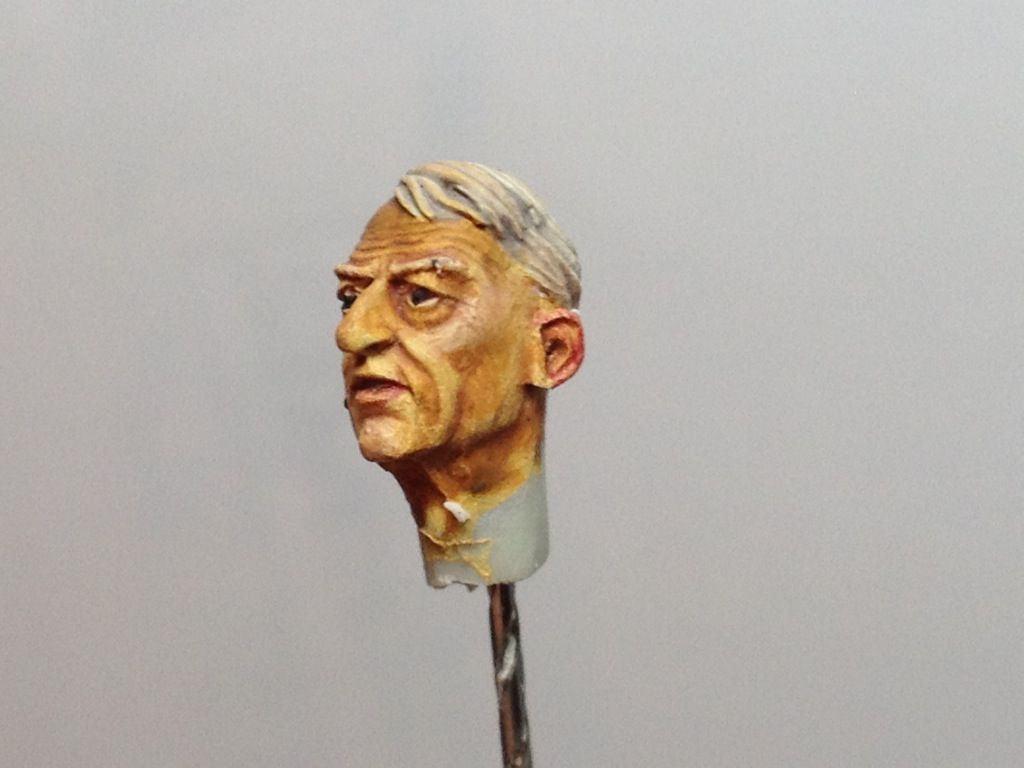

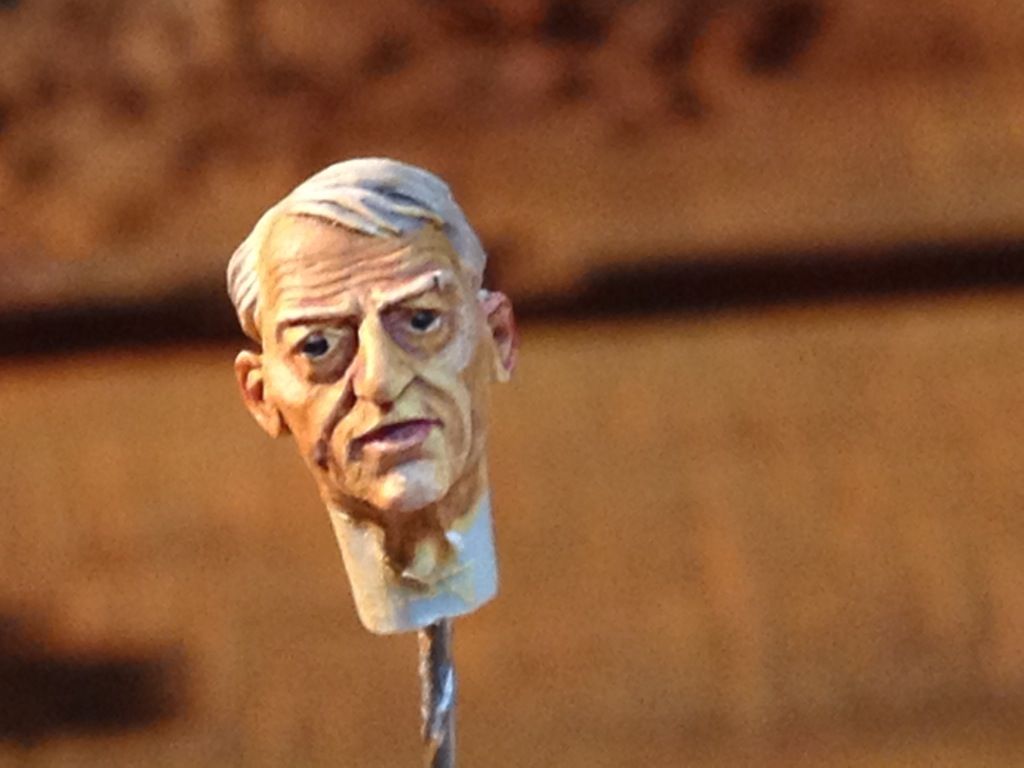
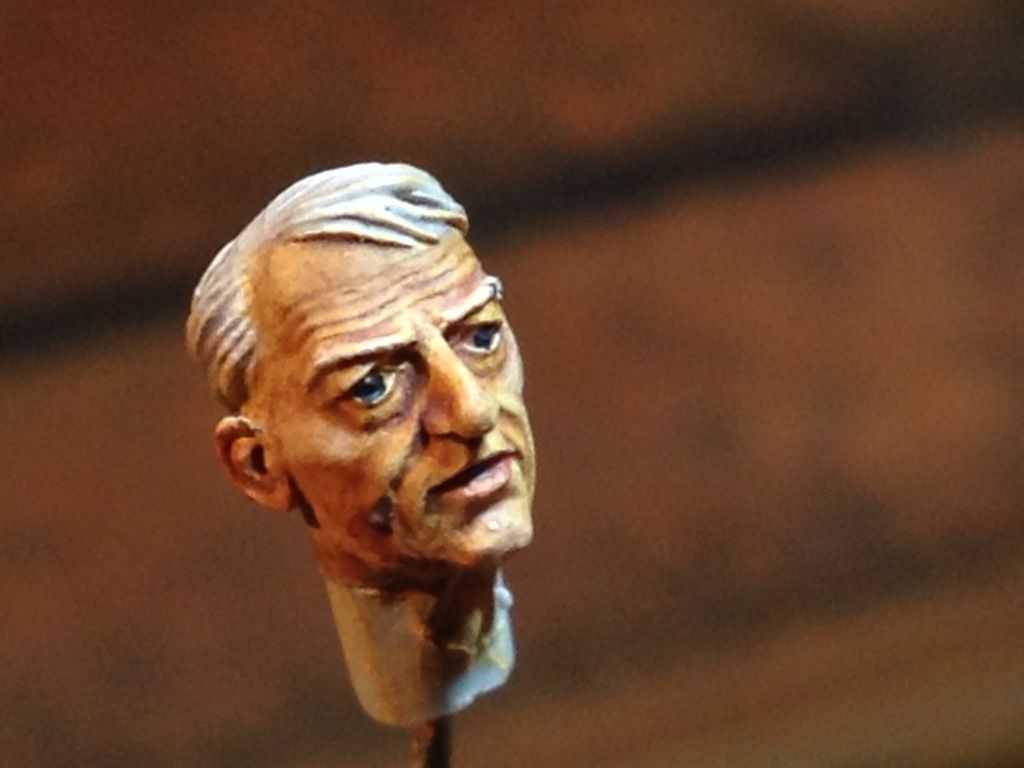
If I remember correctly I painted this guy, a hornet head of course with Vallejo acrylics alone. A light flesh base with some shading done with a couple different Vallejo Shades, flesh tone and raw umber I think. That hair is white with a dark grade shade.
I have to admit I am a very novice painter when it comes to using acrylics but think I am getting better as I try different things.
jrutman
Joined: April 10, 2011
KitMaker: 7,941 posts
Armorama: 7,934 posts
Posted: Saturday, February 22, 2014 - 05:12 AM UTC
Good lookin work there. Even after the crack about hockey!! Heheheh
J
J
ahandykindaguy
Joined: August 20, 2008
KitMaker: 1,295 posts
Armorama: 1,191 posts
Posted: Saturday, February 22, 2014 - 05:34 AM UTC
Quoted Text
Good lookin work there. Even after the crack about hockey!! Heheheh
J
Sorry Jerry I could have resisted but didn't. Your guys seem a bit deflated and flat today.
Thanks for the compliments though. I noticed you called yourself a novice painter the other day.... I wish I was half as good as you were. Figure painting wouldn't scare me like it does.
Watching Despicable Me with my girl again this morning for the umpteenth time. She has been at home recovering from pneumonia all week. So I don't know the final score. Did the come back or no?
So just kicking back on the couch and using my iPhone to do the updates. I love technology.
ahandykindaguy
Joined: August 20, 2008
KitMaker: 1,295 posts
Armorama: 1,191 posts
Posted: Saturday, February 22, 2014 - 06:05 PM UTC
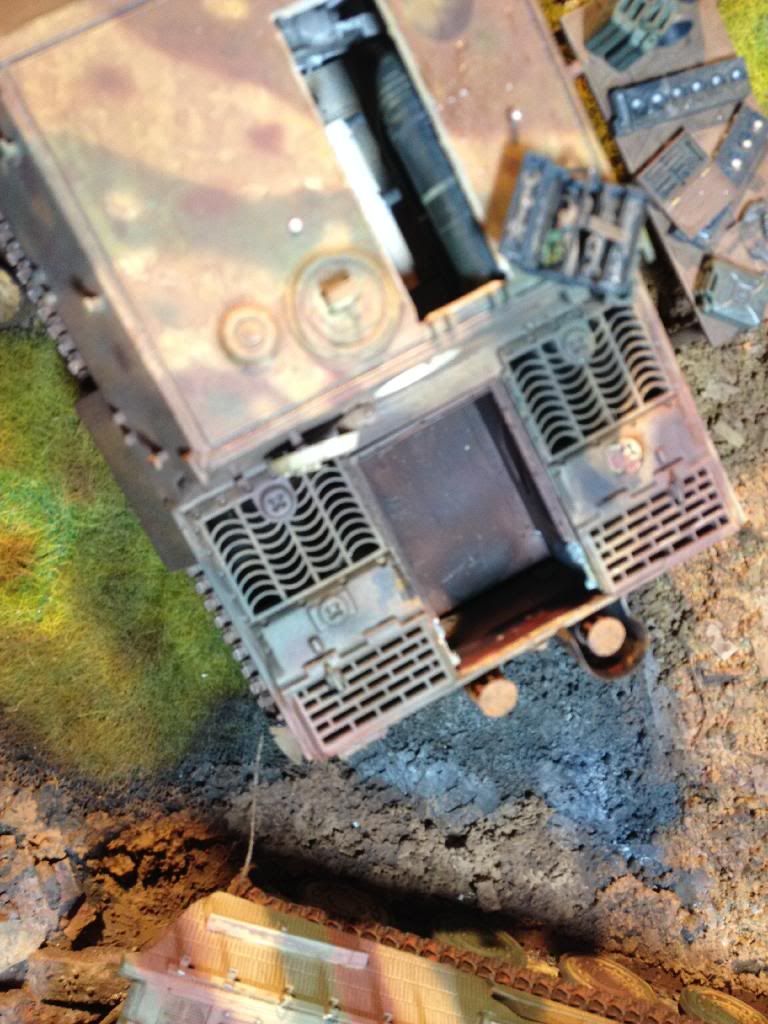
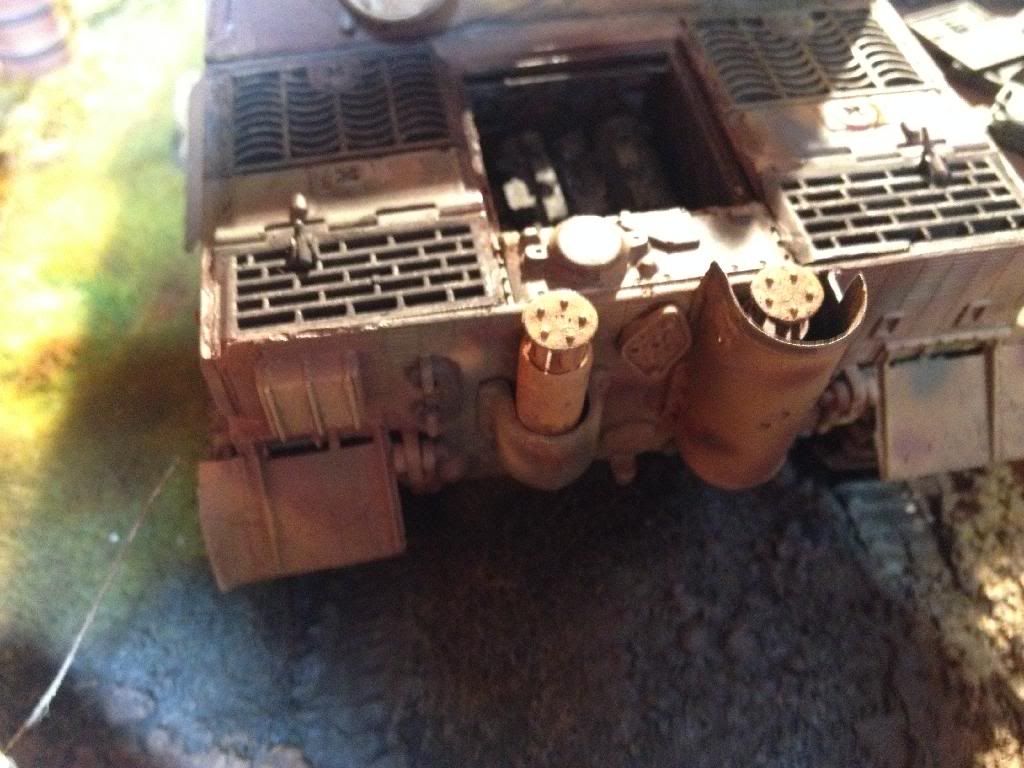
One last update before getting some sleep. Set my alarm for early Sunday (5AM) to watch Canada win the Olympic Gold Medal in hockey. Spent about 1.5 hours tonight painting the insides of the Sturmtiger's intake grilles.
Mecher liked it.
Go Canada Go!!!
Dave


Mecher liked it.

Go Canada Go!!!
Dave
ahandykindaguy
Joined: August 20, 2008
KitMaker: 1,295 posts
Armorama: 1,191 posts
Posted: Sunday, February 23, 2014 - 07:19 AM UTC
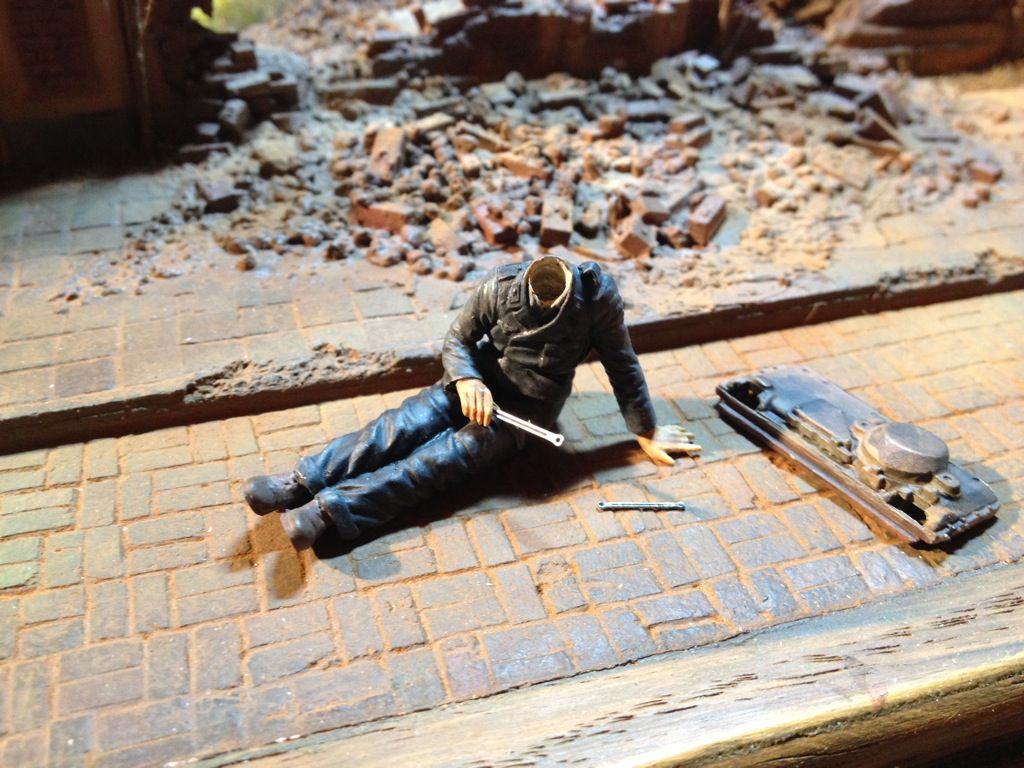
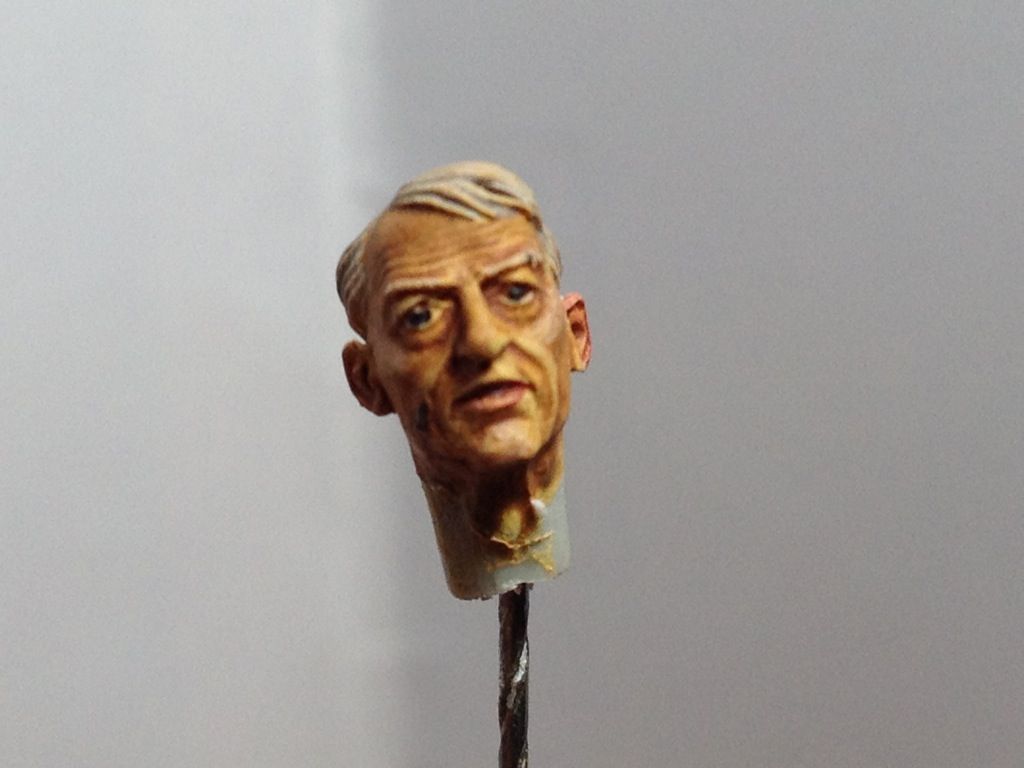
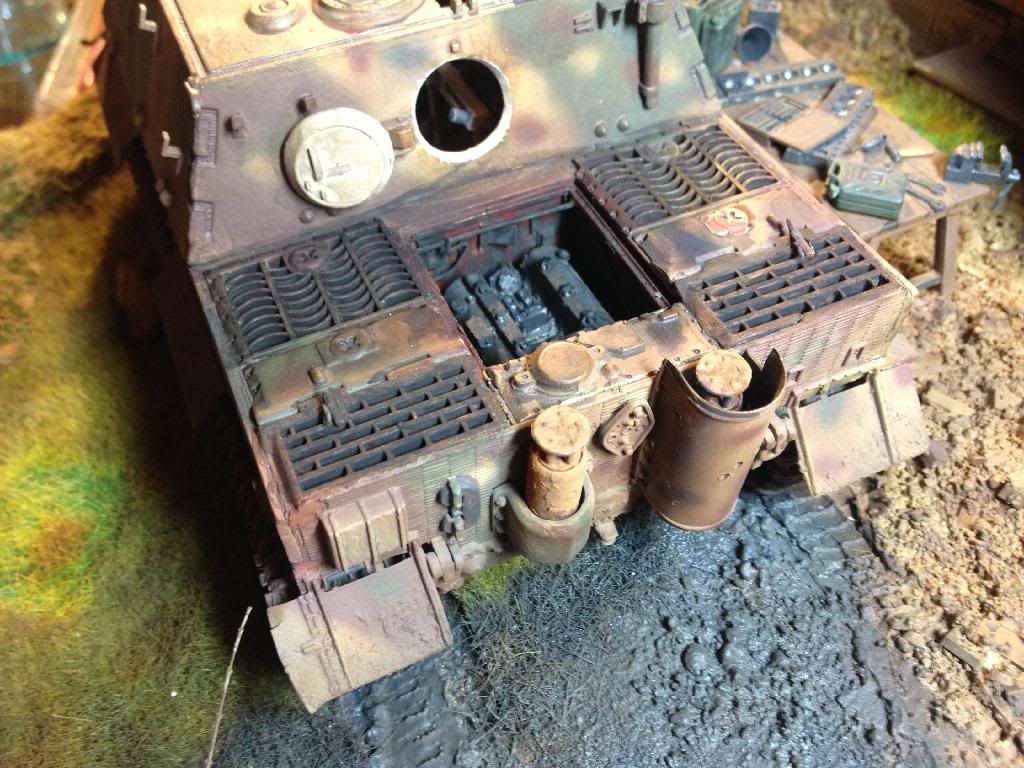
A subtle but necessary difference I think. It is about the details when all is said and done and the overall project can be diminished by the few small details overlooked.
Before:
And after :-)
Before:
And after :-)


jrutman
Joined: April 10, 2011
KitMaker: 7,941 posts
Armorama: 7,934 posts
Posted: Sunday, February 23, 2014 - 08:43 AM UTC
That mech looks like he was around since the Franco-Prussian war!
J
J
ahandykindaguy
Joined: August 20, 2008
KitMaker: 1,295 posts
Armorama: 1,191 posts
Posted: Sunday, February 23, 2014 - 08:50 AM UTC
[quote]That mech looks like he was around since the Franco-Prussian war!
J[/quote
He looks like I feel some days. Chances are where he probably fought and all he may have just been in his late thirties or early forties. He is an old guy though. Probably should have a Volksturm banner around his arm.
Hey Jerry, what do you use for a dead flat finish?
I used these two products, one each on the two guys in the next frame. Neither appear anywhere near dead flat like so many of the other figures I see on this forum. Any help?

The mecher has the model master and the shadowman has both actually.
J[/quote
He looks like I feel some days. Chances are where he probably fought and all he may have just been in his late thirties or early forties. He is an old guy though. Probably should have a Volksturm banner around his arm.
Hey Jerry, what do you use for a dead flat finish?
I used these two products, one each on the two guys in the next frame. Neither appear anywhere near dead flat like so many of the other figures I see on this forum. Any help?


The mecher has the model master and the shadowman has both actually.
ahandykindaguy
Joined: August 20, 2008
KitMaker: 1,295 posts
Armorama: 1,191 posts
Posted: Sunday, February 23, 2014 - 12:52 PM UTC
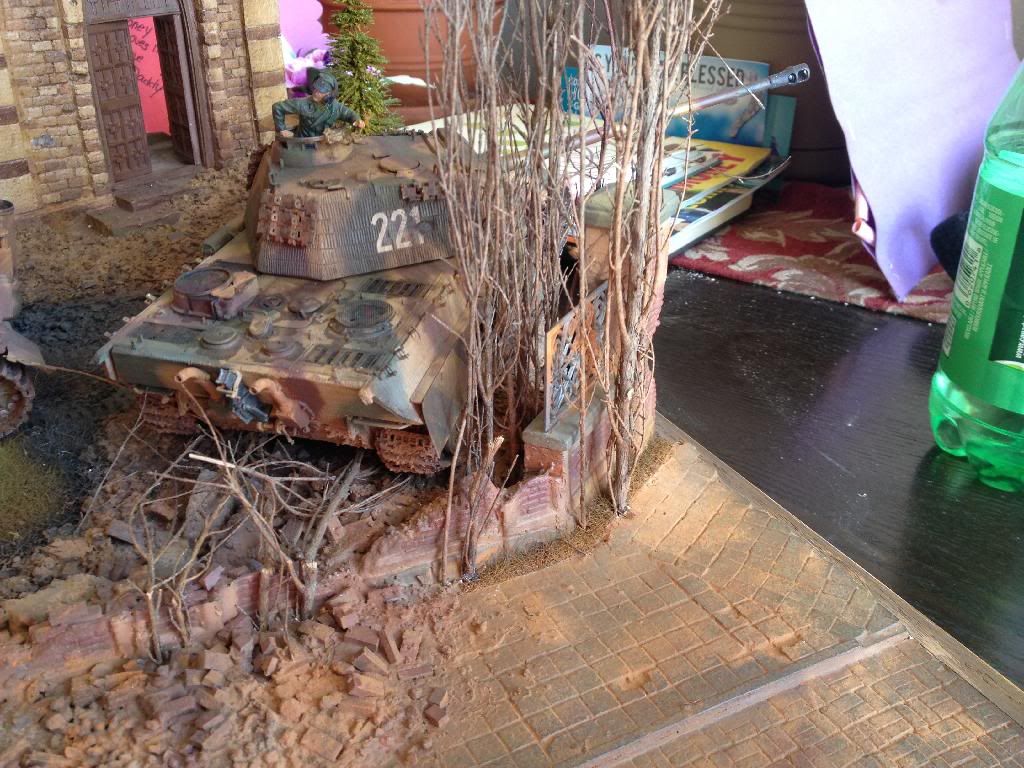
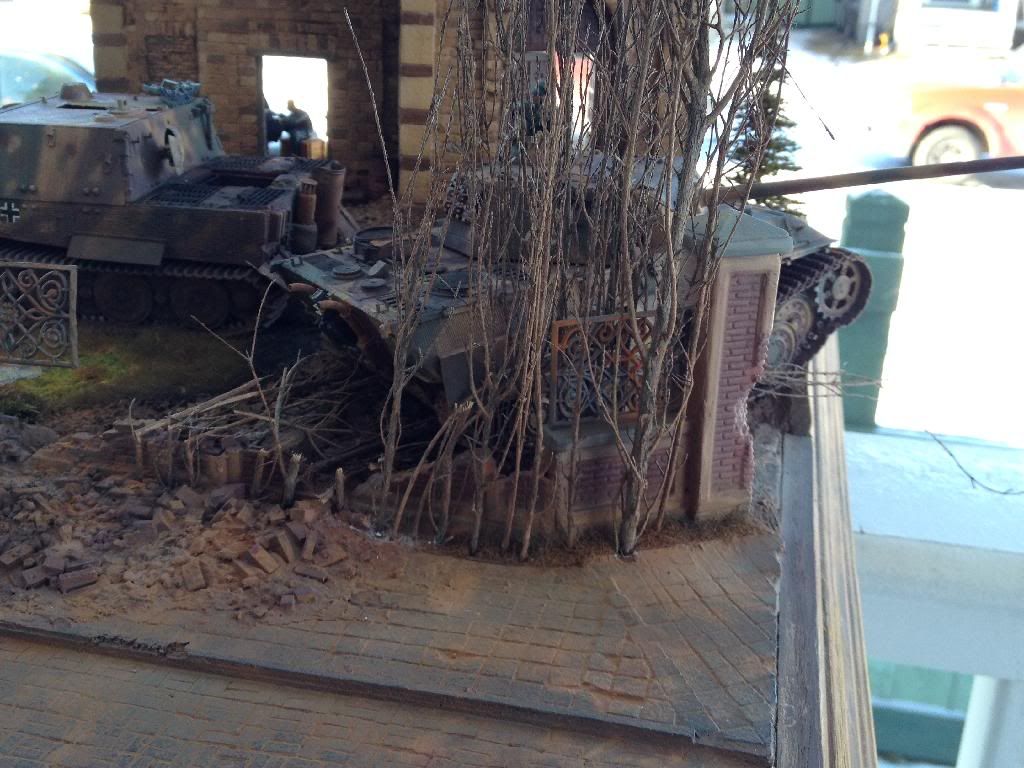
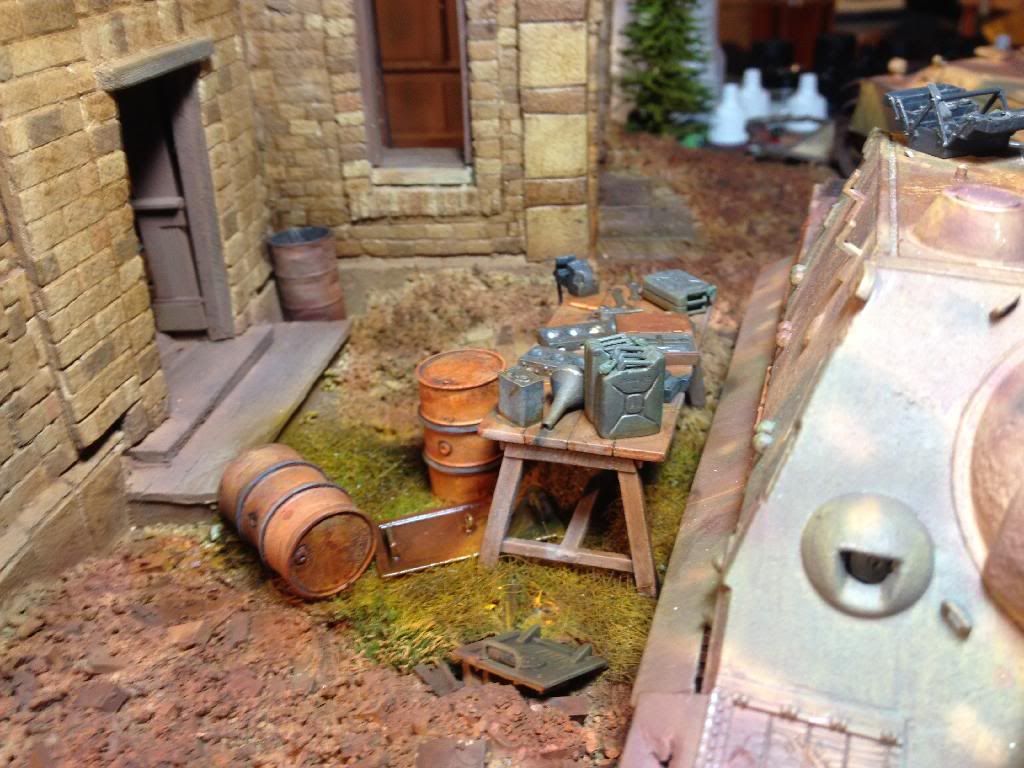
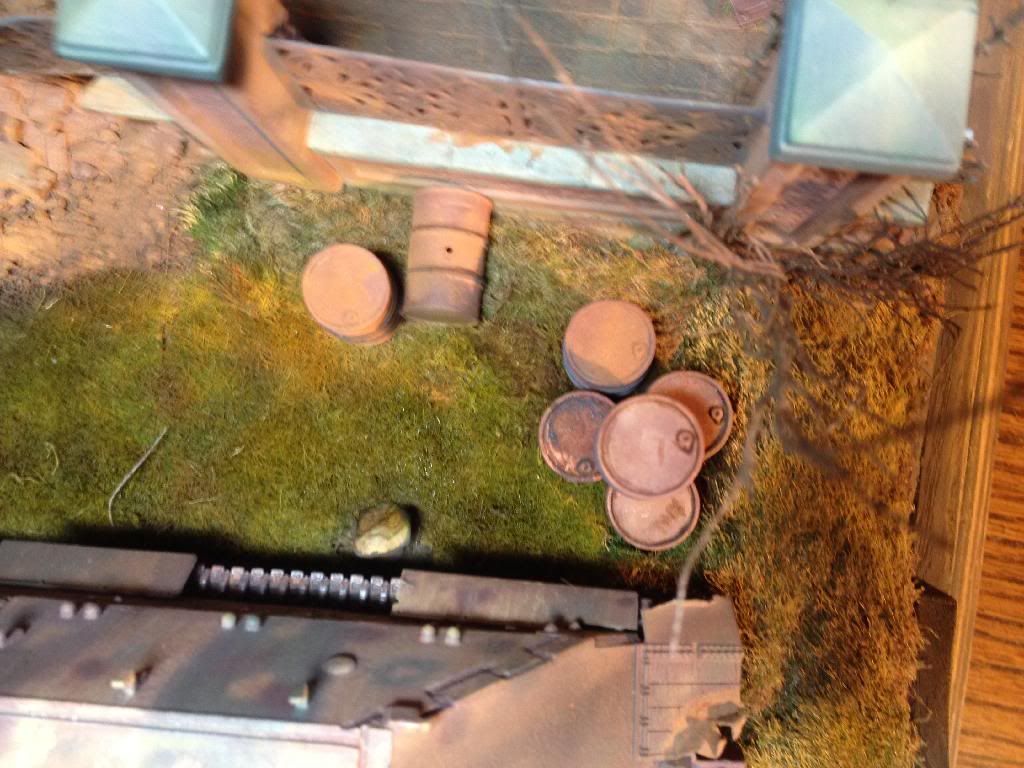
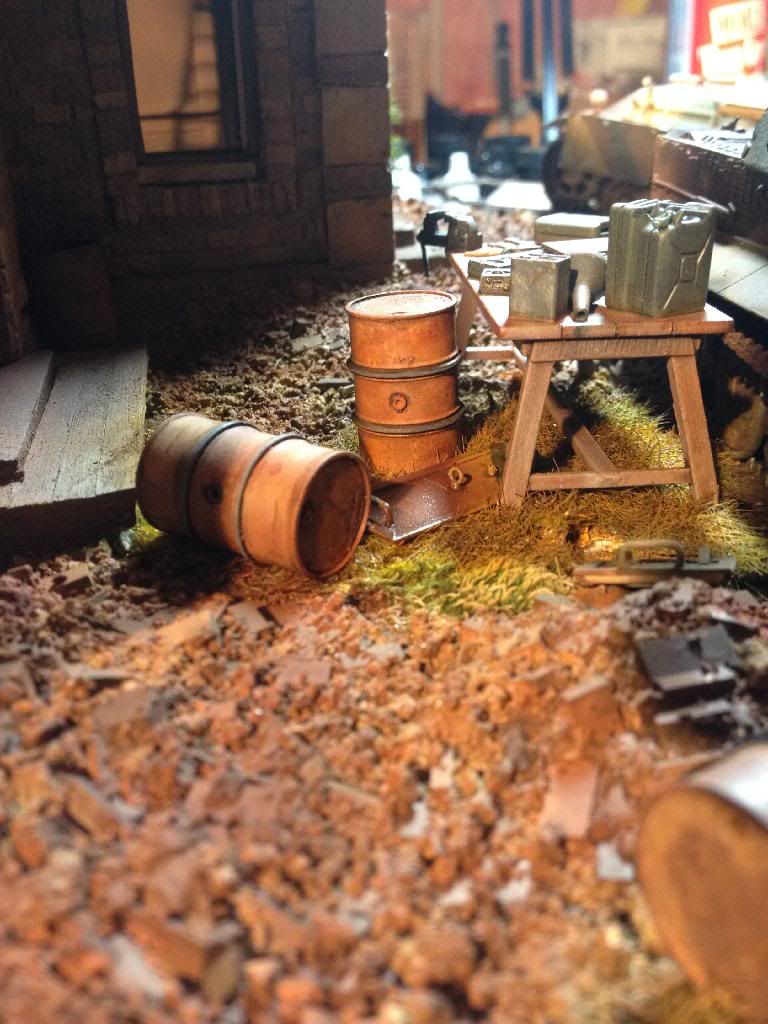
Spent a couple hours this afternoon trying to spruce up the front right corner of the base. Had always envisioned this kind of look to it when I was planning it so I thought I'd try it out. Some "trees" from a Micheals Crafts store wicker broom are the supporting cast here.


jrutman
Joined: April 10, 2011
KitMaker: 7,941 posts
Armorama: 7,934 posts
Posted: Sunday, February 23, 2014 - 04:15 PM UTC
I have used pollyscale flat and also tamiya flat and valejo flat,all clear flats. Plus,make sure if you use acrylic paint to mix it thoroughly.
J
J
ahandykindaguy
Joined: August 20, 2008
KitMaker: 1,295 posts
Armorama: 1,191 posts
Posted: Sunday, February 23, 2014 - 04:53 PM UTC
Quoted Text
I have used pollyscale flat and also tamiya flat and valejo flat,all clear flats. Plus,make sure if you use acrylic paint to mix it thoroughly.
J
Thanks Jerry. I will try to find some Vallejo since that's pretty much all I use for the normal paints. How's the battle with the weather and your vehicle situation going? Hope they are taking care of your needs.
1stjaeger

Joined: May 20, 2011
KitMaker: 1,744 posts
Armorama: 1,727 posts

Posted: Sunday, February 23, 2014 - 08:42 PM UTC
Hi Dave,
You are a gifted figure painter Sir!! This guy with the white hair......that's what I like!
The dio has evolved as well! Great show, superb palette of colours......well done indeed!!!!
Go Canada!!
Cheers
Romain
You are a gifted figure painter Sir!! This guy with the white hair......that's what I like!
The dio has evolved as well! Great show, superb palette of colours......well done indeed!!!!
Go Canada!!
Cheers
Romain
ahandykindaguy
Joined: August 20, 2008
KitMaker: 1,295 posts
Armorama: 1,191 posts
Posted: Monday, February 24, 2014 - 01:57 AM UTC
Thanks Romain. I like how things are starting to look now too. More like what I had originally envisioned and coming together. Hopefully I can keep plugging away at it a little bit each day. I'm going back to work today after a way too short holiday. So time will be restricted again but I will try to keep updates coming at regular intervals.
Dave.
Dave.
ahandykindaguy
Joined: August 20, 2008
KitMaker: 1,295 posts
Armorama: 1,191 posts
Posted: Monday, February 24, 2014 - 02:26 PM UTC
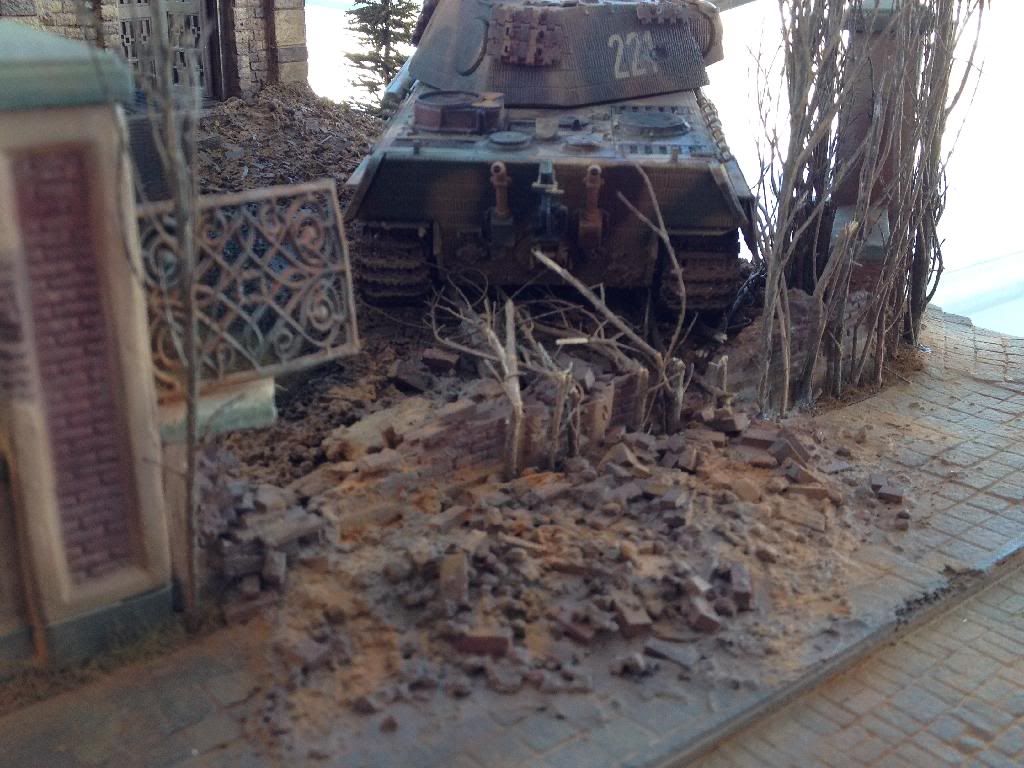
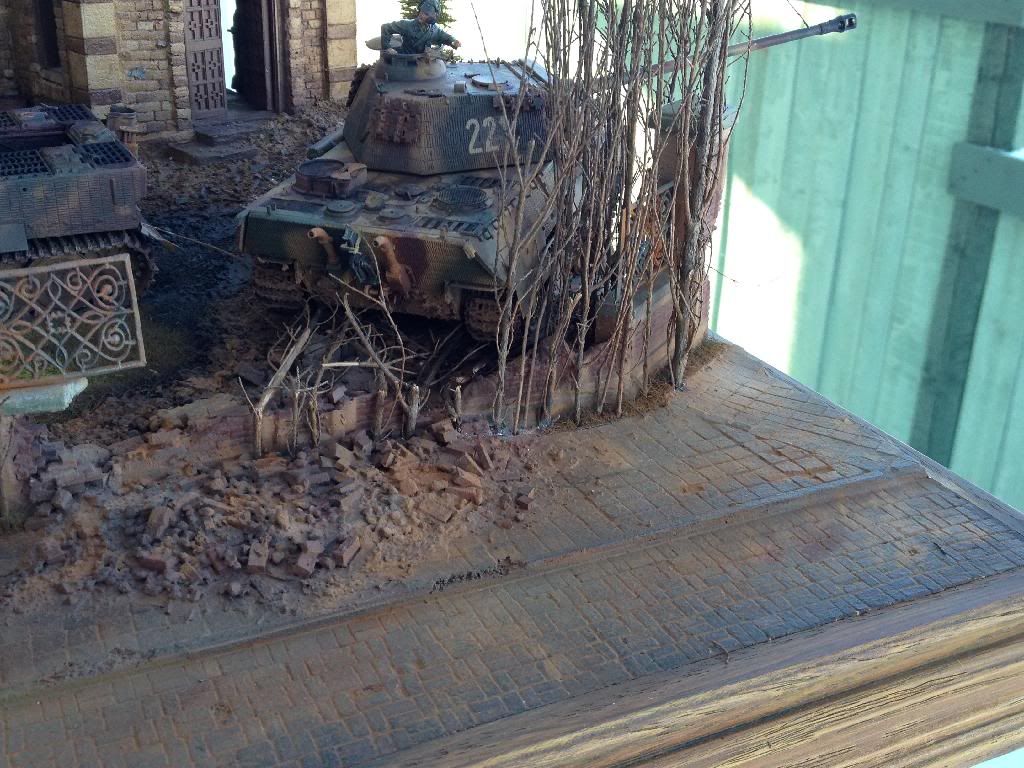
Here's one more pic of the trees up in the front corner.
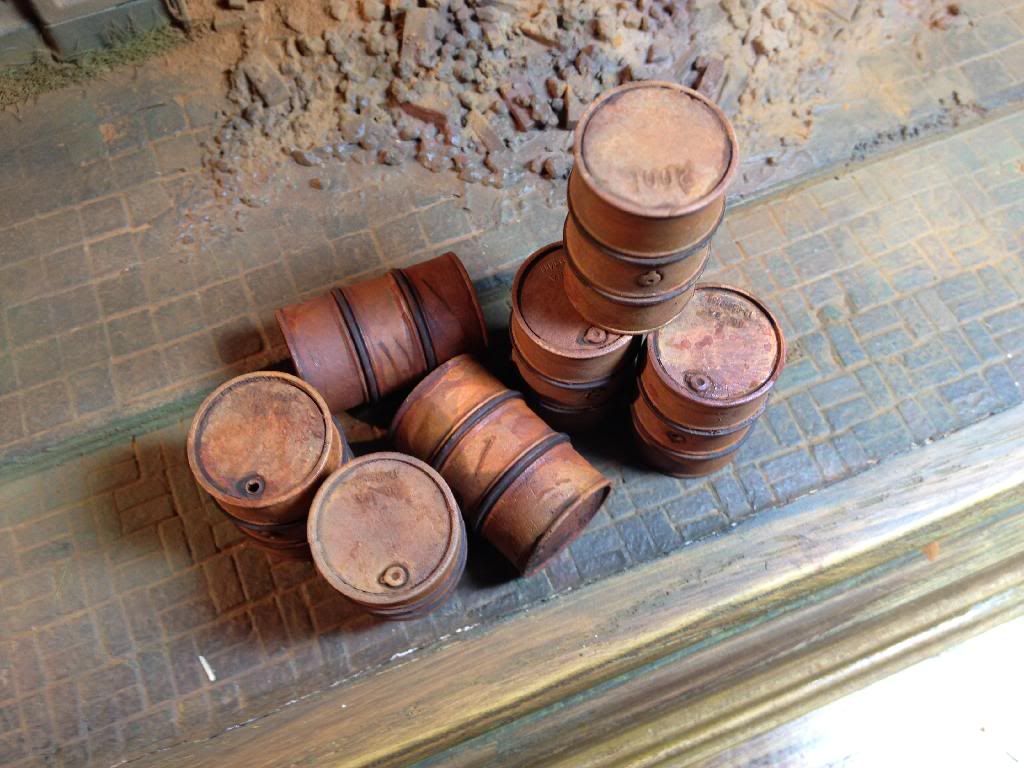
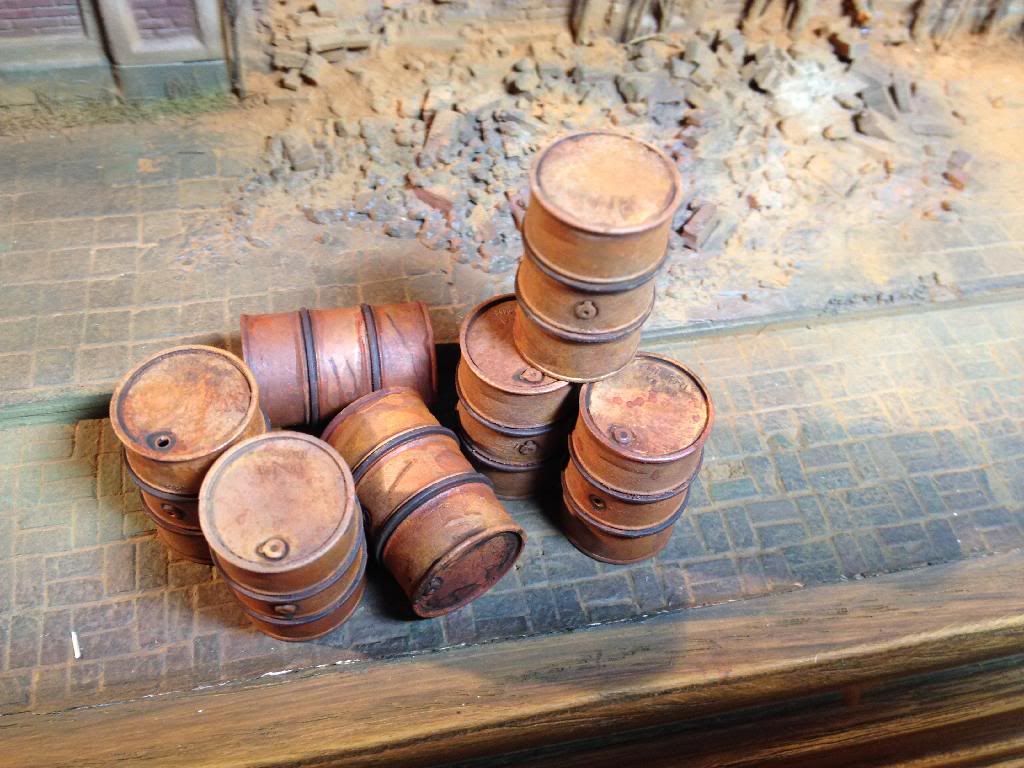
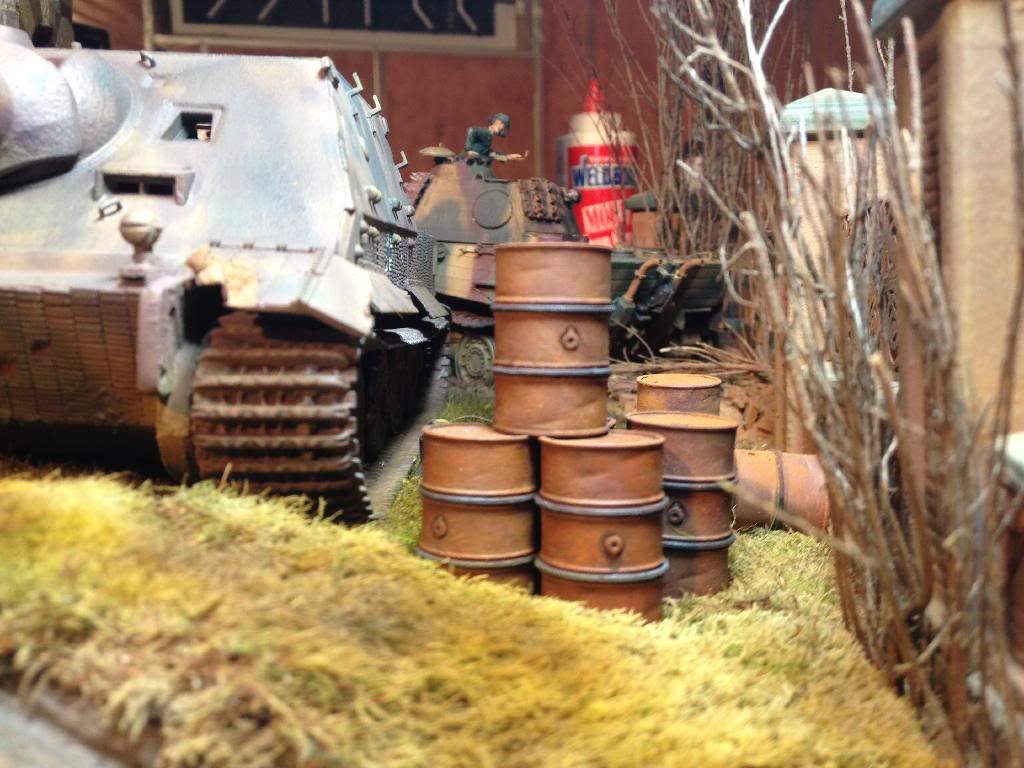
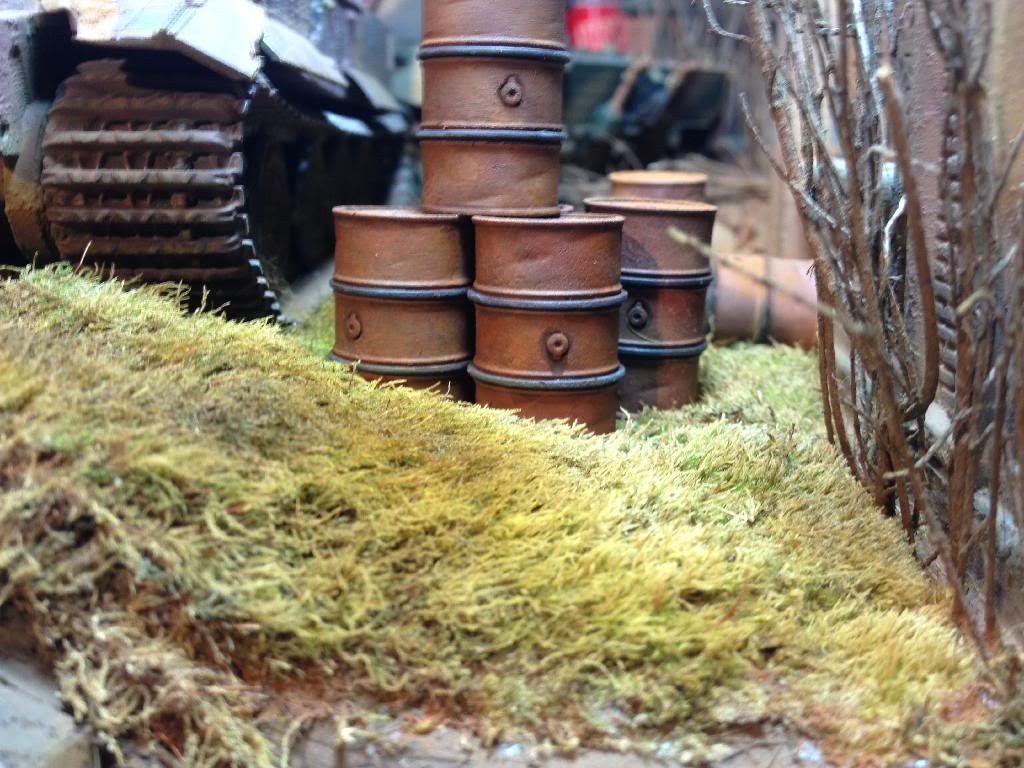
I spent a couple more hours this evening painting another half dozen barrels. I tried a different technique, using a base coat of red primer which I over coated with the old dab and speckle method using Dark Rust, Rust and Light Rust. Varying the amounts and dabbing or speckling to achieve a decent result. When that was dry I put the light rust wash in the airgun and oversprayed each barrel again, also varying the amount and direction of the wash.
Then I took a small brush and with a mixture of dark rust paint and sepia wash I outlined the rubber rings around the middle of each barrel.
Finally I took a sepia wash and a small brush and outlined each ring and and the kids of the barrels as well as the lettering.
A different look from the first half dozen barrels, and a good result I think too. Pigments will be added when they have been glued down on the base.

Thanks for looking in and leaving your comments.
Dave

I spent a couple more hours this evening painting another half dozen barrels. I tried a different technique, using a base coat of red primer which I over coated with the old dab and speckle method using Dark Rust, Rust and Light Rust. Varying the amounts and dabbing or speckling to achieve a decent result. When that was dry I put the light rust wash in the airgun and oversprayed each barrel again, also varying the amount and direction of the wash.
Then I took a small brush and with a mixture of dark rust paint and sepia wash I outlined the rubber rings around the middle of each barrel.
Finally I took a sepia wash and a small brush and outlined each ring and and the kids of the barrels as well as the lettering.
A different look from the first half dozen barrels, and a good result I think too. Pigments will be added when they have been glued down on the base.


Thanks for looking in and leaving your comments.
Dave
ahandykindaguy
Joined: August 20, 2008
KitMaker: 1,295 posts
Armorama: 1,191 posts
Posted: Monday, February 24, 2014 - 02:33 PM UTC
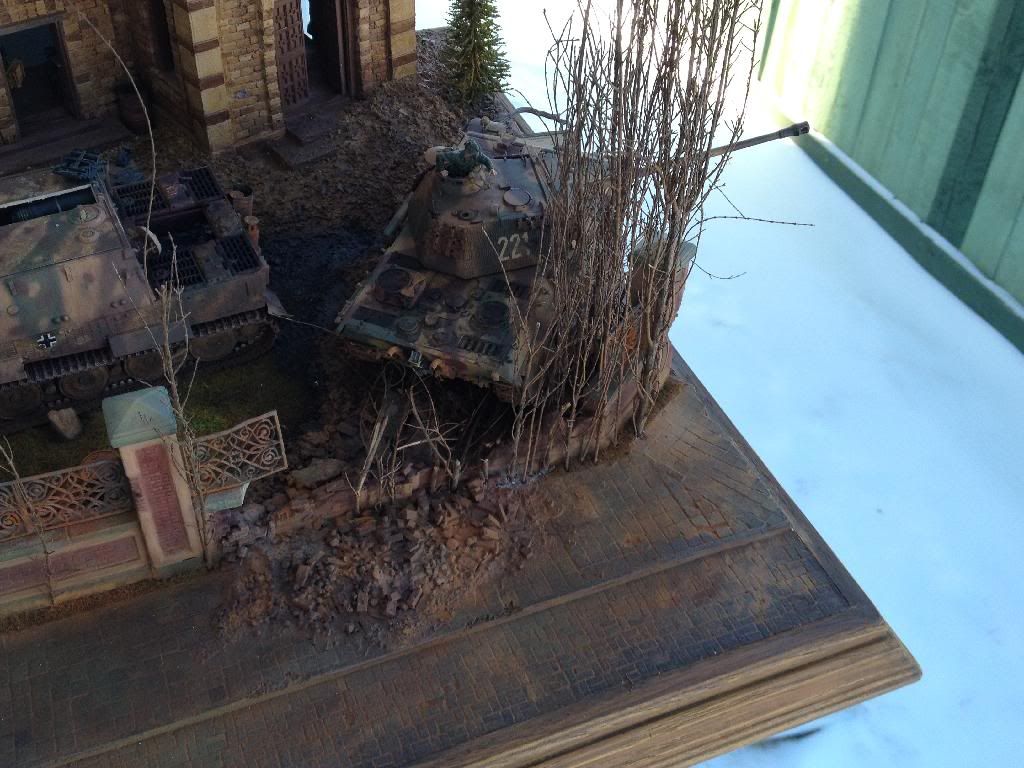
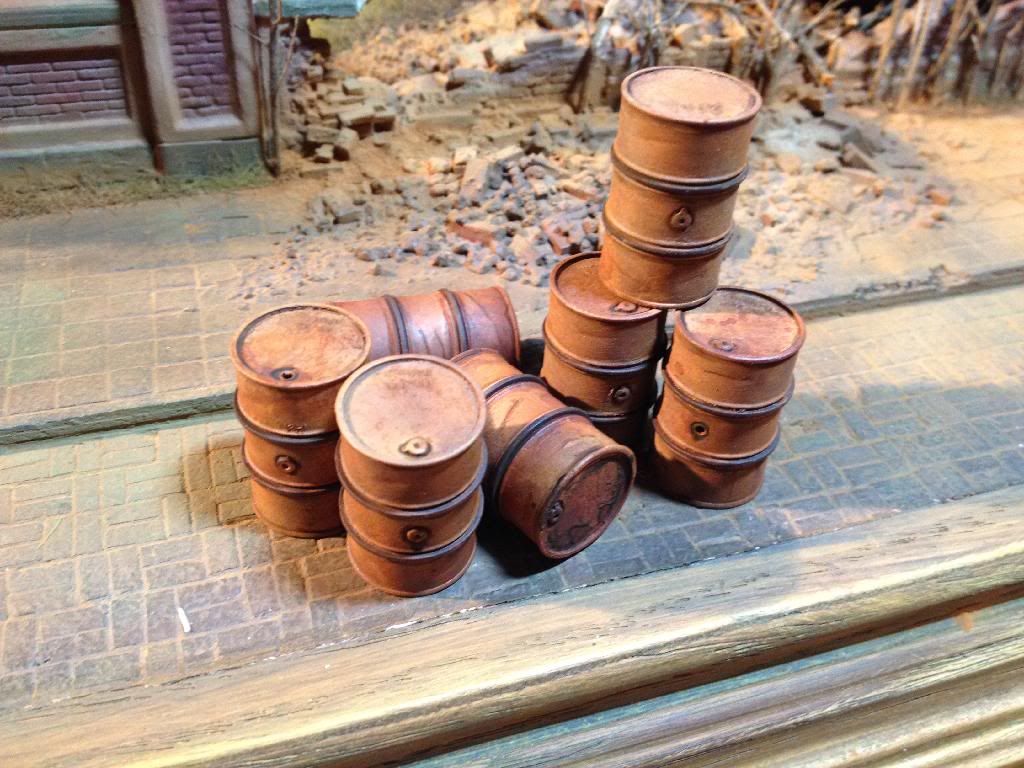
And a few more from other angles....
Hoping to add a few trees to another corner tonight, but first a bite of supper.


Hoping to add a few trees to another corner tonight, but first a bite of supper.
ahandykindaguy
Joined: August 20, 2008
KitMaker: 1,295 posts
Armorama: 1,191 posts
Posted: Monday, February 24, 2014 - 05:27 PM UTC
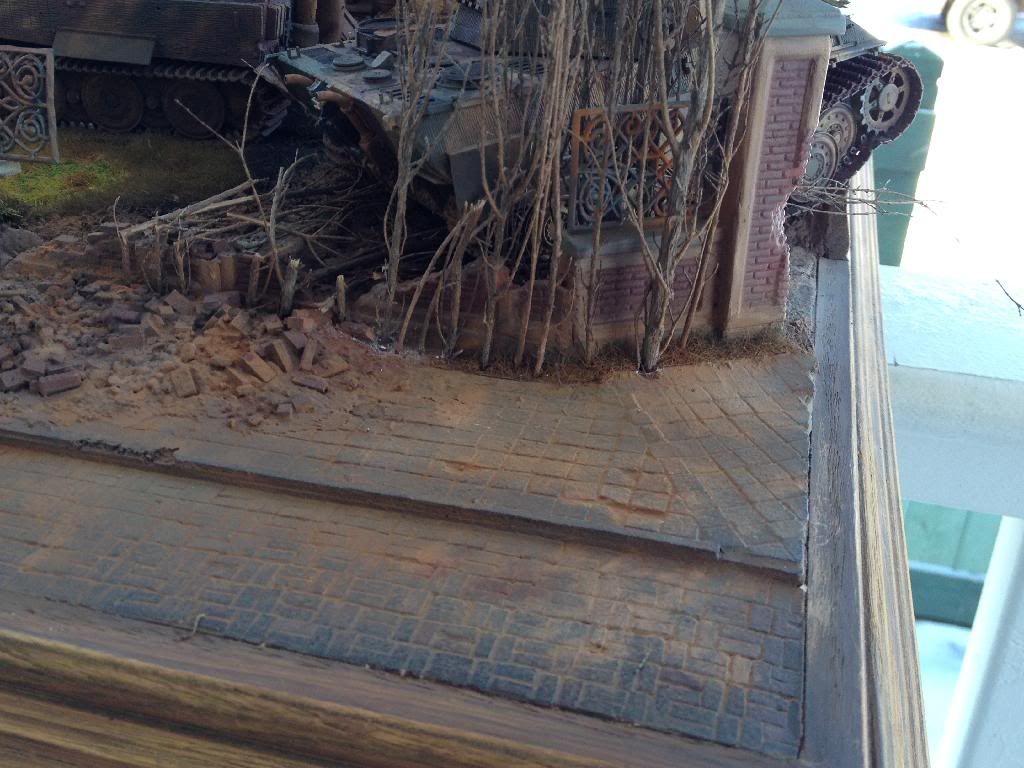
Trees may have to wait till tomorrow. Instead I was bent on placing the other barrels and attempting to blend the old and new grasses together. For that I used my ABrush and some transparent yellow, and some sepia washes of varying mixes.
The tonal qualities are more or less the same now, and the areas are far enough apart that they should blend into the background when all is said and done. Again I think I made some half decent progress.
Until tomorrow then. Keep hammering away at your craft people:-)
Dave.


The tonal qualities are more or less the same now, and the areas are far enough apart that they should blend into the background when all is said and done. Again I think I made some half decent progress.
Until tomorrow then. Keep hammering away at your craft people:-)
Dave.


 |

WEB HOSTING BY


Copyright ©2021 Armorama and Kitmaker Network, a subsidiary of Silver Star Enterprises
All Rights Reserved. Please read our Conditions of Use and Privacy Policy.
All Rights Reserved. Please read our Conditions of Use and Privacy Policy.