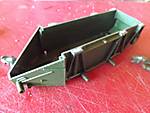
Awesome start there Raul!
I need to get back on mine!
Jeff
Hosted by Richard S.
Featherlight Tanks Campaign
PantherF
Indiana, United States
Joined: June 10, 2005
KitMaker: 6,188 posts
Armorama: 5,960 posts
Joined: June 10, 2005
KitMaker: 6,188 posts
Armorama: 5,960 posts
Posted: Sunday, April 06, 2014 - 05:56 AM UTC
olivepython
Western Australia, Australia
Joined: January 10, 2014
KitMaker: 43 posts
Armorama: 18 posts
Joined: January 10, 2014
KitMaker: 43 posts
Armorama: 18 posts
Posted: Sunday, April 06, 2014 - 09:23 PM UTC
Id just like to say everyone's models are looking great!
My Bt-5 fallen together quite well, very contrary to the kits reputation. I have used a lot of filler but so far i havent had to do any major plastic surgery.
MikeyBugs95
New York, United States
Joined: May 27, 2013
KitMaker: 2,210 posts
Armorama: 1,712 posts
Joined: May 27, 2013
KitMaker: 2,210 posts
Armorama: 1,712 posts
Posted: Monday, April 07, 2014 - 11:40 PM UTC
Hull looks good so far. Keep up the great work guys
MikeyBugs95
New York, United States
Joined: May 27, 2013
KitMaker: 2,210 posts
Armorama: 1,712 posts
Joined: May 27, 2013
KitMaker: 2,210 posts
Armorama: 1,712 posts
Posted: Wednesday, April 09, 2014 - 05:54 PM UTC
Anymore developments guys? My builds stalled for a short bit because of the tracks.. Hate having to paint rubber band tracks.
Posted: Wednesday, April 09, 2014 - 09:05 PM UTC
I see Raul is already doing one of these but it's the only small tank I have in my stash, so here goes! I will be doing mine OOB.
Nito74
Lisboa, Portugal
Joined: March 04, 2008
KitMaker: 5,386 posts
Armorama: 4,727 posts
Joined: March 04, 2008
KitMaker: 5,386 posts
Armorama: 4,727 posts
Posted: Thursday, April 10, 2014 - 12:40 PM UTC
Slow progress on the HB Panzer I
MikeyBugs95
New York, United States
Joined: May 27, 2013
KitMaker: 2,210 posts
Armorama: 1,712 posts
Joined: May 27, 2013
KitMaker: 2,210 posts
Armorama: 1,712 posts
Posted: Friday, April 11, 2014 - 10:38 AM UTC
That is a pretty small Panzer, Nito.
Raulito
Buenos Aires, Argentina
Joined: January 24, 2013
KitMaker: 112 posts
Armorama: 105 posts
Joined: January 24, 2013
KitMaker: 112 posts
Armorama: 105 posts
Posted: Friday, April 11, 2014 - 11:51 AM UTC
Quoted Text
I see Raul is already doing one of these but it's the only small tank I have in my stash, so here goes! I will be doing mine OOB
Nice kit, John. But beware with the kit tracks and the sprocket wheels. Iīve read some reviews and it seems that they donīt fit properly. Thatīs why I get a Fruil set from eBay a few month ago.
I wasnīt able to put my hands on mine since last weekend. Hope this coming weekend will be more productive.
Raul
Nito74
Lisboa, Portugal
Joined: March 04, 2008
KitMaker: 5,386 posts
Armorama: 4,727 posts
Joined: March 04, 2008
KitMaker: 5,386 posts
Armorama: 4,727 posts
Posted: Friday, April 11, 2014 - 11:58 AM UTC
Thanks for the info Raul !
panzerbob01
Louisiana, United States
Joined: March 06, 2010
KitMaker: 3,128 posts
Armorama: 2,959 posts
Joined: March 06, 2010
KitMaker: 3,128 posts
Armorama: 2,959 posts
Posted: Friday, April 11, 2014 - 04:54 PM UTC
Concerning that Pz. 1-C kit...
I'm doing that one for the "Normandy" campaign - it's a neat little panzer and pretty much an OK kit... the tracks not withstanding.
The kit tracks CAN, however, be done. The real issue lies in that the driver sprocket teeth are spaced slightly closer together than the links allow... so the links do not fit around the sprocket cleanly.
IF you are going to stay with those kit tracks - do a little bit of sprocket surgery; cut the sprocket teeth off in the section which lies beneath the track. SAVE those teeth. Mount the gear onto the hull, including those clipped sprockets (setting the sprockets so that the clipped part lies where the tracks will go around the sprocket and normally engage the (clipped-off teeth).
Assemble and cement the track-run and form it around the gear while the run is still soft and pliable. Let it set up, and remove your formed track - run for later painting.
Insert the clipped-off teeth into the track links in the part where they formed around the sprocket. This will serve to show teeth in the track around the sprocket. Paint your tracks and replace them onto the gear on the hull (presumably you will have painted these wheels by this time! ) and do your weathering. Be sure to have the track snug around the sprocket - cement it on if needed.
It's not really much additional work. Just a little tedious! It would have been nicer had HB made the tracks to fit the sprocket, but...
Bob
I'm doing that one for the "Normandy" campaign - it's a neat little panzer and pretty much an OK kit... the tracks not withstanding.
The kit tracks CAN, however, be done. The real issue lies in that the driver sprocket teeth are spaced slightly closer together than the links allow... so the links do not fit around the sprocket cleanly.
IF you are going to stay with those kit tracks - do a little bit of sprocket surgery; cut the sprocket teeth off in the section which lies beneath the track. SAVE those teeth. Mount the gear onto the hull, including those clipped sprockets (setting the sprockets so that the clipped part lies where the tracks will go around the sprocket and normally engage the (clipped-off teeth).
Assemble and cement the track-run and form it around the gear while the run is still soft and pliable. Let it set up, and remove your formed track - run for later painting.
Insert the clipped-off teeth into the track links in the part where they formed around the sprocket. This will serve to show teeth in the track around the sprocket. Paint your tracks and replace them onto the gear on the hull (presumably you will have painted these wheels by this time! ) and do your weathering. Be sure to have the track snug around the sprocket - cement it on if needed.
It's not really much additional work. Just a little tedious! It would have been nicer had HB made the tracks to fit the sprocket, but...
Bob
Nito74
Lisboa, Portugal
Joined: March 04, 2008
KitMaker: 5,386 posts
Armorama: 4,727 posts
Joined: March 04, 2008
KitMaker: 5,386 posts
Armorama: 4,727 posts
Posted: Saturday, April 12, 2014 - 06:12 AM UTC
Still working on lower hull details,
Removed by original poster on 04/12/14 - 18:19:51 (GMT).
Raulito
Buenos Aires, Argentina
Joined: January 24, 2013
KitMaker: 112 posts
Armorama: 105 posts
Joined: January 24, 2013
KitMaker: 112 posts
Armorama: 105 posts
Posted: Saturday, April 12, 2014 - 06:23 AM UTC
olivepython
Western Australia, Australia
Joined: January 10, 2014
KitMaker: 43 posts
Armorama: 18 posts
Joined: January 10, 2014
KitMaker: 43 posts
Armorama: 18 posts
Posted: Saturday, April 12, 2014 - 12:48 PM UTC
WOW!! The hull looks great Raul. Is that a white metal sprocket?
Raulito
Buenos Aires, Argentina
Joined: January 24, 2013
KitMaker: 112 posts
Armorama: 105 posts
Joined: January 24, 2013
KitMaker: 112 posts
Armorama: 105 posts
Posted: Saturday, April 12, 2014 - 01:03 PM UTC
Quoted Text
WOW!! The hull looks great Raul. Is that a white metal sprocket?
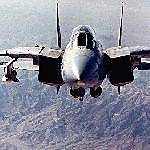
Thank you, Sammy! Yes they are. They came with the Fruil tracks set.
As I posted before and Bob Woodman explained masterfully, there are some issues with the kit sprockets not fitting the plastic tracks.
BTW, the wheels are not glued yet but they fit nice and tight as everything I build in this kit up to now.
Raul
MikeyBugs95
New York, United States
Joined: May 27, 2013
KitMaker: 2,210 posts
Armorama: 1,712 posts
Joined: May 27, 2013
KitMaker: 2,210 posts
Armorama: 1,712 posts
Posted: Saturday, April 12, 2014 - 06:18 PM UTC
It looks very nice, Raul. It makes me anxious to start my Luchs.
olivepython
Western Australia, Australia
Joined: January 10, 2014
KitMaker: 43 posts
Armorama: 18 posts
Joined: January 10, 2014
KitMaker: 43 posts
Armorama: 18 posts
Posted: Thursday, April 17, 2014 - 02:28 AM UTC
I couldnt help myself, visiting the local hobby shop i found Revell's Pz. 35(t) and for only AU$33 i just couldnt resist. When i got a closer look i was real impressed. The deatil is crisp and there is almost no flash. Now ive got another light tank if i finished the BT-5 early!
TankSGT
New Jersey, United States
Joined: July 25, 2006
KitMaker: 1,139 posts
Armorama: 946 posts
Joined: July 25, 2006
KitMaker: 1,139 posts
Armorama: 946 posts
Posted: Thursday, April 17, 2014 - 06:58 AM UTC
No pictures yet but I started my build. There is a bit of a gap on the turret underside and some sanding needed. The 2 piece gun tube needs some work as well. Skybow unlike most companies starts with the turret vs the hull. I also drilled out the commanders vision blocks, to be filled with Cyrstal Clear after painting.
Nice work so far folks.
Tom
Nice work so far folks.
Tom
nng-nng
Bayern, Germany
Joined: October 22, 2013
KitMaker: 380 posts
Armorama: 376 posts
Joined: October 22, 2013
KitMaker: 380 posts
Armorama: 376 posts
Posted: Thursday, April 17, 2014 - 10:34 AM UTC
Quoted Text
I couldnt help myself, visiting the local hobby shop i found Revell's Pz. 35(t) and for only AU$33 i just couldnt resist. When i got a closer look i was real impressed. The deatil is crisp and there is almost no flash. Now ive got another light tank if i finished the BT-5 early!
the 35(t) isnīt a bad kit, maybe just a bit old... (the new Academy does look way better, but isnīt that more pricy)
But I couldnīt resist aswell and got it by now almost done.
If you bend the tracks to create a bit sag, it looks quite good...
IF you donīt it, looks as crappy as the prototype model on the box... what you can also do is to improve the drivers aiming sight... I can provide pic if you like.
olivepython
Western Australia, Australia
Joined: January 10, 2014
KitMaker: 43 posts
Armorama: 18 posts
Joined: January 10, 2014
KitMaker: 43 posts
Armorama: 18 posts
Posted: Thursday, April 17, 2014 - 12:23 PM UTC
Quoted Text
Quoted Text
I couldnt help myself, visiting the local hobby shop i found Revell's Pz. 35(t) and for only AU$33 i just couldnt resist. When i got a closer look i was real impressed. The deatil is crisp and there is almost no flash. Now ive got another light tank if i finished the BT-5 early!
the 35(t) isnīt a bad kit, maybe just a bit old... (the new Academy does look way better, but isnīt that more pricy)
But I couldnīt resist aswell and got it by now almost done.
If you bend the tracks to create a bit sag, it looks quite good...
IF you donīt it, looks as crappy as the prototype model on the box... what you can also do is to improve the drivers aiming sight... I can provide pic if you like
Yes please Fabian. I did notice that the tracks are mainly indvidual links so it shouldnt be too difficult to replicate the sag.
cheers
MikeyBugs95
New York, United States
Joined: May 27, 2013
KitMaker: 2,210 posts
Armorama: 1,712 posts
Joined: May 27, 2013
KitMaker: 2,210 posts
Armorama: 1,712 posts
Posted: Friday, April 18, 2014 - 05:02 PM UTC
I'm in the process of making a black wash to try it on the Stuart. The building is all done so now that's the final thing to do and then I'll be finished finished with the kit.
olivepython
Western Australia, Australia
Joined: January 10, 2014
KitMaker: 43 posts
Armorama: 18 posts
Joined: January 10, 2014
KitMaker: 43 posts
Armorama: 18 posts
Posted: Saturday, April 19, 2014 - 10:49 PM UTC
hey everyone school holidays = non stop modelling action. so here is the progress on the BT5. The Aber PE set has proved very handy as a lot of the detail on this old kit is very chunky. [/img]
the Aber photo echted ventilator grill thing is made up of 10 seperate PE parts, the grill, the frame for the grill, two end pieces, a cross piece, 3 internal frames and three hinges(i havent attachted them yet), it was a nightmare to get right!!
a few shots of the temporaryly assembled engine deck and turret.
cheers guys
sam
the Aber photo echted ventilator grill thing is made up of 10 seperate PE parts, the grill, the frame for the grill, two end pieces, a cross piece, 3 internal frames and three hinges(i havent attachted them yet), it was a nightmare to get right!!
a few shots of the temporaryly assembled engine deck and turret.
cheers guys
sam
Posted: Sunday, April 20, 2014 - 01:07 AM UTC
Guys I'm mainly an aero-head but do like the light and recce tanks, I've looked through the rules but it doesn't mention paper panzers so my question is can I enter with the VK1602 Leopard a light weight at only 22ton.
MikeyBugs95
New York, United States
Joined: May 27, 2013
KitMaker: 2,210 posts
Armorama: 1,712 posts
Joined: May 27, 2013
KitMaker: 2,210 posts
Armorama: 1,712 posts
Posted: Sunday, April 20, 2014 - 08:13 AM UTC
Yes. Paper panders, as long as they are light or reconnaissance tanks, are allowed.
nng-nng
Bayern, Germany
Joined: October 22, 2013
KitMaker: 380 posts
Armorama: 376 posts
Joined: October 22, 2013
KitMaker: 380 posts
Armorama: 376 posts
Posted: Monday, April 21, 2014 - 01:23 AM UTC
Quoted Text
Yes please Fabian. I did notice that the tracks are mainly indvidual links so it shouldnt be too difficult to replicate the sag.
cheers
alright, here we go:
the drivers aiming device, added a little pice of scrap PE in front of the drivers vision port and replaced the the "solid disc on the stick" with scrap PE and a small ring of wire:
didnīt stick too colose to the instructions and rearranged the segments in the lower front area, the segments can take some gentle bending without falling apart.
I thought I was quuite close to the finish, but noticed, while looking at the kit, that there is lot of work still waiting for me...
But back to my entry: Iīve switched to a T-26 wich will be modelled as the tank wich served as a Road sign for German forces quite long in Smolensk (at least as far as I can trust Google translate)... and this site:
http://rkka.pskov.ru/Smolensk/smolensk_01.htm
The kit is comming together quite nicely, workable tracks, PE and flash free moulding, Iīll add some progress pics later on...