Featherlight Tanks Campaign
Namabiiru
 Associate Editor
#399
Rhode Island, United States
Joined: March 05, 2014
KitMaker: 2,888 posts
Armorama: 1,920 posts
Posted: Thursday, May 08, 2014 - 09:56 AM UTC
Cheers, Raul! Appreciate the inputs. I always get nervous whenever I talk about winking at accuracy because there are a few around here who get a bit indignant at the suggestion. As you say, it is a hobby, so everyone should be free to enjoy it in their own way.
Keep calm and build on!

Buenos Aires, Argentina
Joined: January 24, 2013
KitMaker: 112 posts
Armorama: 105 posts
Posted: Thursday, May 08, 2014 - 10:34 AM UTC
Quoted Text
Cheers, Raul! Appreciate the inputs. I always get nervous whenever I talk about winking at accuracy because there are a few around here who get a bit indignant at the suggestion. As you say, it is a hobby, so everyone should be free to enjoy it in their own way.
Keep calm and build on!
Mark,
Mark,
Couldn´t agree more.
Let´s have fun and keep the good work.
Cheers
PS: Thank you for give me the perfect excuse to buy more beer!!!

Distrito Federal, Mexico
Joined: November 09, 2005
KitMaker: 8 posts
Armorama: 5 posts
Posted: Friday, May 09, 2014 - 08:58 AM UTC
Hi!
I want to build a Marmon-Herrington CTMS-1TBI tank. A few served in the Mexican Army during WWII era. No kit though, so this one will be a scratchbuild almost 100%. I hope this is not a problem for the campaign.
Cheers,
Luis

New York, United States
Joined: May 27, 2013
KitMaker: 2,210 posts
Armorama: 1,712 posts
Posted: Friday, May 09, 2014 - 09:59 AM UTC
Scratchbuilds are fine. Have fun doing it. It ought to be quite interesting.
I do some 3D design work. Message me for more info on what I'm doing or have done. Inquire about a product catalog.
Namabiiru
Associate Editor #399
Rhode Island, United States
Joined: March 05, 2014
KitMaker: 2,888 posts
Armorama: 1,920 posts
Posted: Friday, May 09, 2014 - 10:58 AM UTC
Raul, Bob, et al;
I haven't found any good clear photos of the jerry can holders; are the tie-downs straps with buckles, or are they hinged bars?
Namabiiru
Associate Editor #399
Rhode Island, United States
Joined: March 05, 2014
KitMaker: 2,888 posts
Armorama: 1,920 posts
Posted: Friday, May 09, 2014 - 11:01 AM UTC
Quoted Text
Hi!
I want to build a Marmon-Herrington CTMS-1TBI tank. A few served in the Mexican Army during WWII era. No kit though, so this one will be a scratchbuild almost 100%. I hope this is not a problem for the campaign.
Cheers,
Luis
Wow! Good luck with that! Post lots of photos--I'm excited to watch that come together.
Buenos Aires, Argentina
Joined: January 24, 2013
KitMaker: 112 posts
Armorama: 105 posts
Posted: Saturday, May 10, 2014 - 02:40 AM UTC
Quoted Text
Raul, Bob, et al;
I haven't found any good clear photos of the jerry can holders; are the tie-downs straps with buckles, or are they hinged bars?
This is the only pic I have where they are clearly seen. It looks like leather straps. You can also see a difference in hue comparing the straps and the metal holders.

Hope it helps.
Raul
tatbaqui
News Writer #040
Metro Manila, Philippines
Joined: May 06, 2007
KitMaker: 2,713 posts
Armorama: 2,451 posts
Posted: Saturday, May 10, 2014 - 04:18 AM UTC
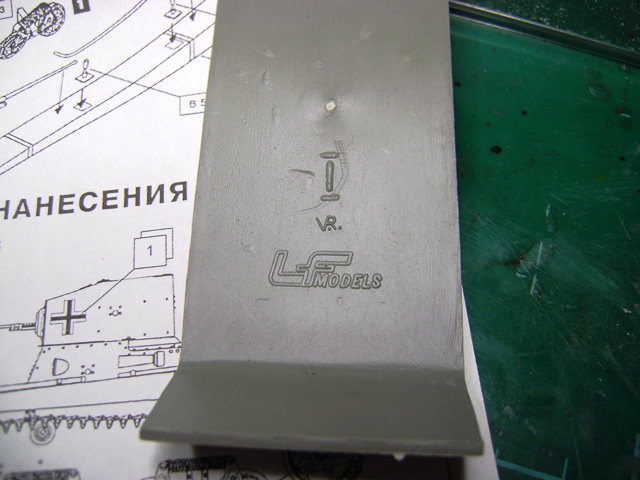
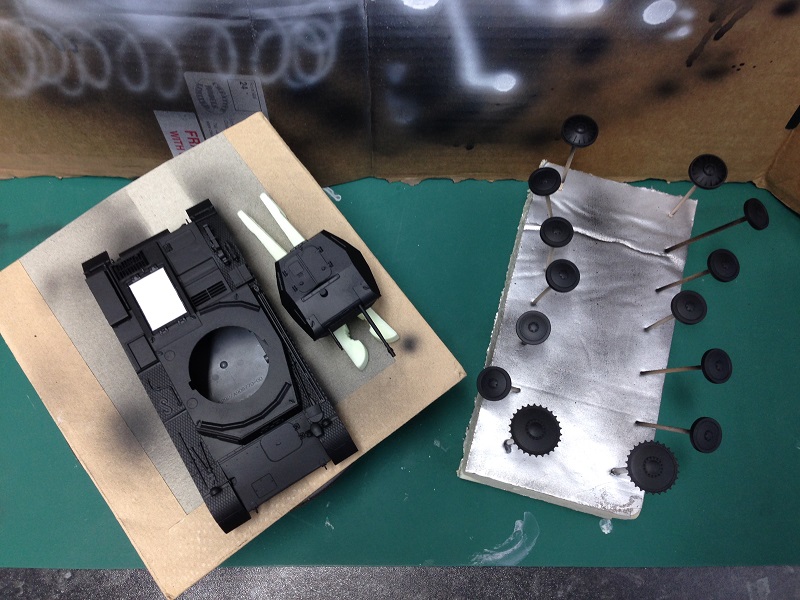
Started work on the T-37A suspension / wheels then the hull. Test fit for the upper surfaces.

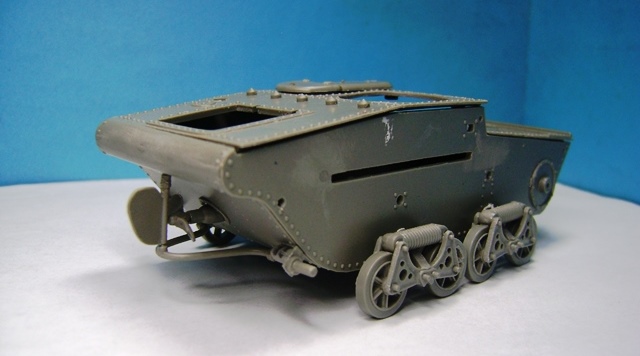
Seems like Maquette has re-boxed this -- first time to hear of LF Models
Cheers,
Tat
Louisiana, United States
Joined: March 06, 2010
KitMaker: 3,128 posts
Armorama: 2,959 posts
Posted: Saturday, May 10, 2014 - 04:53 AM UTC
Quoted Text
Quoted Text
Raul, Bob, et al;
I haven't found any good clear photos of the jerry can holders; are the tie-downs straps with buckles, or are they hinged bars?
This is the only pic I have where they are clearly seen. It looks like leather straps. You can also see a difference in hue comparing the straps and the metal holders.
Hope it helps.
Raul
Nice pic! Note also the sharp look at the fire-bottle handles...

As to the can-rack: clearly this was a frame constructed from thin metal strapping, so a PE frame would be quite in-scale compared to any 1/35 styrene rack.
All might keep this in mind for similar such racks on other German AFV - specially on those SdKfz 234x armored-cars and on the Italian cars with cans on their fenders...
About the strap... When you look around at various pics of these racks - you'll probably notice that most appear to have had a strap and buckle, not a formed metal strap and latch. My approach is to assume "usually" that these were leather straps with buckles. But you can certainly go either way.
The can itself is well worth looking at. This was a dedicated can embossed "Wasser", and also marked with bold white crosses on what appears to have been a dark gray or dark green can. The painted crosses are clearly worn and nice exhibit of "worn markings"!
Thanks for posting this!
Bob
Namabiiru
Associate Editor #399
Rhode Island, United States
Joined: March 05, 2014
KitMaker: 2,888 posts
Armorama: 1,920 posts
Posted: Saturday, May 10, 2014 - 09:37 AM UTC
Super helpful! Thanks!
Buenos Aires, Argentina
Joined: January 24, 2013
KitMaker: 112 posts
Armorama: 105 posts
Posted: Sunday, May 11, 2014 - 06:26 AM UTC
Here´s the kit´s barrel. I´think I can live with it.

Raul
New York, United States
Joined: May 27, 2013
KitMaker: 2,210 posts
Armorama: 1,712 posts
Posted: Sunday, May 11, 2014 - 07:26 AM UTC
Hot pierogis! That barrel looks awesome! What size bit did you use?
I do some 3D design work. Message me for more info on what I'm doing or have done. Inquire about a product catalog.
Buenos Aires, Argentina
Joined: January 24, 2013
KitMaker: 112 posts
Armorama: 105 posts
Posted: Sunday, May 11, 2014 - 07:49 AM UTC
Thanks Michael.
It´s a 0,2mm jewelers drill bit. It´s very fragile and you have to be very careful not to bend it or broke it.
The gun barrel was one of my HB Pz. IC main concerns now I can move on more relaxed.

Raul
New York, United States
Joined: May 27, 2013
KitMaker: 2,210 posts
Armorama: 1,712 posts
Posted: Wednesday, May 14, 2014 - 03:20 PM UTC
Ah. Ok. That is a tiny, tiny, tiny, tiny, tiny bit... I've luckily only broken one of my small bits the 79 size (and a large one that broke off while I was trying to predrill a hole for a screw) but unfortunately I lost my smallest size bit, an 80.
And I finished my Stuart just today. I'll have pictures up tomorrow or sometime.
I do some 3D design work. Message me for more info on what I'm doing or have done. Inquire about a product catalog.
England - South West, United Kingdom
Joined: March 24, 2014
KitMaker: 23 posts
Armorama: 22 posts
Posted: Wednesday, May 14, 2014 - 11:30 PM UTC
After doing a lot of reading up and researching (the vast majority on this site!), I've started getting some paint on my kit.
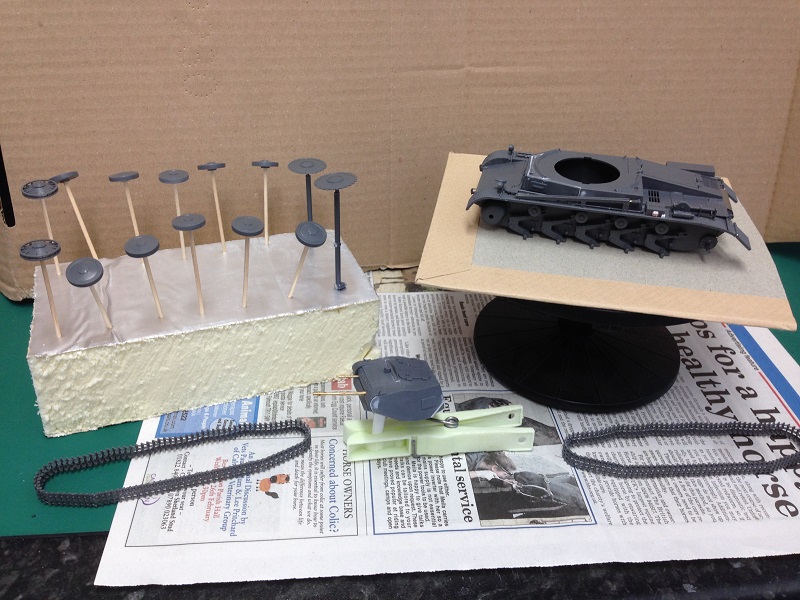
Firstly, I sprayed a black primer of Vallejo. I also had a go at masking the white rectangular background for the air recognition marking on the engine deck.
Yesterday I gave the kit a coat of Tamiya XF63 and then after a few hours drying time, a few bits of XF10 were added for camouflage.
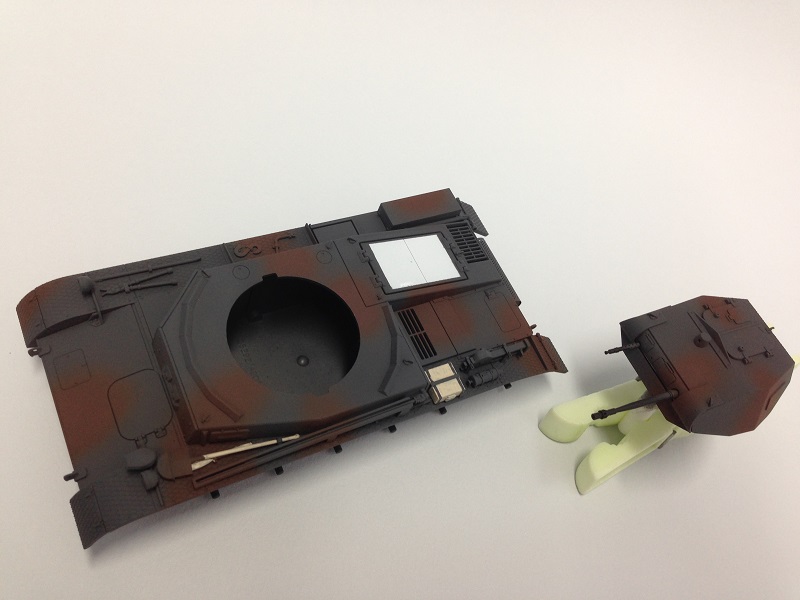
This morning I've started getting things ready for decals, etc.
I've also scratch built and cast my own ammunition crates/boxes, while I've been waiting for other stuff to dry.
Cheers, Paul.
Texas, United States
Joined: February 22, 2008
KitMaker: 5,026 posts
Armorama: 1,604 posts
Posted: Thursday, May 15, 2014 - 05:10 PM UTC
Well I will finally be able to join this campaign with a change in my line up. I have changed from a Trumpeter 30 (H) to an Ark Pz Kpfw II Ausf J and will post a start photo ASP. Nice build Paul, which kit are you using?
Bob
If it aint broke dont fix it.
England - South West, United Kingdom
Joined: March 24, 2014
KitMaker: 23 posts
Armorama: 22 posts
Posted: Friday, May 16, 2014 - 03:00 AM UTC
Thanks Bob, it's the Tamiya Panzerkampfwagen II Ausf. A/B/C (French Campaign)kit.
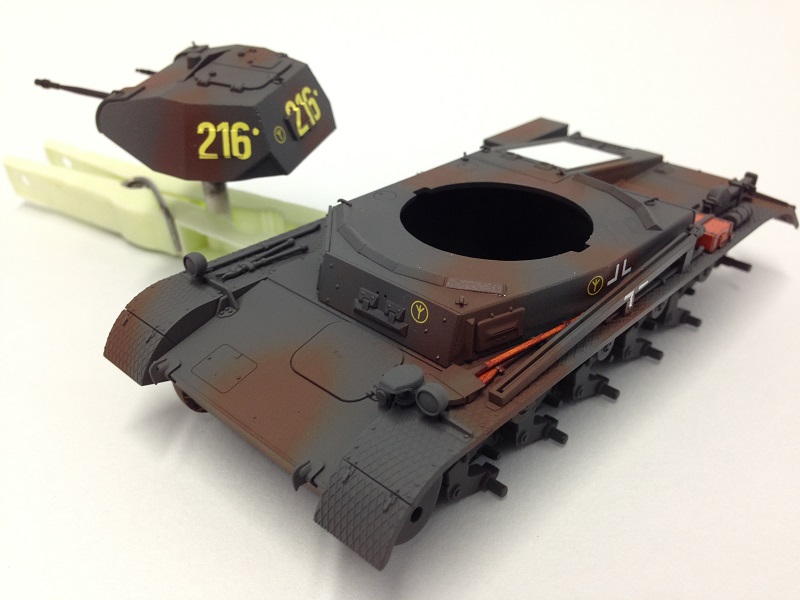
I got the markings on it this morning and painted the 'wood' bits with oil paint. Will get on with the tracks, stowage, etc, for next few days while the oil paint dries.
Cheers, Paul
Namabiiru
Associate Editor #399
Rhode Island, United States
Joined: March 05, 2014
KitMaker: 2,888 posts
Armorama: 1,920 posts
Posted: Friday, May 16, 2014 - 10:19 AM UTC
Looking good, Paul.
BT BT
Raul, et al; any thoughts on how to produce the tow cable for the PzIc? My thinking at the moment is to use very thin solder/lead wire and score it along its length with course sandpaper, but I'm concerned the lead will be too soft to get that tensioned look of a steel cable. Ideas?
Buenos Aires, Argentina
Joined: January 24, 2013
KitMaker: 112 posts
Armorama: 105 posts
Posted: Saturday, May 17, 2014 - 01:46 PM UTC
Quoted Text
Raul, et al; any thoughts on how to produce the tow cable for the PzIc? My thinking at the moment is to use very thin solder/lead wire and score it along its length with course sandpaper, but I'm concerned the lead will be too soft to get that tensioned look of a steel cable. Ideas?
In most of my models I use fine cooper wire (2 strands or more) braided together. It´s good for a medium or big tank. In this model I have to find some really thin cable for the same. The tow cable must pass through some PE holders that are very small.
I´ve found what it seems to be a nylon strand inside a LAN cable (you can´t see the texture in the pic but it´s fine for a tow cable).

I think if I soak it in a mixture of white glue and water it´s possible to obtain a good tension once it´s dry. I´ll experiment with that and let you know.
Buenos Aires, Argentina
Joined: January 24, 2013
KitMaker: 112 posts
Armorama: 105 posts
Posted: Saturday, May 17, 2014 - 01:54 PM UTC
Quoted Text
I got the markings on it this morning and painted the 'wood' bits with oil paint. Will get on with the tracks, stowage, etc, for next few days while the oil paint dries.
This Pz IIC is looking really, really good. I´m building one for the Operation Fall Gelb 1940 Campaign and I´m waiting for Archer transfers to arrive.
Did you use the Tamiya decals on yours? I´m a little concern about them (looks too thick).
Raul
England - South West, United Kingdom
Joined: March 24, 2014
KitMaker: 23 posts
Armorama: 22 posts
Posted: Saturday, May 17, 2014 - 08:32 PM UTC
Thanks Raul!
Yes, the decals are a bit thick, but I just wanted to progress. Like you say, they are the Archer ones (Tamiya missed out the rear turret markings). I also had to mix some paint to fill in areas where the decals split due to the very small and tight recesses where the markings go.
Cheers, Paul
New York, United States
Joined: May 27, 2013
KitMaker: 2,210 posts
Armorama: 1,712 posts
Posted: Sunday, May 18, 2014 - 05:36 AM UTC
I finished the Stuart a few days ago and finally got the pictures up:

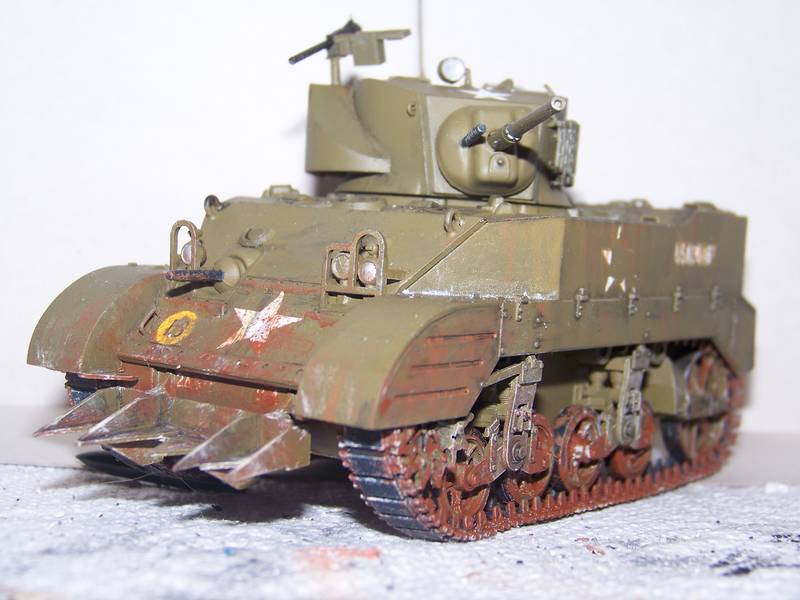
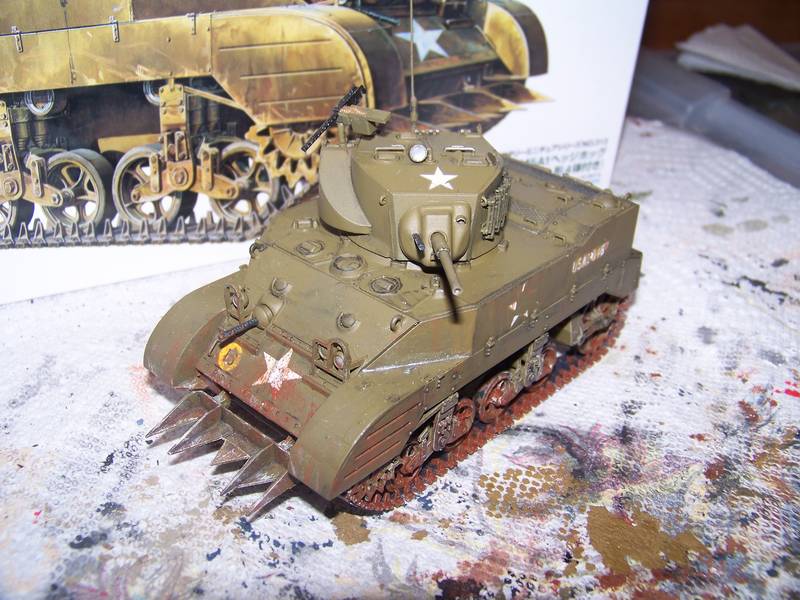
Only thing not OOB is the antenna which I made from a length of copper wire.
Oh... the decal on the side breaking happened when I was clear coating it... I honestly have no idea what happened to cause it or what happened to the rest of the decal after it broke off.
I do some 3D design work. Message me for more info on what I'm doing or have done. Inquire about a product catalog.
Namabiiru
Associate Editor #399
Rhode Island, United States
Joined: March 05, 2014
KitMaker: 2,888 posts
Armorama: 1,920 posts
Posted: Sunday, May 18, 2014 - 10:07 AM UTC
Mike,
You could try throwing a great big splash of mud right there where the decal should be. It's a slightly inelegant solution, but would do the trick.
Louisiana, United States
Joined: March 06, 2010
KitMaker: 3,128 posts
Armorama: 2,959 posts
Posted: Sunday, May 18, 2014 - 03:01 PM UTC
Of course you may want to toss a couple other splats around, too - I'm not sure one large and conspicuous mud-pie right there without some others elsewhere would be better than a lost star!

Maybe instead you could substantially scuff up that side as if it brushed along a building - do a lot of scraping and such and maybe use a tiny brush to add in a fragments of white where the star was supposed to be...
Bob
New York, United States
Joined: May 27, 2013
KitMaker: 2,210 posts
Armorama: 1,712 posts
Posted: Sunday, May 18, 2014 - 05:14 PM UTC
Well, both solutions sound adequate, but Bob's more-so than Mark's. Eventually I'll get around to fixing it but for now I'm calling it.
I do some 3D design work. Message me for more info on what I'm doing or have done. Inquire about a product catalog.