

Nice work. I'm hoping to get started the end of January, two projects to clear off the bench first. Heck, I might even know what I'm building by then.
Kimmo
Hosted by Richard S.
Panzer IV Campaign

Thudius

Joined: October 22, 2012
KitMaker: 1,194 posts
Armorama: 1,077 posts
Posted: Saturday, December 27, 2014 - 06:27 AM UTC

WARDUKWNZ

Joined: June 01, 2011
KitMaker: 1,716 posts
Armorama: 1,638 posts

Posted: Saturday, December 27, 2014 - 12:47 PM UTC
I like it Chuck ... its looking very very nice so far  cant wait to see more .
Phill
cant wait to see more .Phill


Nito74

Joined: March 04, 2008
KitMaker: 5,386 posts
Armorama: 4,727 posts
Posted: Sunday, December 28, 2014 - 01:29 AM UTC
Update,
most of the wheels are done,

2 rubber colours ( Tamyia & Vallejo)
Hull ready for wheels

most of the wheels are done,
2 rubber colours ( Tamyia & Vallejo)
Hull ready for wheels

shorty53

#330

Joined: July 15, 2011
KitMaker: 175 posts
Armorama: 72 posts

Posted: Thursday, January 01, 2015 - 05:27 AM UTC
Pz.Kpfw.IV Ausf.F2(G), some more steps.
Steps 7,8,9 & 10

Step 11

Steps 7,8,9 & 10
Step 11

Scoutmaster

Joined: March 05, 2010
KitMaker: 81 posts
Armorama: 79 posts
Posted: Thursday, January 01, 2015 - 07:32 AM UTC
My Entry to this Group Build:


In-progress photos to follow soon....


In-progress photos to follow soon....
Gewehr43

Joined: May 12, 2014
KitMaker: 105 posts
Armorama: 68 posts
Posted: Saturday, January 03, 2015 - 07:17 AM UTC
Making progress. If you'd asked me a year ago if I'd ever be hand-winding tiny springs for armor hatches, I'd have laughed in your face... today I did two of them.
Now to paint the interior and affix the superstructure. Then it's on to the daunting task of the fenders and their hangers. Ugh. Wish me luck.


I'm almost done, right? Right?!

nnnnnnope... not even close.
Now to paint the interior and affix the superstructure. Then it's on to the daunting task of the fenders and their hangers. Ugh. Wish me luck.
I'm almost done, right? Right?!
nnnnnnope... not even close.

panzerbob01
Joined: March 06, 2010
KitMaker: 3,128 posts
Armorama: 2,959 posts
Posted: Saturday, January 03, 2015 - 07:55 AM UTC
Quoted Text
Making progress. If you'd asked me a year ago if I'd ever be hand-winding tiny springs for armor hatches, I'd have laughed in your face... today I did two of them.
There's a first time for everything!

Soon, you'll be winding a real wire spring to replace every little creased styrene ridge provided on any of many otherwise great kits! "No more styrene fakies for me! "
I know. This-all happened to me a while back!
 And now I actually search for opportunities to "correct" this little detail!
Just wait until you "discover" those tiny raised lines provided on kits to represent small tie-down loops!
Looks mighty good, to me!

Bob

ColinEdm


Joined: October 15, 2013
KitMaker: 1,355 posts
Armorama: 1,229 posts
Posted: Saturday, January 03, 2015 - 11:18 AM UTC
Wow, amazing work there Chuck!
Gewehr43
Joined: May 12, 2014
KitMaker: 105 posts
Armorama: 68 posts
Posted: Saturday, January 03, 2015 - 08:13 PM UTC
Thanks, guys. Bob, I can absolutely see that happening. The thought terrifies me.

pablo_g

Joined: October 21, 2003
KitMaker: 529 posts
Armorama: 500 posts

Posted: Tuesday, January 06, 2015 - 02:35 AM UTC
Hello gentlemen,
Lovely Jagdpanzer, Chuck. Here are some pictures of the progress of the Bergepanzer from Trumpeter, I set him on Voyager, set what the truth is dedicated Dragon model, but it fits;-). The model I bought from a friend and it turned out that missing a few parts of the engine but somehow I advised.


Paweł
Lovely Jagdpanzer, Chuck. Here are some pictures of the progress of the Bergepanzer from Trumpeter, I set him on Voyager, set what the truth is dedicated Dragon model, but it fits;-). The model I bought from a friend and it turned out that missing a few parts of the engine but somehow I advised.
Paweł
SGTJKJ

#041

Joined: July 20, 2006
KitMaker: 10,069 posts
Armorama: 4,677 posts

Posted: Tuesday, January 06, 2015 - 04:22 PM UTC
Beautiful details, Chuck. Are you sure there is any plastic under all the PE 
Good luck on the fenders!
Pawel, great build so far. Looks to be another beautiful build from your side. It seems you are going all in on interior details on the last few of your builds. Excellent!
Looking forward to see more.
Good luck on the fenders!
Pawel, great build so far. Looks to be another beautiful build from your side. It seems you are going all in on interior details on the last few of your builds. Excellent!
Looking forward to see more.

pablo_g
Joined: October 21, 2003
KitMaker: 529 posts
Armorama: 500 posts
Posted: Tuesday, January 06, 2015 - 06:50 PM UTC
Thanks to Jesper. It so happened that I have now in the workshop with the interior of vehicles. I do not really like them to do because when assembled in the little seen, but once it is in the set I'm doing.
Paweł
Paweł
SGTJKJ
#041
Joined: July 20, 2006
KitMaker: 10,069 posts
Armorama: 4,677 posts
Posted: Tuesday, January 06, 2015 - 08:12 PM UTC
Yes, a pity so little is visible. Especially when done as great as you. Looking forward to follow your builds.
Nito74
Joined: March 04, 2008
KitMaker: 5,386 posts
Armorama: 4,727 posts
Posted: Wednesday, January 07, 2015 - 12:15 AM UTC
Update:


and started working on the tracks too

and started working on the tracks too

retiredyank
Joined: June 29, 2009
KitMaker: 11,610 posts
Armorama: 7,843 posts
Posted: Wednesday, January 07, 2015 - 12:23 AM UTC
Did this, last night.


The interior is in the paint shop.


The interior is in the paint shop.

Avarice
Joined: February 20, 2014
KitMaker: 26 posts
Armorama: 26 posts
Posted: Wednesday, January 07, 2015 - 09:43 AM UTC
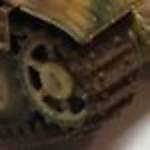
Basecoat of Dunkelgleb (late war) applied, it looks a little bit too green to me, but once the weathering starts I'm sure it will tone down a touch. Also applied a wash of "oiled earth" which made it look dirty.
Also started applying the base coat to the commander figure.
Anyway, on to the pictures.
Top deck

Bottom tub

Turret

Side skirts and wheels

Commander figure

Decals applied and dryfit

Also started applying the base coat to the commander figure.
Anyway, on to the pictures.
Top deck
Bottom tub
Turret
Side skirts and wheels
Commander figure
Decals applied and dryfit
SGTJKJ
#041
Joined: July 20, 2006
KitMaker: 10,069 posts
Armorama: 4,677 posts
Posted: Wednesday, January 07, 2015 - 12:05 PM UTC
Nice progress, Benjamin. I also believe the dunkelgelb is a bit too green. Did you use Vallejo's dunkelgelb? I have used that before and gotten the same result as you. Too much of a greenish hue.
I did lighten my scheme up during the start of the weathering process with some desert yellow dusty overspray. Combined with the following washes it worked nicely.
Nice beaten rusty look to the rear exhaust.
Looking forward to see more.
I did lighten my scheme up during the start of the weathering process with some desert yellow dusty overspray. Combined with the following washes it worked nicely.
Nice beaten rusty look to the rear exhaust.
Looking forward to see more.

Namabiiru
#399
Joined: March 05, 2014
KitMaker: 2,888 posts
Armorama: 1,920 posts

Posted: Thursday, January 08, 2015 - 03:42 AM UTC
I typically add a fair amount of AV Light Sand and a touch of AV Hemp to my AV Dunkelgelb to get something less greenish. I suppose AV has done their homework and know what the color is supposed to look like, but everyone I've heard from seems to pretty well universally agree--it's just too green.
Avarice
Joined: February 20, 2014
KitMaker: 26 posts
Armorama: 26 posts
Posted: Thursday, January 08, 2015 - 06:19 AM UTC
Unfortunately I haven't progressed to airbrush use yet.. still hand painting. But for this model, with all the intricate schurzen mounts, I decided to try the dunkelgleb rattle can from Toy Soldiers. It which went on pretty well and much faster than hand painitng!
I think I'm going to use some pigments to attempt a faded winter camo white wash, hopefully this will make it appear less green and more 'true' in colour. Never done a winter camo scheme before, so it could end in epic fail.
I think I'm going to use some pigments to attempt a faded winter camo white wash, hopefully this will make it appear less green and more 'true' in colour. Never done a winter camo scheme before, so it could end in epic fail.
Namabiiru
#399
Joined: March 05, 2014
KitMaker: 2,888 posts
Armorama: 1,920 posts
Posted: Thursday, January 08, 2015 - 06:29 AM UTC
For thoroughly-weathered winter camo, here's the process I've used with some success: First, a well-cured coat of future or varnish; next a couple good coats of hairspray followed by an over-spray of off-white (can be brush-painted just as well and doesn't need to be especially neat); use a dampened stiff-bristle brush to wear away as much of the white as you want (don't rub too hard or you'll eat away your base coat); next apply small dots of white oil paint all over the model, and using a brush dampened with turpentine wipe downward to remove most of the oil, but leaving streaks of white-wash; last step is to apply grime, dirt, mud, etc. as desired.
Hope this is helpful.
Hope this is helpful.

alewar

Joined: December 27, 2006
KitMaker: 773 posts
Armorama: 765 posts
Posted: Thursday, January 08, 2015 - 07:10 AM UTC
Chuck
Luck?....
Envy!
Great work!
Regards from the south
Alvaro
Luck?....
Envy!
Great work!
Regards from the south
Alvaro
Namabiiru
#399
Joined: March 05, 2014
KitMaker: 2,888 posts
Armorama: 1,920 posts
Posted: Thursday, January 08, 2015 - 12:35 PM UTC
Made some good progress on my Hummel:

Hope to start laying down some paint soon, but have been thinking I may need to build a spray booth first...
Hope to start laying down some paint soon, but have been thinking I may need to build a spray booth first...
SGTJKJ
#041
Joined: July 20, 2006
KitMaker: 10,069 posts
Armorama: 4,677 posts
Posted: Thursday, January 08, 2015 - 07:17 PM UTC
Quoted Text
But for this model, with all the intricate schurzen mounts, I decided to try the dunkelgleb rattle can from Toy Soldiers.
Interesting that both Vallejo and Toy Soldiers make dunkelgelb very greenish. Wonder if the have some old recipe or paint chip they are using as a basis for the very greenish yellow.
Namabiiru
#399
Joined: March 05, 2014
KitMaker: 2,888 posts
Armorama: 1,920 posts
Posted: Friday, January 09, 2015 - 07:07 AM UTC
Question for the panel of experts: The Hummel carries what appears to be compressed gas cylinder of some kind--like welding gases come in. Any idea what it is, and what color it should be?
Avarice
Joined: February 20, 2014
KitMaker: 26 posts
Armorama: 26 posts
Posted: Saturday, January 10, 2015 - 08:10 AM UTC
Thanks for the advice!
I've applied a faded white wash look through the use of white pigment. Mud and dirt was achieved with dark brown pigments mixed with plaster and soot from ground up pastels. Still got a little bit of highlighting, chipping and worn metal edge effects to go, but I think its not far off!


I've applied a faded white wash look through the use of white pigment. Mud and dirt was achieved with dark brown pigments mixed with plaster and soot from ground up pastels. Still got a little bit of highlighting, chipping and worn metal edge effects to go, but I think its not far off!
 |

WEB HOSTING BY


Copyright ©2021 Armorama and Kitmaker Network, a subsidiary of Silver Star Enterprises
All Rights Reserved. Please read our Conditions of Use and Privacy Policy.
All Rights Reserved. Please read our Conditions of Use and Privacy Policy.