

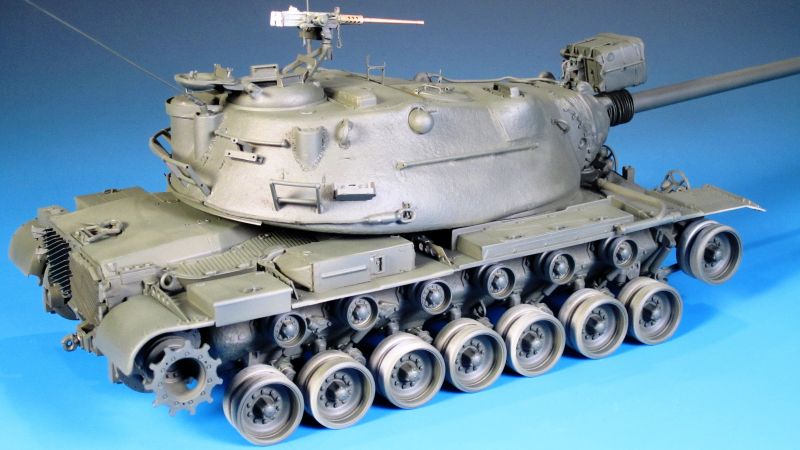
1⁄35M103A2 Heavy Tank
18
Comments
Part 12 - True Colours
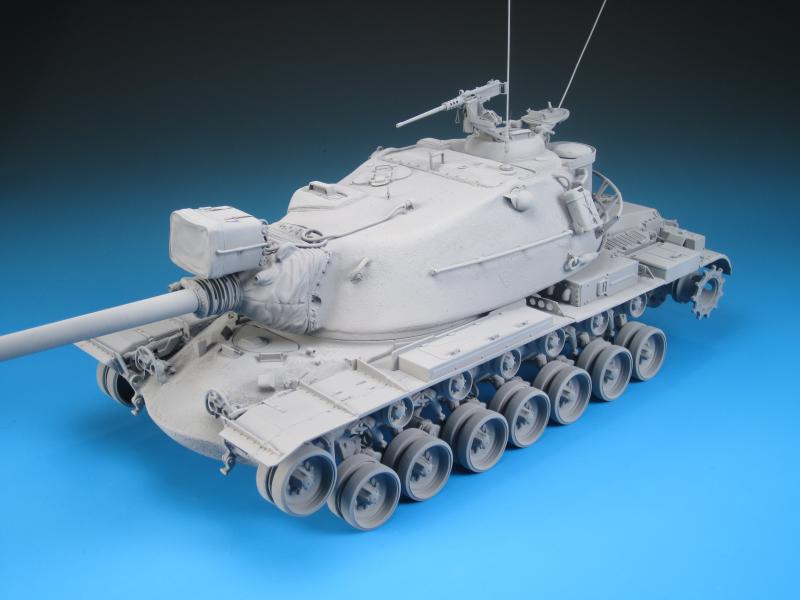
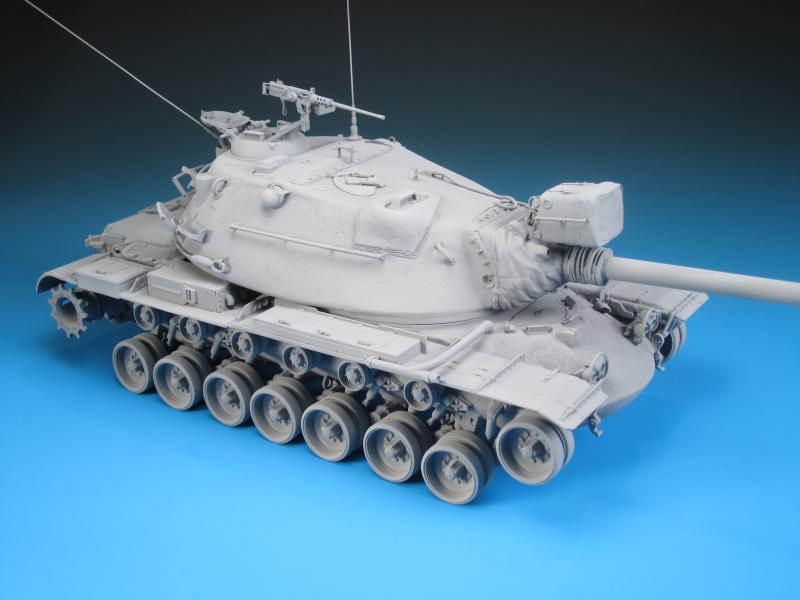
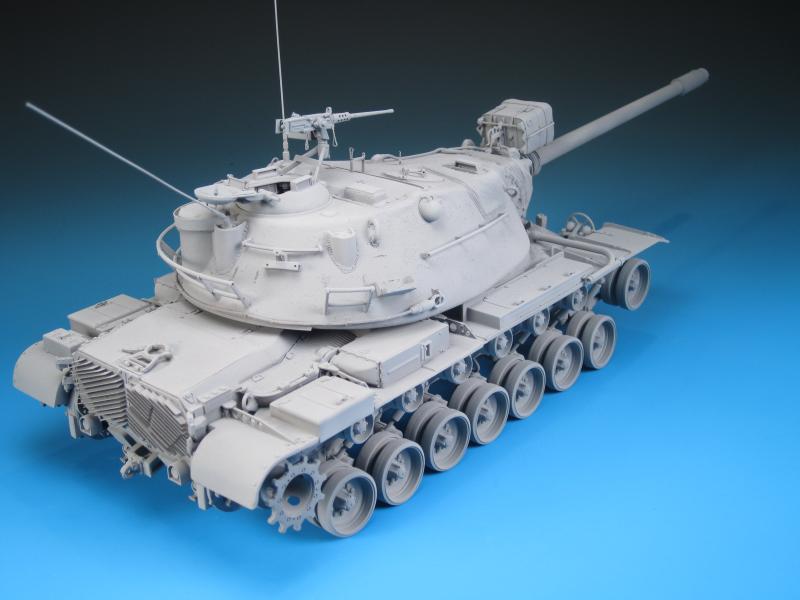
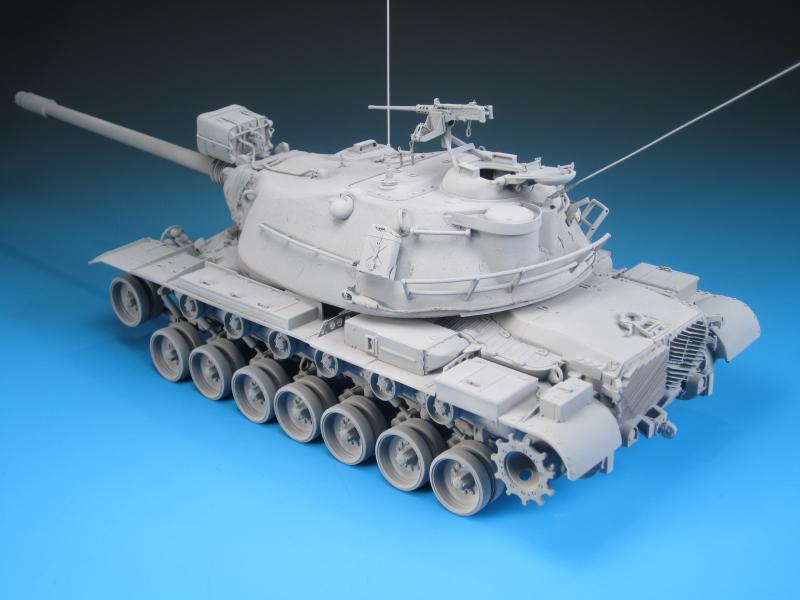
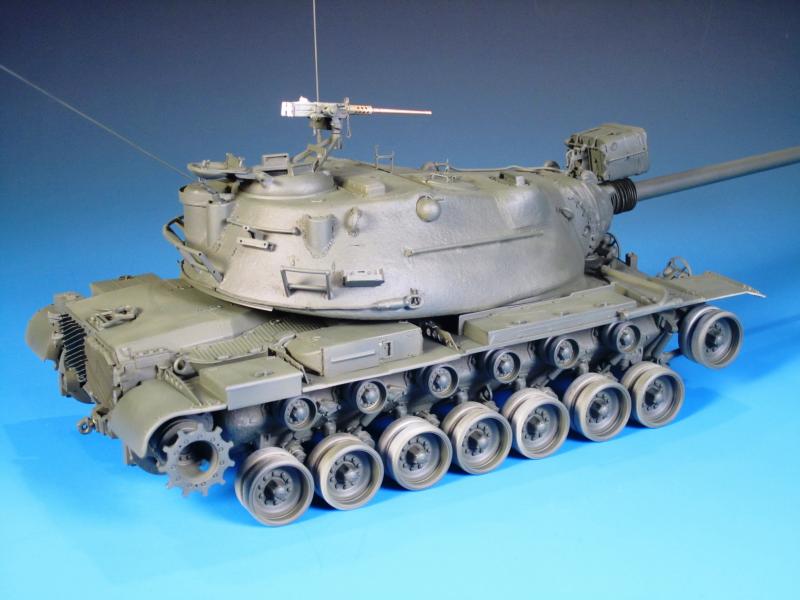
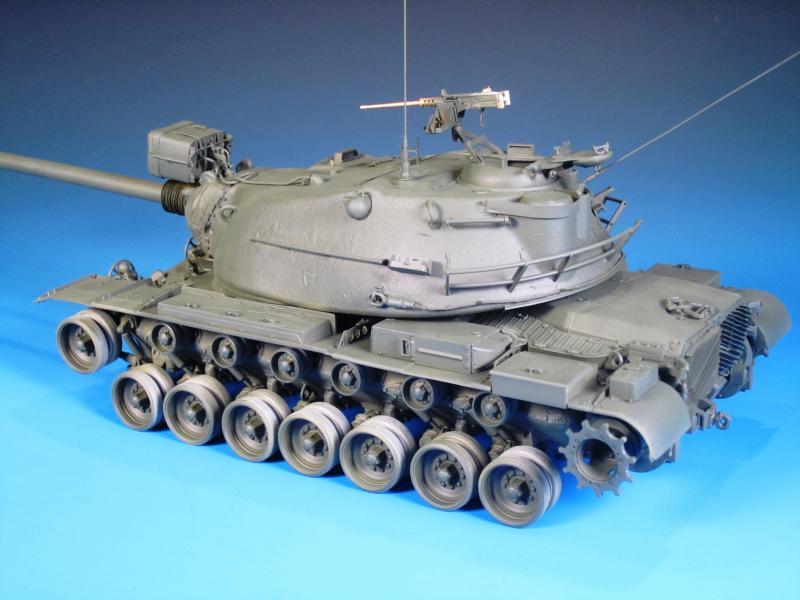
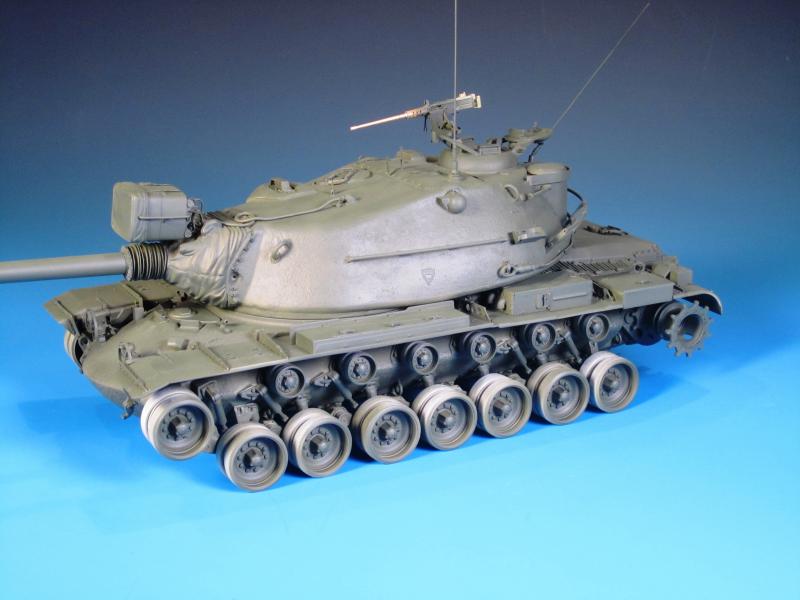
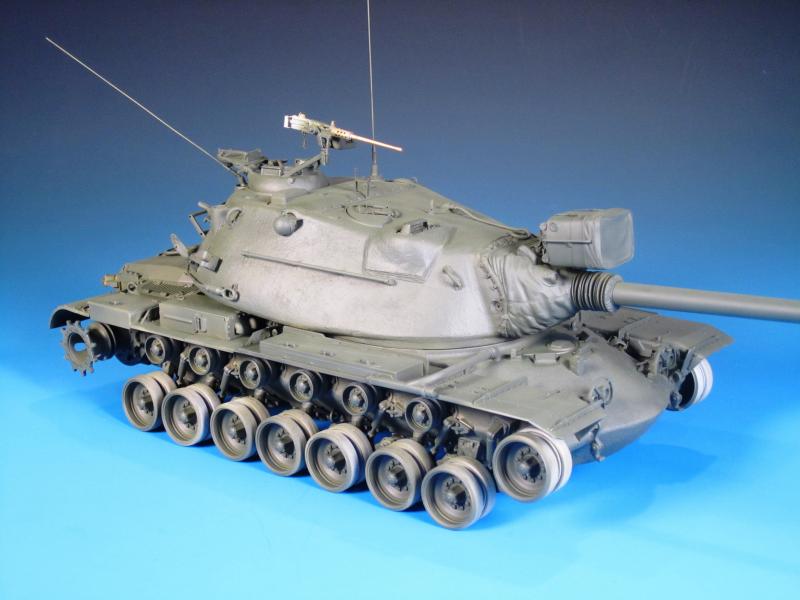
I applied a primer coat and blended in all those added on details and modifications. For primer I used Tamiya Neutral Grey XF-53. I find this a very likeable paint colour to cover metal and plastic parts with an even coat as well as to provide depth for the base coat application. The M103A2s were painted in USMC Green. The Dragon instructions have you painting the kit in Olive Drab. There is a visible difference between USMC Green and Olive Drab. I omitted any pre-shading as I find the majority of it gets covered with the base coat and additional weathering. I will fool around with the colour during weathering. Instead of mixing a cocktail of paints for USMC Green, I selected Model Master Acryl Marine Corps Green 4724. I thinned it with distilled water and set off with the airbrush. The paint covered very well and really starts to pull the details such as the cast texture and weld marks that I added. There are many details to paint now that the base coat is on:- The searchlight will be painted OD for contrast.
- Searchlight cable
- Jerry cans
- Tank phone indicator light
- .50 Cal HMG
- Tow cable
- Cupola interior
- Commander's hatch pad
- Periscopes
- Antenna mounts
- Road wheels
- Return rollers
- Taillights
- Mantlet cover
- Spare track links
About the Author


Comments


Thanks very much again Fellas! I really appreciate your positive feedback and comments.
What's next? I've got a few Leopards to get back to but as far as Cold War Heavies...a German KPz 70 and a British FV4005 are on the list.
MAR 10, 2016 - 04:01 PM
Which was more work, building the kit or writing that article? Both are a great effort. Nice to see something a little less covered here.
MAR 13, 2016 - 05:52 AM
Building the kit was for sure much more work. I'm glad you like both results!
MAR 13, 2016 - 09:55 AM

Thanks Colin...with any luck I will have it at the Alberta Open Model Contest in Edmonton at the end of May.
MAR 13, 2016 - 11:56 PM

Thanks Bob! Not nearly what you bring to the table with your amazing ships!
MAY 12, 2016 - 05:00 AM
Copyright ©2021 by Jason Bobrowich. Images and/or videos also by copyright holder unless otherwise noted. The views and opinions expressed herein are solely the views and opinions of the authors and/or contributors to this Web site and do not necessarily represent the views and/or opinions of Armorama, KitMaker Network, or Silver Star Enterrpises. All rights reserved. Originally published on: 2016-03-08 14:36:15. Unique Reads: 20561

WEB HOSTING BY


Copyright ©2021 Armorama and Kitmaker Network, a subsidiary of Silver Star Enterprises
All Rights Reserved. Please read our Conditions of Use and Privacy Policy.
All Rights Reserved. Please read our Conditions of Use and Privacy Policy.