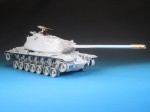
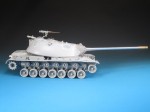
1⁄35M103A2 Heavy Tank
18
Comments
Part 5 - Mantlet Madness
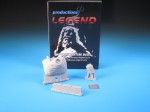
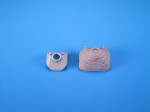
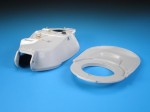
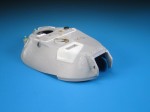
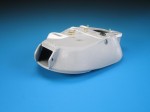
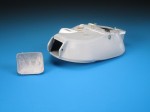
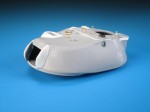
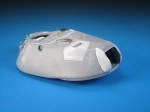
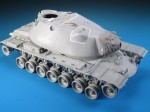
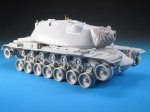
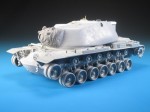
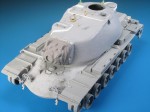
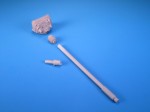
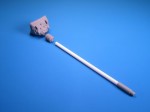
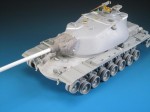
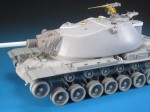
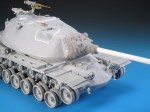
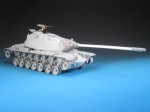
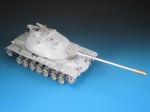
During my build I proposed to Legend Productions a small update set for the M103A2 kit. The kit has far too many issues to come up with a large detail set, although I know Legend Productions would do an amazing job fixing all the errors. One of the unique features of the M103A2 is the mantlet cover and accordion style barrel dust jacket. I thought this would be a great detail to add to the kit as an aftermarket part. Legend Productions went straight to work with their master makers, and has produced an excellent set for further detailing the Dragon Model kit. The set consists of a very well detailed and correctly sized resin mantlet, a resin accordion style barrel dust cover, a PE set of 19 mantlet clamps, and multiple resin bolts. As a caveat, this set was designed for use with the kit barrel, and as a result the RB Models metal barrel will not fit the resin accordion style barrel dust cover. While this may be a bit of a letdown I will show you how to use the RB Models barrel in this mantlet set. During the development of the set the RB Models barrel was not available to Legend Productions so that is why it has been designed for use with the kit barrel. I must say a big thank you to Legend Productions for continuing to listen to modellers in regards to creating detail sets, and for providing me this pre-production set for use in this build. You can see more images of the M103A2 Mantlet set in my In Box Review. When you look at the kit mantlet in comparison with the new resin mantlet, the width difference is a factor that has to be addressed on the turret. As a result of the small size of the kit mantlet, the turret gun trunnions (gun mounts) need to be increased in width. Legend Productions provides some guidance with respect to trimming down the existing trunnion area and at the same time widening it to accept the resin mantlet. That being said, this is not simply a trim and swap kind of task. You will need to widen the trunnions, integrate them into the turret, blend the additions, and mount the mantlet. I started with removing the casting lugs on the inner side of the mantlet. With clipping, cutting, sanding, and grinding using a Dremel tool I attempted to hollow out the inside as much as possible to create a smooth fit to the front of the turret. I thought this was going to be a straight forward task but it proved a bit challenging in order to get the correct look to the trunnions in combination with attaching the mantlet. Legend Productions provides visual instructions of the trimmed down turret and the addition of plastic fillets to widen the turret. I trimmed down the trunnion area and sealed up the turret. You won't need any of the parts provided to create the moveable mantlet. The resin parts were glued in place solidly. While the Legend Productions resin mantlet set is really nicely moulded and detailed, getting the turret widened correctly caused me grief over an extended period of time. It has nothing to do with the Dragon or Legend Productions parts, but instead my approach to trying to widen the trunnion area quickly and simply. I started with an application of two-part Tamiya putty. This added the increased width I needed but I flawed in a couple of areas. In retrospect I should have landmarked the trunnion indents on either side of the turret when adding the putty. Not doing this led to a guessing game as the mantlet was fitted. As well, I found with the putty it was difficult to obtain a true 90 degree side angle for the trunnions that then led back to a gentle curve into the turret. At the same time I sanded and sealed up the turret. As I felt that some of the external components on the turret needed to be adjusted and the surface texture needed to be enhanced, I simply sanded off all mounting points that Dragon had embossed on the turret sides and rear. The accordion dust cover portion in the Legend set was designed for the Dragon kit barrel. It is too small to accept the RB Models barrel whether the metal barrel is cut or the accordion dust cover part is drilled out due to the tapered size of the RB Models barrel. If Legend had possessed the RB Models barrel when they mastered the mantlet or the accordion dust cover parts, I suspect the parts would have been created for both the Dragon barrel and the RB Models barrel. The RB Models barrel can be mounted in the mantlet easily, but the accordion dust cover has to be scratch built to add it to the RB Models barrel and Legend Productions mantlet combination. Is it the perfect solution? No, but using either the kit barrel or the RB Models barrel provides all levels of modellers with options during a build. My first attempt (and second and third) at properly widening the trunnions in order to fit the resin mantlet were not successful. This was a trial and error issue created by me for not preplanning and sticking to basics of construction. After I had added the putty I sanded it and added a couple of coats of Mr Surfacer 1000 to smooth out edges and blend it to the turret. The angles created by the putty were not correct and I simply amplified the issue by sanding and adding more filler. If I had to do this again I would have done the following: 1. Drilled out the holes in the kit turret that indicate the location of the trunnions. These are nicely defined on the turret part. 2. Insert a small section of styrene tube the same size as the trunnion holes to mark and create a reference point for adding a styrene fillet to widen the mantlet area. 3. Add a styrene fillet to increase the width. Keep this at 90 degrees on both sides of the mantlet area. 4. Add putty or filler to even out the surface and create the turret face angle. 5. Trim down the styrene trunnion tubes so they are flush with the sides. 6. You would have to test fit and adjust the resin mantlet to ensure the positioning is correct with respect to the trunnion locations. 7. Add a solid piece inside the styrene tube to create the indent in the trunnion holes. There could be multiple ways to approach the widening of the trunnions / mantlet area, so pick and choose your options and method. After multiple battles to get a reasonably angled and widened trunnion, I attached the Legend Productions mantlet. I used multiple layers of Mr. Surfacer to even out the surface and blend the angles into the turret face. Is it perfect? No. I carried over the Mr Surfacer to the rest of the turret to provide a consistent rough surface texture. I drilled out the trunnion holes on either side of the mantlet. I had to use the Mk.1 eyeball to place the holes, and again, if I had to do it over again I would have ensured the kit trunnions were landmarked. Legend Productions provides tiny PE mantlet clamps and resin bolts to finish off the mantlet. I added the PE mantlet clamps provided by Legend Productions in their mantlet set and then carried on with attaching the modified barrel and accordion dust cover combo. When I attached the barrel to the accordion dust cover I had toyed with the idea of adding a slightly larger diameter styrene gun tube. The result of my test fitting was a slightly chipped forward collar on the right side that you'll be able to see in some of the images. If you chose to use the Legend Productions set, the accordion dust cover is not perfectly symmetrical. It does have a top and bottom with a slight sag toward the bottom. This feature can be seen in reference images. By spinning the part on the mantlet you can easily determined the bottom. Coincidentally the bottom is also where the resin pour lug is attached. The main gun definitely adds to the dynamic look of the massive tank. To finish off the mantlet area I removed the rudimentary triangular lifting handles with the nicely detailed PE versions from the Voyager Model M103A1 set. Drilling out and countersinking the bolts on the top of the mantlet was the final touch of detail. Using this option for the main gun will improve the look from the kit provided barrel and mantlet. It's not perfect, but who is? The resin accordion dust cover cannot be used with the metal barrel as the resin part is not big enough to permit it being drilled out for the barrel. The barrel can be mounted flush with the mantlet by drilling out the mantlet opening. This is not to enlarge the visible opening but instead to create and even opening on the resin inside the mantlet. I used a Dremel tool on low speed to enlarge the interior opening until the barrel slid in flush against the face of the mantlet. CA glue was used to secure the barrel to the mantlet. You will have to decide how you are going to tackle the accordion dust cover. If you are going to use a series of cut out circles then make sure you do not glue on the bore evacuator and muzzle on the end of the barrel. As the build continues I was able to replicate the accordion dust cover.Comments
Thanks very much again Fellas! I really appreciate your positive feedback and comments.
What's next? I've got a few Leopards to get back to but as far as Cold War Heavies...a German KPz 70 and a British FV4005 are on the list.
MAR 10, 2016 - 04:01 PM
Which was more work, building the kit or writing that article? Both are a great effort. Nice to see something a little less covered here.
MAR 13, 2016 - 05:52 AM
Building the kit was for sure much more work. I'm glad you like both results!
MAR 13, 2016 - 09:55 AM
Thanks Colin...with any luck I will have it at the Alberta Open Model Contest in Edmonton at the end of May.
MAR 13, 2016 - 11:56 PM
Thanks Bob! Not nearly what you bring to the table with your amazing ships!
MAY 12, 2016 - 05:00 AM
Copyright ©2021 by Jason Bobrowich. Images and/or videos also by copyright holder unless otherwise noted. The views and opinions expressed herein are solely the views and opinions of the authors and/or contributors to this Web site and do not necessarily represent the views and/or opinions of Armorama, KitMaker Network, or Silver Star Enterrpises. All rights reserved. Originally published on: 2016-03-08 14:36:15. Unique Reads: 20561


