

1⁄35M103A2 Heavy Tank
18
Comments
Part 13 - Mark It Up
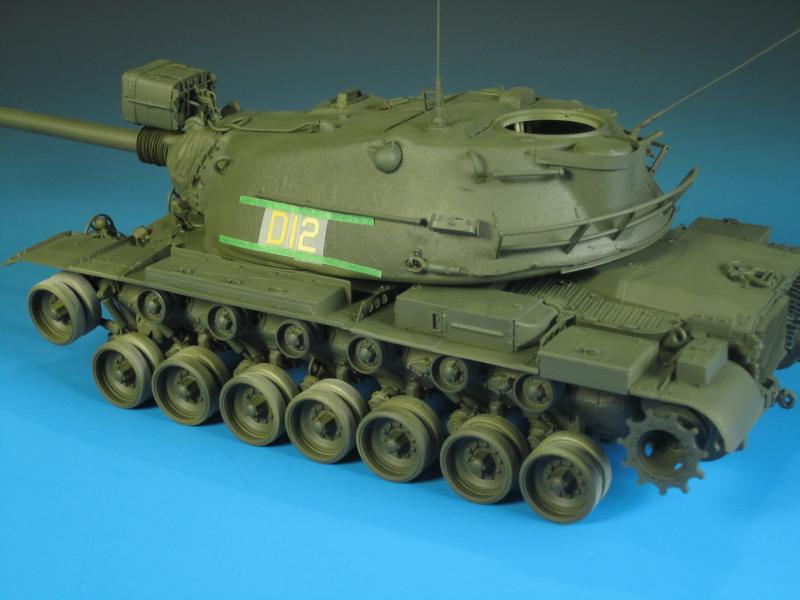
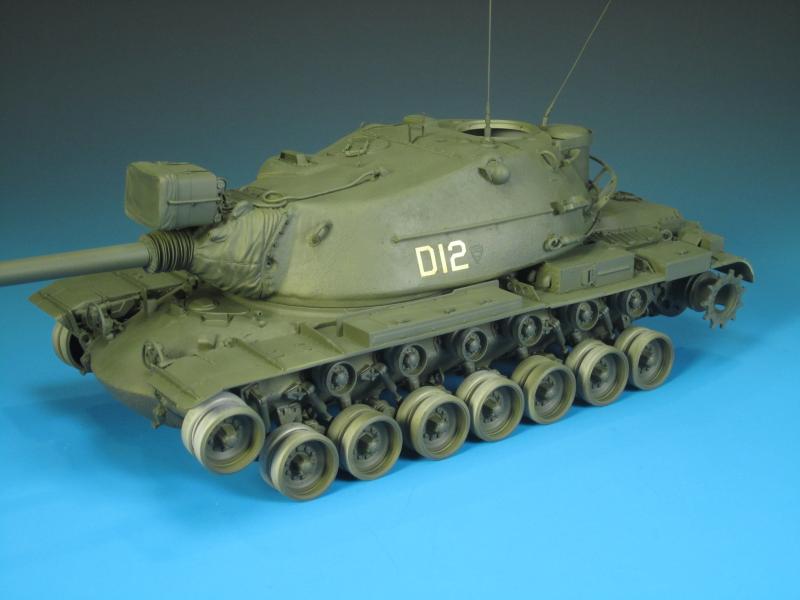
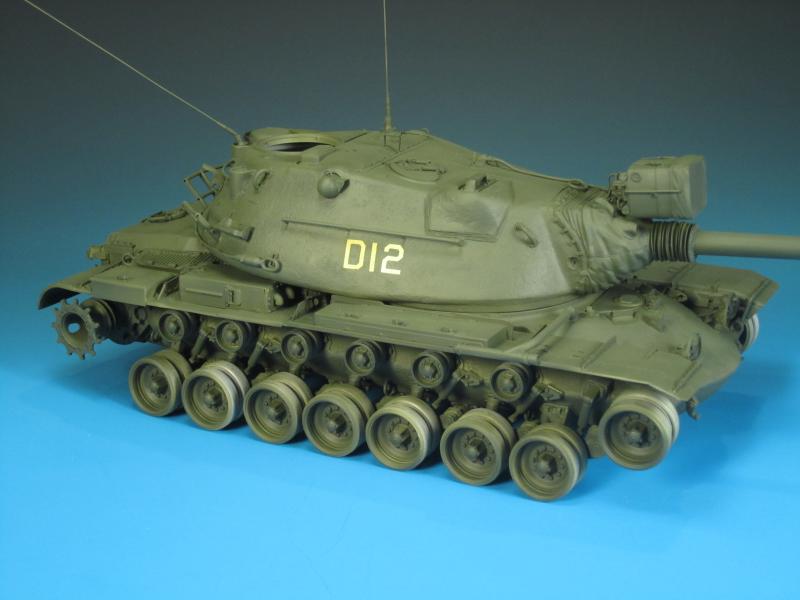
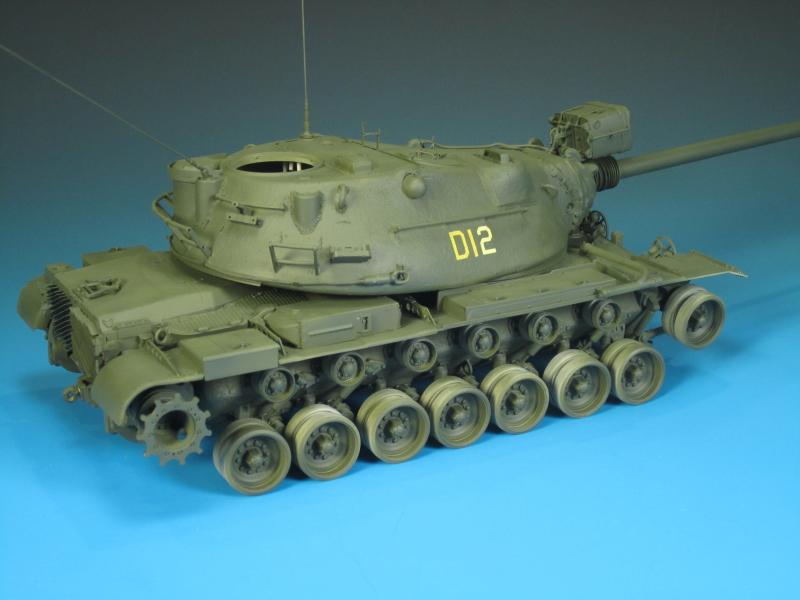
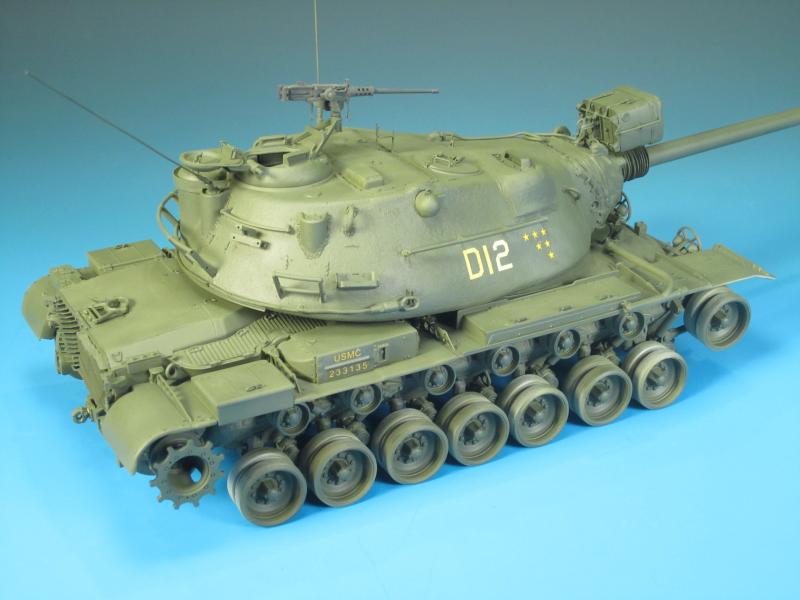
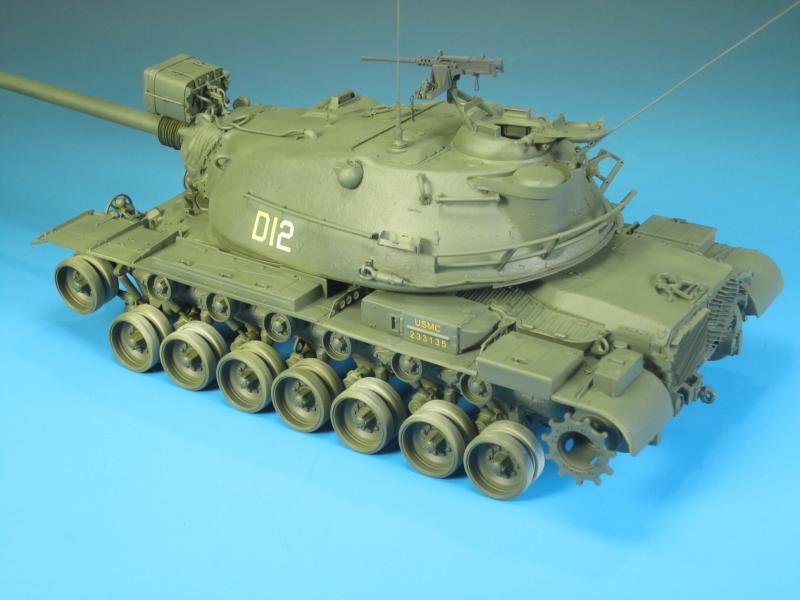
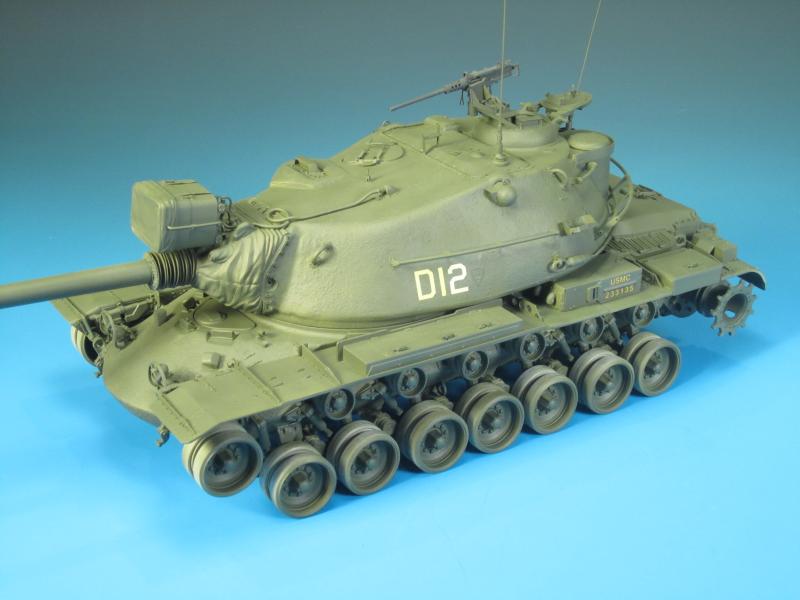
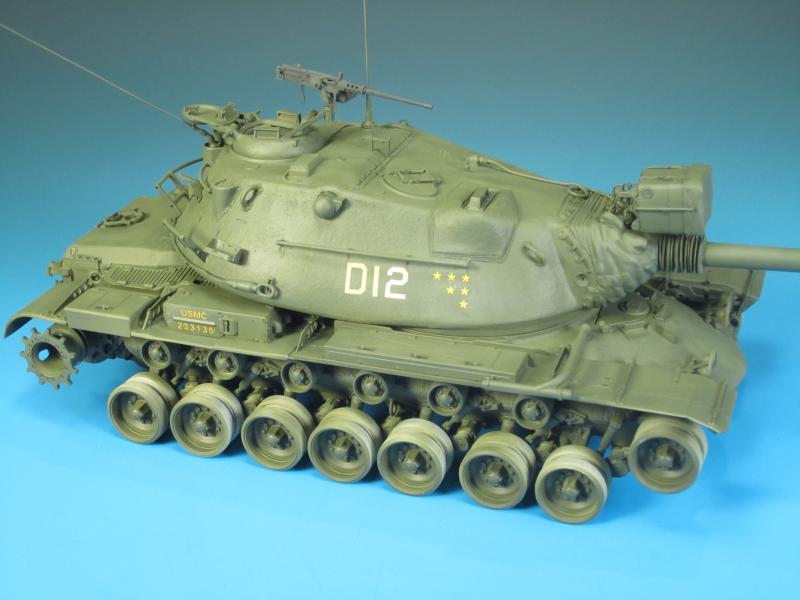
I was nervous yet excited to try the dry transfers for the call signs. I really like dry transfers when they work well. When they don't work well or placement is not ideal they are a nightmare. I used the Woodland Scenics 45 degree USA Gothic Yellow numbers and letter sets. Using the largest numbers and letters in the sets I cut them out and positioned them on my cutting mat. Once positioned, I used thin strips of tape on the top and bottom to tack them together. I positioned the call signs on the turret sides and using a dull pencil crayon burnished them in order to apply them to the turret. A light touch is important so as to not jostle them and have them apply in a consistent manner. I did not use any gloss coat on the turret, I find with dry transfers a flat surface is much better for adhesion. Once burnished I slowly peeled back the carrier film and voila the call signs were attached. They attached to the turret very well, and up close you can still see the rough casting texture of the turret. Once the carrier sheet was removed I used the thin backing sheet over the top and then lightly burnished the call signs to set them in place. The M103A2s seem to have several variations of the size and positioning of the turret call signs. The placement of the call signs on the left and right sides of the turret are not in line with each other. Compared to the font of the Dragon decals, the Woodland Scenics letter and numbers look far more accurate. In selecting the rest of the markings I defaulted to the Dragon decals. For "D12" the USMC serial number is correct in the decals, and overall it actually looks like the correct font, size, and colour. Markings on the 2nd Tank Battalion M103A2s originating in Camp Lejeune appear to be much more spartan than the markings on the M103A2s from the 1st Tank Battalion in Camp Pendleton. The star markings on the right side of the turret were crew commendations provided by the Platoon Commander during the deployment to Guantanamo Bay. In the kit Dragon provides the star decals for both sides of the turret. As I stated previously, I can confirm that the stars were not applied to the left side of the turret. Therefore I left them off of the left side. In preparation for the decals, I spot applied Vallejo Air Gloss Varnish through the airbrush. Once it had dried overnight the decals were applied with the assistance of Micro Set. To finish off the decals an airbrushed coat of Vallejo Matt Varnish was applied to blend everything in.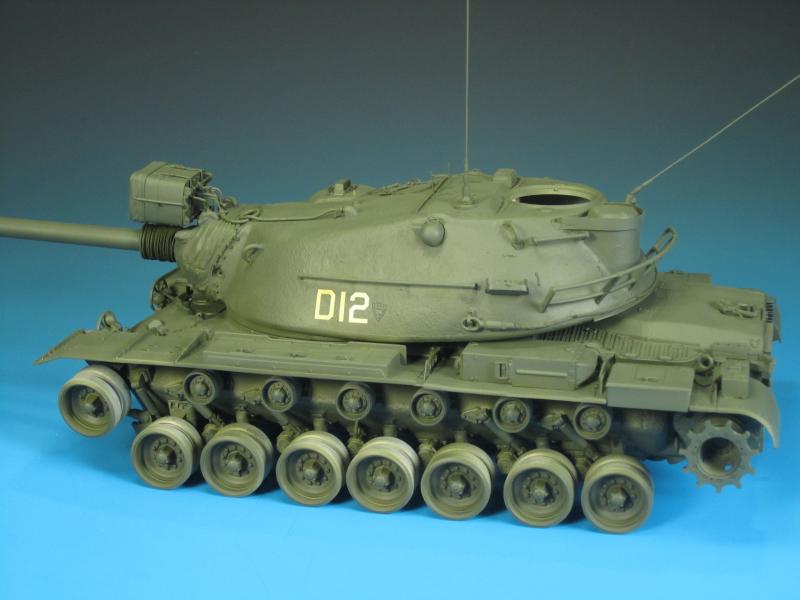
About the Author


Comments


Thanks very much again Fellas! I really appreciate your positive feedback and comments.
What's next? I've got a few Leopards to get back to but as far as Cold War Heavies...a German KPz 70 and a British FV4005 are on the list.
MAR 10, 2016 - 04:01 PM
Which was more work, building the kit or writing that article? Both are a great effort. Nice to see something a little less covered here.
MAR 13, 2016 - 05:52 AM
Building the kit was for sure much more work. I'm glad you like both results!
MAR 13, 2016 - 09:55 AM

Thanks Colin...with any luck I will have it at the Alberta Open Model Contest in Edmonton at the end of May.
MAR 13, 2016 - 11:56 PM

Thanks Bob! Not nearly what you bring to the table with your amazing ships!
MAY 12, 2016 - 05:00 AM
Copyright ©2021 by Jason Bobrowich. Images and/or videos also by copyright holder unless otherwise noted. The views and opinions expressed herein are solely the views and opinions of the authors and/or contributors to this Web site and do not necessarily represent the views and/or opinions of Armorama, KitMaker Network, or Silver Star Enterrpises. All rights reserved. Originally published on: 2016-03-08 14:36:15. Unique Reads: 20561

WEB HOSTING BY


Copyright ©2021 Armorama and Kitmaker Network, a subsidiary of Silver Star Enterprises
All Rights Reserved. Please read our Conditions of Use and Privacy Policy.
All Rights Reserved. Please read our Conditions of Use and Privacy Policy.