

1⁄35M103A2 Heavy Tank
18
Comments
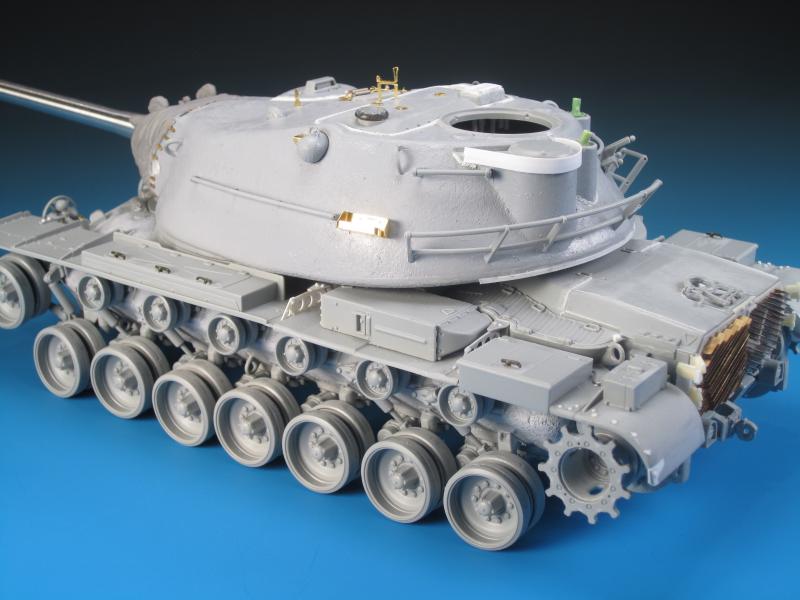
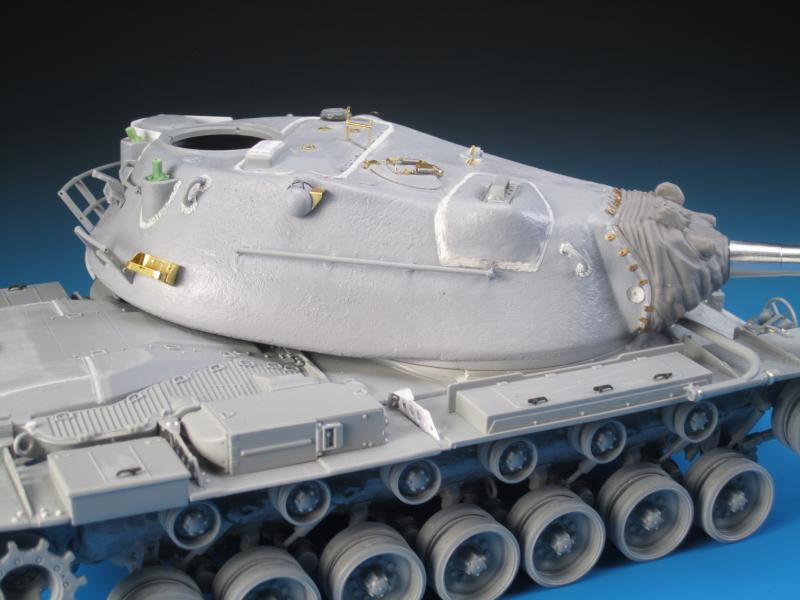
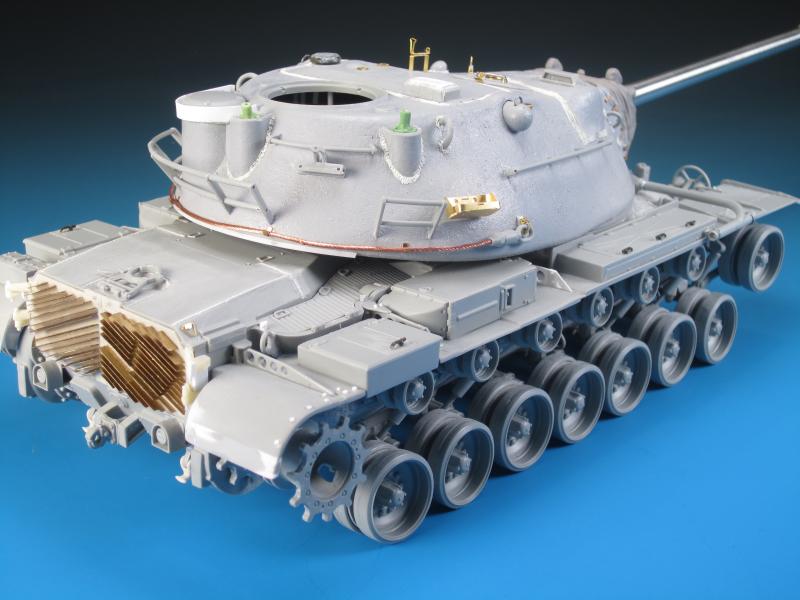
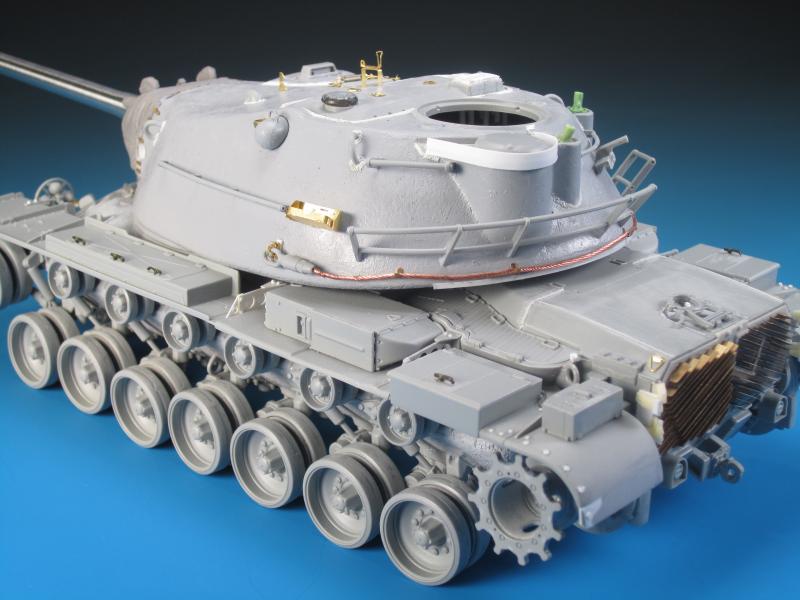
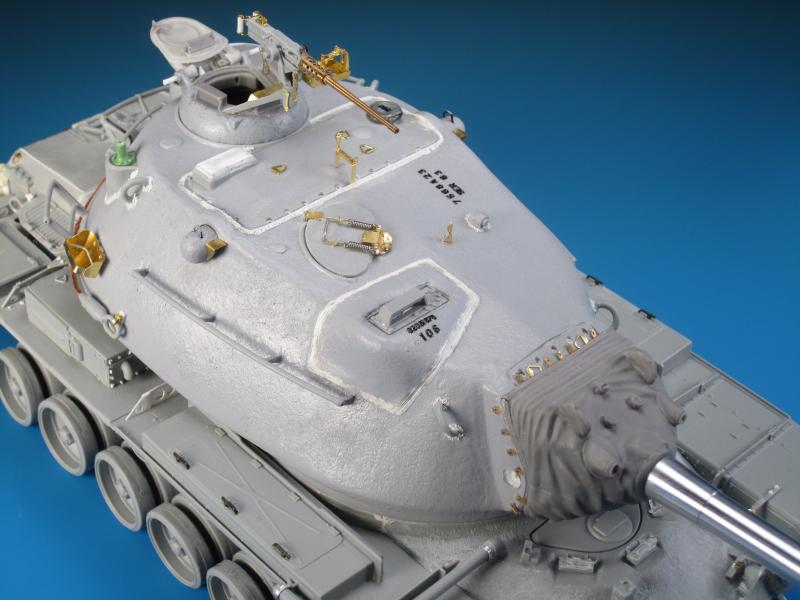
Part 6 - More Turret Tackling
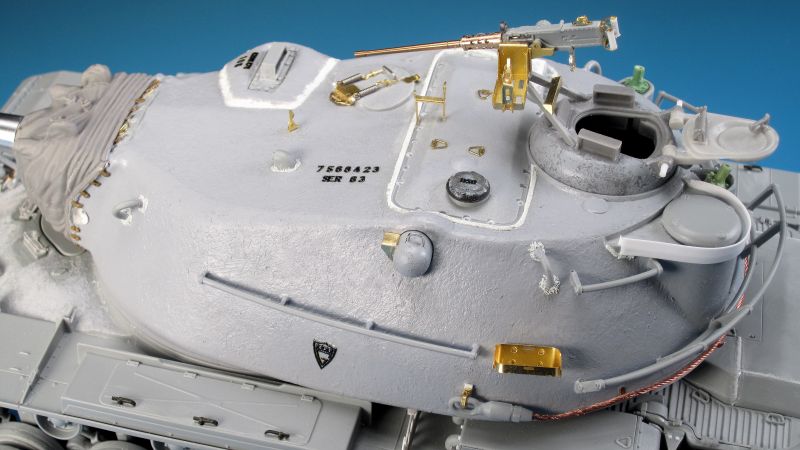
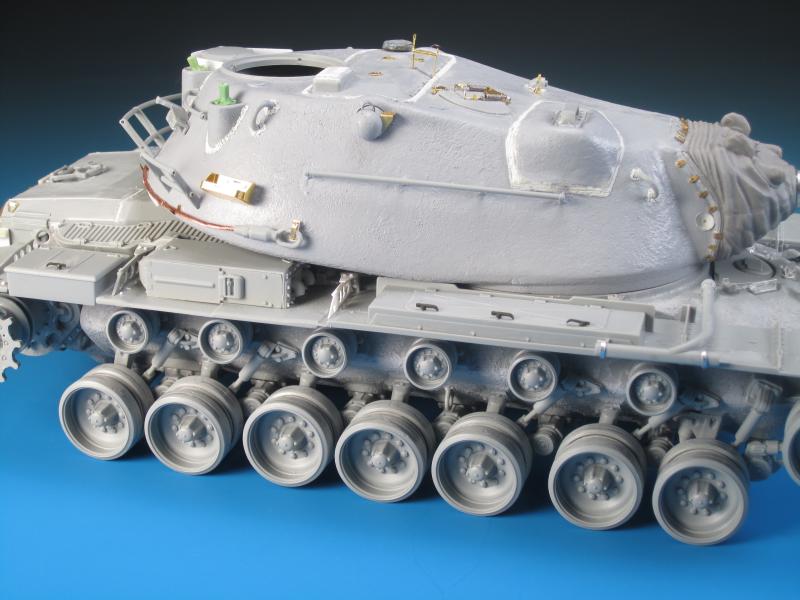
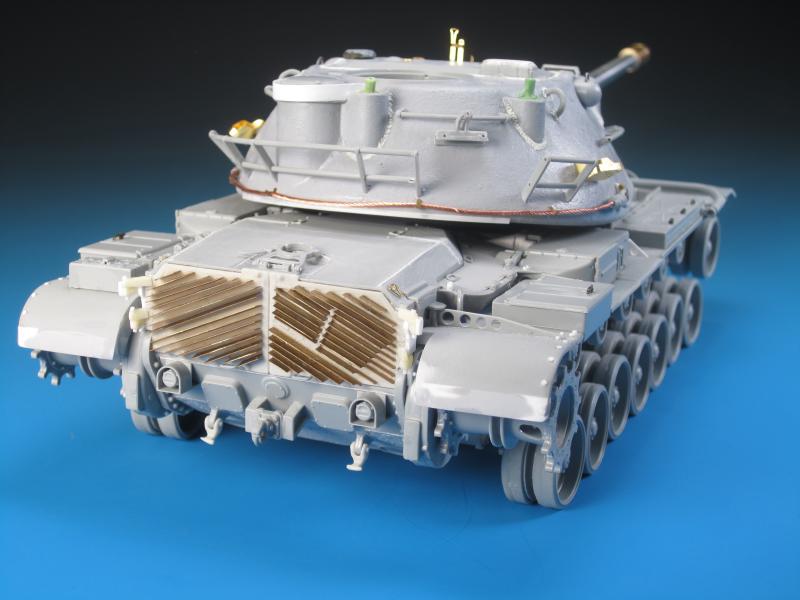
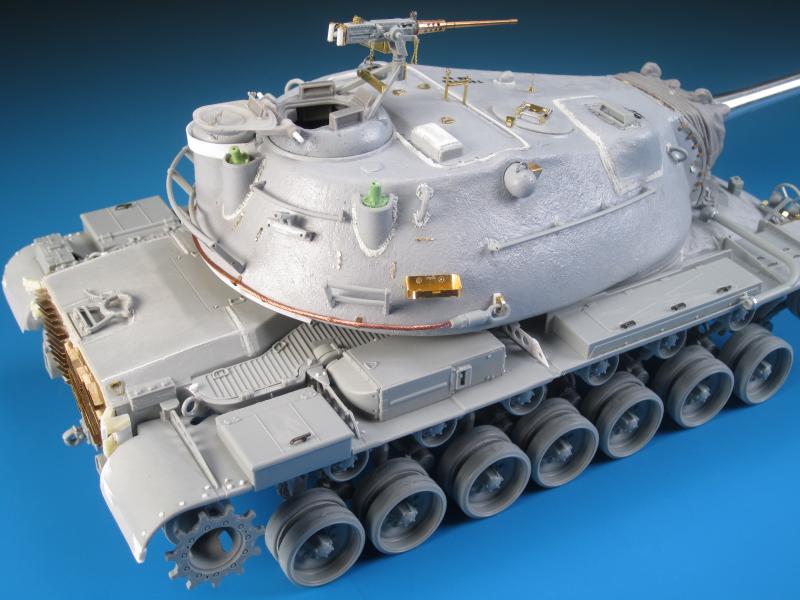
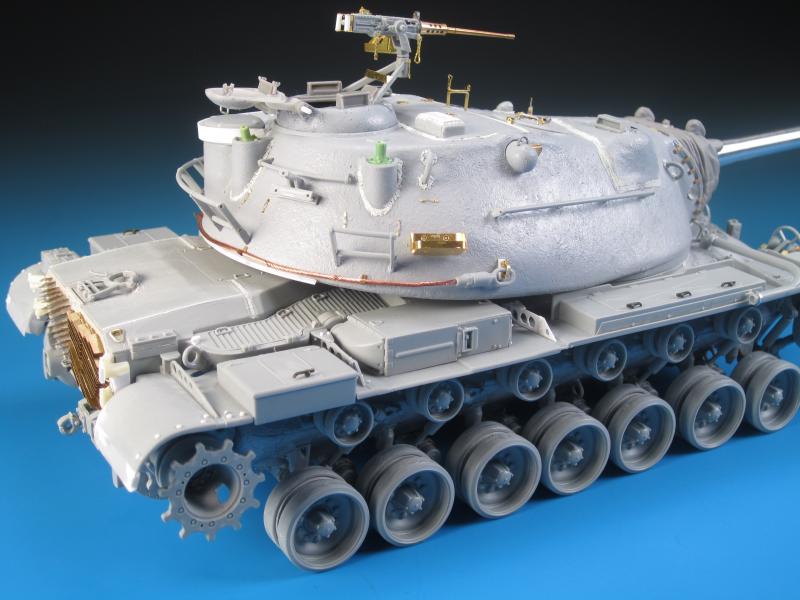
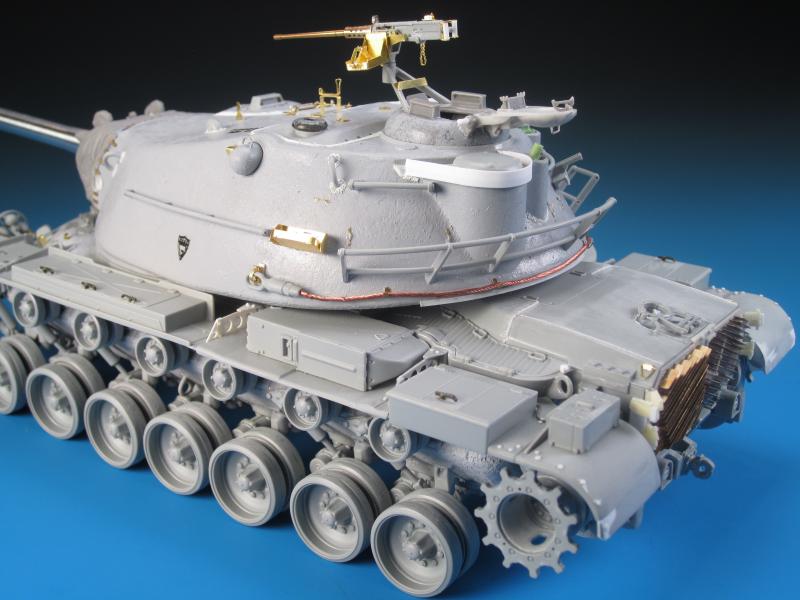
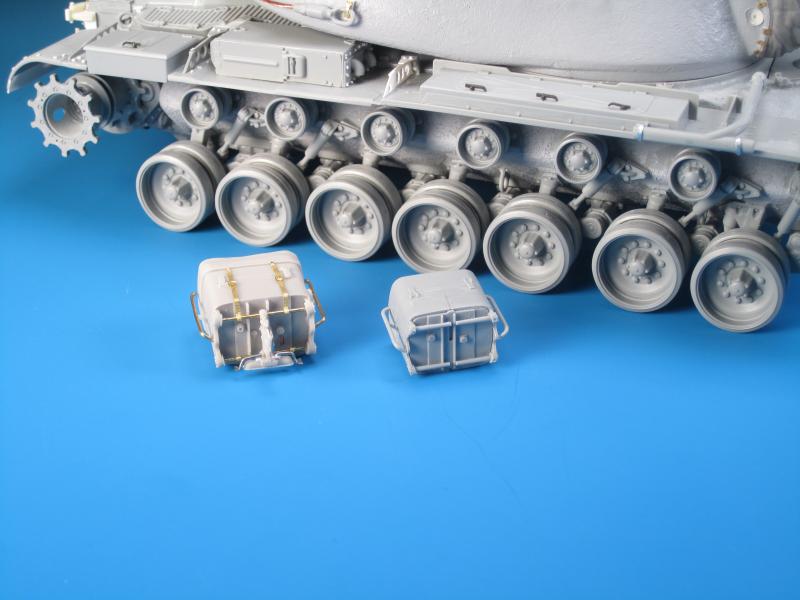
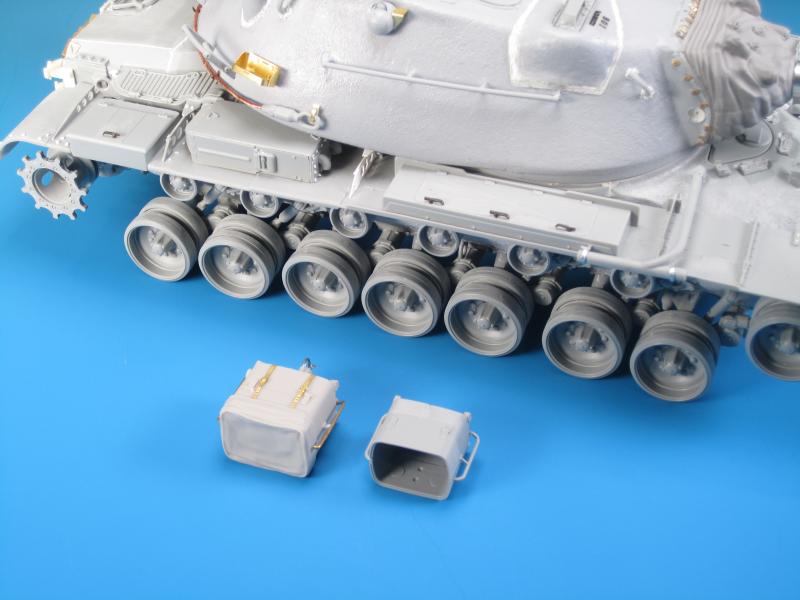
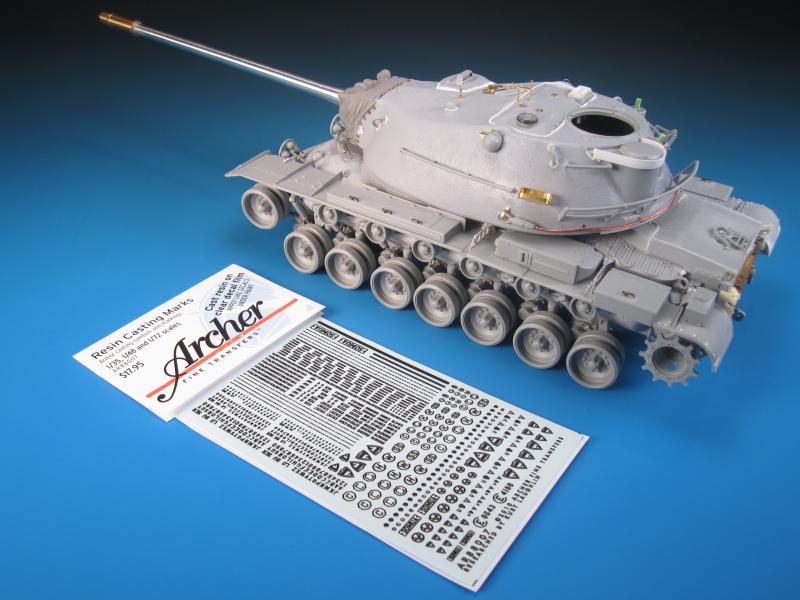
As the turret build continued I added the various railings and stowage brackets. Before adding the railings and brackets I attached the four large lifting eyes so that I could use them as landmark references for the other parts. I will add weld seams to the lifting eyes as the build continues. Overall the kit parts are sufficient. There are multiple seams to remove and this is easy enough to do with a sharp #11 blade. The other detail added to the parts was to drill out the ends with a small bit in a pin vise drill. You don't have to drill deep but just enough to create the illusion of the tubes being hollow. As I had coated the turret with Mr. Surfacer I used multiple references to get the placements as correct as I could. With the overall turret dimensions incorrect this proved very difficult and I had to come to a common middle ground with the part placements. The Dragon kit provides metal water cans moulded with the jerry can racks. Voyager Models provides replacement PE jerry can racks and straps in their detail set and so I used them on the turret. The searchlight mount on the right rear of the turret is somewhat basic but it works. Within the kit Dragon provides two tow cable ends with a very simplistic moulded on rectangle of plastic that is supposed to represent the mounting base and retaining clamp. It does not even come close to looking realistic. Dragon Models also provides a length of string to represent the tow cable. Now I am by no means a tow cable aficionado, but I have used my share of aftermarket tow cables and the string tow cables do not cut it. String tow cables do not seem limited to lower end kits but they are still commonplace in expensive, well detailed kits and aftermarket conversions. Companies need to invest only a touch more effort and capital in order to get rid of the string and include copper tow cables. I cut and sanded off the blobs of plastic on the tow cable ends and ditched the string. I replaced the string with the nicely braided copper tow cable provided in the Voyager Model M103A1 detail set. I drilled out the ends a bit to accept the copper cable before attaching it with CA glue. Within that set are also PE tow cable retaining brackets for the M103A1. Upon reviewing my reference images I came to the conclusion that the M103A2 uses the same type of tow cable retaining brackets, but they were moved to the sides of the turret and attached to a welded on base plate instead of the previous hull sponson location on the M103A1. I created a simple styrene base plate and attached them to the turret in alignment with reference placement. I then attached the PE brackets to the base plates. Next I used the PE tow cable U-shaped brackets from the Legend Productions M60A1/A3 detail set and attached them along the bottom edge of the turret. Starting on the right side of the turret I attached the tow cable end to the bracket and added the hinged portion and wing nut PE parts. I fed the tow cable around the turret and into the U-shaped brackets. At each U-shaped bracket I secured the tow cable with a touch of CA glue and created slight dips to add some variation as it travelled around the turret base. Once over to the left side of the turret the process was repeated to secure the tow cable end. During this phase of the build I also added weld seams to the four turret lifting eyes and to the searchlight socket. The result looks good and miles (or kilometres) ahead of what was provided in the kit. I was surprised that the M103A2 had only a single tow cable given the massive size of the tank, while other tanks such as the M48 and M60 had two tow cables. One of the subtle yet important details absent on the turret of the Dragon kit are the casting numbers and foundry mark on the turret. These markings are quick visible on the turret and a feature I thought would be important to add during my build. I looked at a few different options such as cutting off plastic numbers/letters from sprues, using PE numbers/letters, and using resin numbers/letters. I chose to use the Archer Fine Details Resin Casting Marks. This is a set crossing multiple scales and contains a multitude of raised resin casting marks on clear decal sheet. Using reference material I selected numbers and letters that would provide a generic representation. The location of the emblem foundry mark is on the left side of the turret. The other locations for casting numbers were in the left turret roof, on top of the small turret ventilator, and in front of the gunner's sight housing. Using the resin decals was not an issue and a dab of Microsol held the markings in place until the primer coat is applied. The result is very appealing and adds another dimension of detail to the massive turret. The Dragon kit represents the tie down loops on the turret as simple moulded on nubs. During the turret build I had sanded them off in anticipation of replacing them with PE versions. I used the PE tie downs provided in the Voyager Model M103A1 detail set. The instructions show a PE part, allegedly included, that is to be bent to create a jig from which the tie downs are formed. For the life of me I could not find the jig part on the PE frets. I created a simple styrene jig on my work bench and got to forming the tie downs. For a tank this large I expected many more tie downs around the turret storage racks but references showed there were only eight. I placed the tie downs the best I could given references. This was a simple addition to add a pop more detail. On the front of the turret I wanted to do some work on the searchlight. Reference images of the M103A2s in service showed the searchlight both mounted and not mounted. I am opting for mounting the searchlight so I needed to figure out whether to use the kit searchlight or an aftermarket version. The Dragon searchlight is under scale. How much I don't know, but it is obvious. The Dragon searchlight is produced in multiple pieces and creates a spectrum of seams when assembled. There are small details absent and no option for a lens cover. There is a small length of vinyl tube provided to represent cabling that is too narrow in diameter in my opinion. There are multiple alternatives such as those from Def Models, Legend Productions, or sourcing it from a kit such as the AFV Club M60A1 kit. I had the Legend Production M48A3 mantlet and searchlight set on hand. The Legend Productions searchlight may be a little over scaled but it has excellent details and a moulded on lens cover. I used the brass rod provided in the Legend set to create the supports and lifting handles. For further detailing I added what appears to be locking arms on the mounts on the rear of the searchlight adjustment mechanism. The final touch was to add four PE straps from the Voyager Model M103A1 detail set to secure the lens cover. The searchlight, mantlet mounts, and cable weren't added until the barrel accordion dust cover is completed.


About the Author


Comments


Thanks very much again Fellas! I really appreciate your positive feedback and comments.
What's next? I've got a few Leopards to get back to but as far as Cold War Heavies...a German KPz 70 and a British FV4005 are on the list.
MAR 10, 2016 - 04:01 PM
Which was more work, building the kit or writing that article? Both are a great effort. Nice to see something a little less covered here.
MAR 13, 2016 - 05:52 AM
Building the kit was for sure much more work. I'm glad you like both results!
MAR 13, 2016 - 09:55 AM

Thanks Colin...with any luck I will have it at the Alberta Open Model Contest in Edmonton at the end of May.
MAR 13, 2016 - 11:56 PM

Thanks Bob! Not nearly what you bring to the table with your amazing ships!
MAY 12, 2016 - 05:00 AM
Copyright ©2021 by Jason Bobrowich. Images and/or videos also by copyright holder unless otherwise noted. The views and opinions expressed herein are solely the views and opinions of the authors and/or contributors to this Web site and do not necessarily represent the views and/or opinions of Armorama, KitMaker Network, or Silver Star Enterrpises. All rights reserved. Originally published on: 2016-03-08 14:36:15. Unique Reads: 20561

WEB HOSTING BY


Copyright ©2021 Armorama and Kitmaker Network, a subsidiary of Silver Star Enterprises
All Rights Reserved. Please read our Conditions of Use and Privacy Policy.
All Rights Reserved. Please read our Conditions of Use and Privacy Policy.